Instruction Facebook Feed for Magento2.4
Download and install
Download the plugin archive from the Shop Pinta store and save it on your computer. Unpack the zip archive.
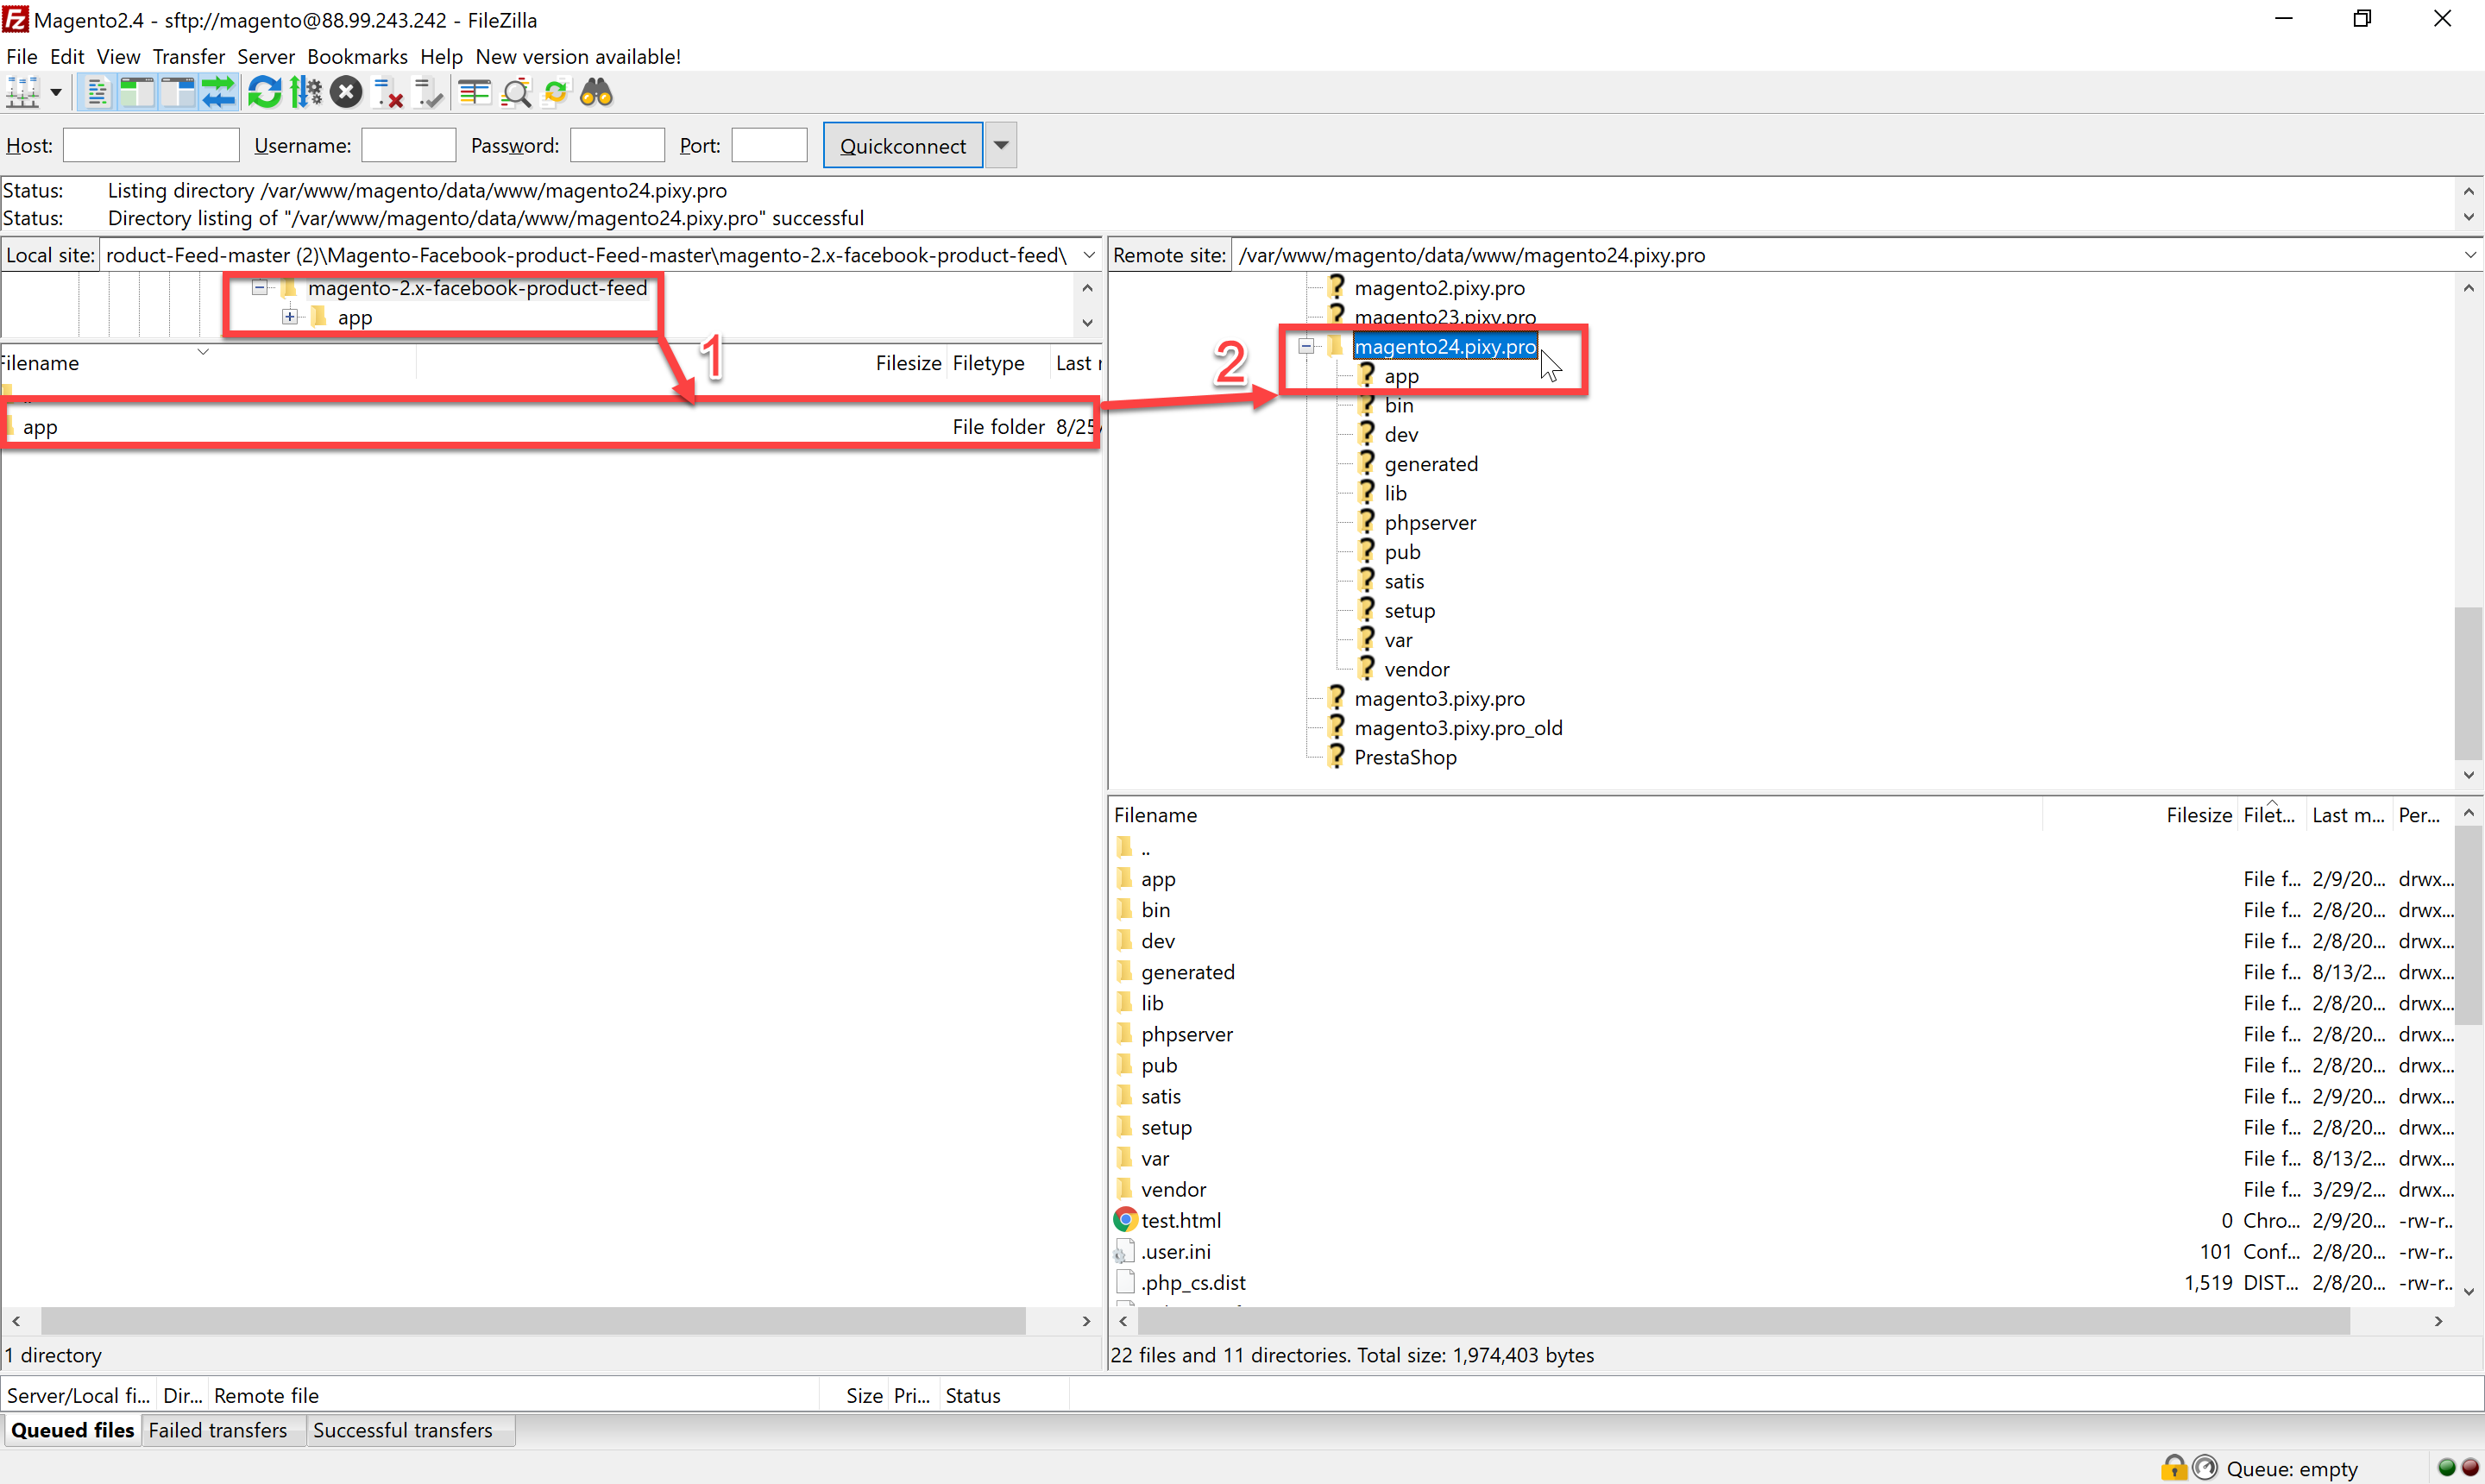
Connect via FTP to your website and copy the contents of the magento-2.x-facebook-product-feed folder (1) to the root of the website folder (2).
Be sure to use such commands as php bin/magento setup:upgrade and php bin/magento setup:di:compile in the web console to activate the plugin.
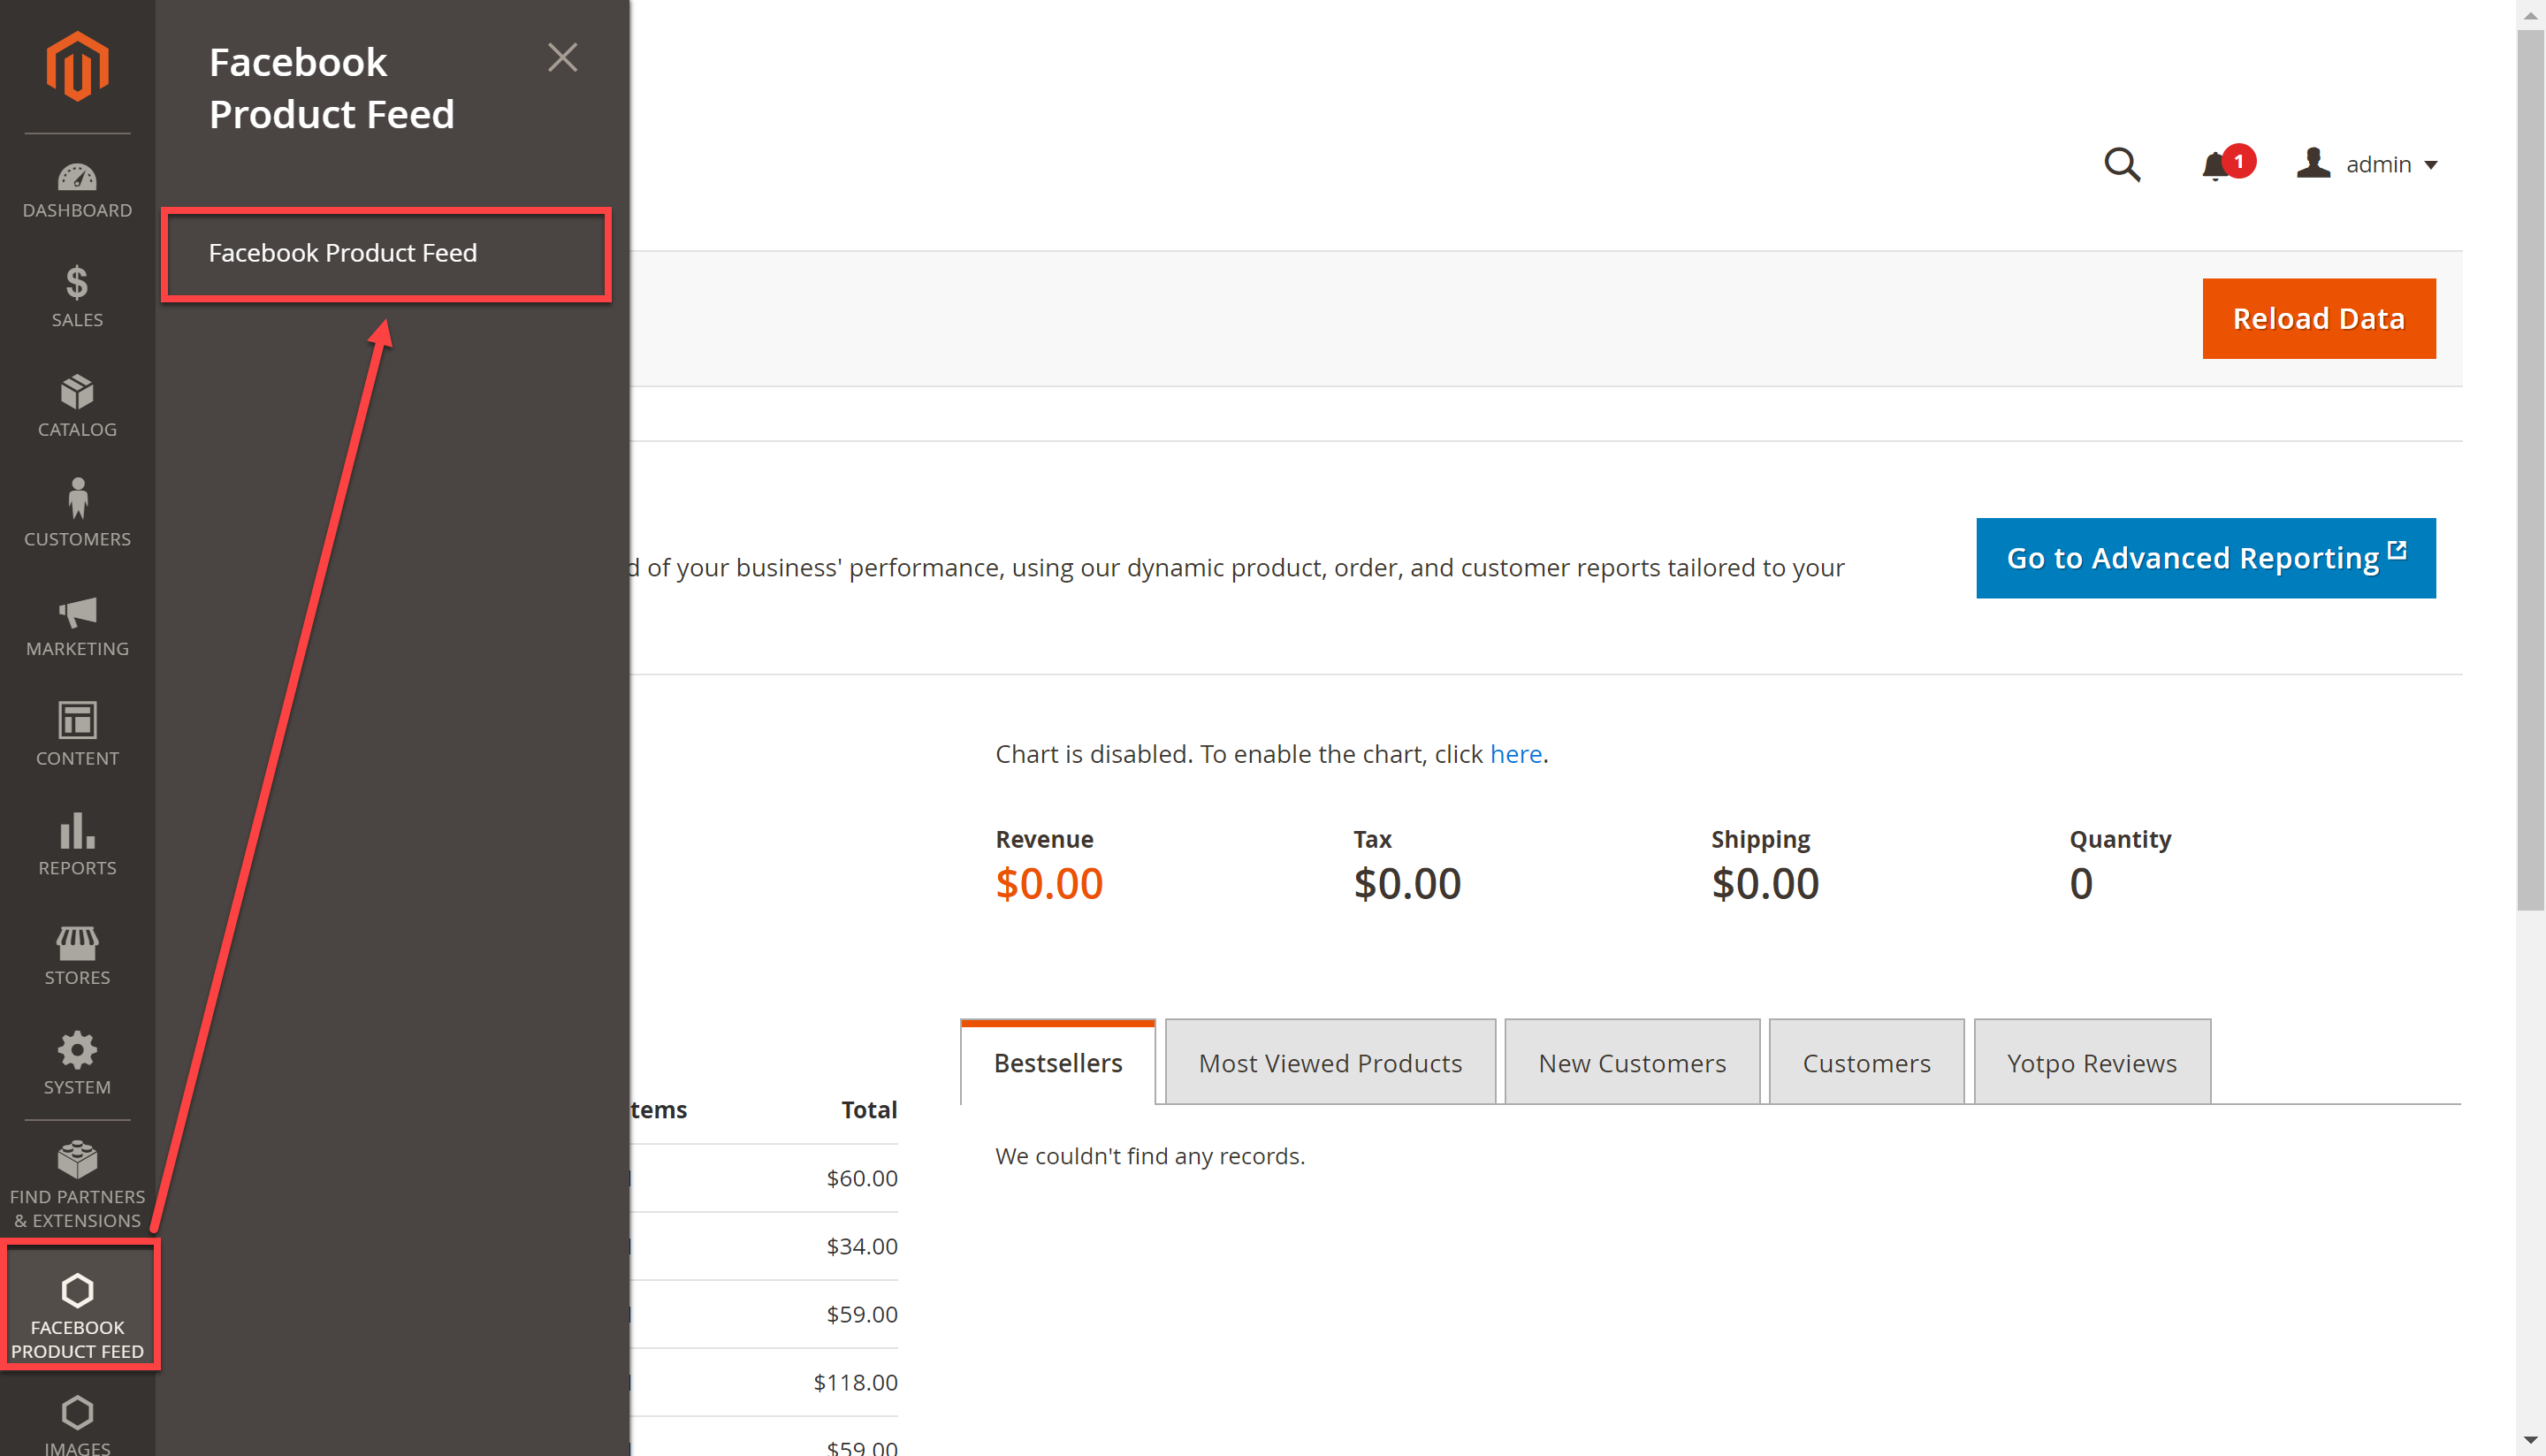
To configure the plugin, in the main menu of the admin panel, select the Facebook Product Feed section that appears after installation.
Plugin page
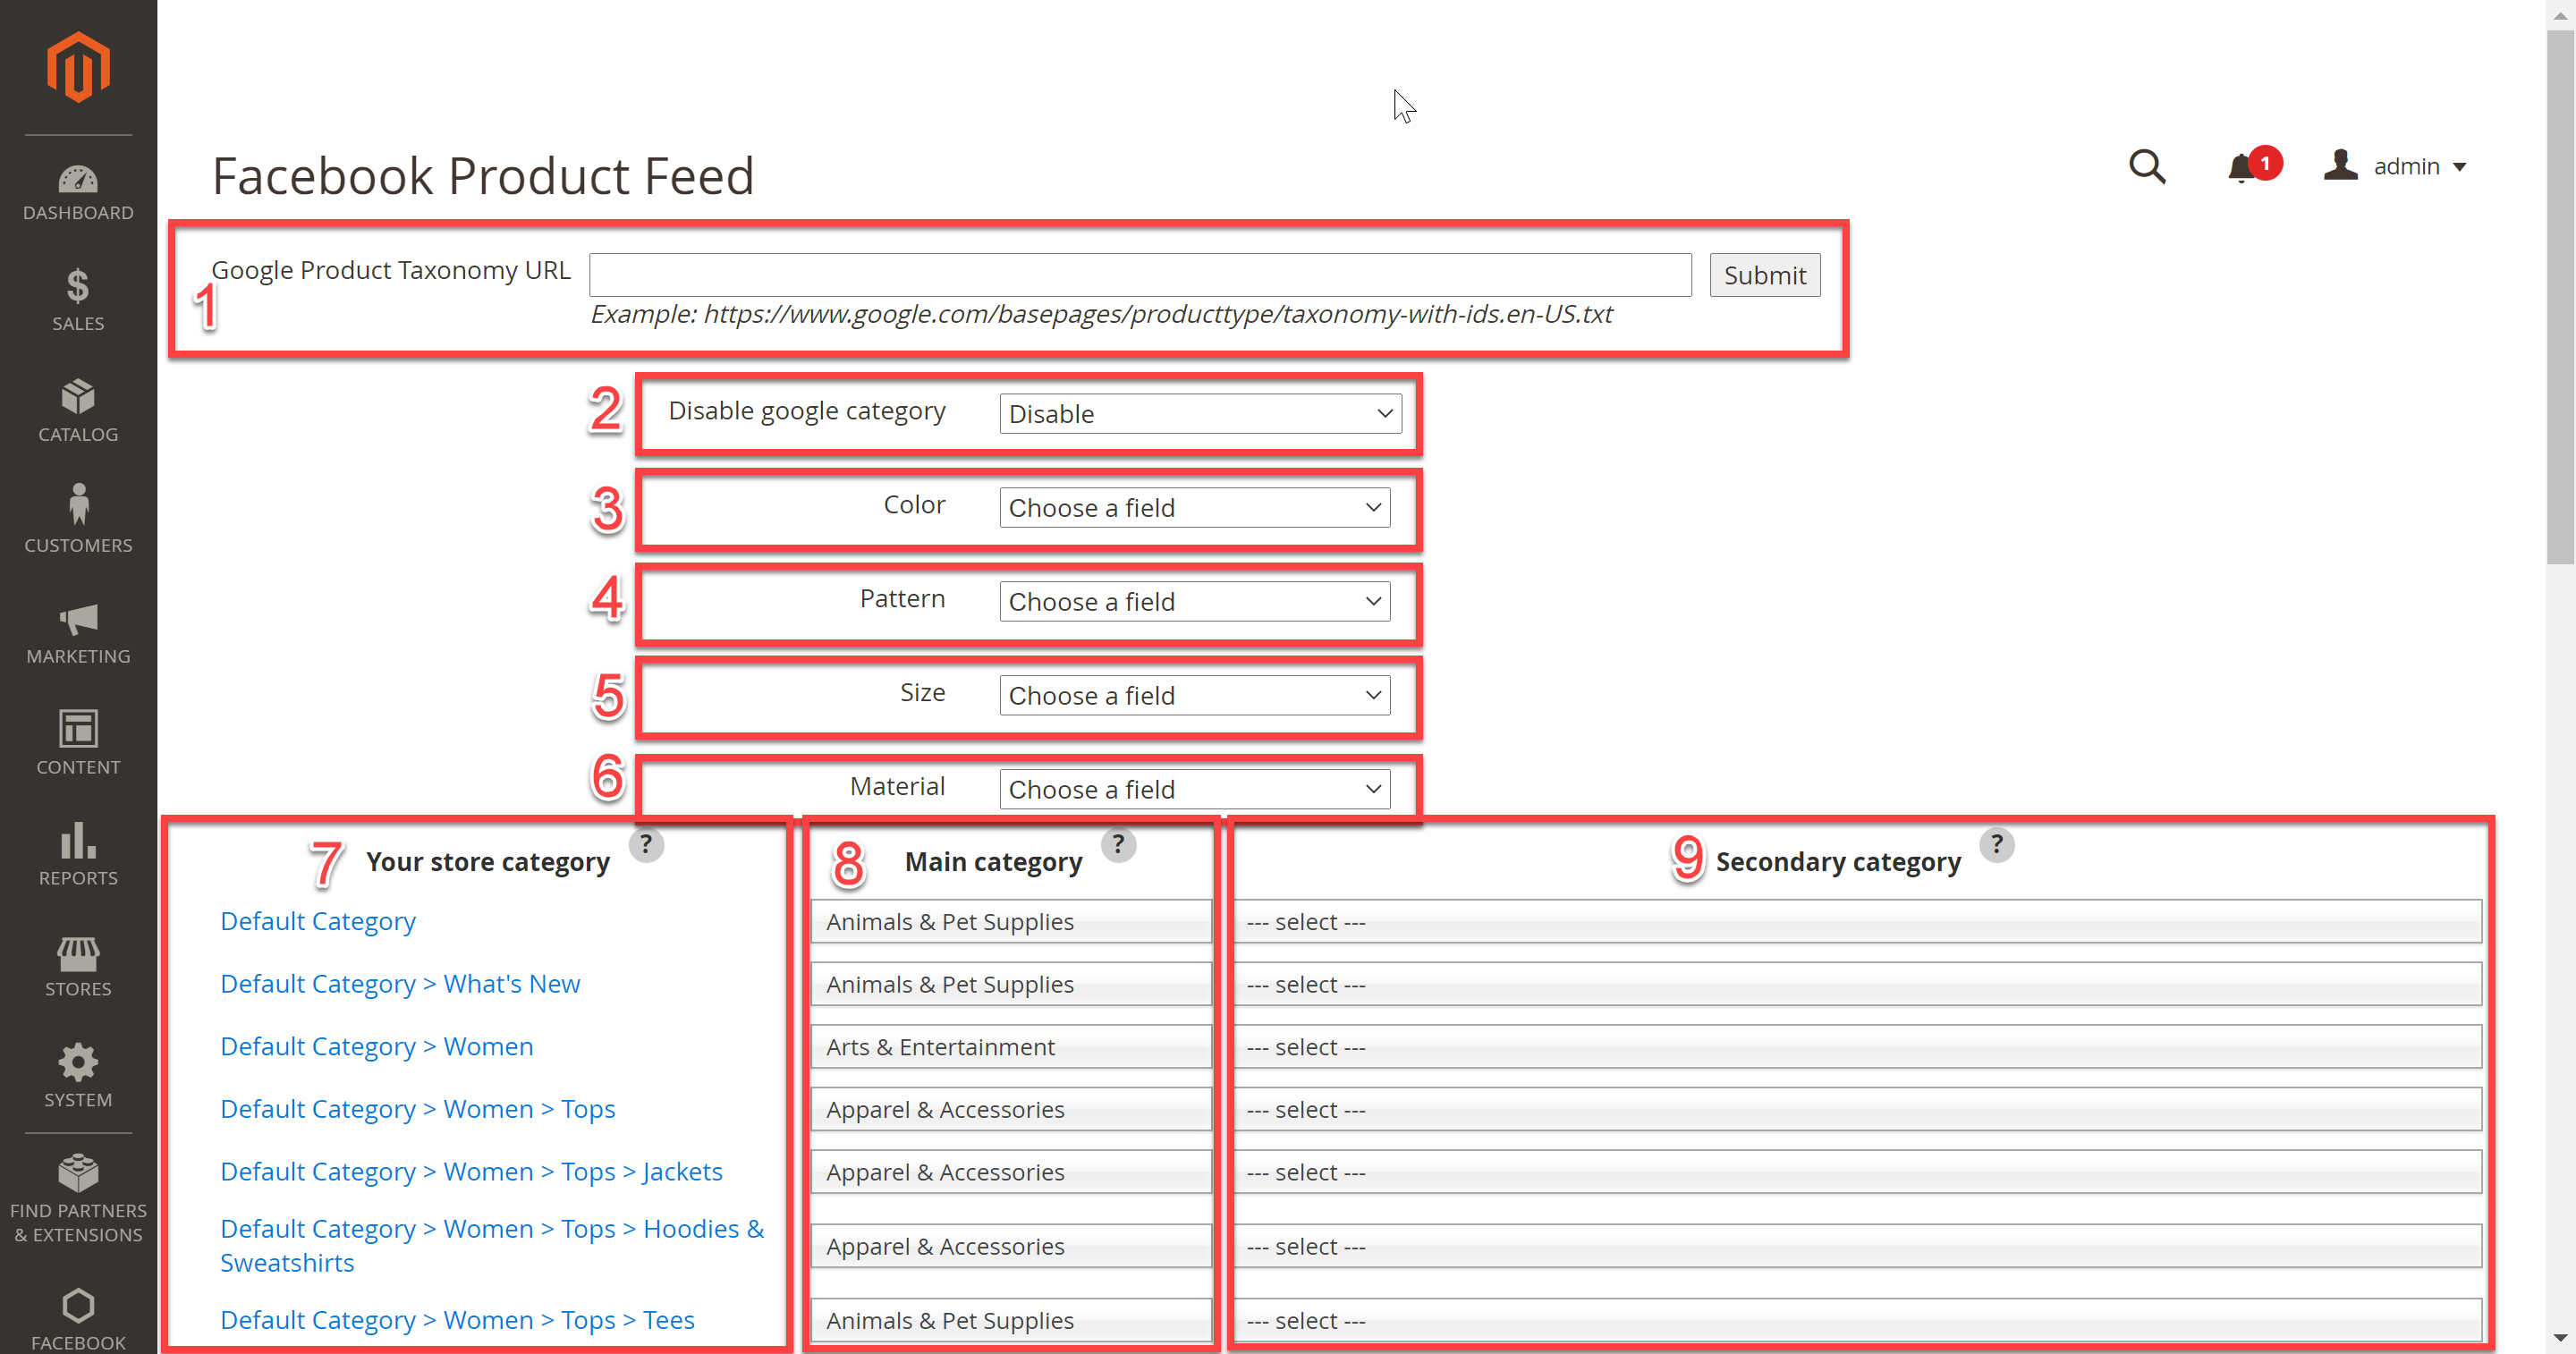
The plugin page consists of:
The Google Product Taxonomy URL field (1) - to update the Google categories, enter the URL of the Google categories.
The Disable google category field (2) - to enable / disable the use of Google categories (position Disable is by default).
Fields Color (3), Pattern (4), Size (5), Material (6) - to choose matching product options on your website to the options on Facebook.
The Your store category block (7) corresponds to the categories of your store.
The Main category block (8) - to select the main categories of Google.
The Secondary category block (9) - to select the subcategories of Google.
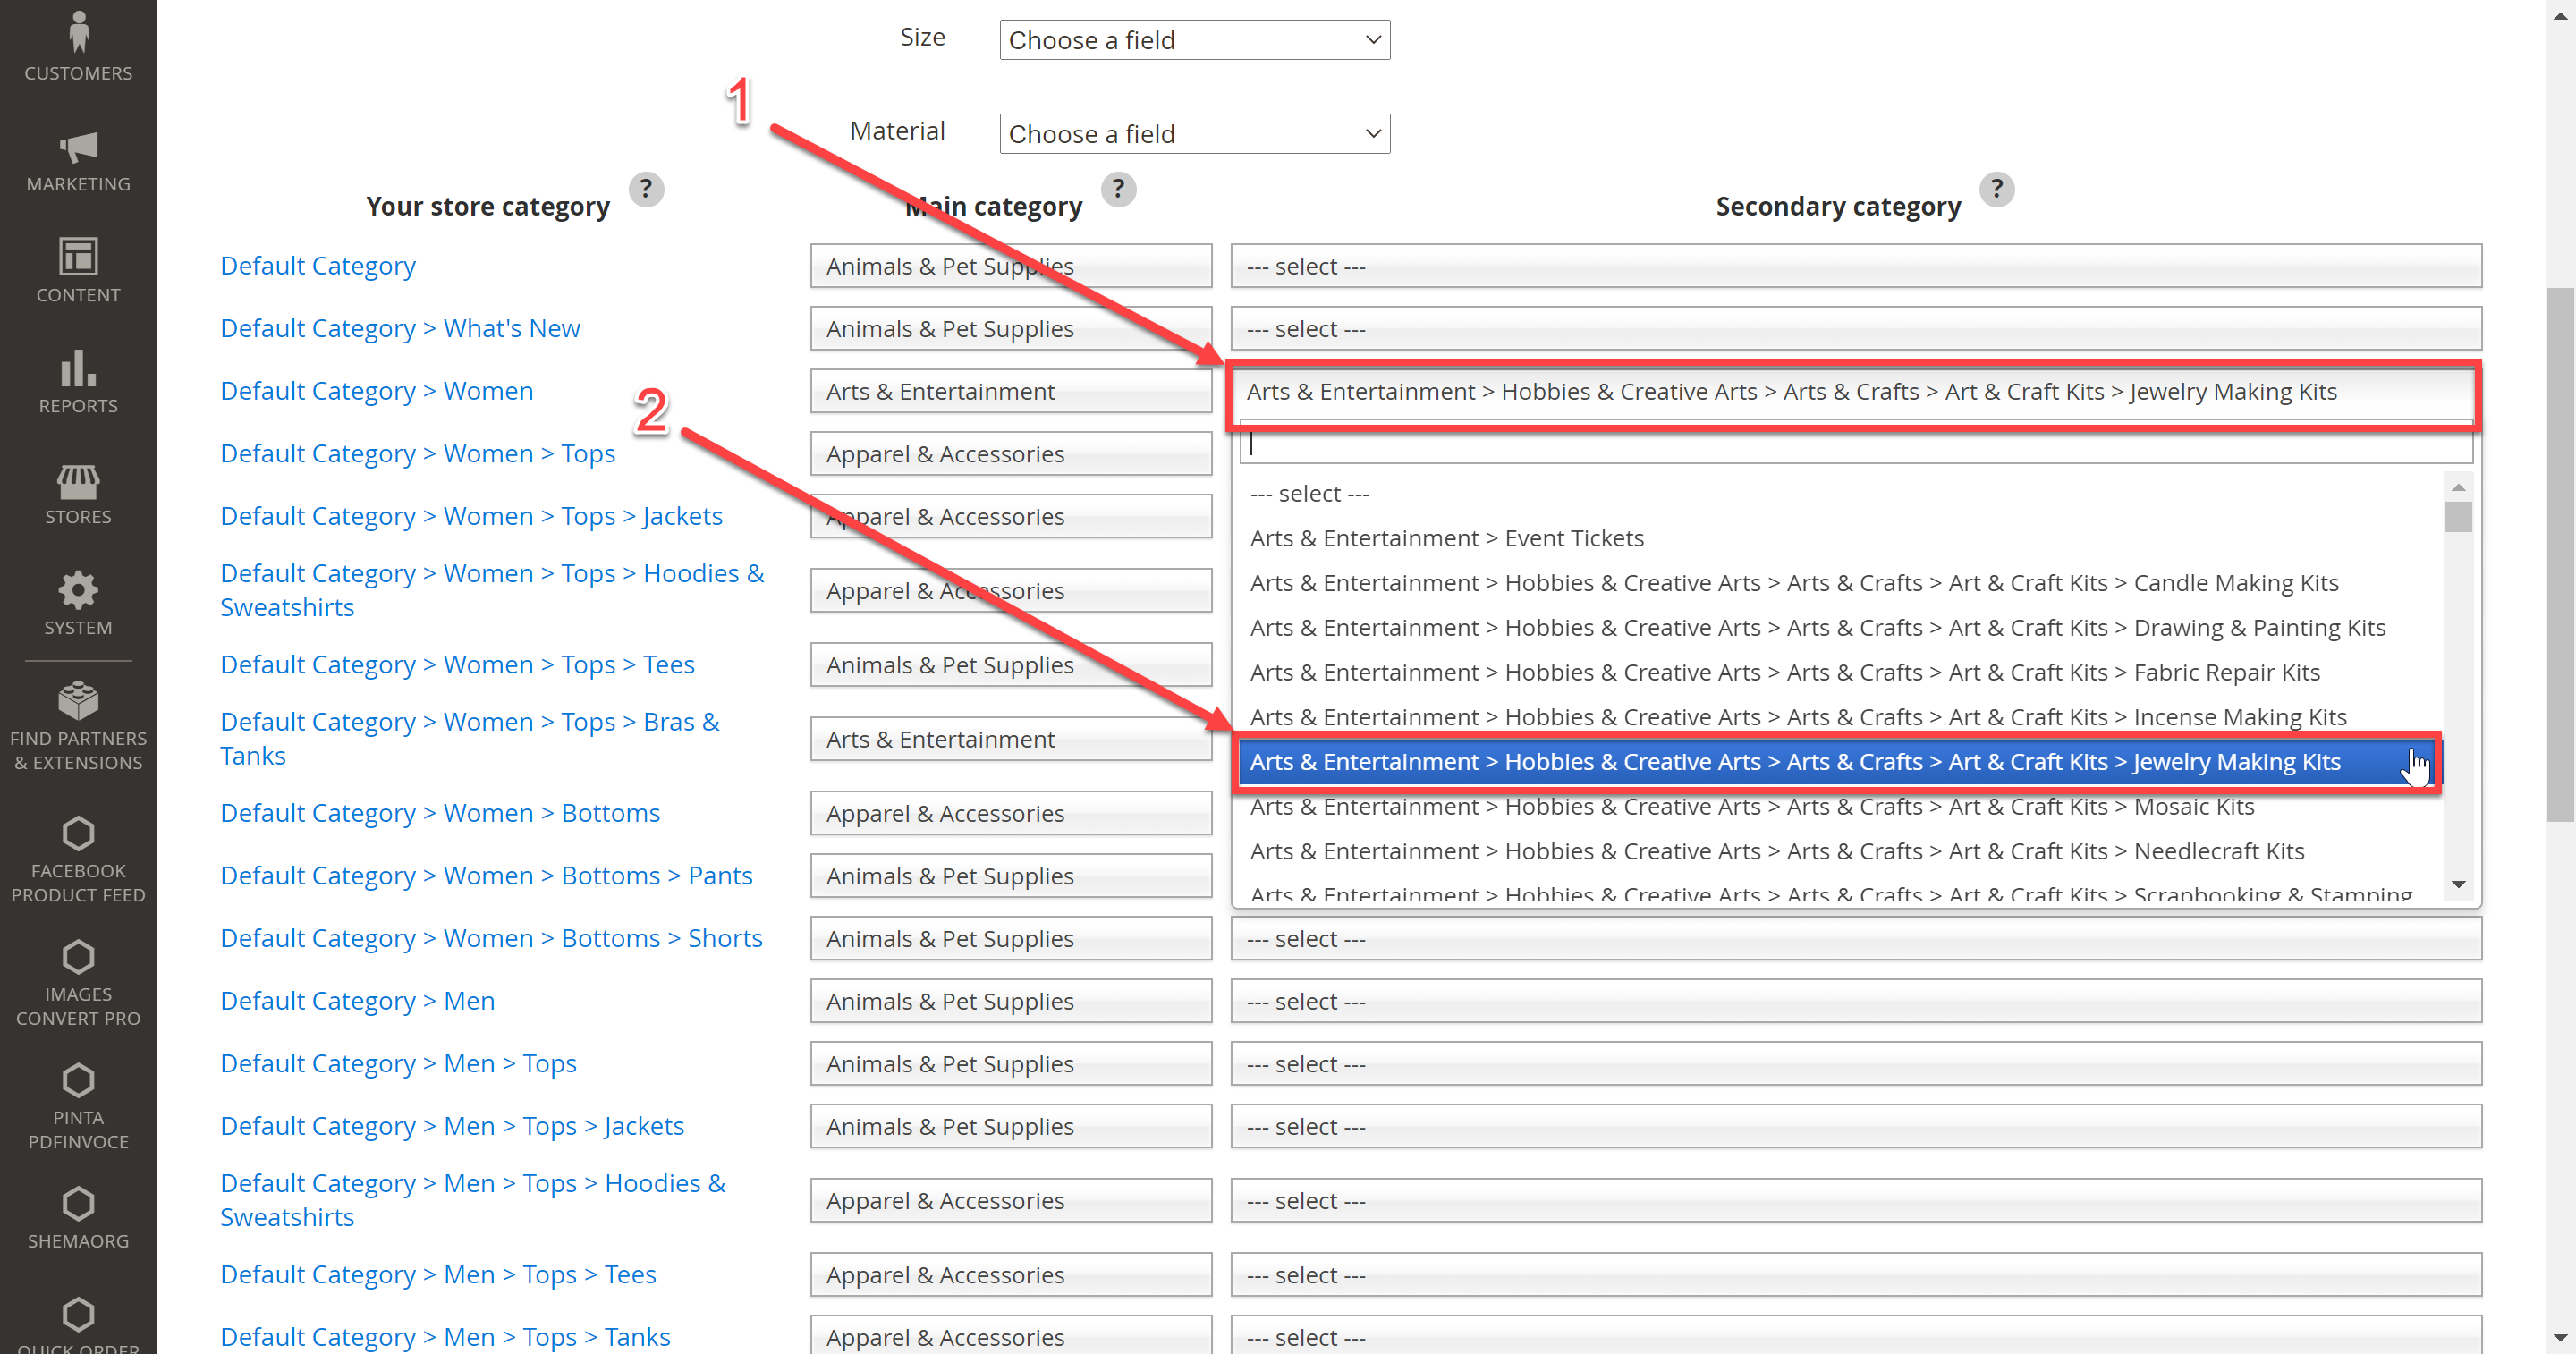
In the table of categories, choose matching of your categories on the website (the Your store category block) to the main categories of Google (the Main category block) (obligatorily). To do this, press select (1) and choose the appropriate category from the list (2).

Additionally, you can specify Google subcategories (the Secondary category block). To do this, press select (1) and choose the appropriate category from the list (2).
If you want to disable the use of Google categories, in the Disable google category field, select the Enabled position (1).
Next, put the checkboxes of the product category (2) that will be uploaded to the feed. Use the Enabled all categories / Disabled all categories button (3) to put all checkboxes (uncheck) at the same time.
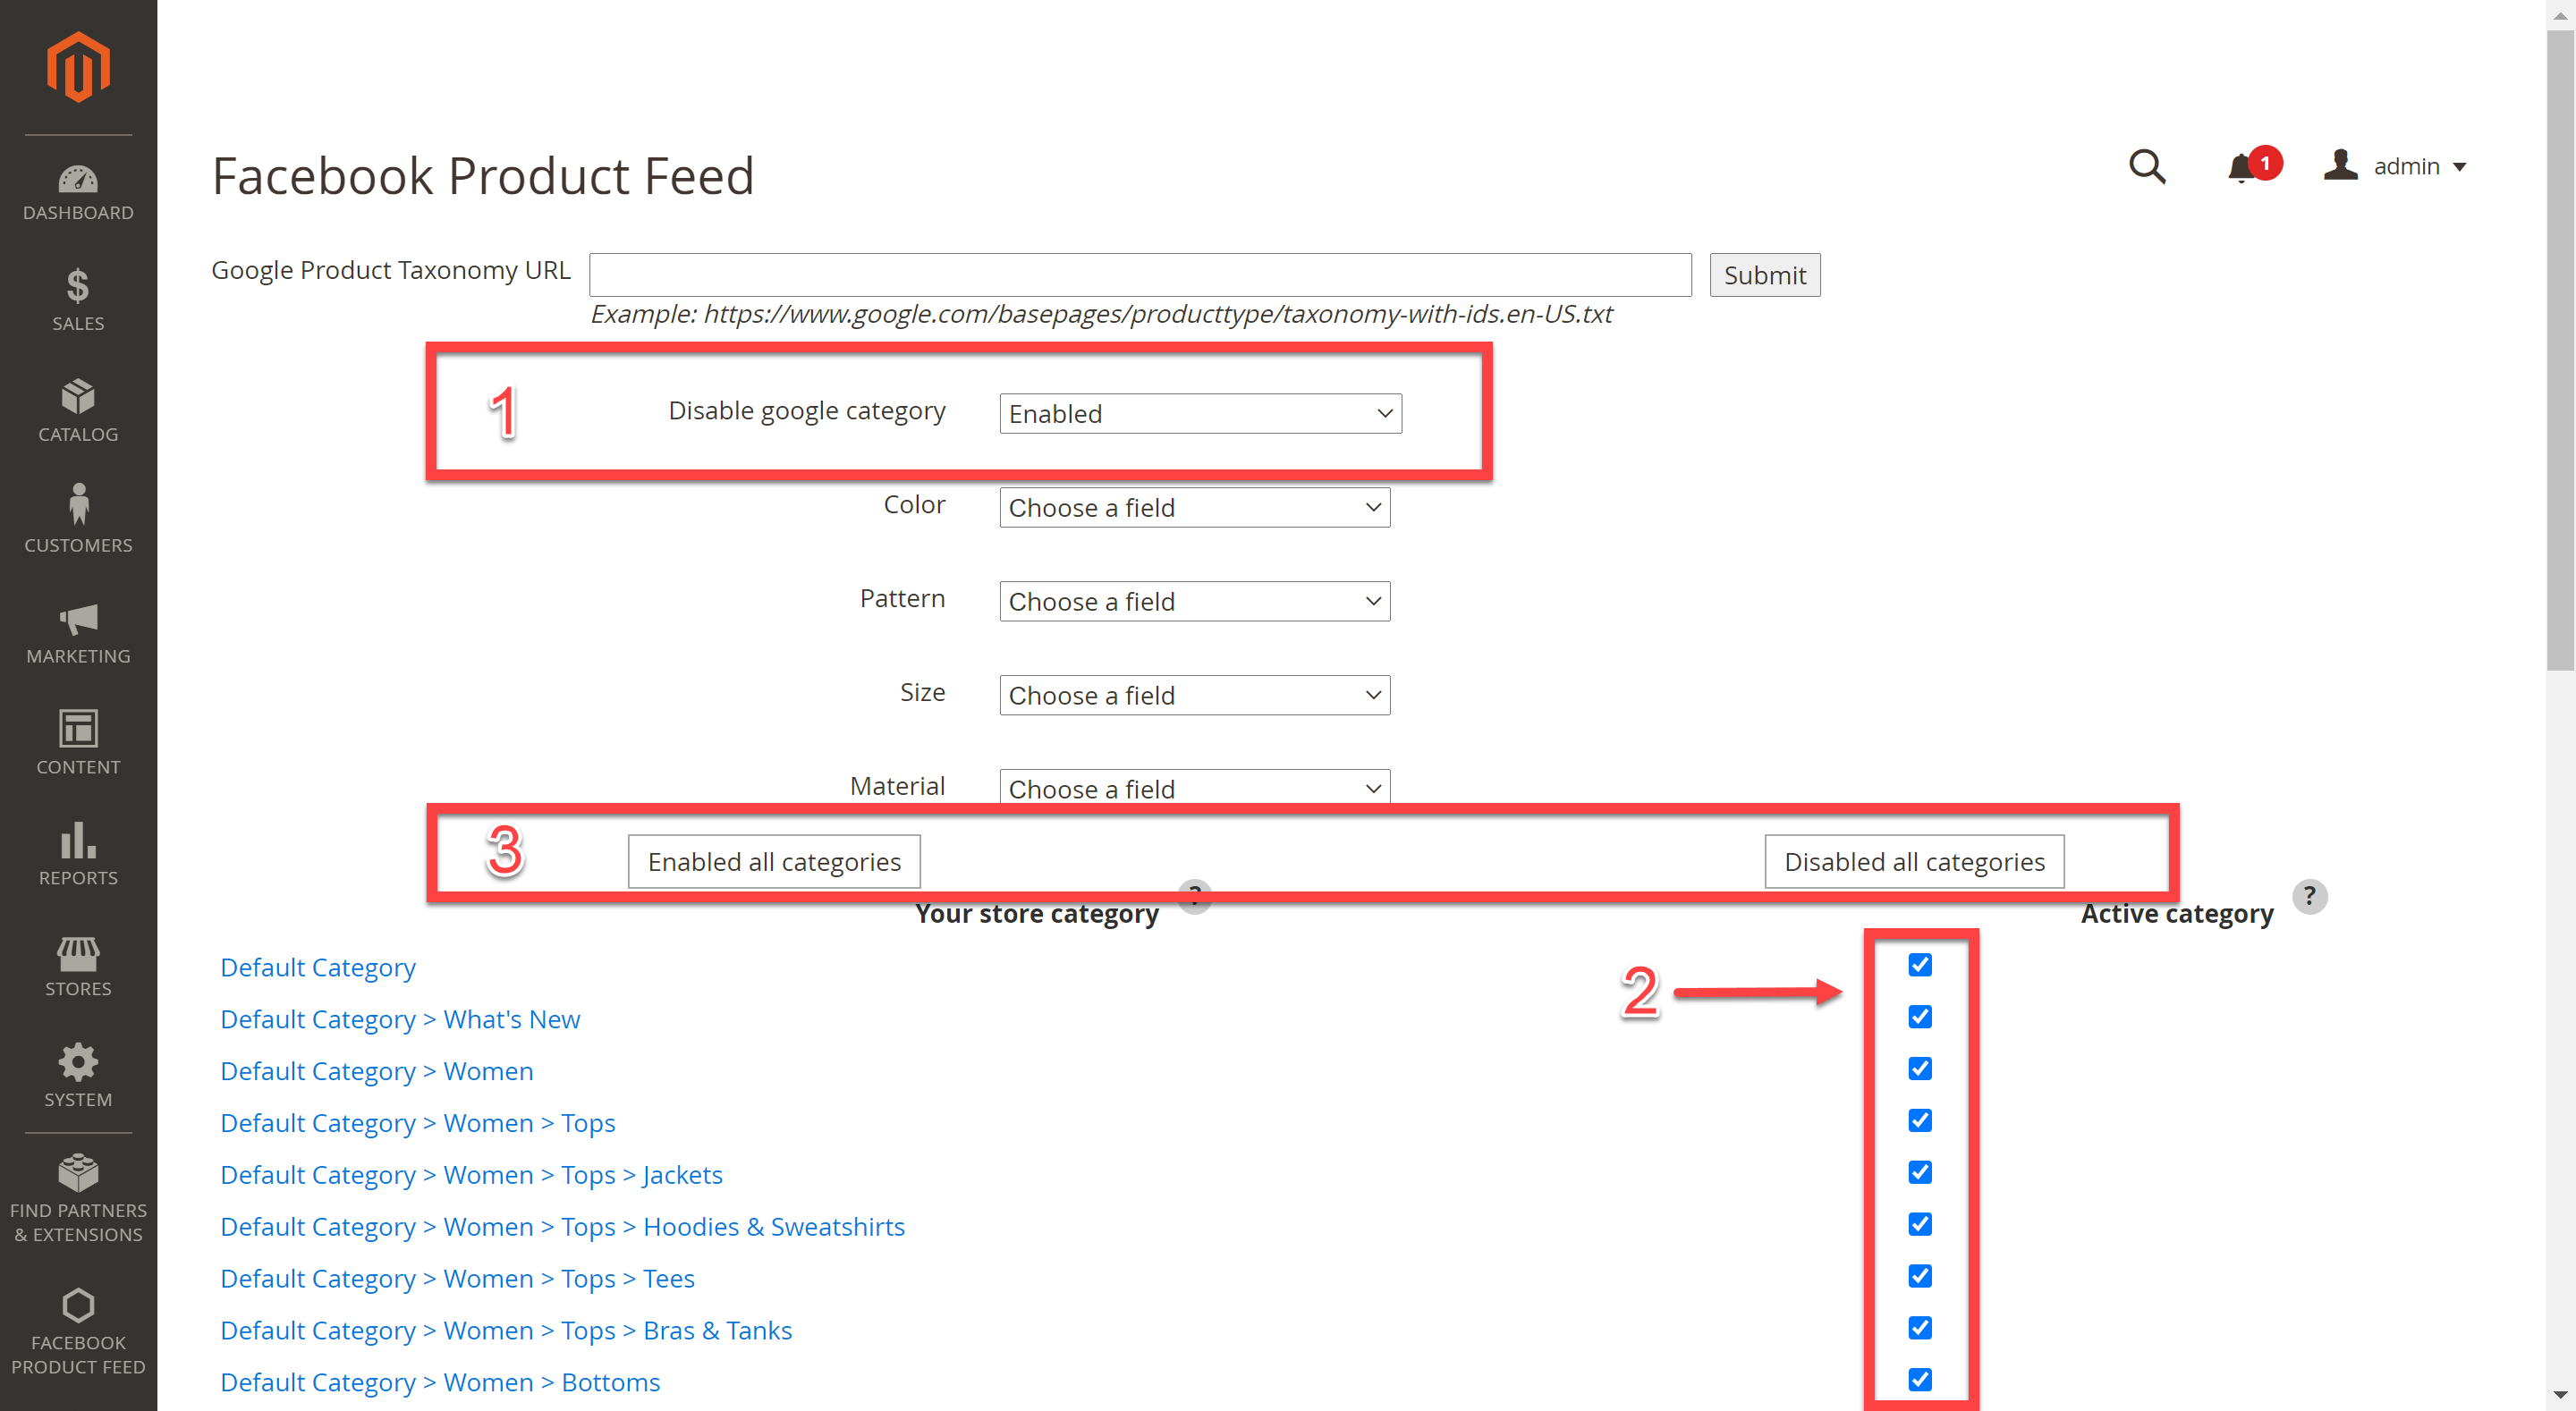
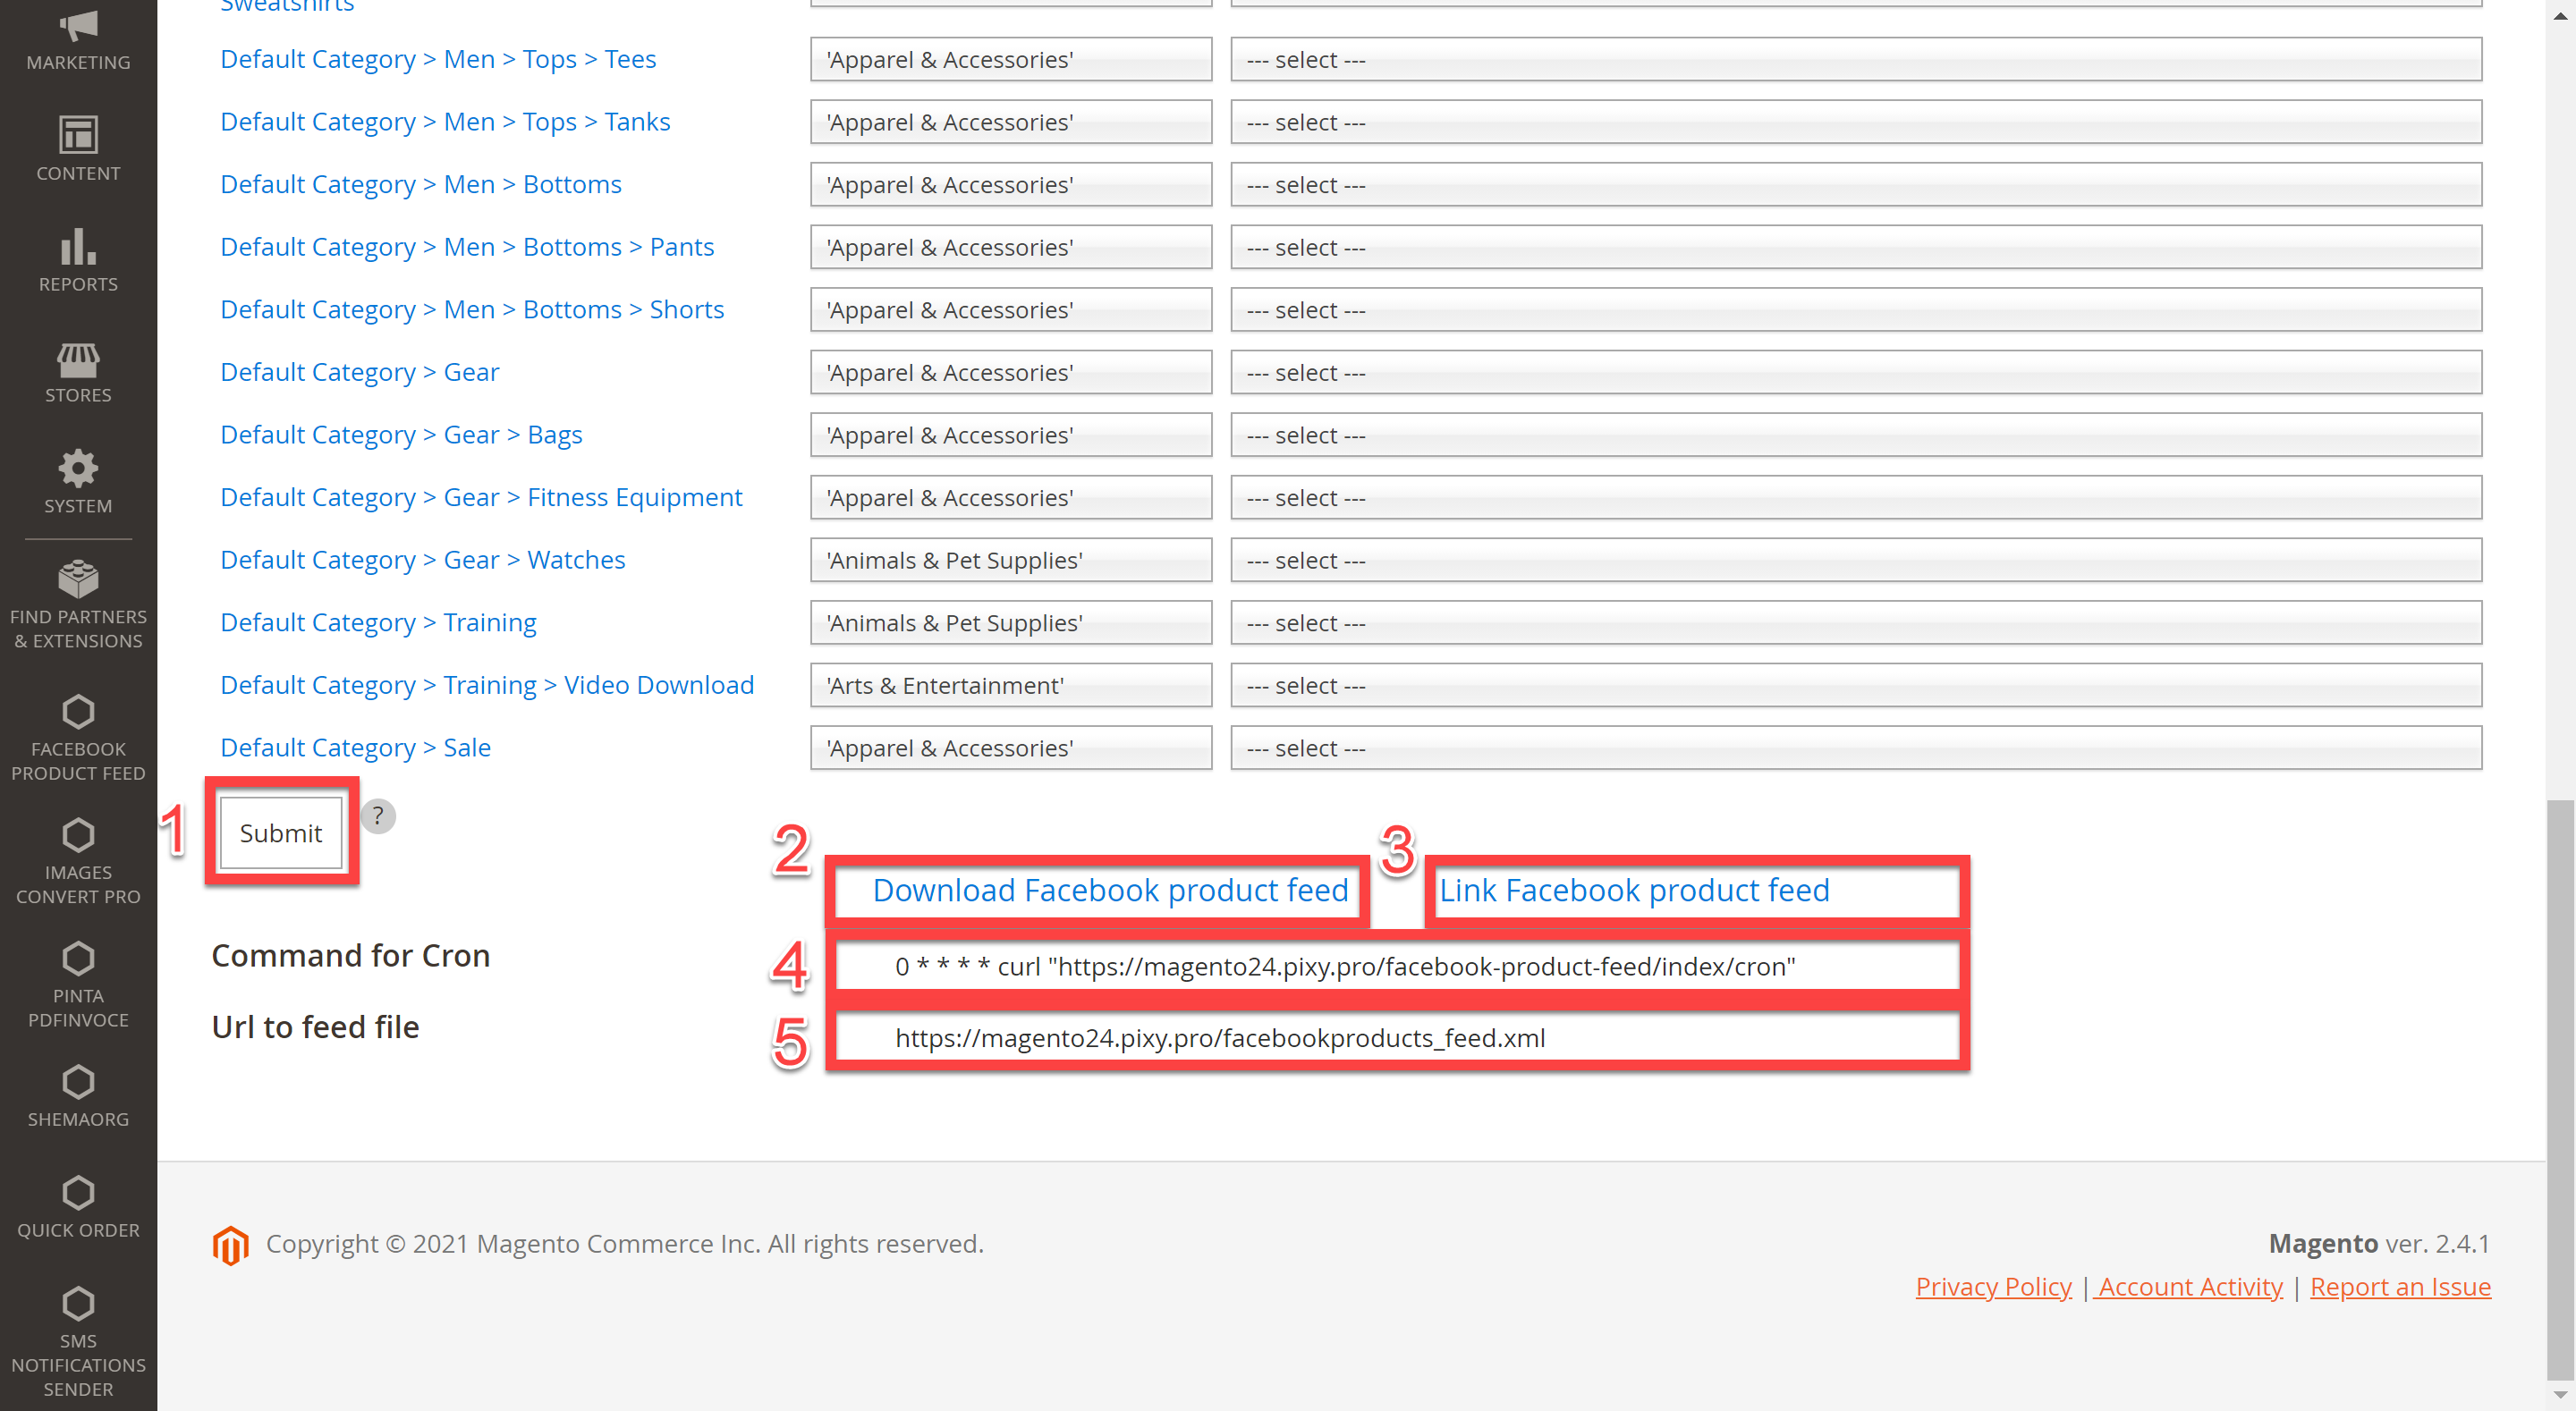
After selecting the product categories to be uploaded to the feed, save the changes. To do this, click the Submit button (1).
To generate the feed as a file, click the Download Facebook product feed button (2).
The generated feed will be saved to your computer.
To generate your feed as a link, click the Link Facebook product feed button (3).
The generated feed will open in a new browser window.
To use the cron command, copy the data into the Command for Cron field (4) and paste it into cron.
The Url to feed file field (5) contains the URL of the feed updated with the cron command.
Feed upload on the Facebook
Sign up for a Facebook account if you don't already have one, and create Catalog in your Facebook advertising account.
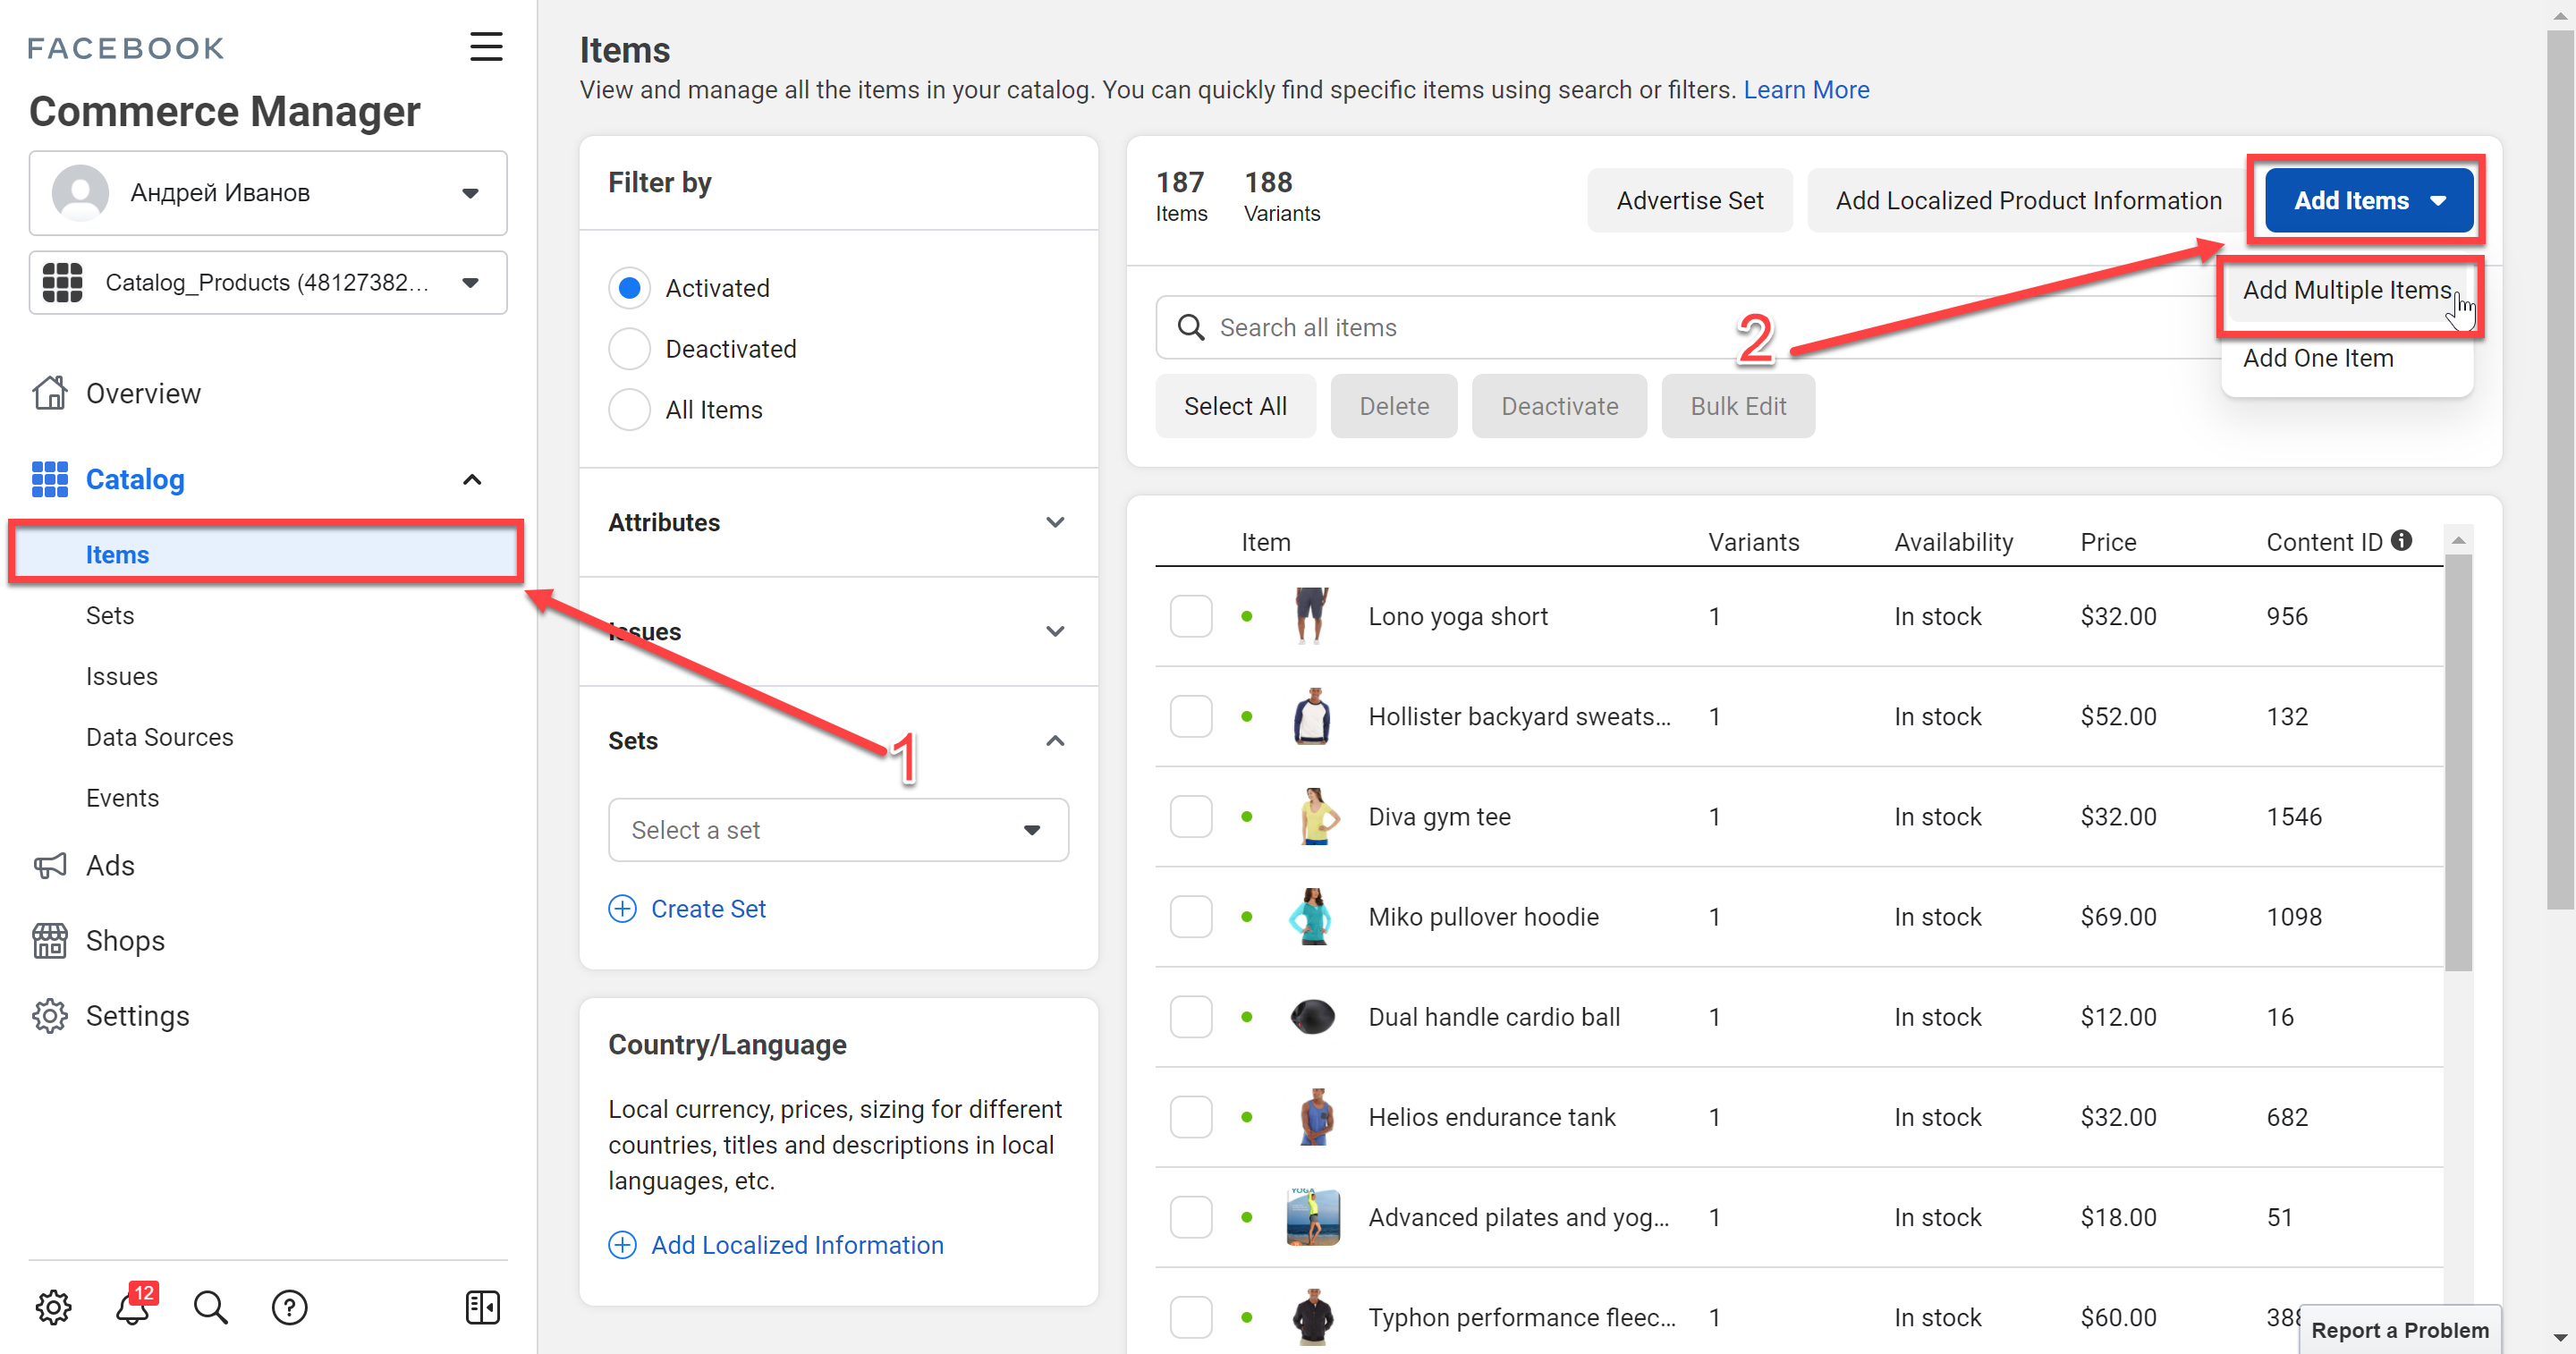
To upload the feed to your Facebook Сatalog, in the Items tab (1) click the Add items > Add Multiple Items button (2).
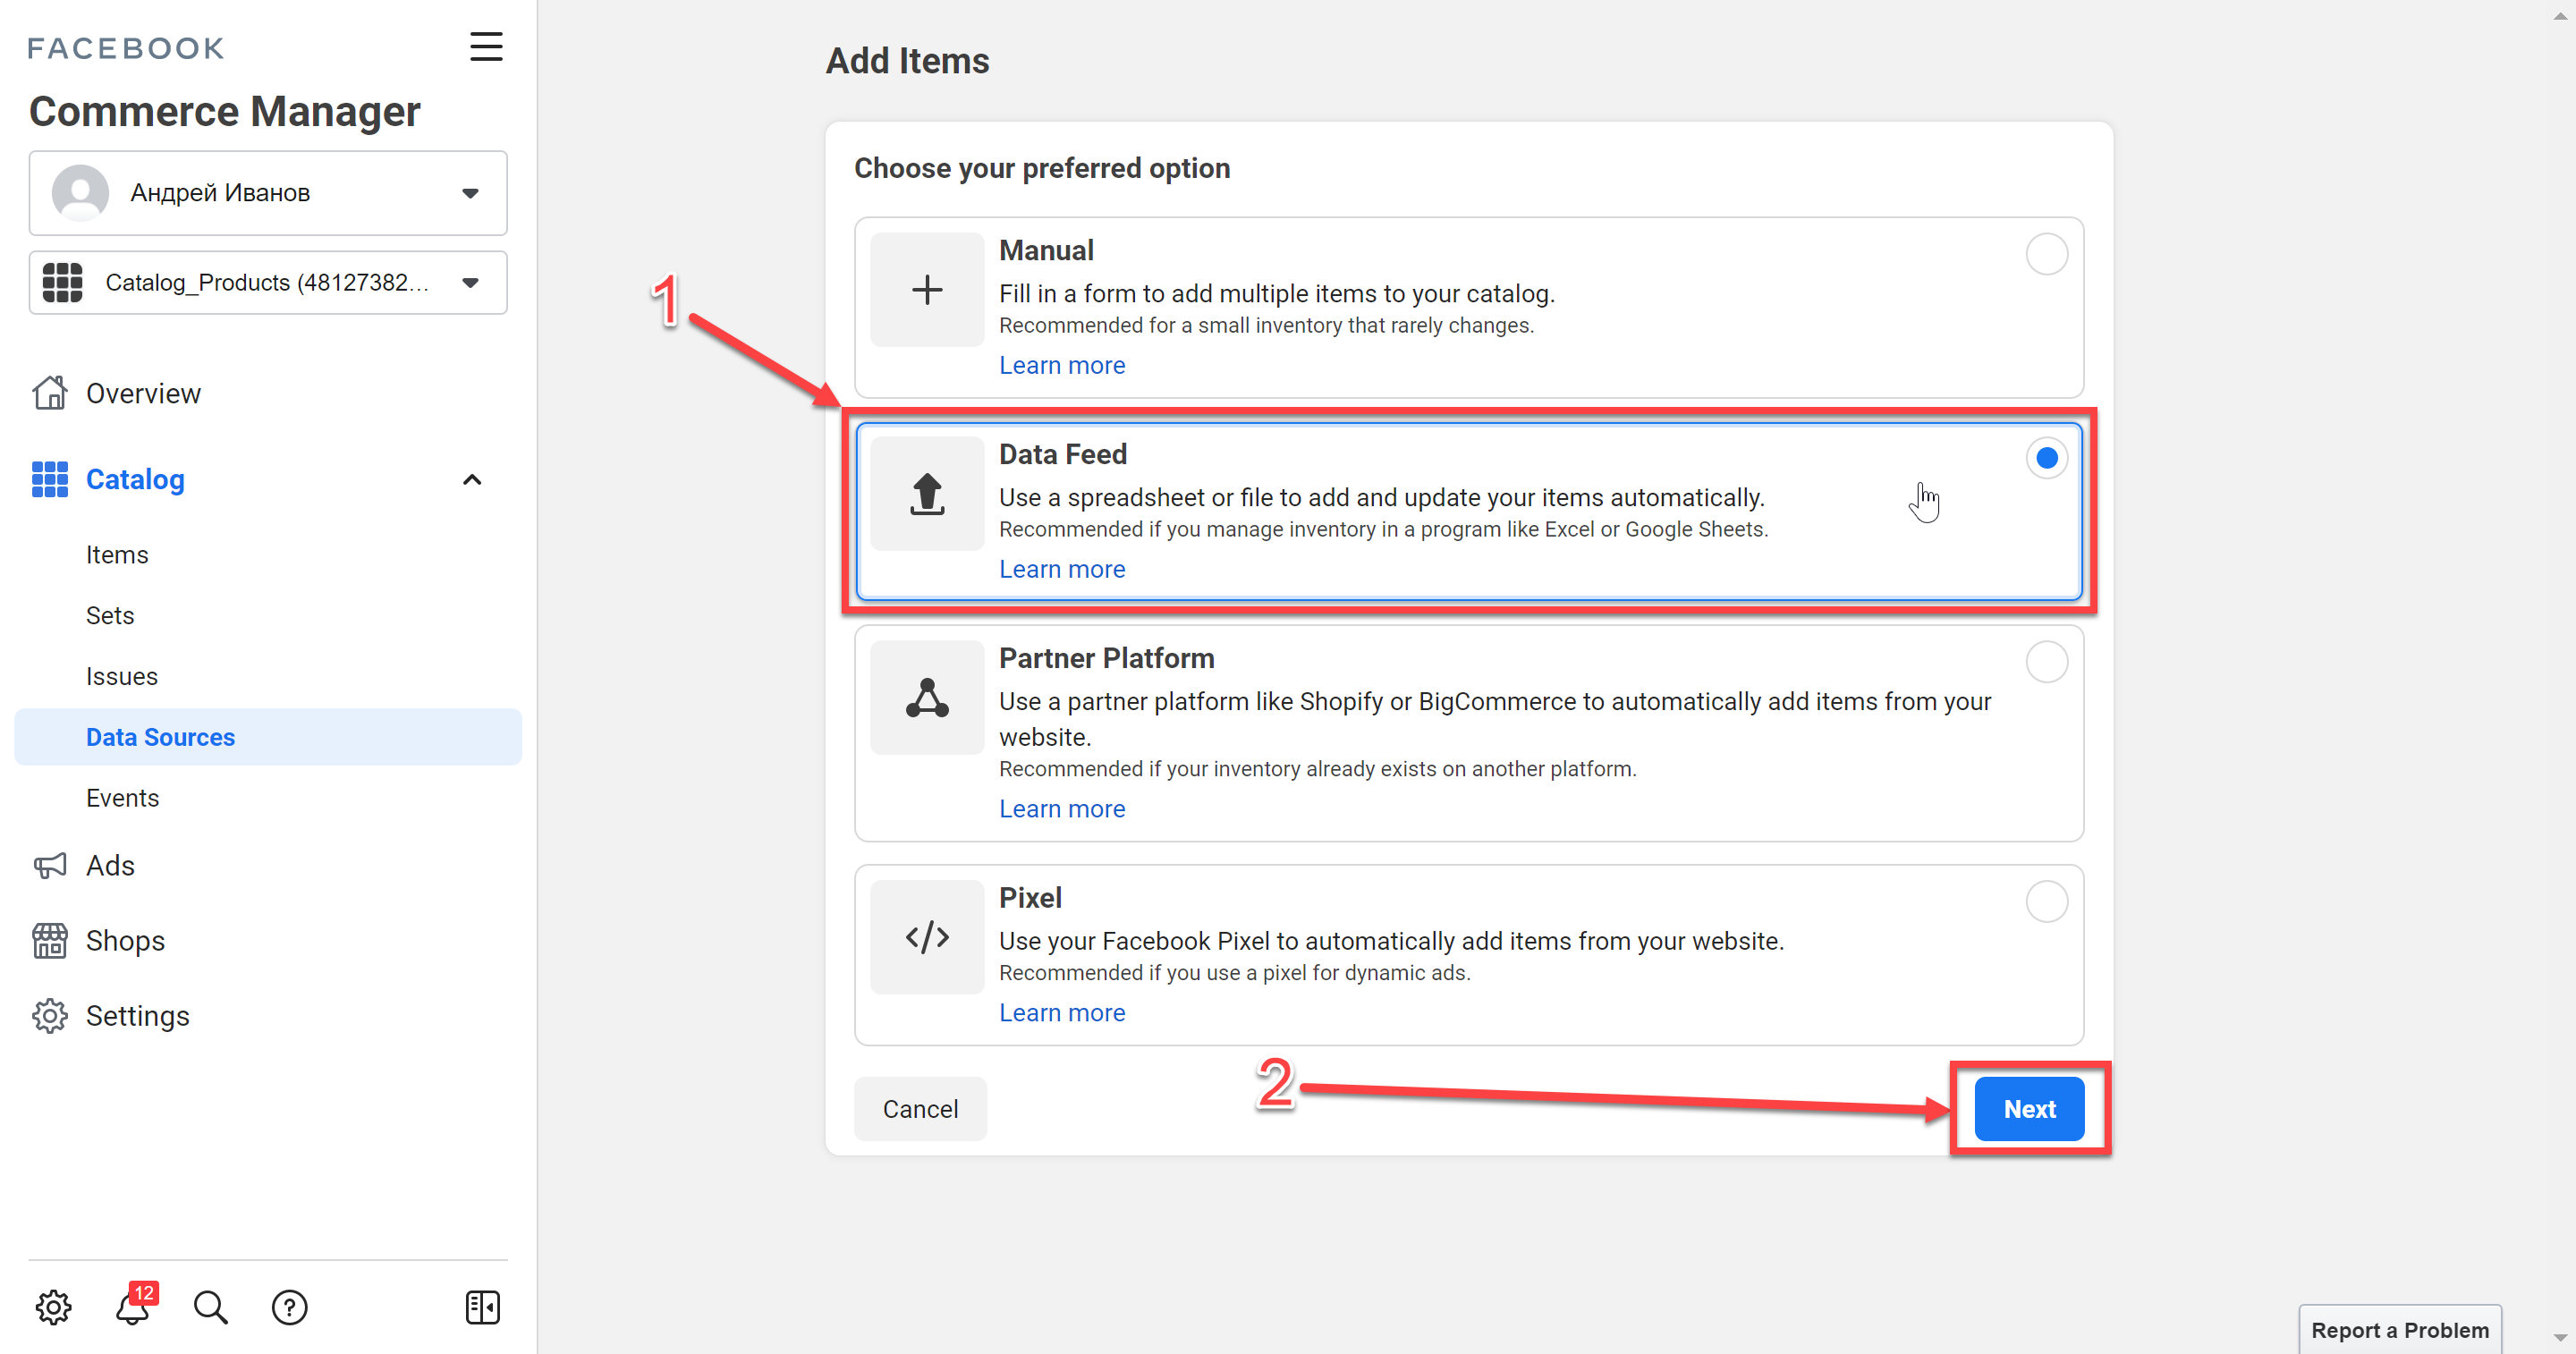
In the Add Items tab that opens, select the Data Feed block (1) and click the Next button (2).
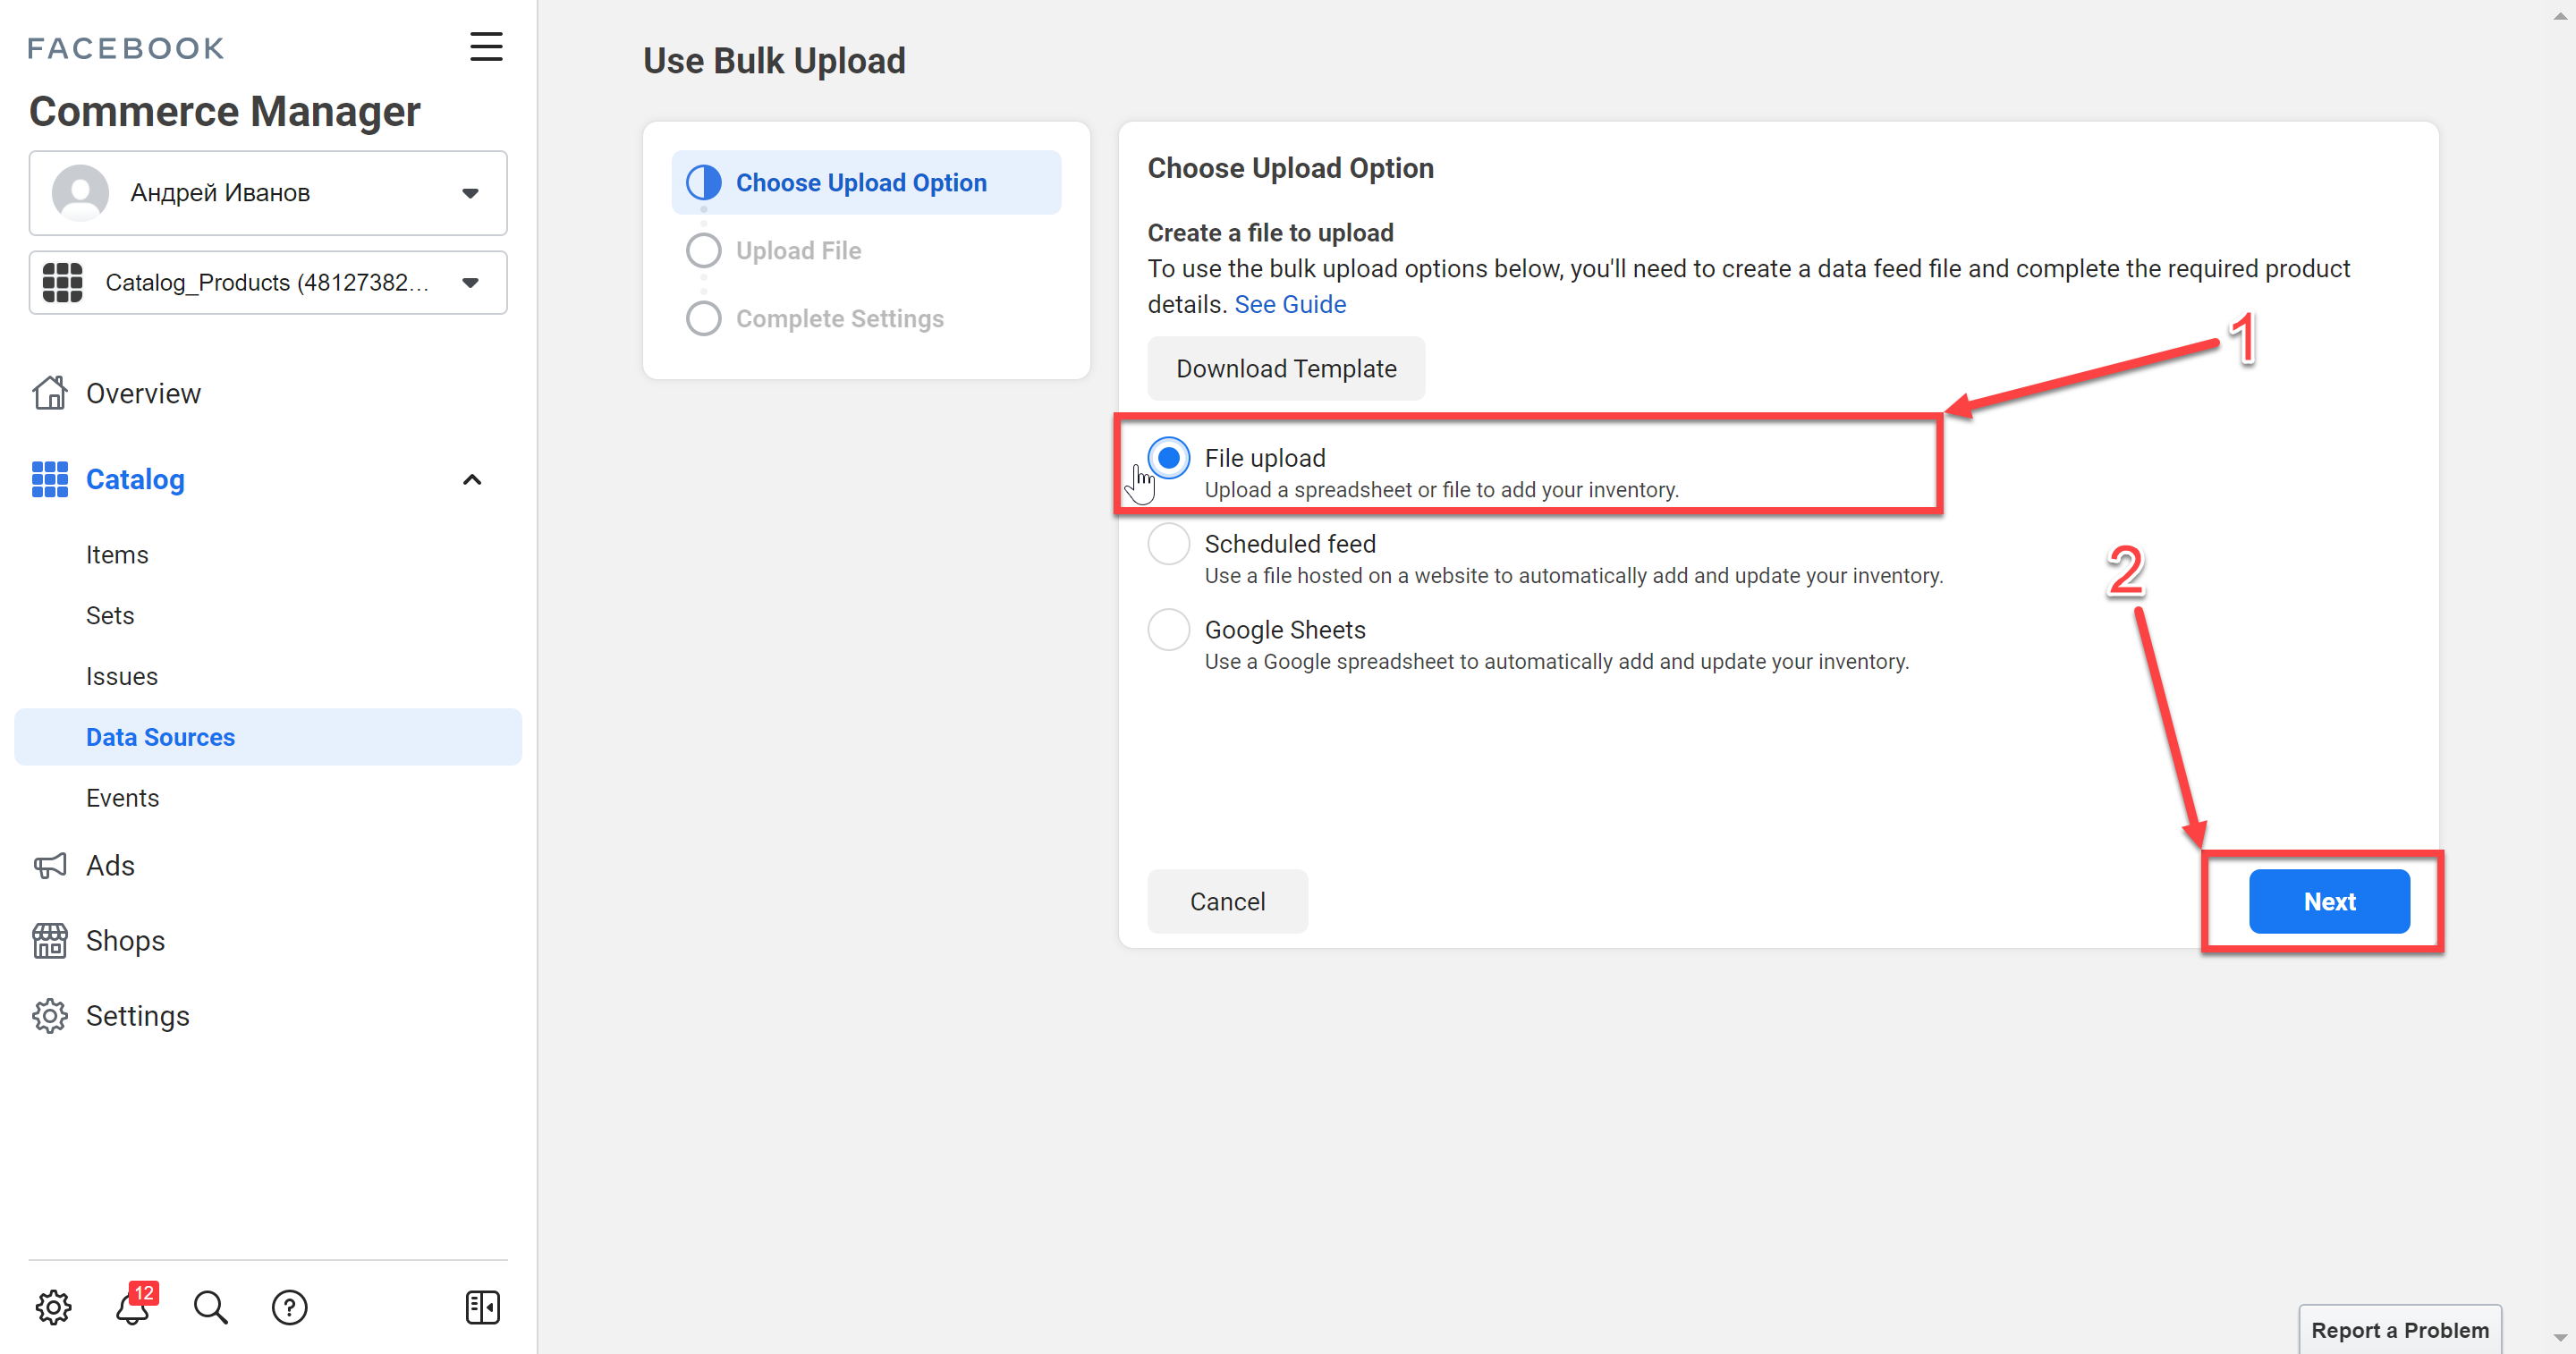
Next, to upload the feed as a file, in the Use Bulk Upload block, select the File upload option (1) and click the Next button (2).
Click the Upload File button (1), select the generated feed (2) and click the Next button (3).

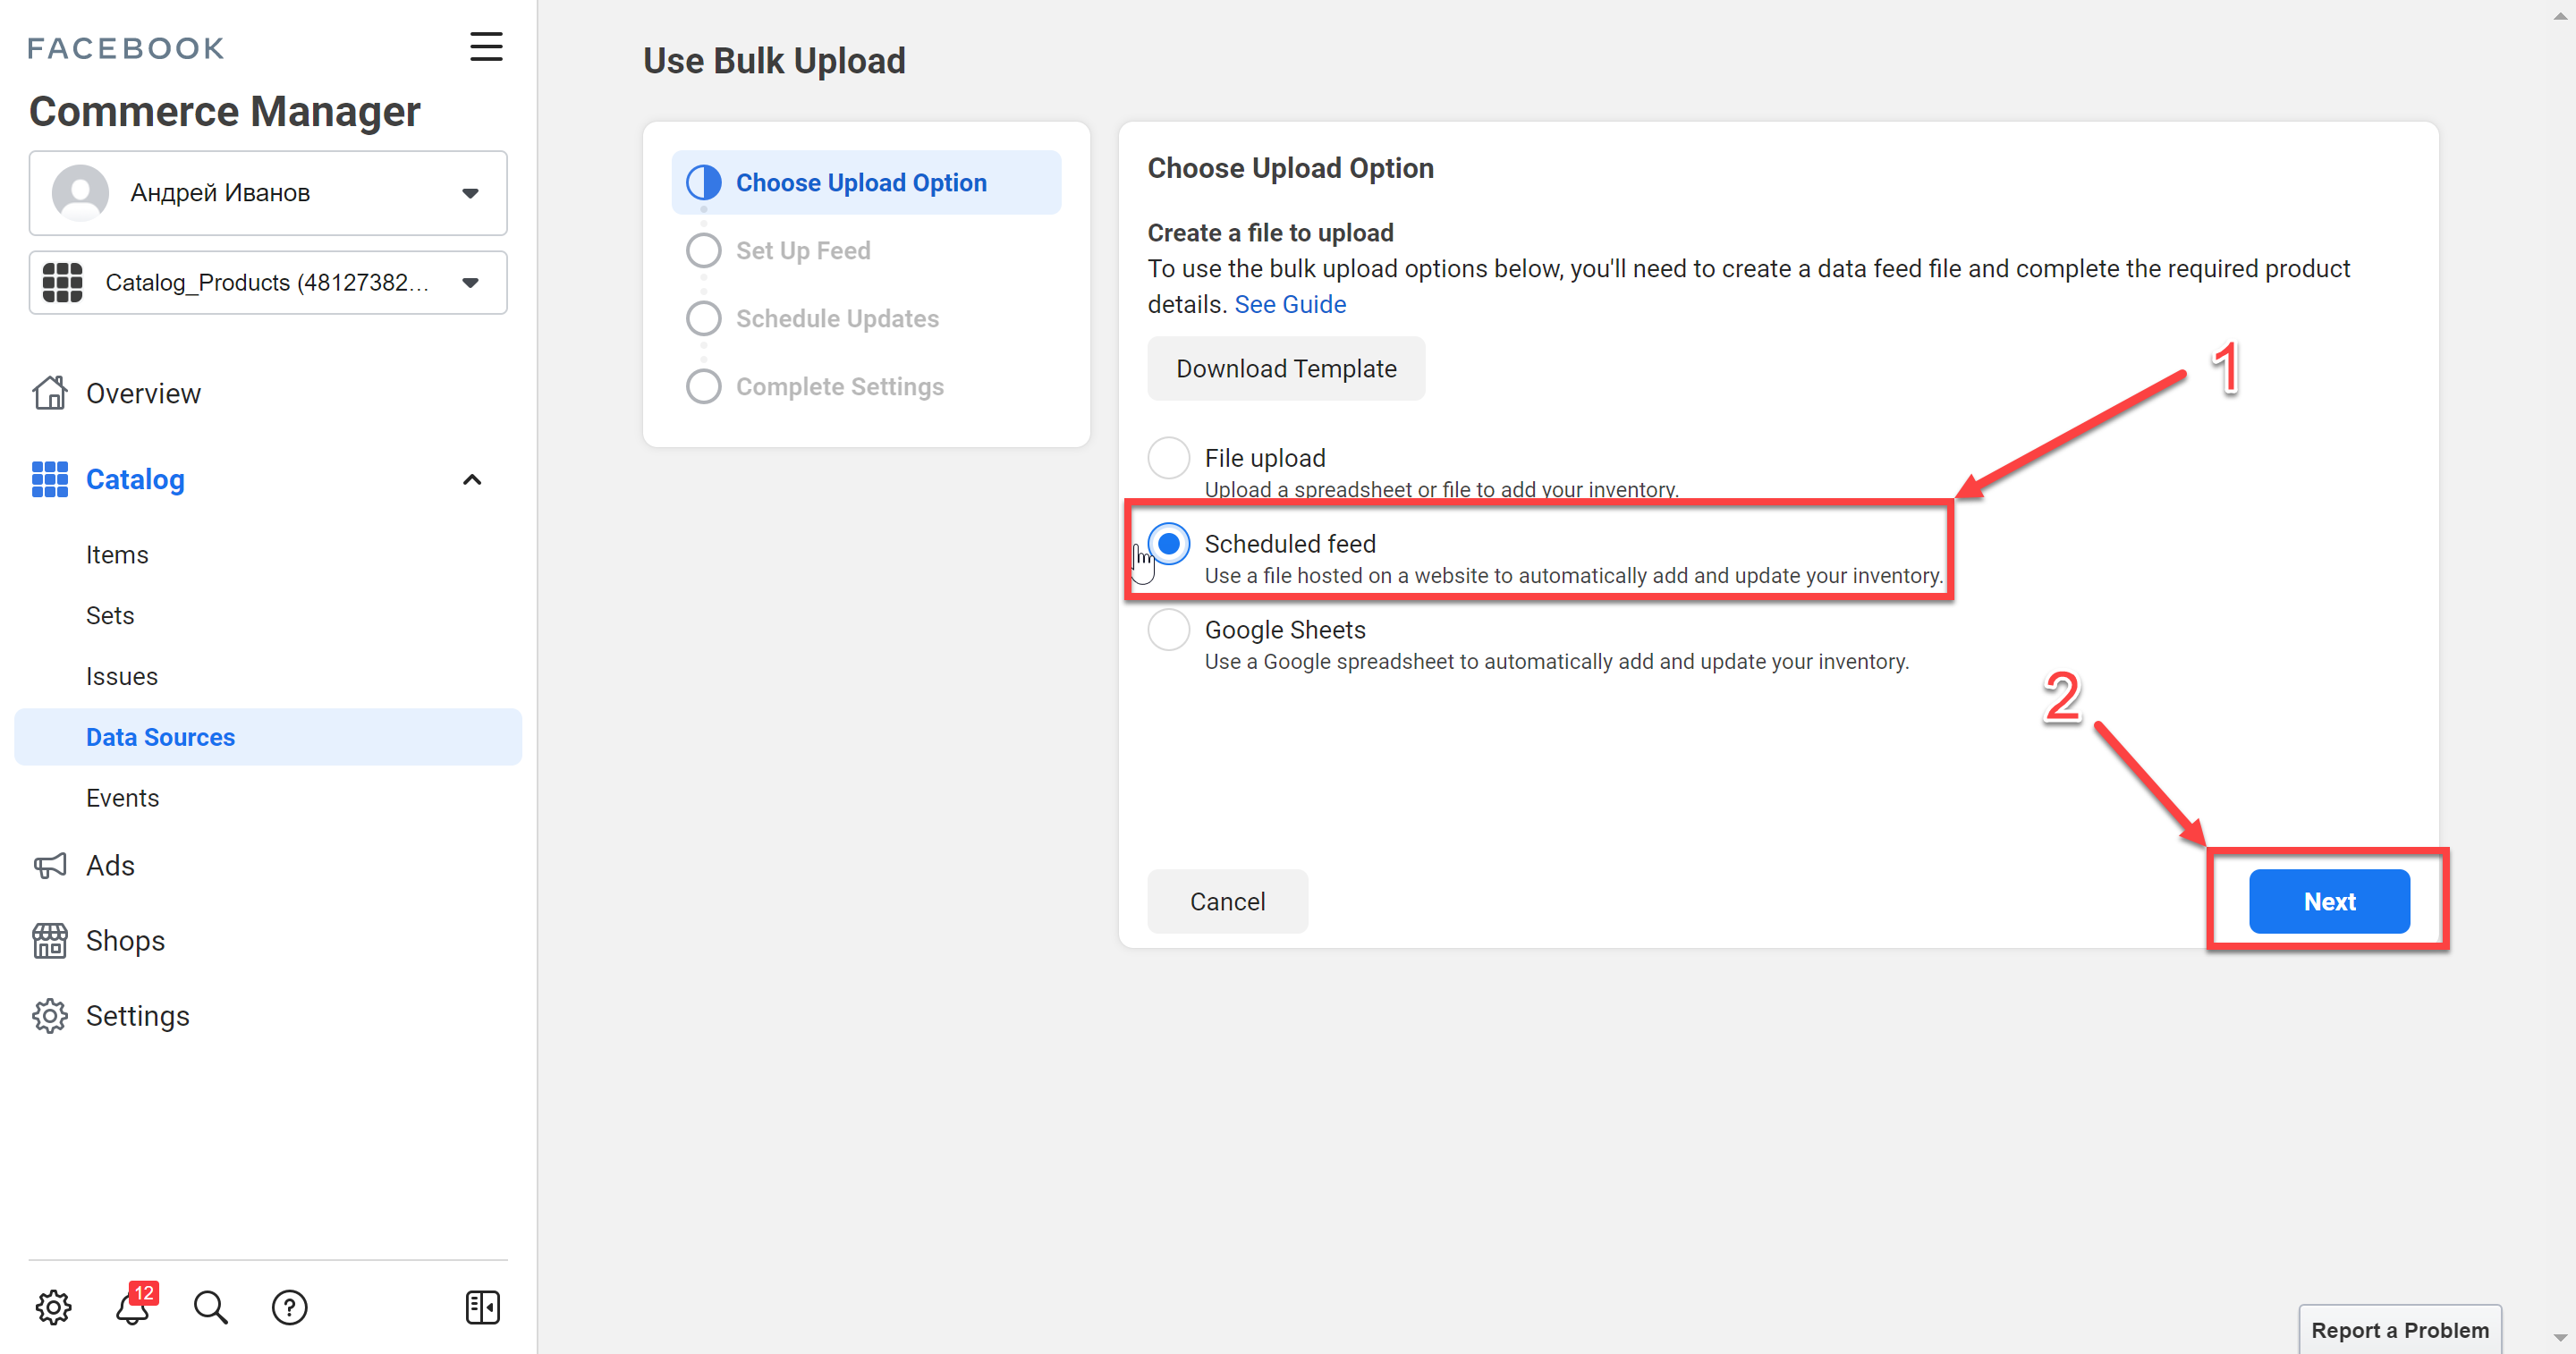
If you want to upload the feed as a link, in the Use Bulk Upload block select the Scheduled feed option (1) and click the Next button (2).
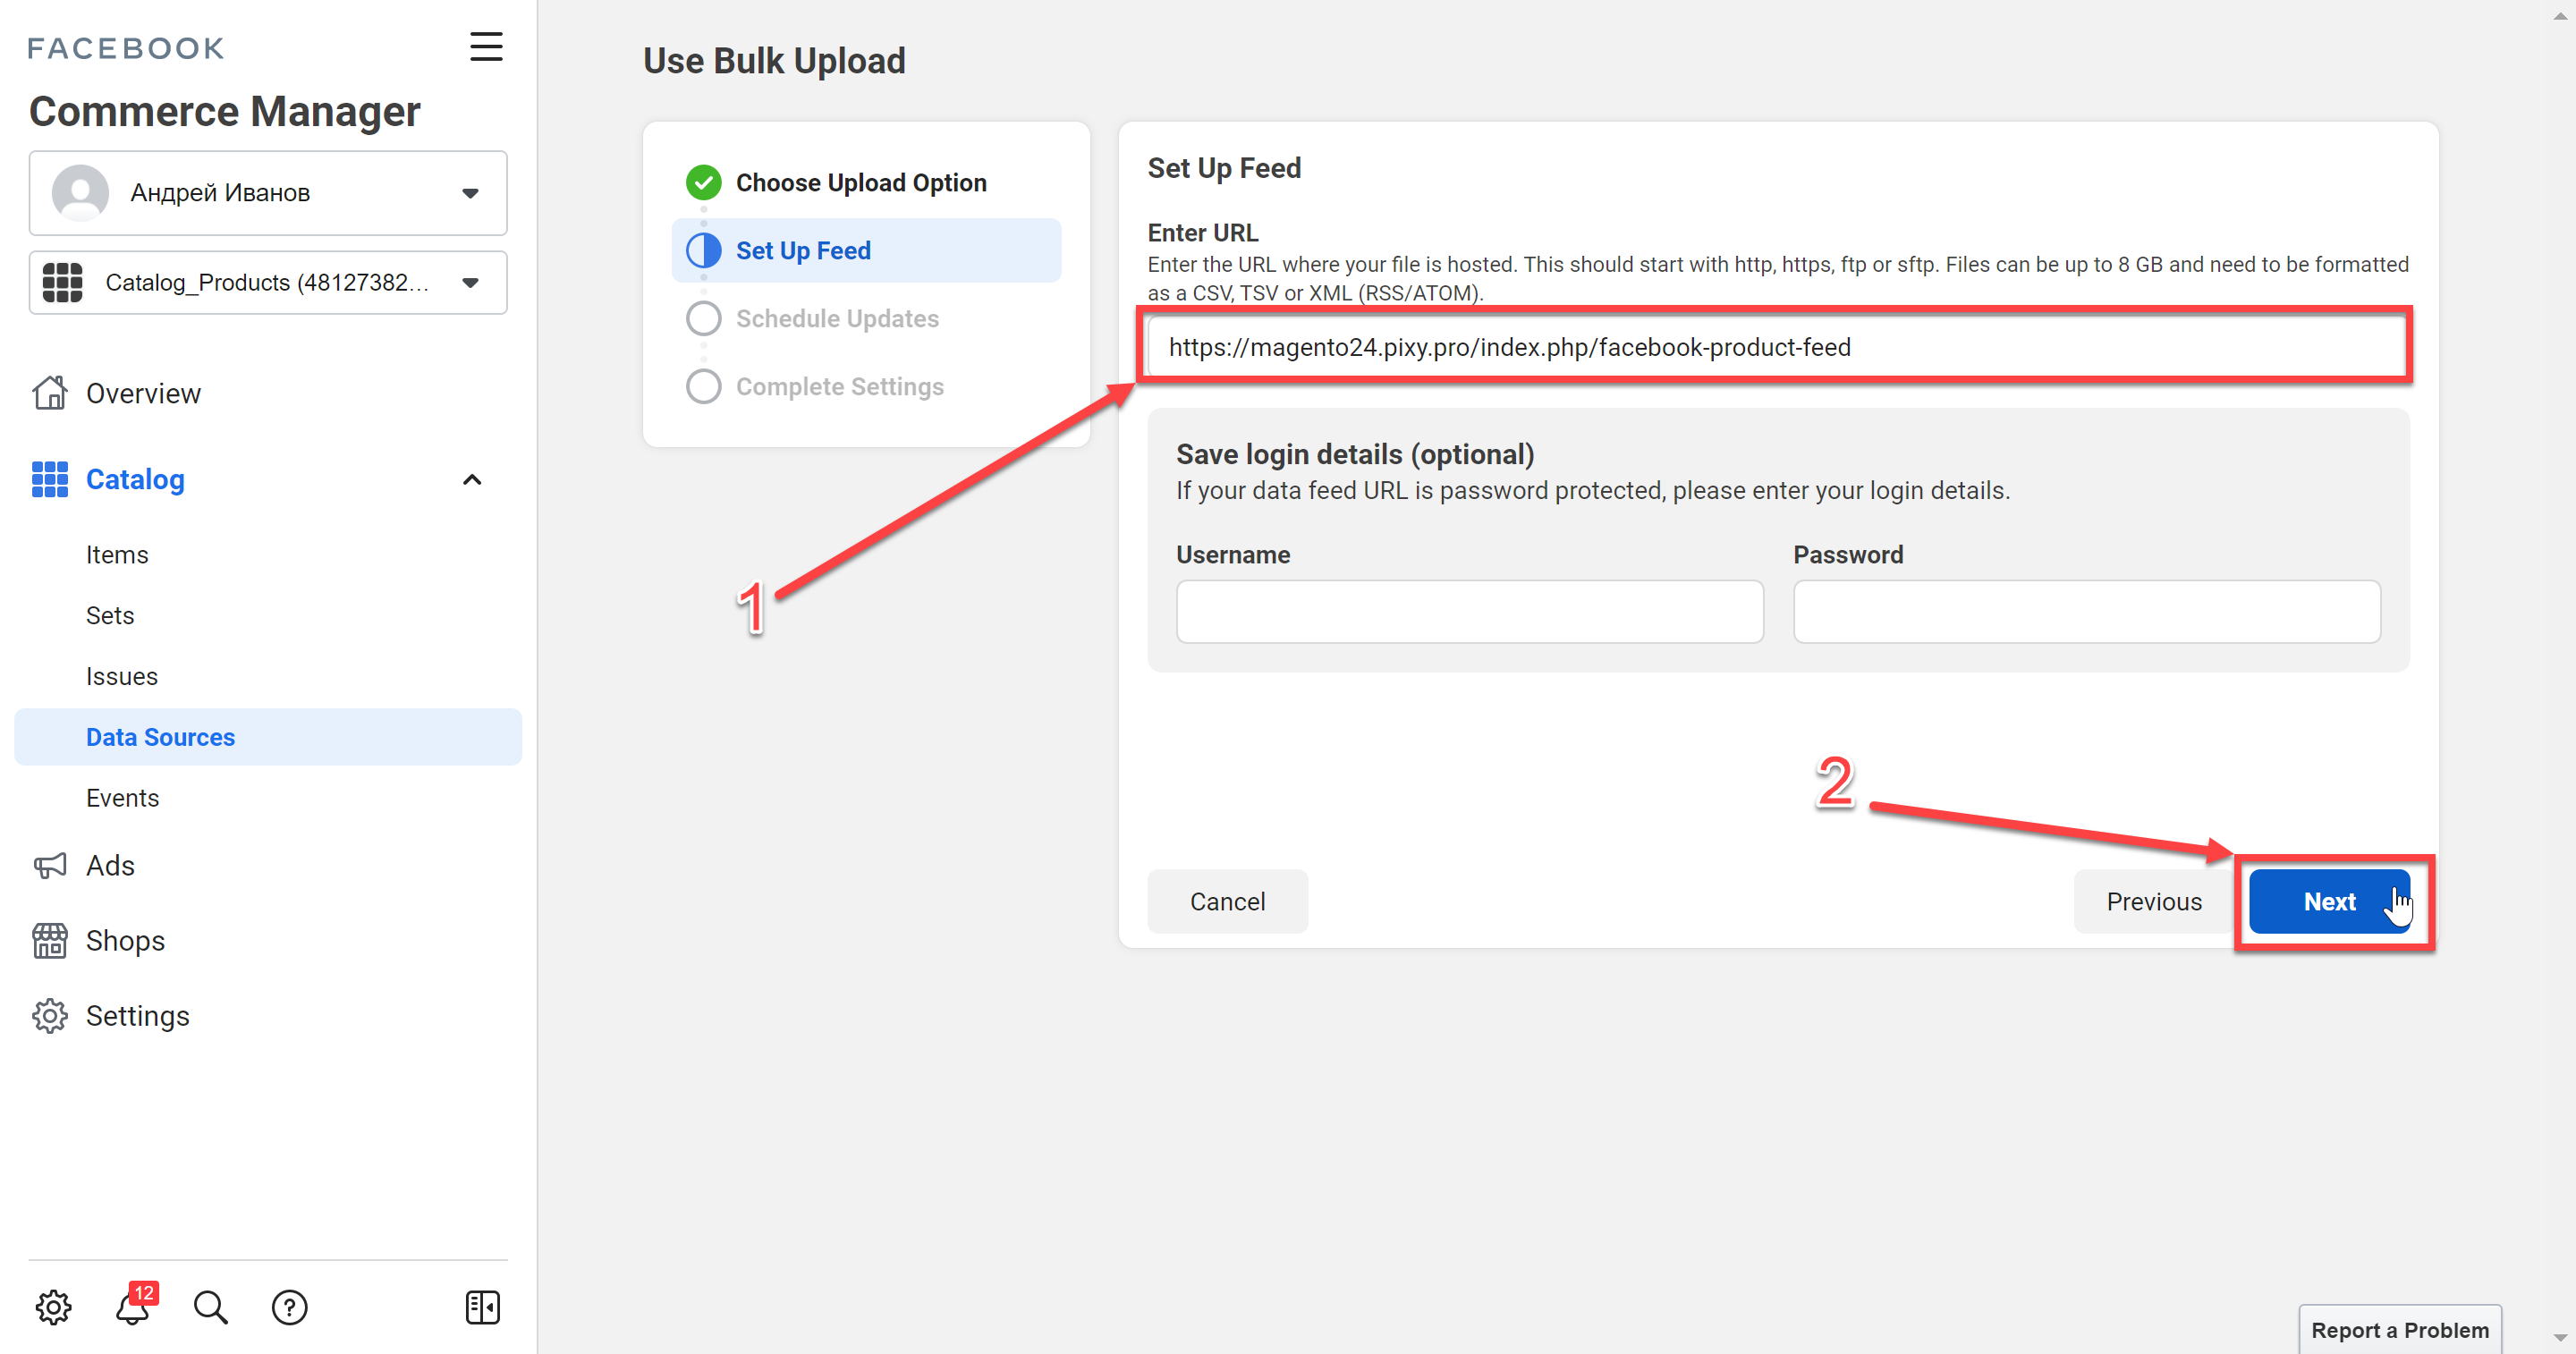
Paste the URL of generated feed from the plugin page into the Enter URL field (1) and click Next button (2).
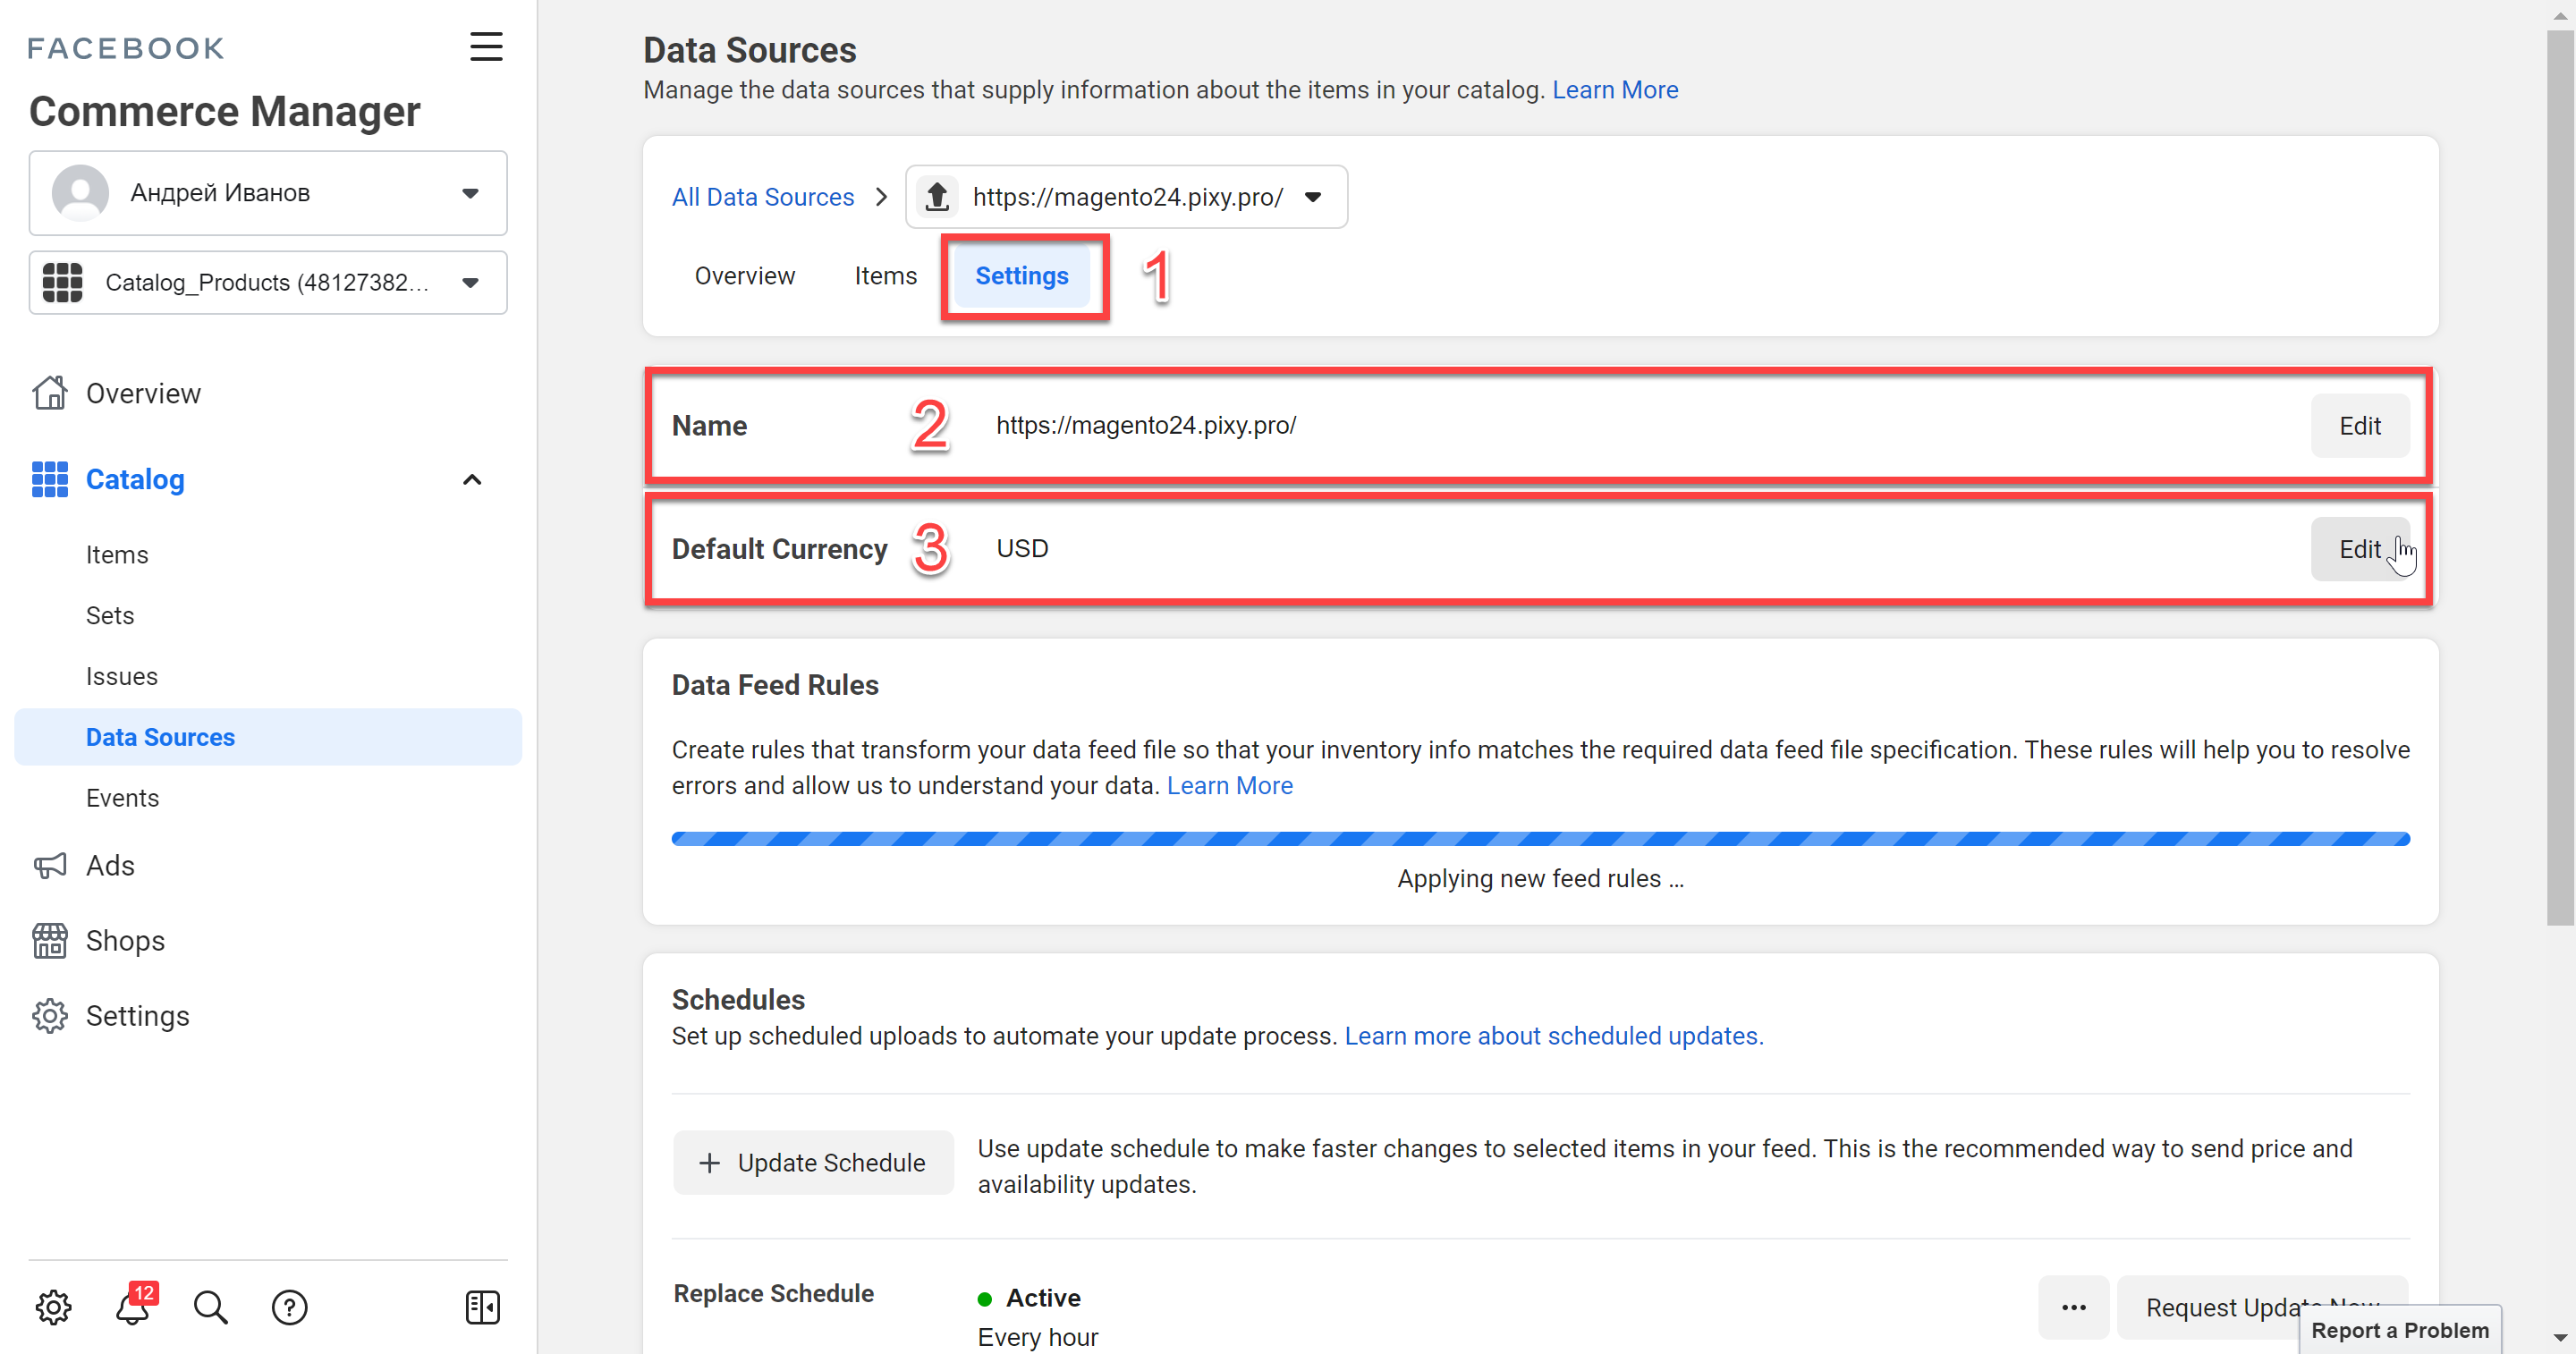
In the Settings tab (1) name your data source (2) and select currency (3).
Wait for the product to load from the feed and go to the Items tab.
All products on your website corresponding to the selected categories are uploaded to the Facebook Catalog and displayed in a table.
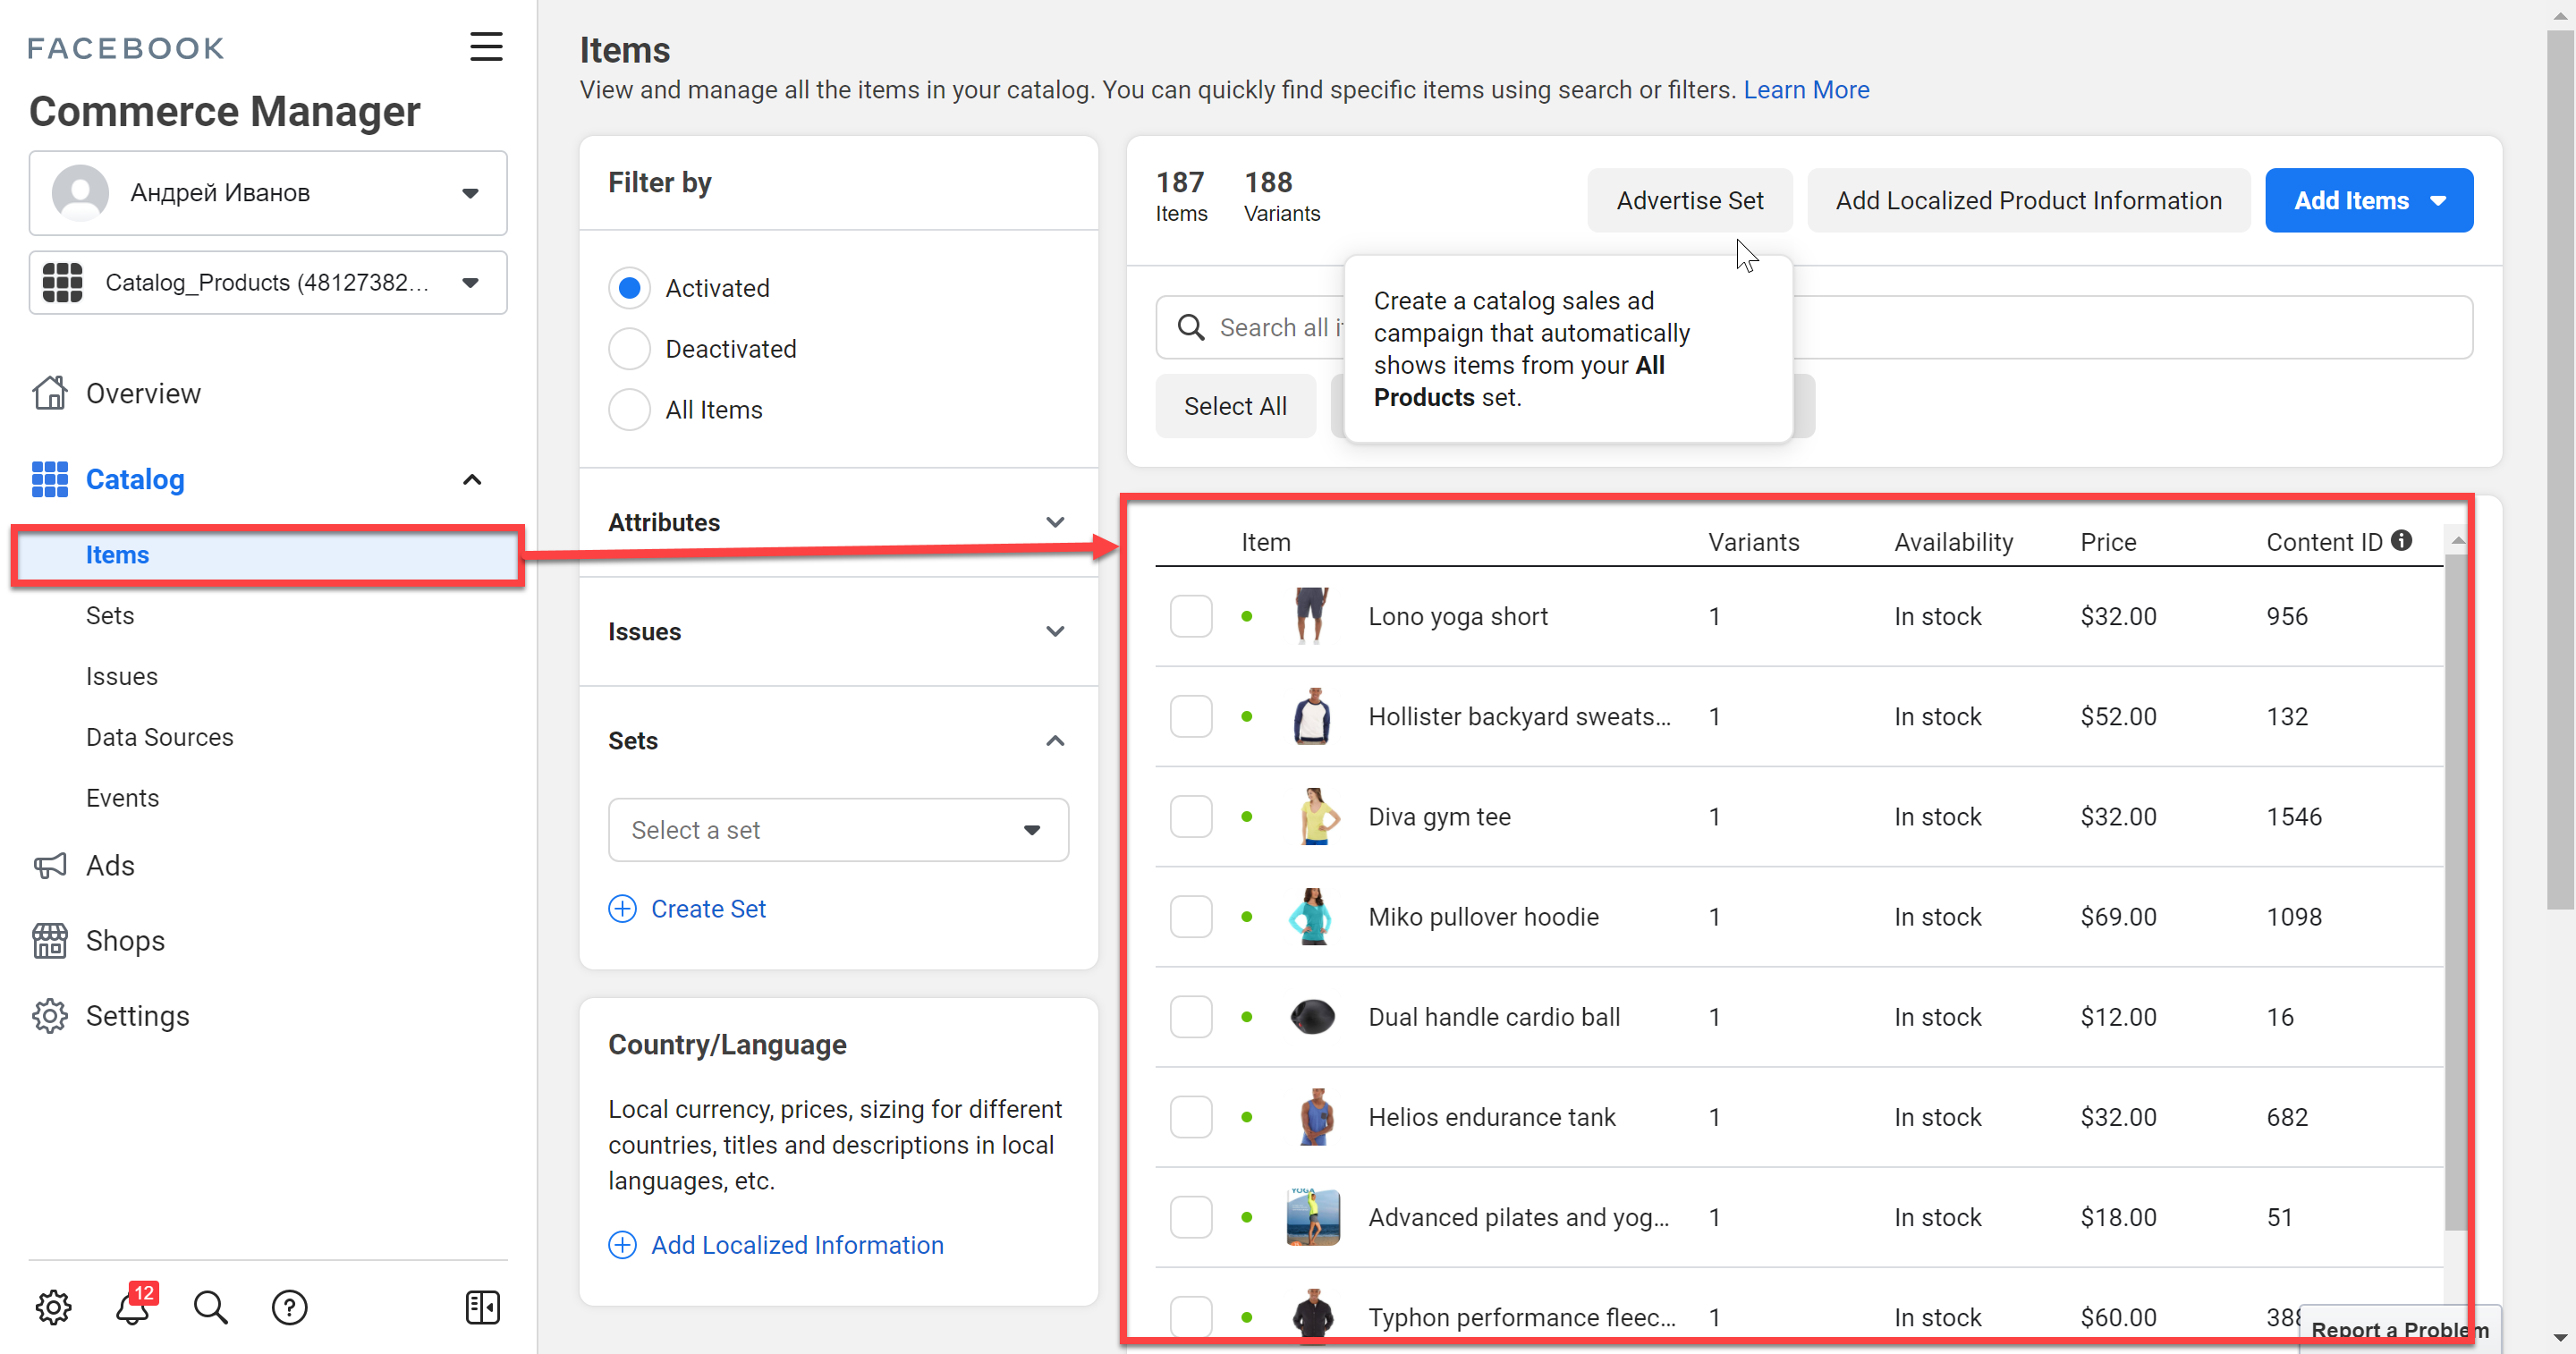
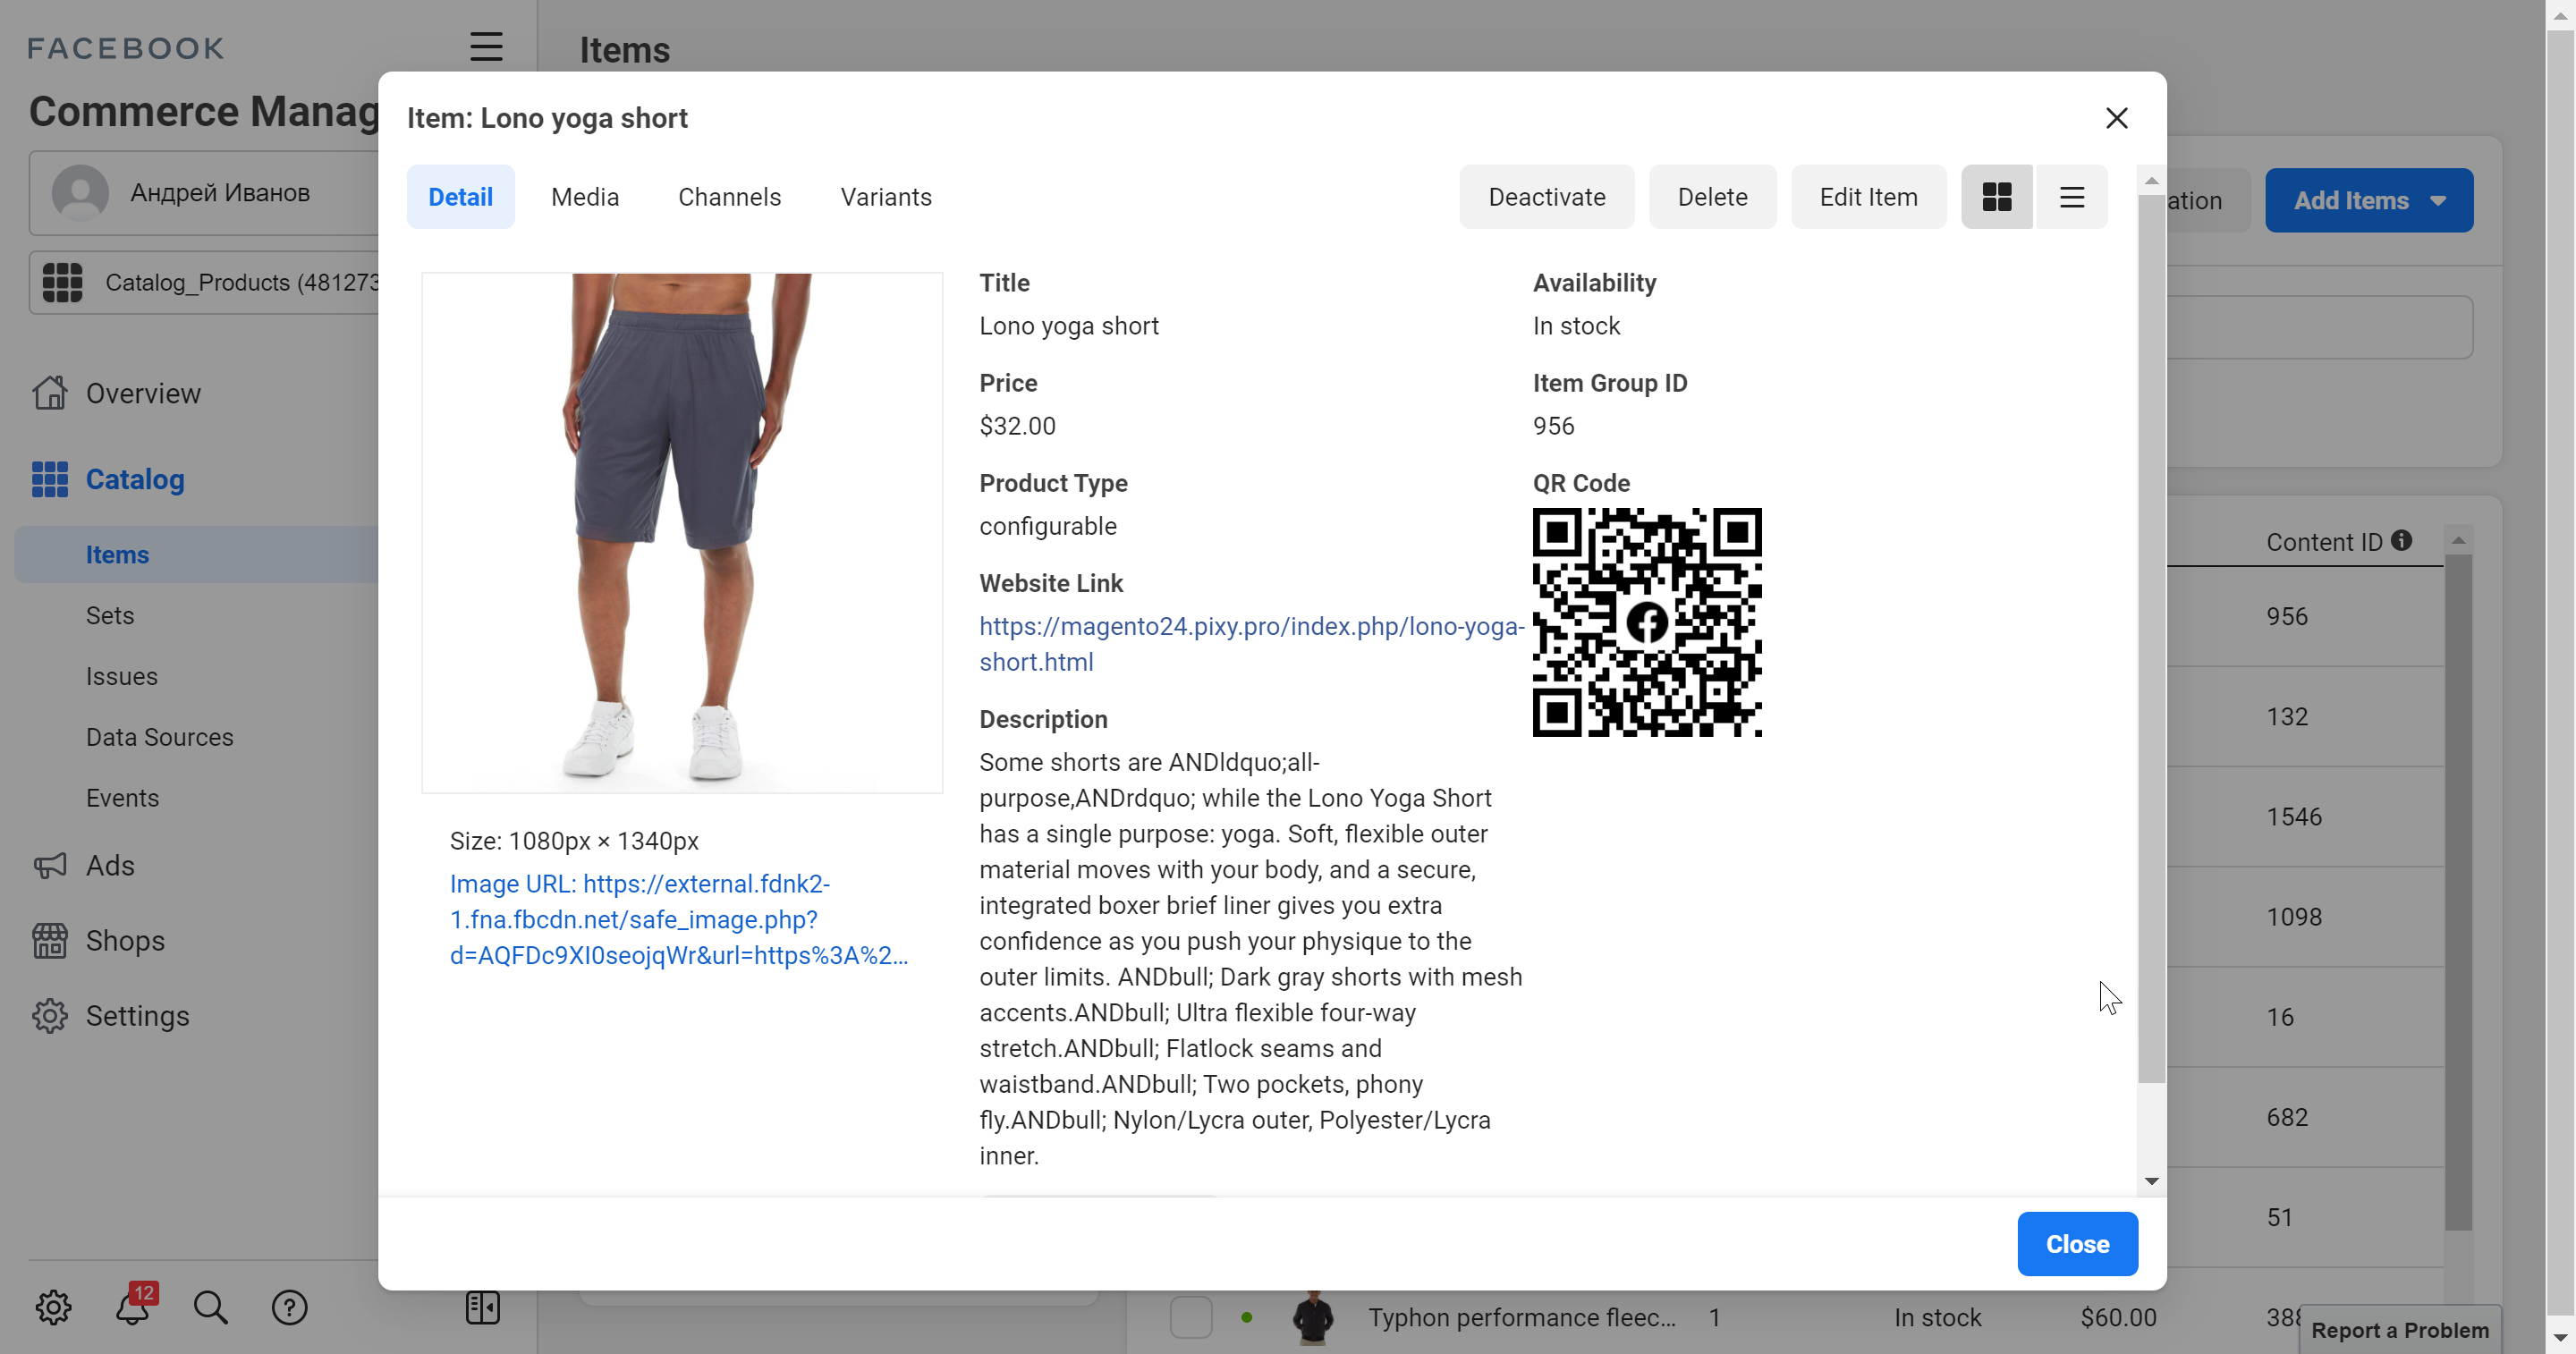
A detailed description of the product is in the Product Card. To open the product card, click on the product in the table.
VIDEO INSTRUCTION