Instruction Squeezeimg Images Optimizer
Download and install
Download the plugin archive from the Shop Pinta store and save it on your computer. Unpack the zip archive.
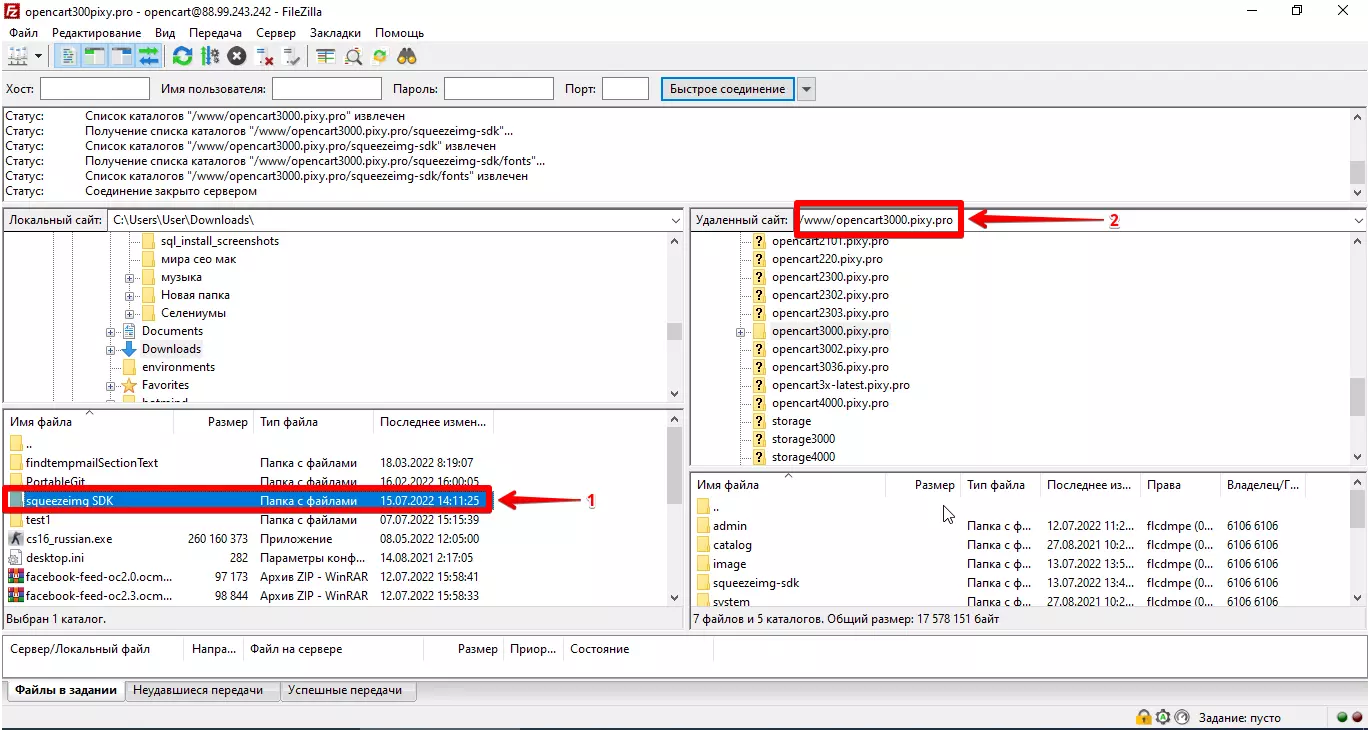
Connect via FTP to your website, and copy (1) the contents of the folder to the root of the website folder (2).
Open the plugin in a browser window - your_website_domain/squeezeimg-sdk/. For example, https://opencart3000.pixy.pro/squeezeimg-sdk/
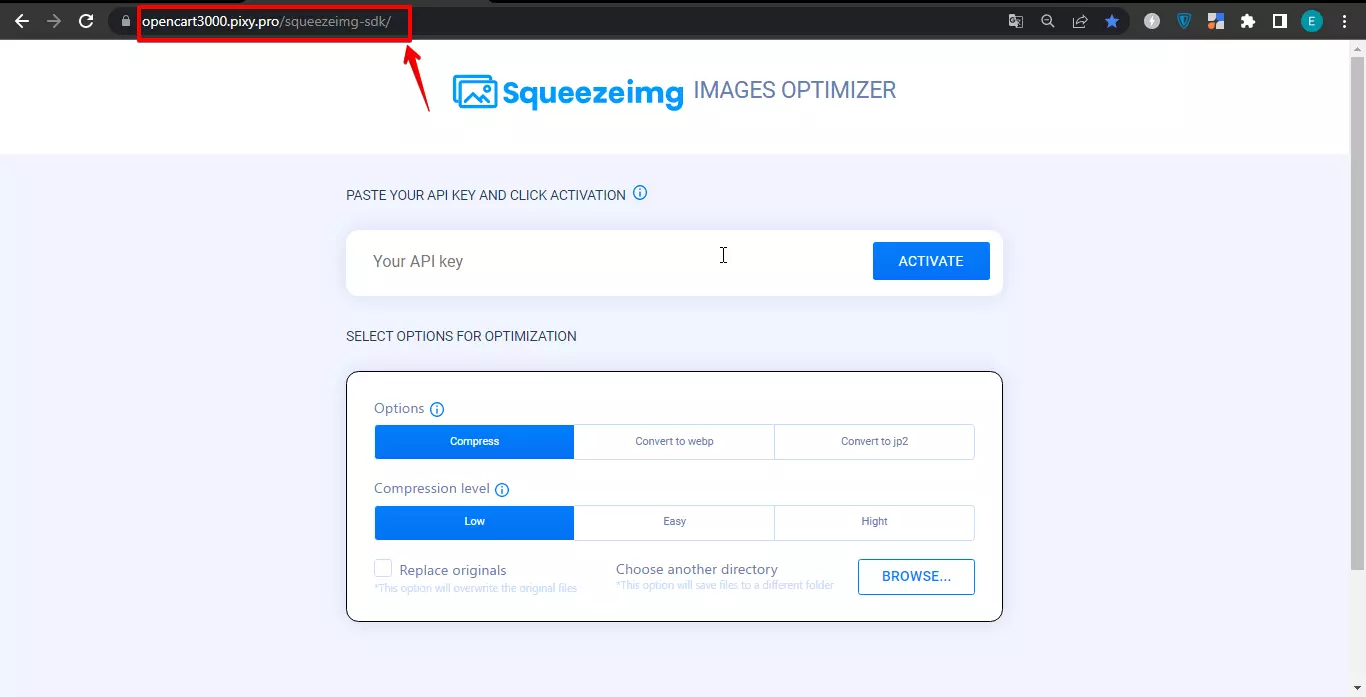
Plugin page
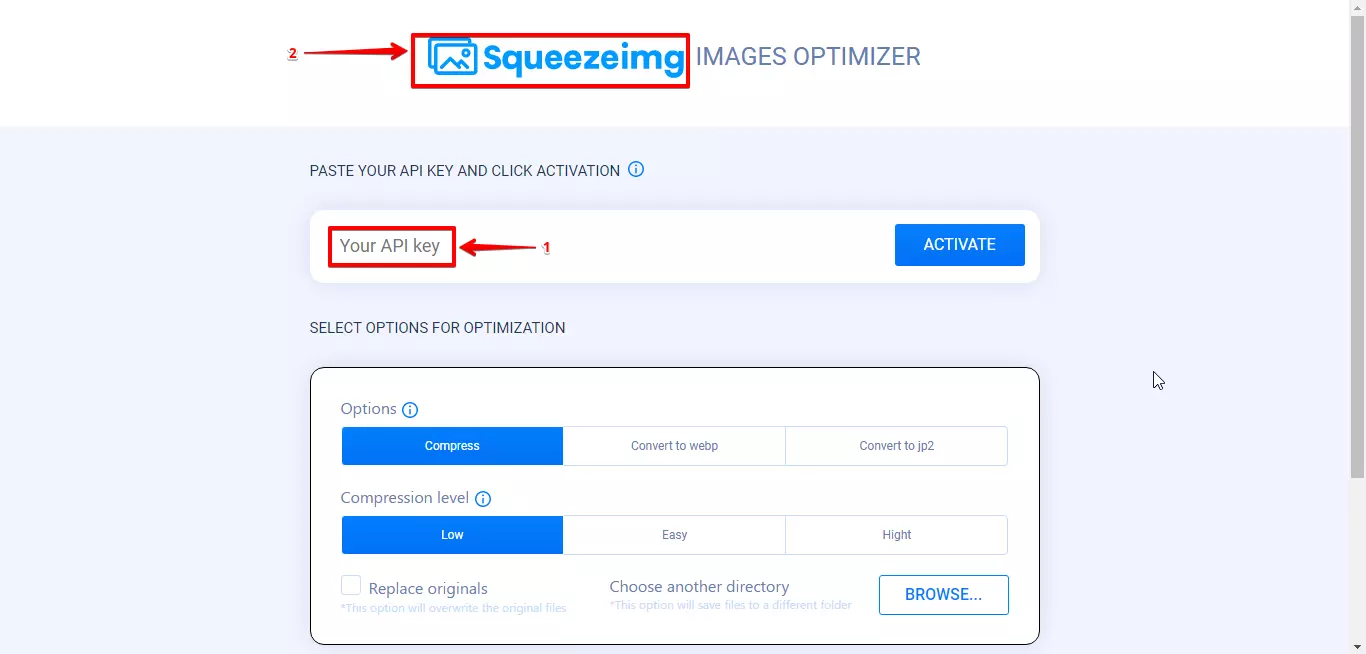
To optimize images, in the Your API key field (1), you need to add the API key generated after registration in the Squeezeimg service.
To do this, click on the Squeezeimg logo (2).
Next, in the Squeezeimg service window that opens, Login (3), if you are already registered with the service, or register a new account - SIGN UP (4).
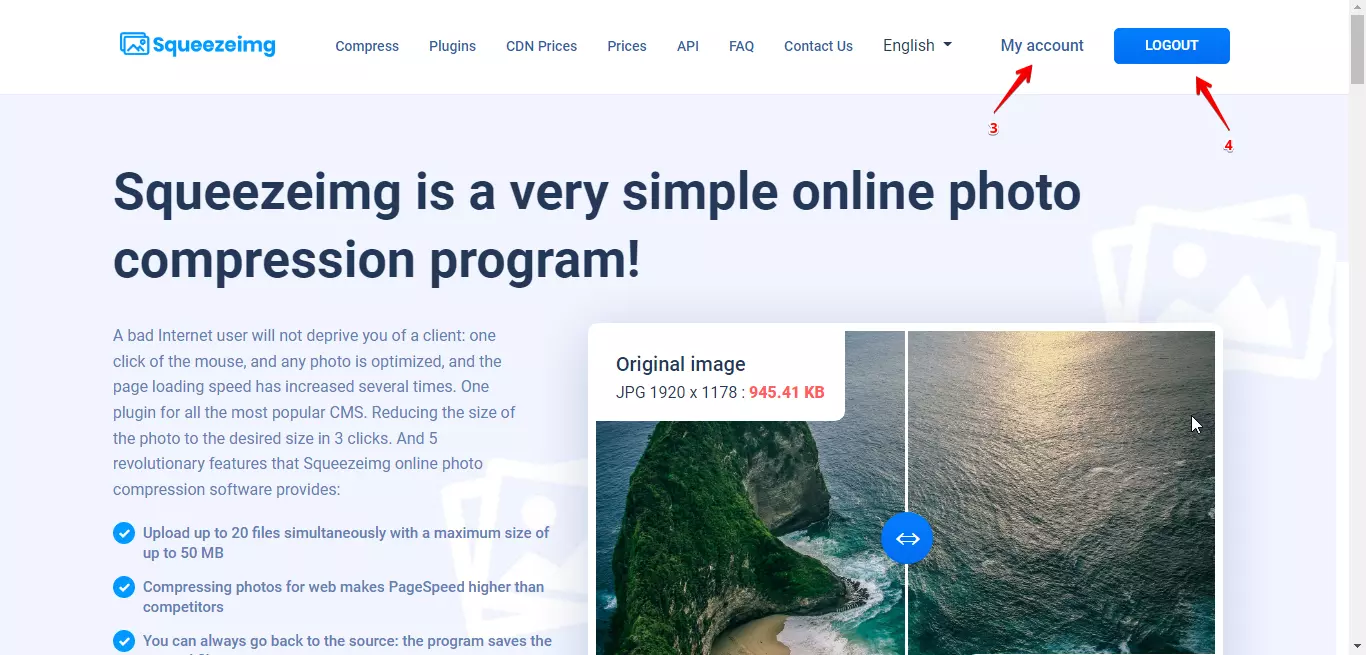
After registration, go to the My account section, open the API tab (5) and click the GENERATION NEW KEY button (6) to generate the API KEY (7).
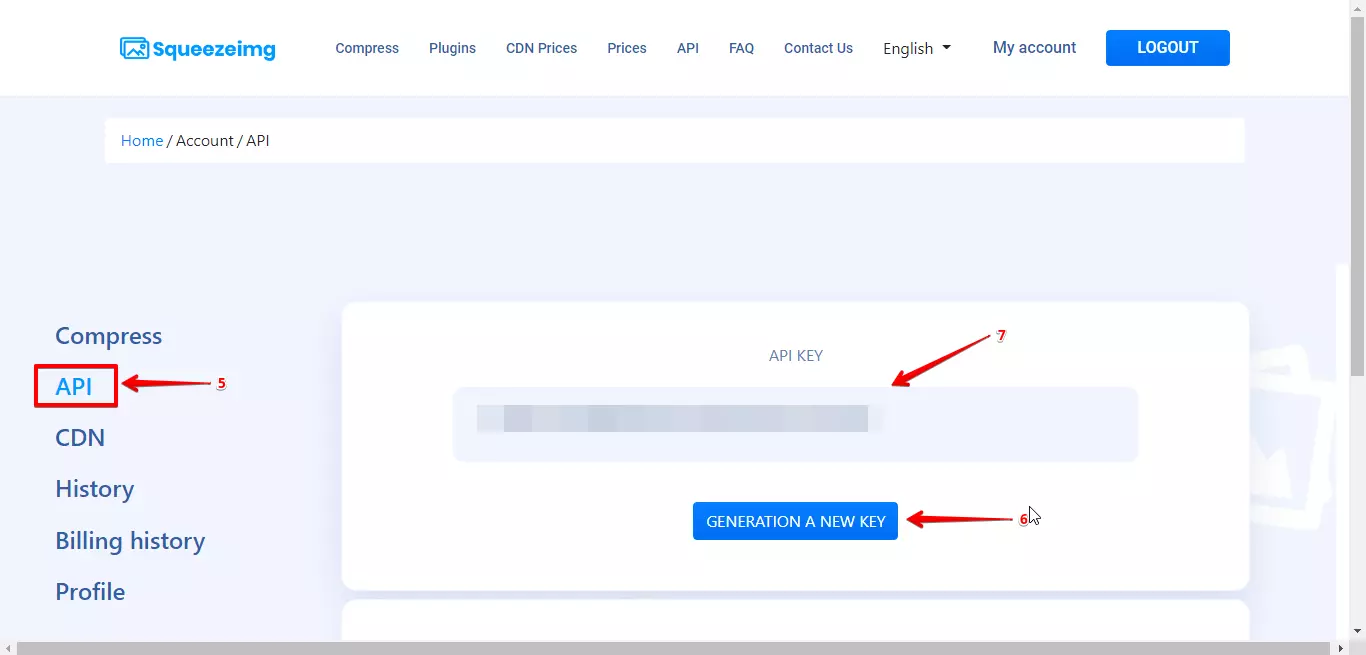
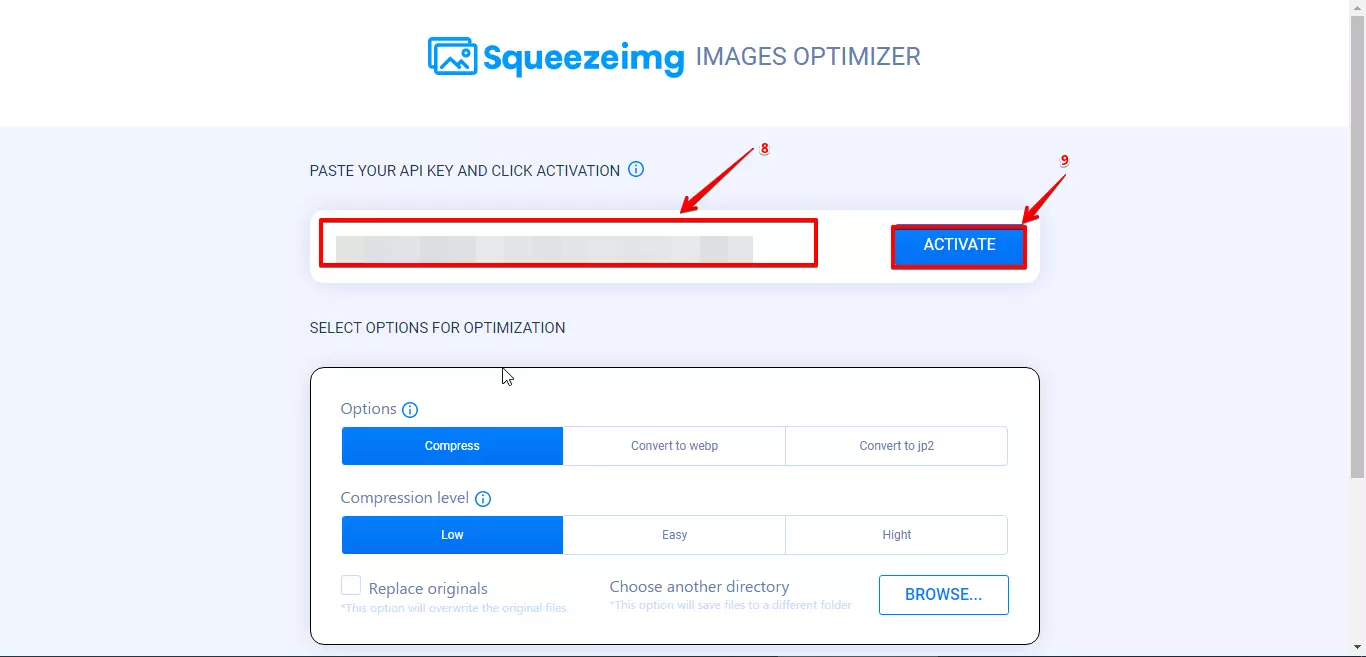
Insert the generated token from the API KEY field into the Your API key field (8) on the plugin page and click the Activate button (9).
After checking the API key you will be able to compress / convert images.
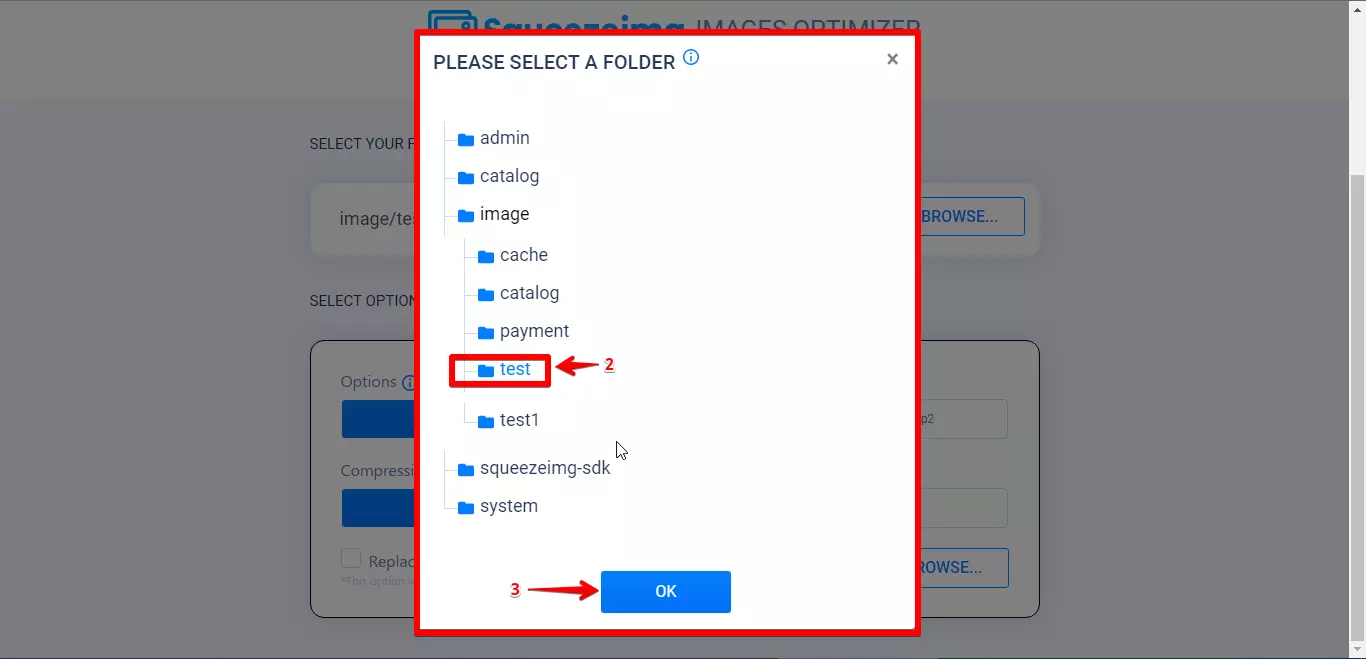
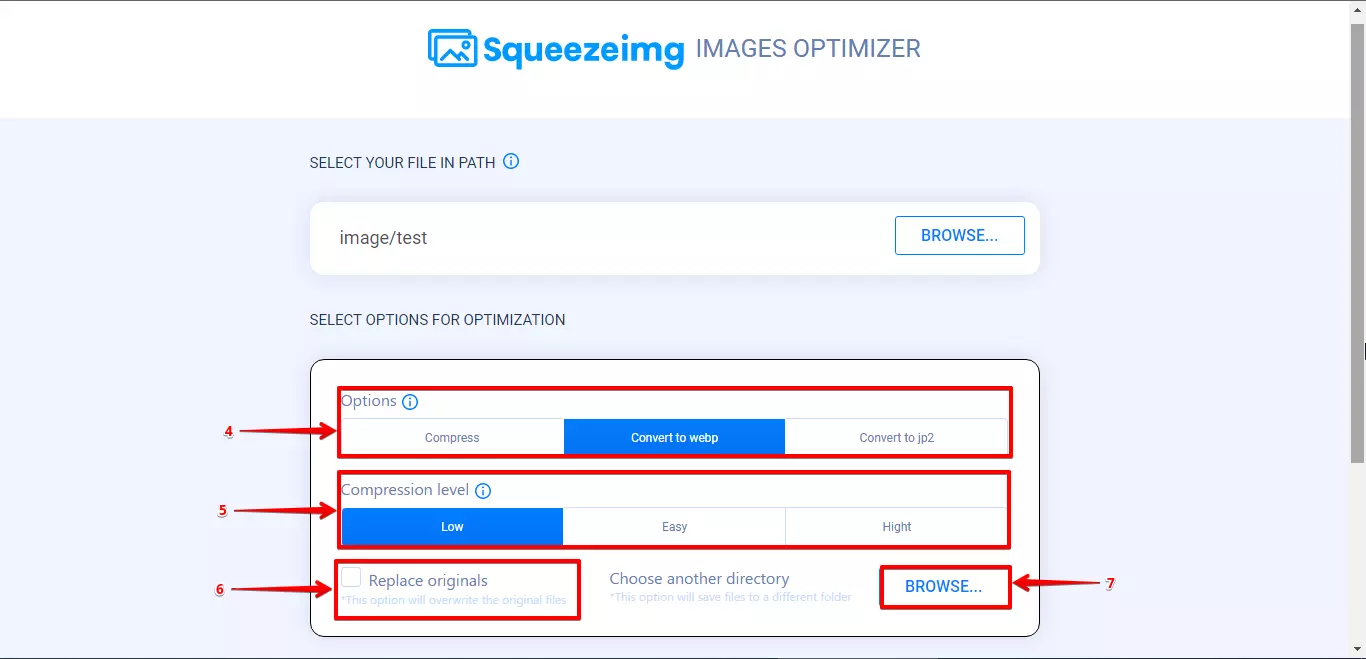
Click the Browse button (1) and select the folder with the images on your server that you want to optimize (2, 3).
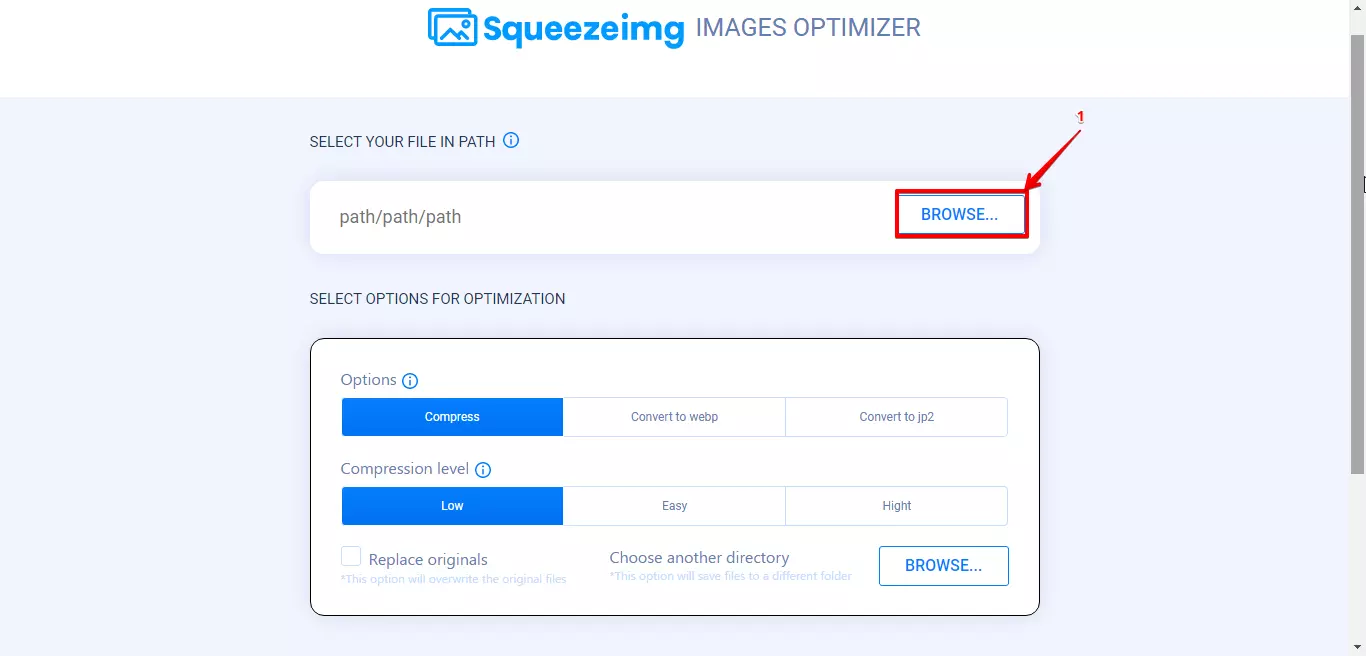
Next, select the option and compression level for image processing in the SELECT OPTIONS FOR OPTIMIZATION block:
The Options field (4) allows you to select the type of image processing:
COMPRESS - images are compressed without changing the format.
WEBP - images are compressed with conversion to WebP format.
JP2 - images are compressed with conversion to Jp2 format.
The Compression level field (5) allows you to select the image compression rate (LOW, EASY, HIGHT).
Check the Reduces disk space checkbox (6) if you want to replace original files with converted images.
Or leave the checkbox unchecked and the processed images will be saved in the folder with the original.
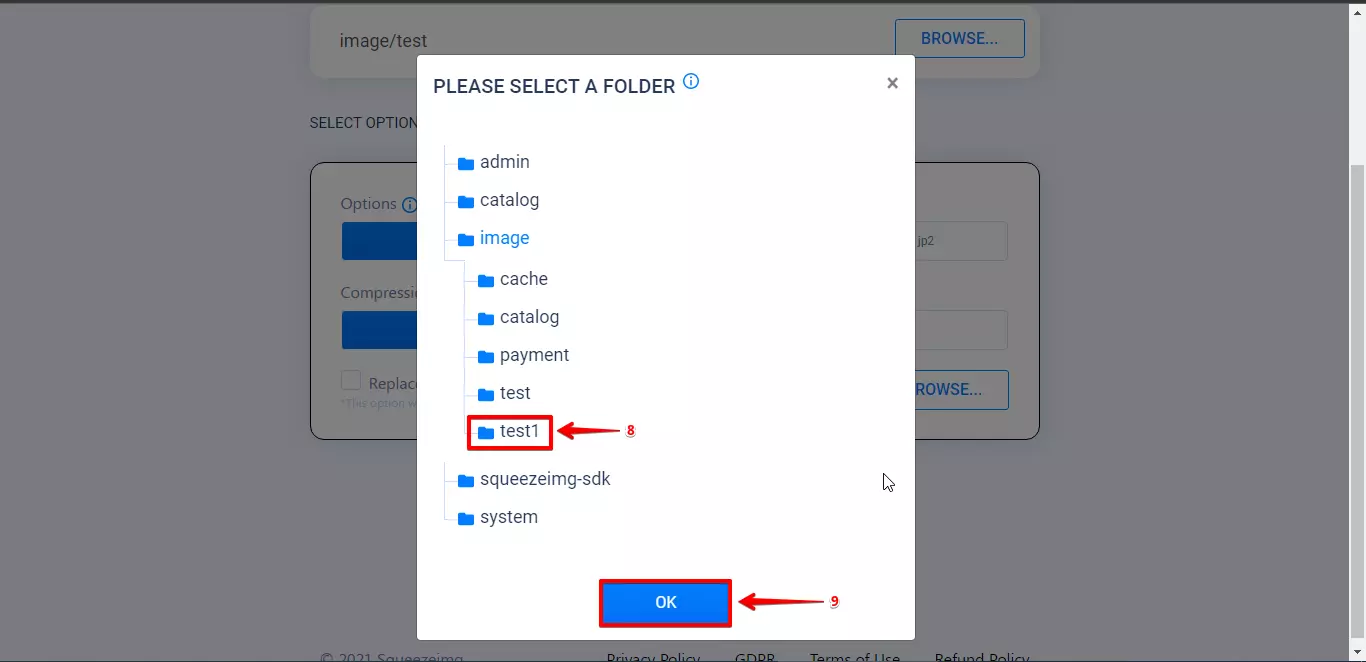
You can also choose another folder to save the converted images to. To do this, click the Browse button (7).
Next, select the previously created folder on the server (8, 9).
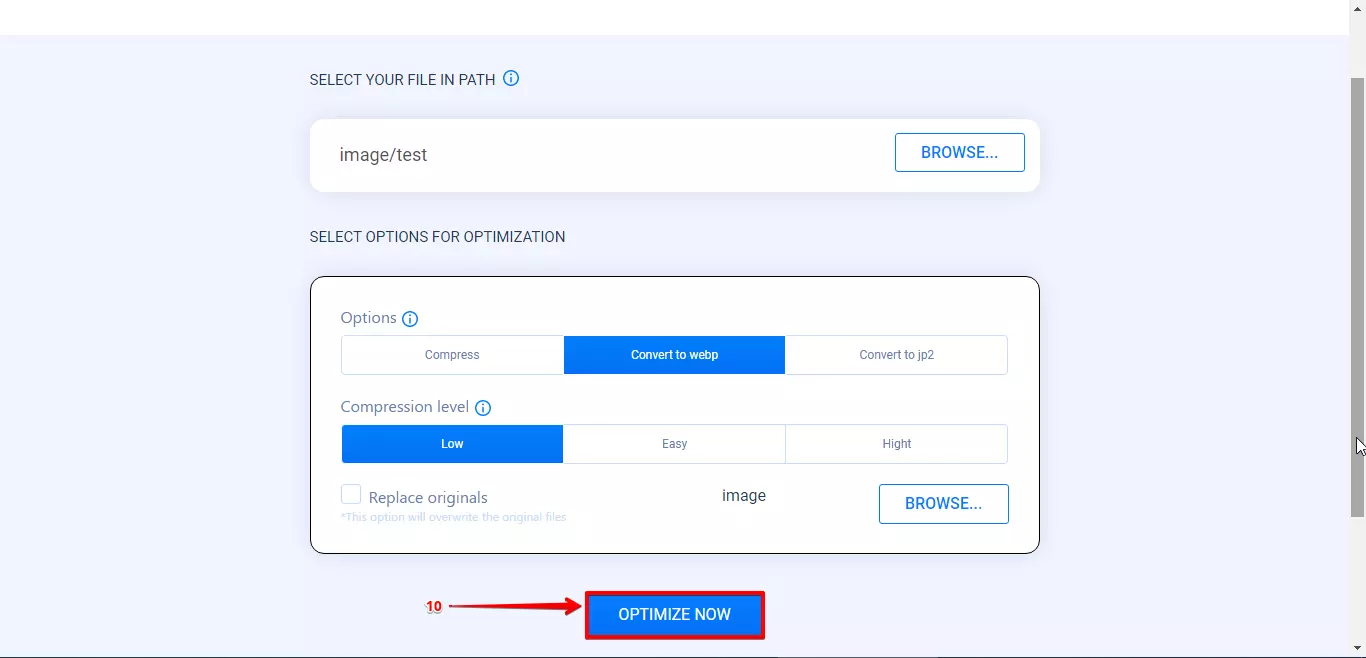
To start image compression / conversion, click the Optimize now button (10).
As a result, detailed information about the optimized images (11) is displayed - a list of all images, the original file size (12) and the file size after processing (13).
You can also download processed images to your computer (14).
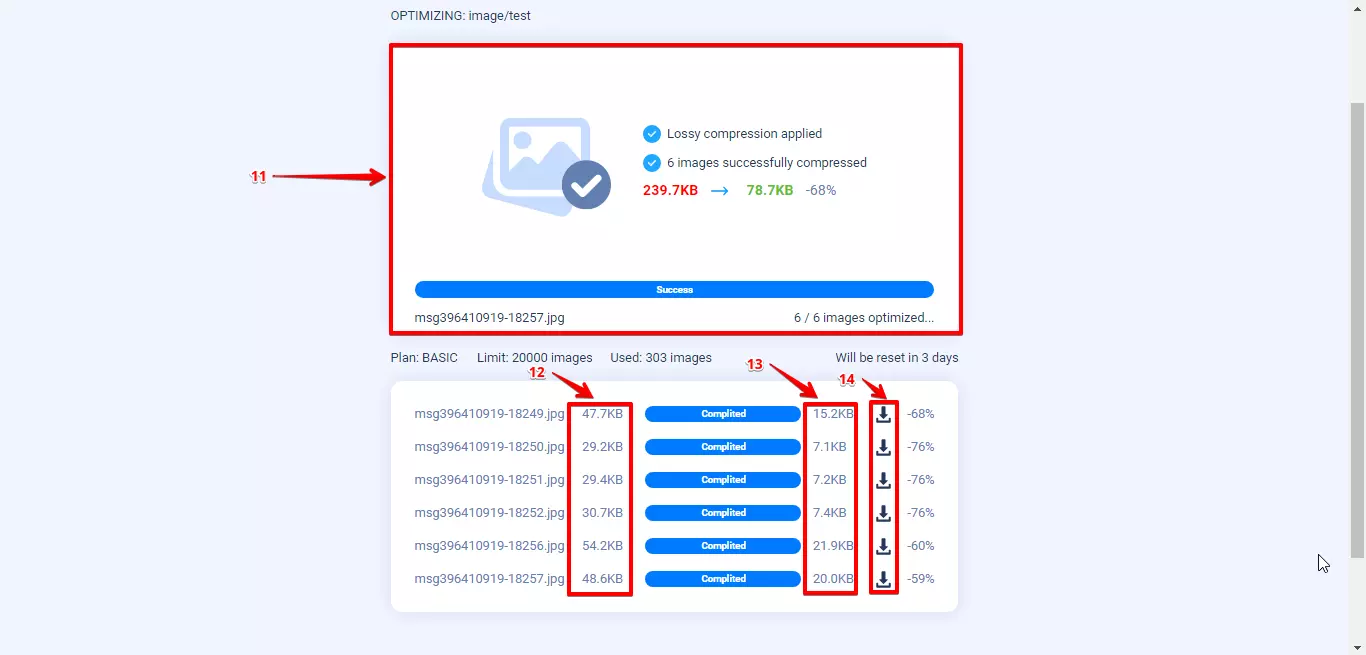
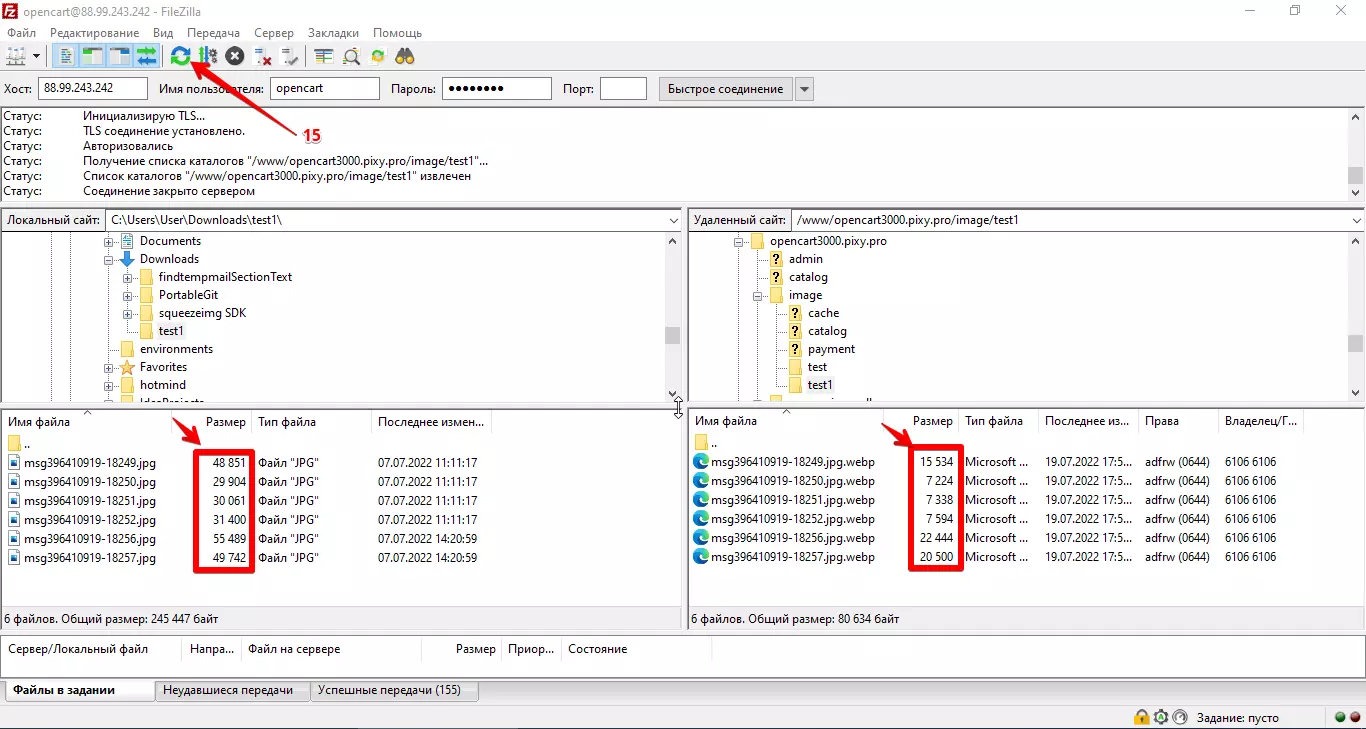
Click the Refresh button (15) to display the processed images in the folder on your server.
VIDEO INSTRUCTION