Braintree Payment Setup for PrestaShop
INSTRUCTION BRAINTREE PAYMENT GATEWAY PRO FOR PRESTASHOP 1.7
Download and install
Download the plugin archive in the Shop Pinta store and save it on your computer.
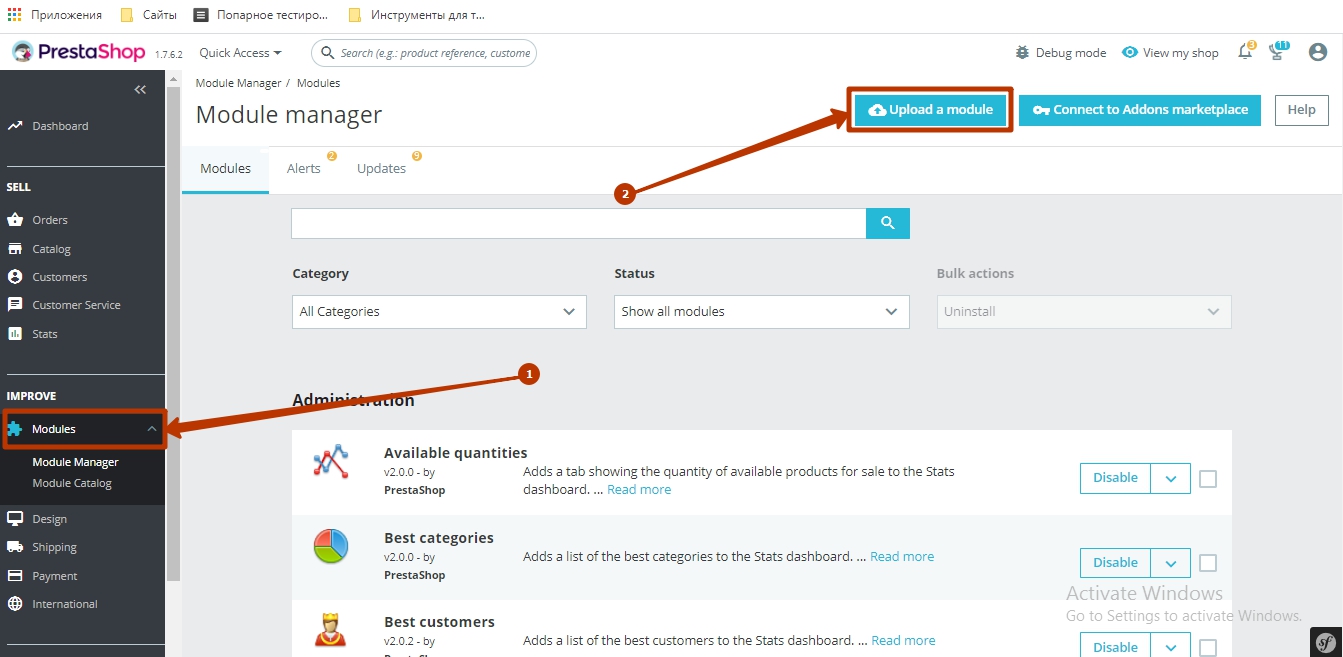
In the admin panel of your website, select Modules > Module Manager (1) and click the Upload a module button (2).
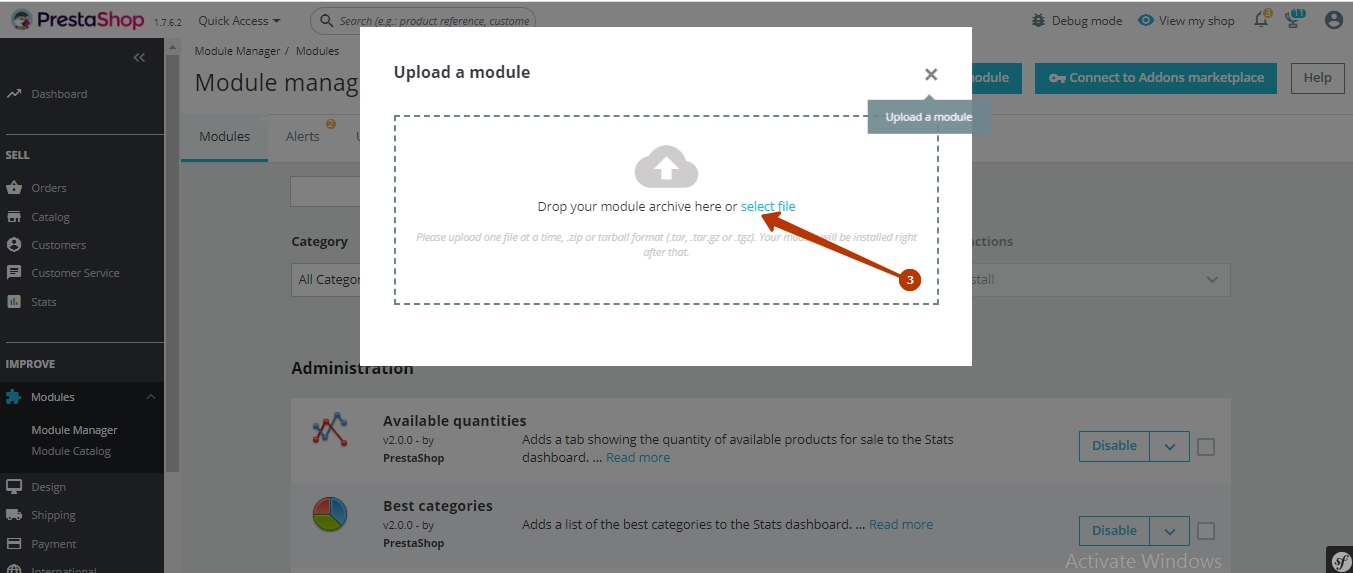
In the opened window, click on select file (3).
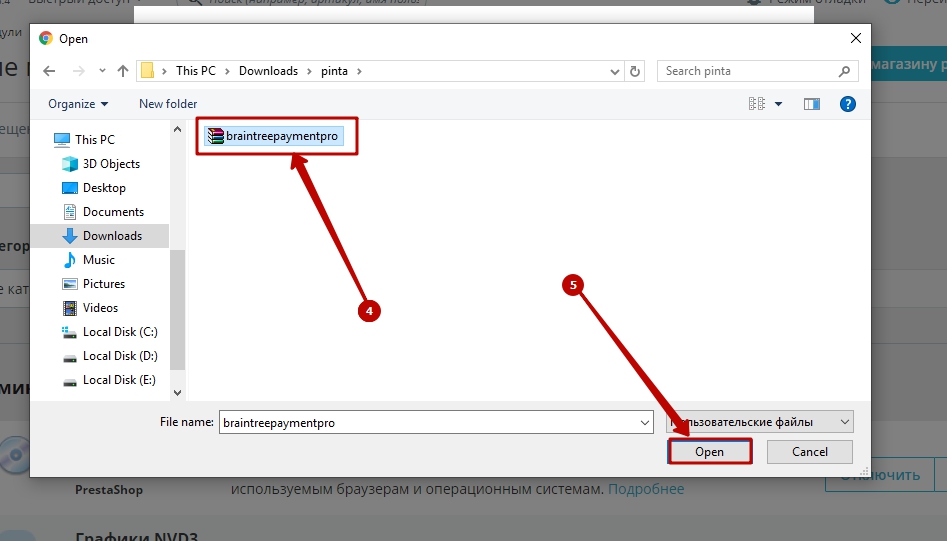
Select the plugin archive (4) and click the Open button (5).
To configure the plugin, click the Configure button (6).

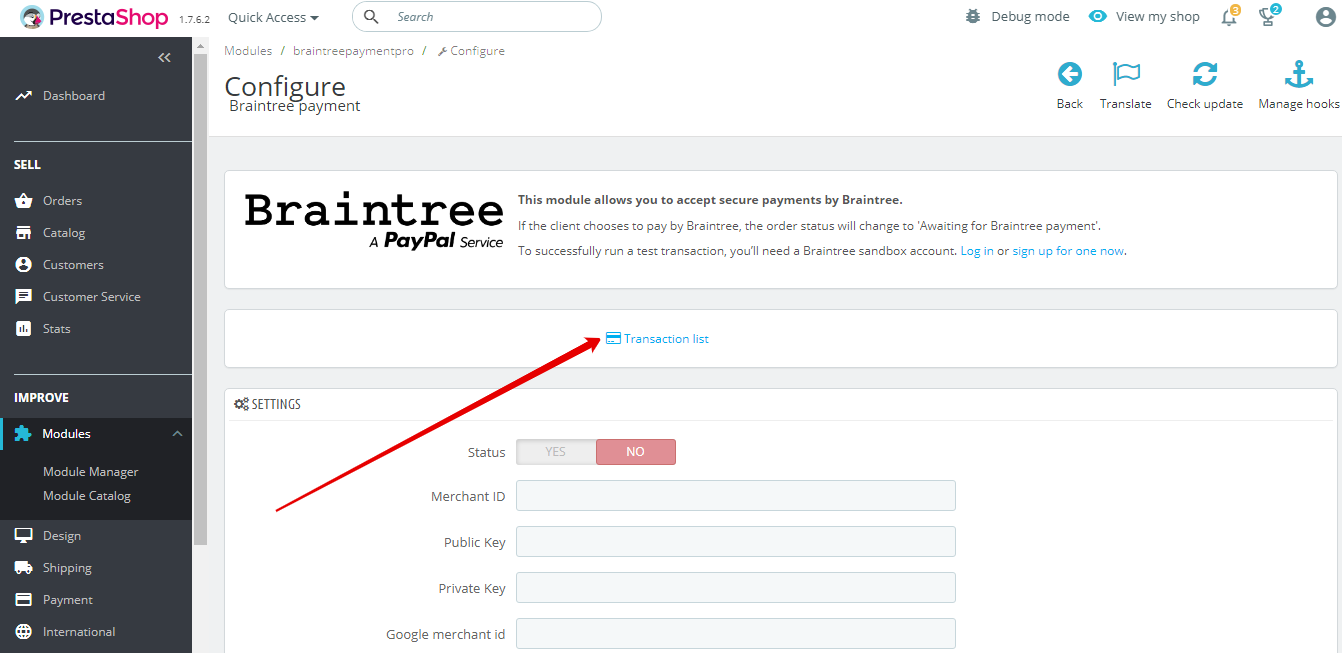
Plugin page
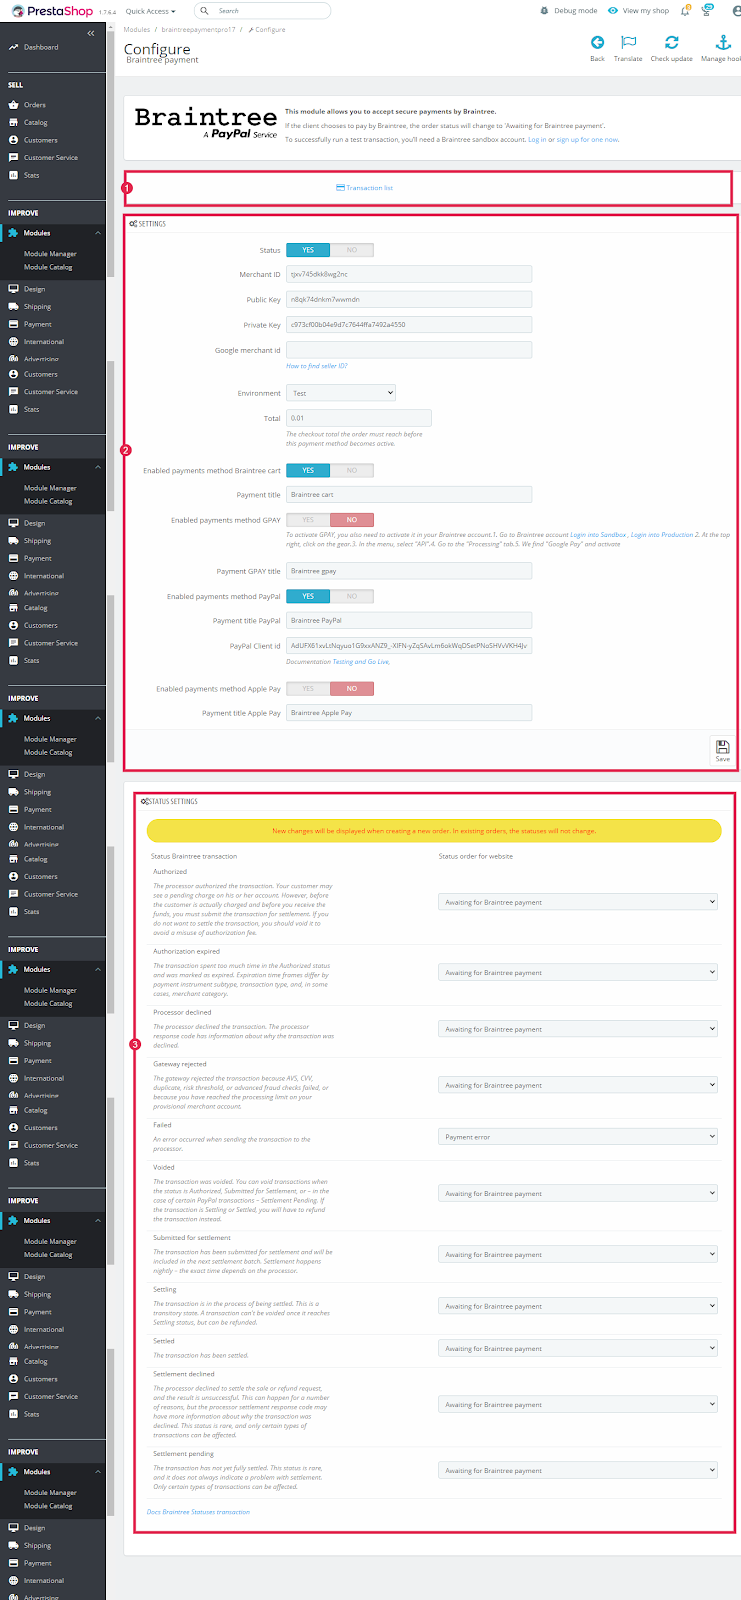
The plugin page consists of three blocks:
Transaction list (1).
SETTINGS (2).
STATUS SETTINGS (3).
The Transaction list block displays all transactions of the Braintree payment system. To open the list, click on it.
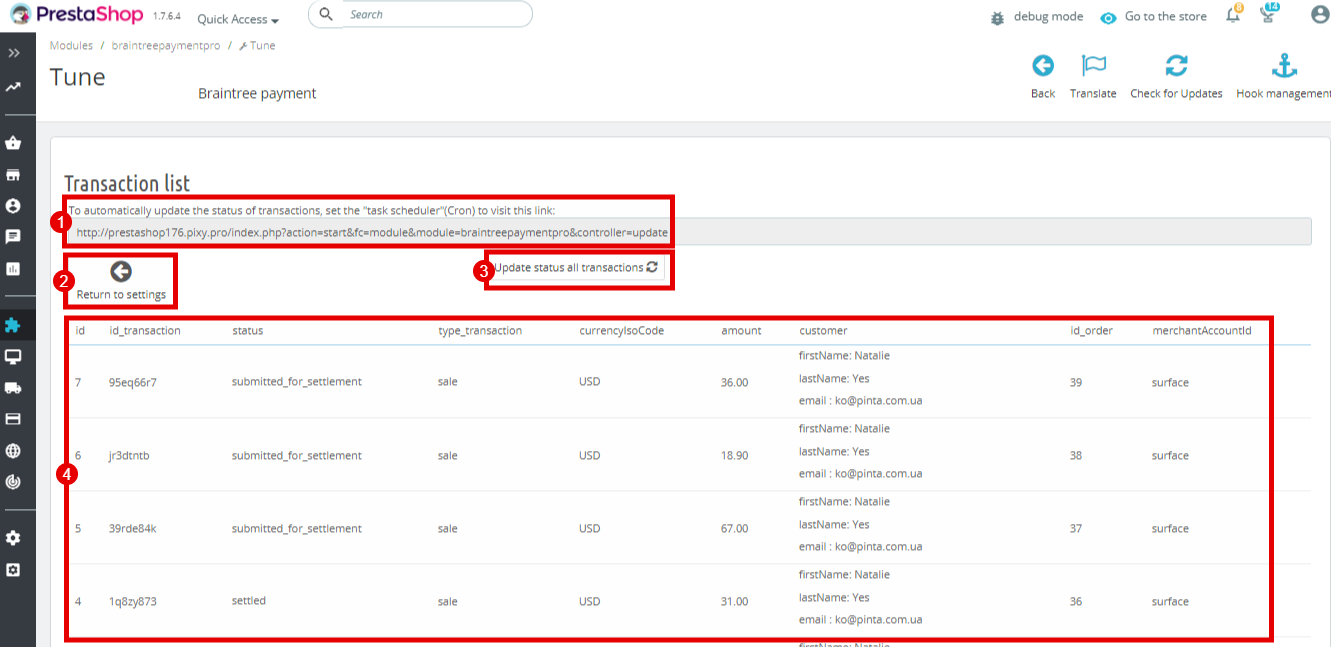
The Transaction list page includes:
The link for cron command (1) - to automatically update the status of transactions.
The Return to settings button (2) - to return to the plugin page.
The Update status all transactions button (3) - to update the status of all transactions.
The Transaction table (4) - to display data for all transactions.
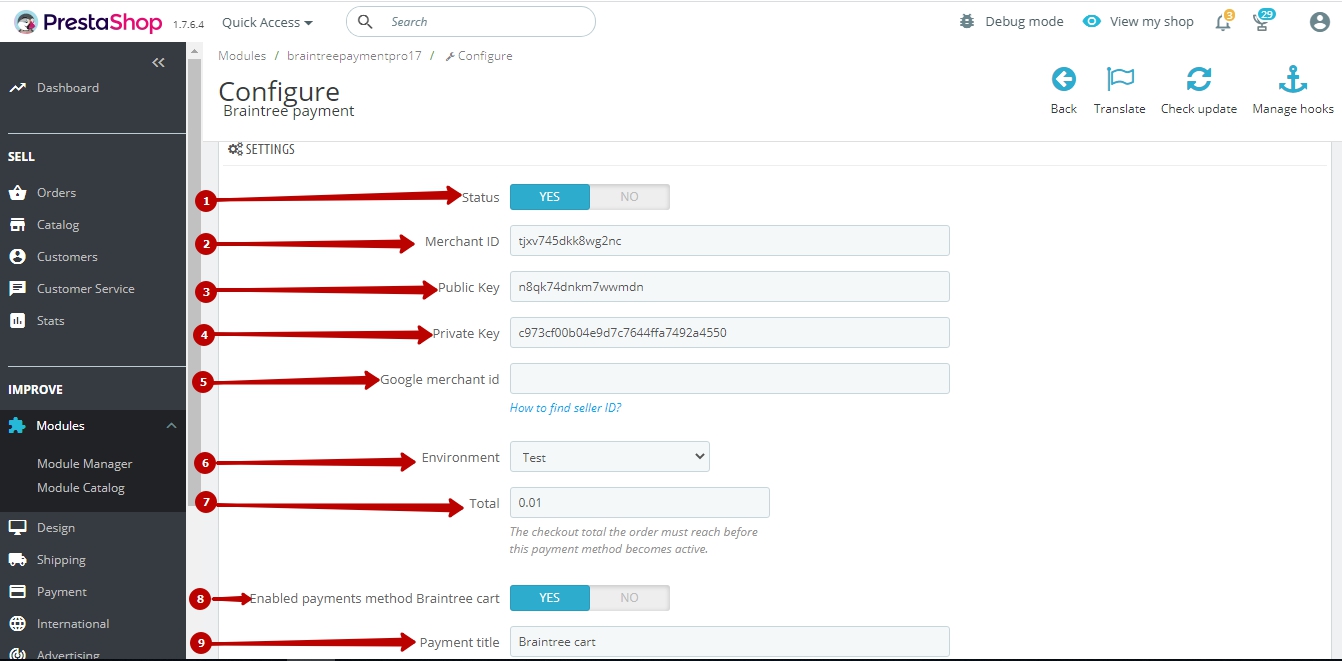
The SETTINGS block consists of:
The Status сheckbox (1) - to enable / disable the plugin (position Yes / No).
The Merchant ID field (2) - to enter the merchant ID copied after registering an account for the Braintree sandbox.
The Public Key field (3) - to enter the merchant public key copied after registering an account for the Braintree sandbox.
The Private Key field (4) - to enter the merchant private key copied after registering an account for the Braintree sandbox.
The Google Merchant id field (5) - to enter ID copied after registering an account for Google Pay.
The Environment field (6) - to choose the test or normal mode of the plugin (position Test / Production).
The Total field (7) - to enter the minimum total order amount at which Braintree payment method will be enabled.
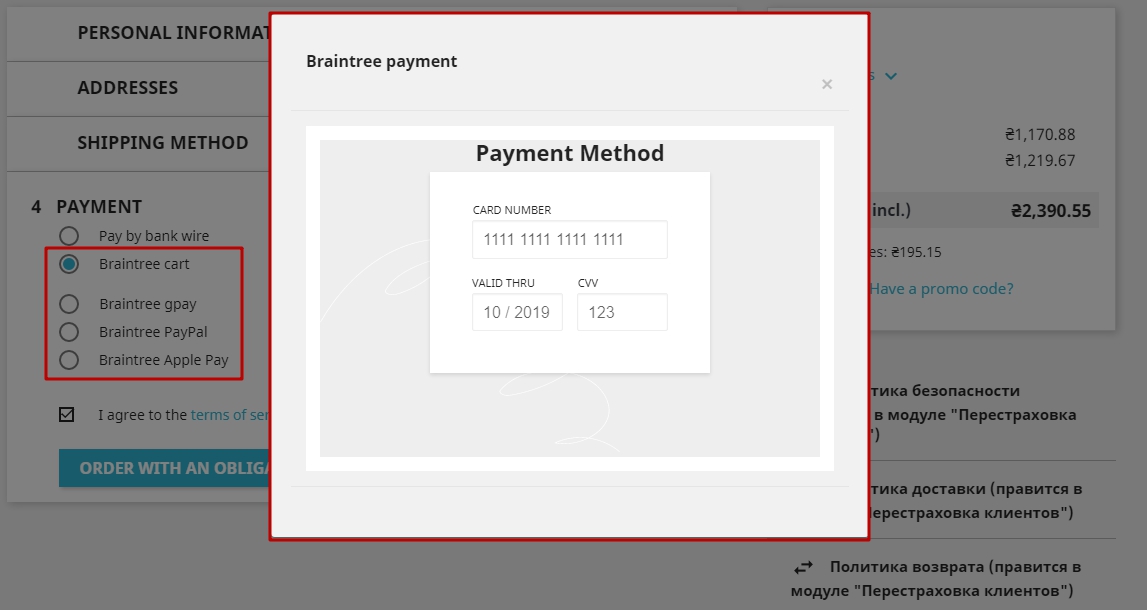
The Enabled payments method Braintree cart сheckbox (8) - to enable / disable the ability to pay through the Braintree method when placing an order (position Yes / No).
The Payment title field (9) - to enter the name of the payment checkbox through the Braintree method, which will be displayed when placing an order on your website.
The Enabled payments method GPAY field (10) - to enable / disable the ability to pay through the Google Pay method when placing an order (position Yes / No).
The Payment GPAY title field (11) - to enter the name of the payment checkbox through the Google Pay method, which will be displayed when placing an order on your website.
The Enabled payments method PayPal checkbox (12) - to enable / disable the ability to pay through the PayPal method when placing an order (position Yes / No).
The Payment title PayPal field (13) - to enter the name of the payment checkbox through the PayPal method, which will be displayed when placing an order on your website.
The PayPal Client id field (14) - to enter the merchant key copied after registering a PayPal account.
The Enabled payments method Apple Pay checkbox (15) - to enable / disable the ability to pay through the Apple Pay method when placing an order (position Yes / No).
The Payment title Apple Pay field (16) - enter the name of the payment checkbox through the Apple Pay method, which will be displayed when placing an order on your website.
The Save button (17) - to save the selected plugin settings.

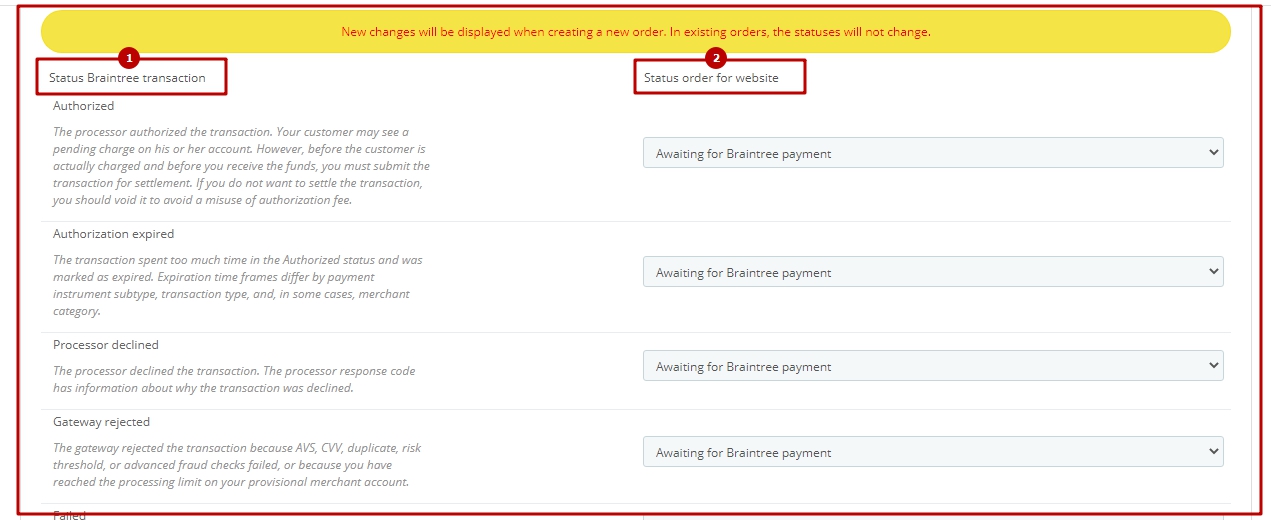
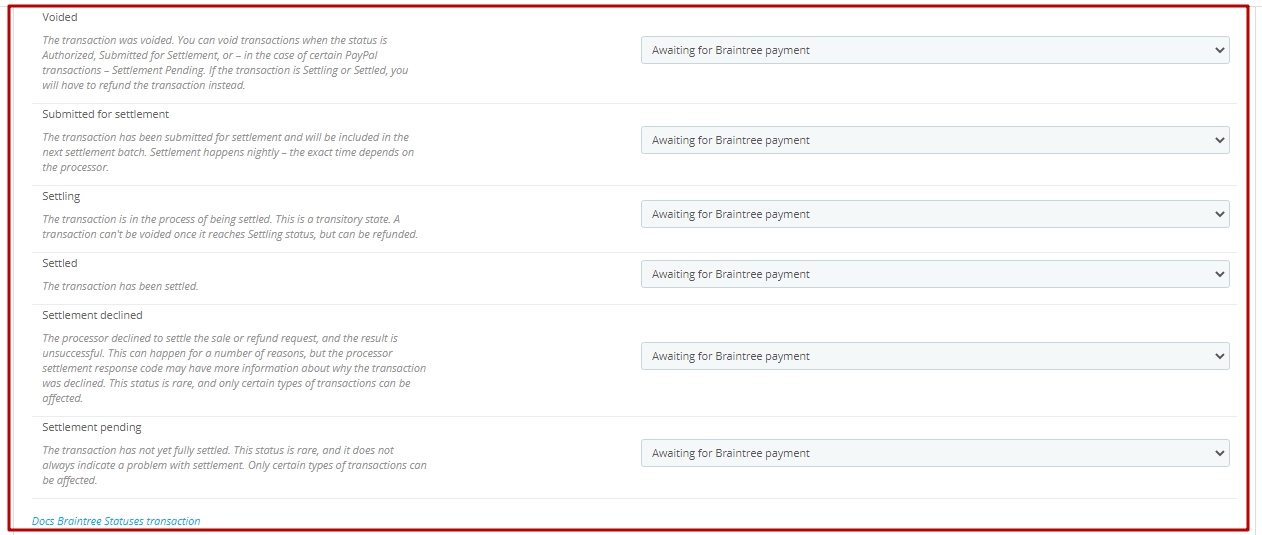
The STATUS SETTINGS block allows you to select the statuses of orders on your website, corresponding to the transaction statuses of the Braintree payment system:
Status Braintree transaction (1) - displays the transaction statuses of the Braintree system.
Status order for website (2) - to select the corresponding order status on your website.
Now your customers can pay for their order using the Braintree system.
VIDEO INSTRUCTION