How to Set Up ChatGPT AI for OpenCart
INSTRUCTION CHAT GPT AI FOR OPENCART 3.0
Download and install
Download the plugin archive from Shop Pinta and save it on your computer.
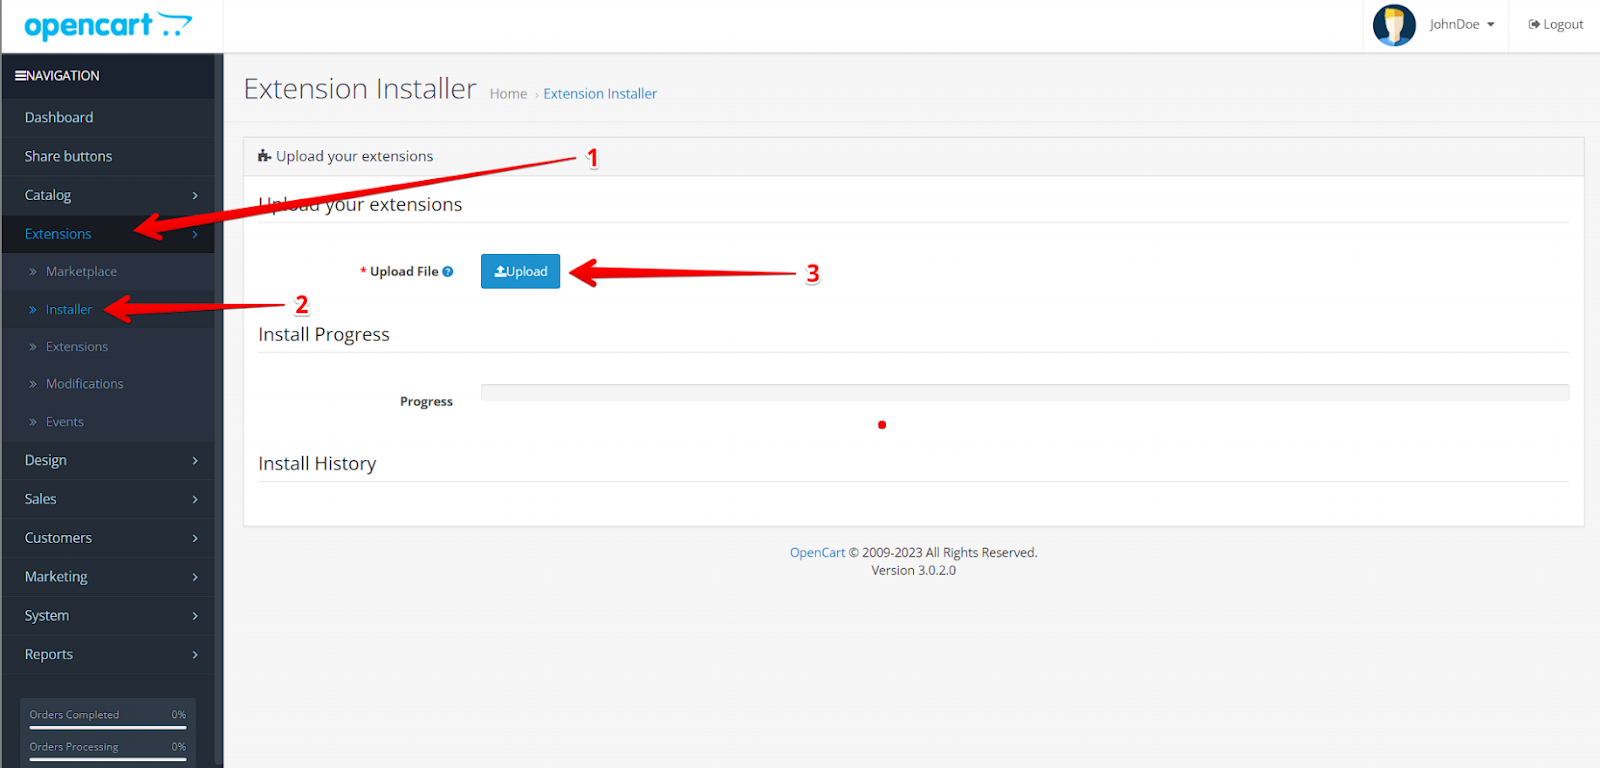
In the admin panel of your website, select Extensions (1) > Installer (2).
In the Upload your extensions block, click the Upload button (3).
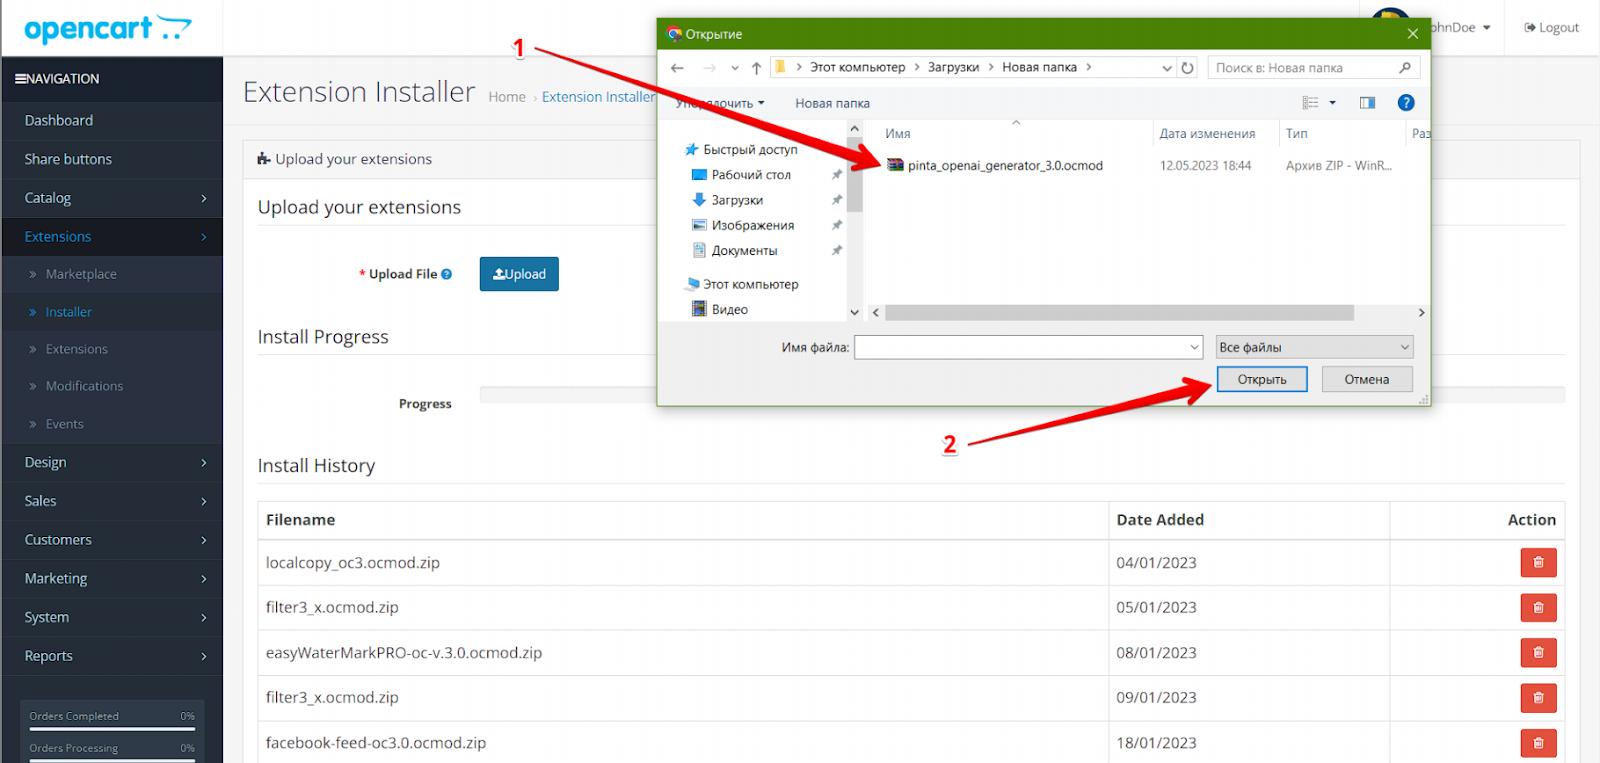
In the opened window select the plugin archive (1) and click the Open button (2).
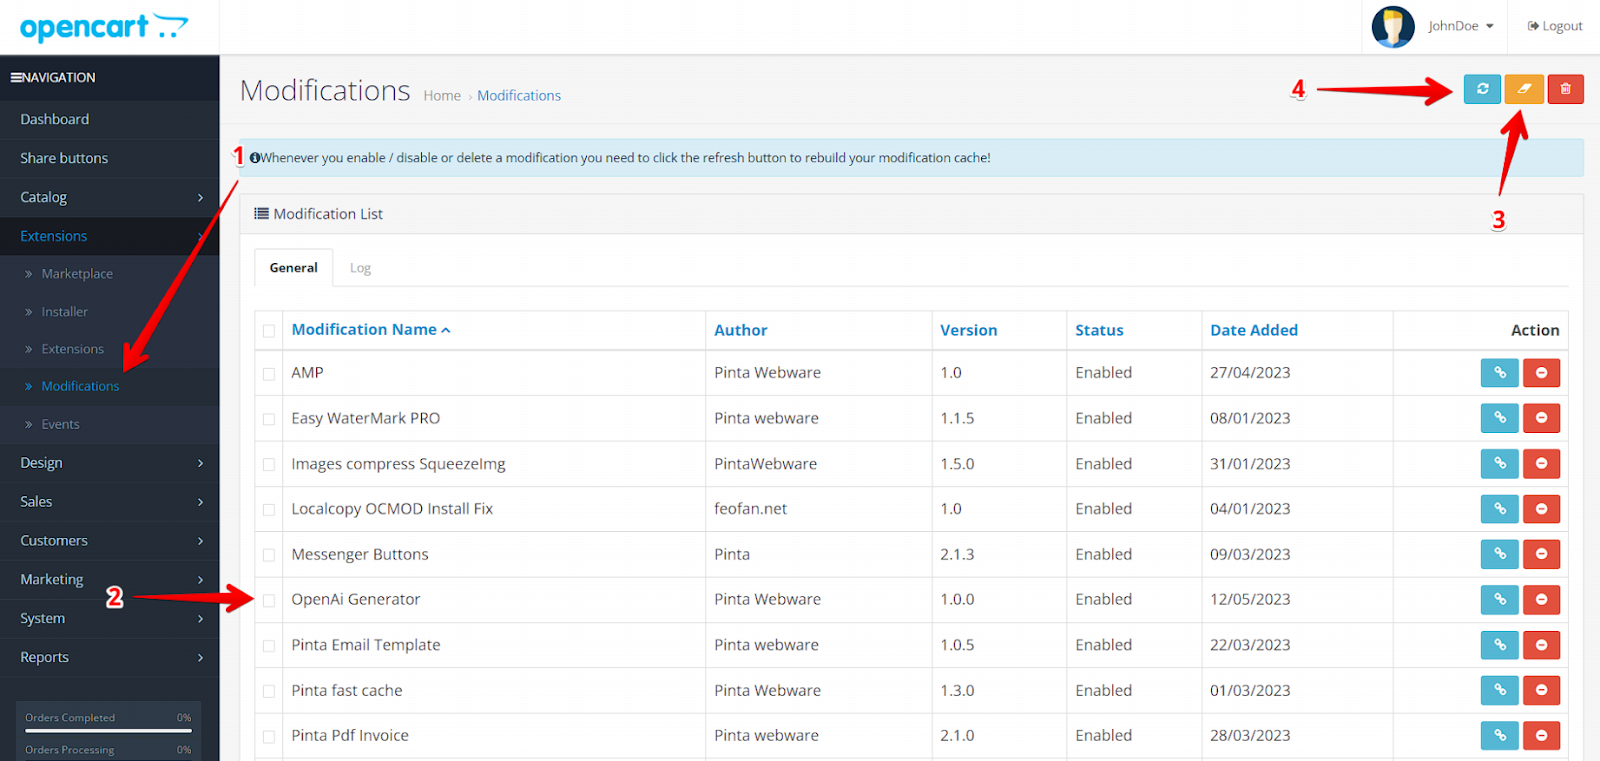
Clear the cache (recommended). To do it, in Extensions > Modifications (1), select the checkbox (2) for the plugin and click the Clear (3) and Refresh (4) buttons.
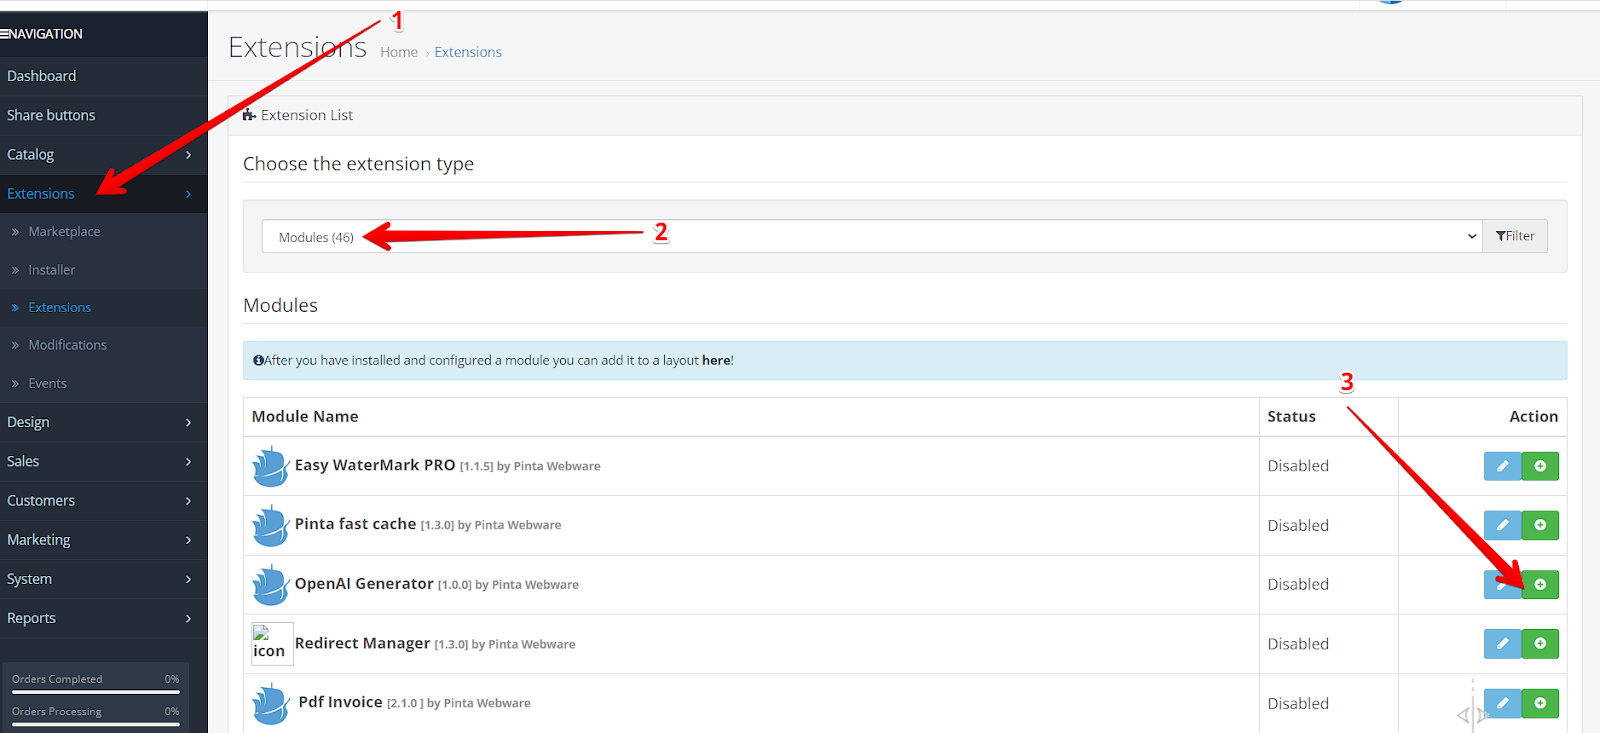
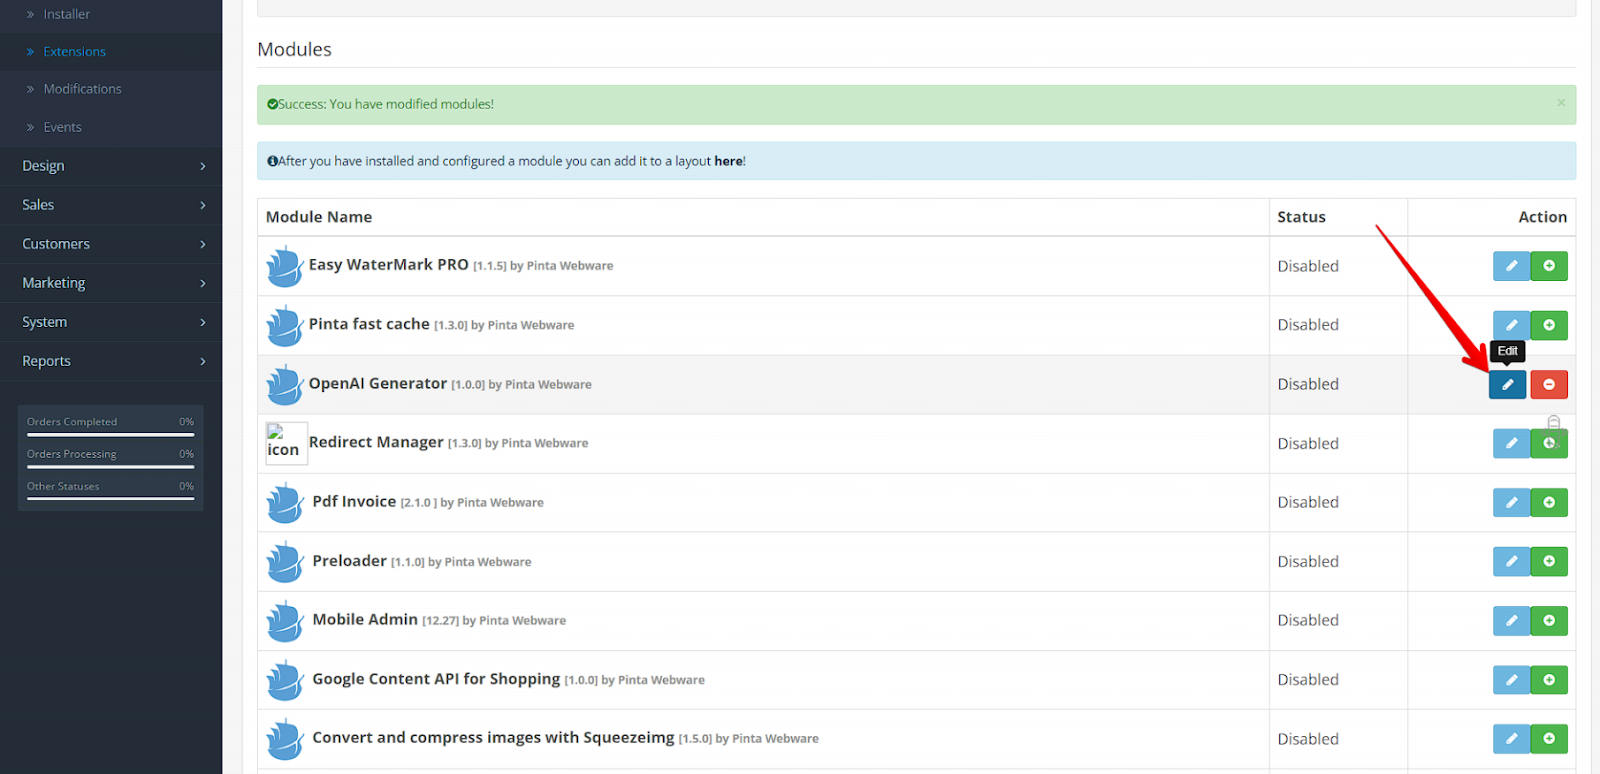
Go to the Extensions subcategory (1). In the Extension List, select the Modules type (2).
Find the OpenAI Generator plugin and click the Install button (3).
To configure the plugin, click the Edit button.
Plugin page
The plugin page includes:
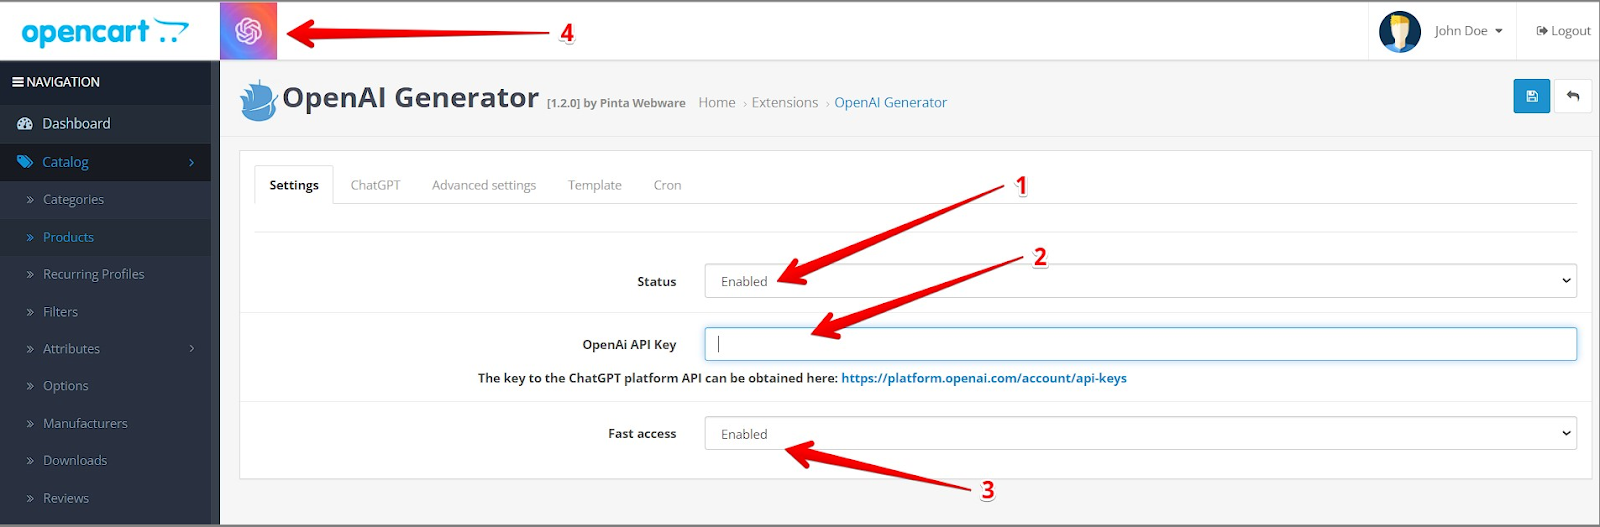
The Settings tab allows you to activate the plugin.
This tab contains the fields:
Status (1) - to enable / disable the plugin (position Enabled / Disabled).
OpenAi API Key (2) - to enter an API key generated in the OpenAi service.
Fast access (3) - to enable / disable the button of the plugin quick access (located in the upper left part of the window (4).
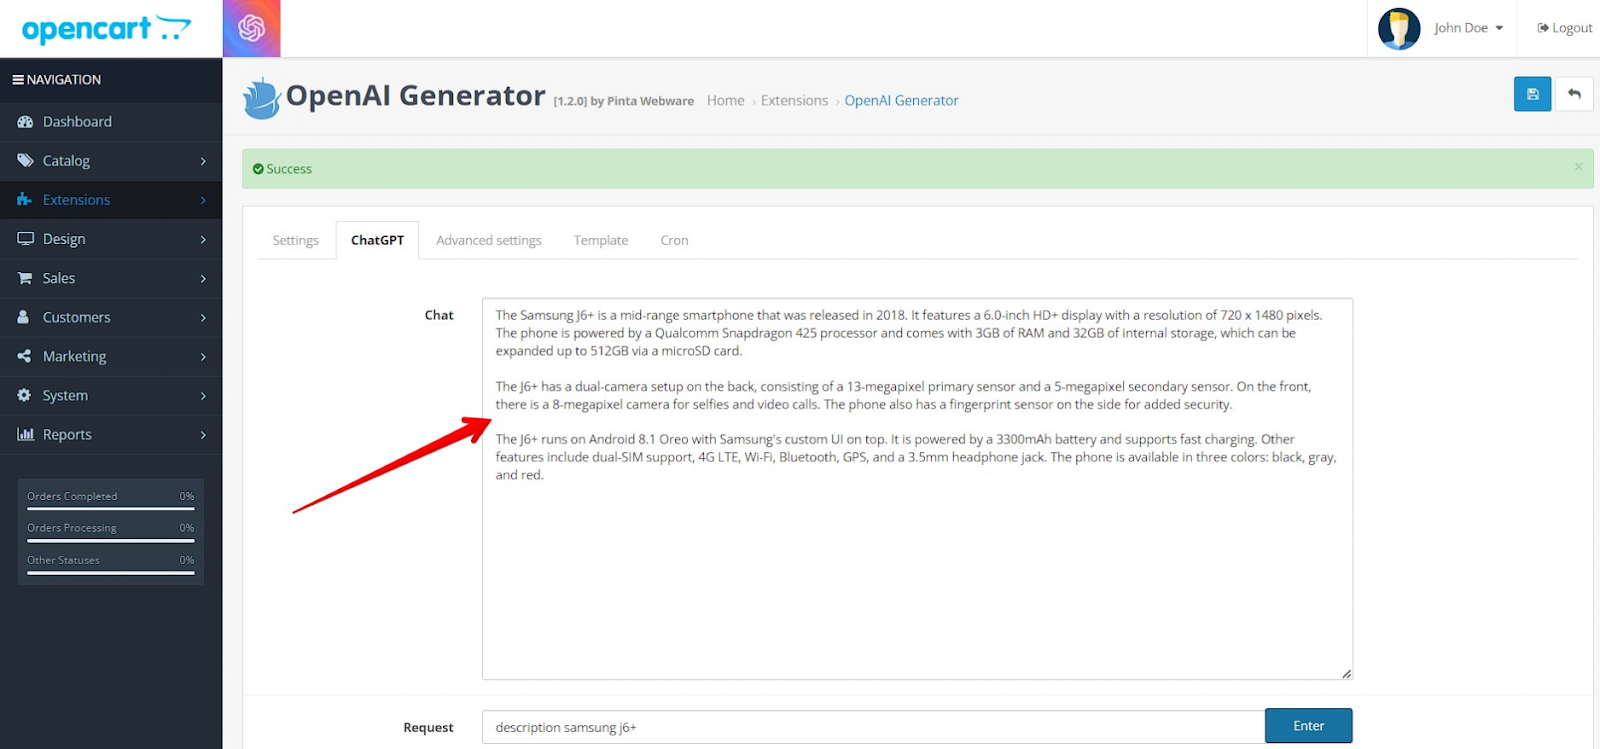
The ChatGPT tab allows you to generate the content with the selected settings.
This tab contains the fields:
Chat (2) - to display the results of your request (2).
Request (1) - to enter a request that will send to Chat GPT. Click the Enter button to start generation.
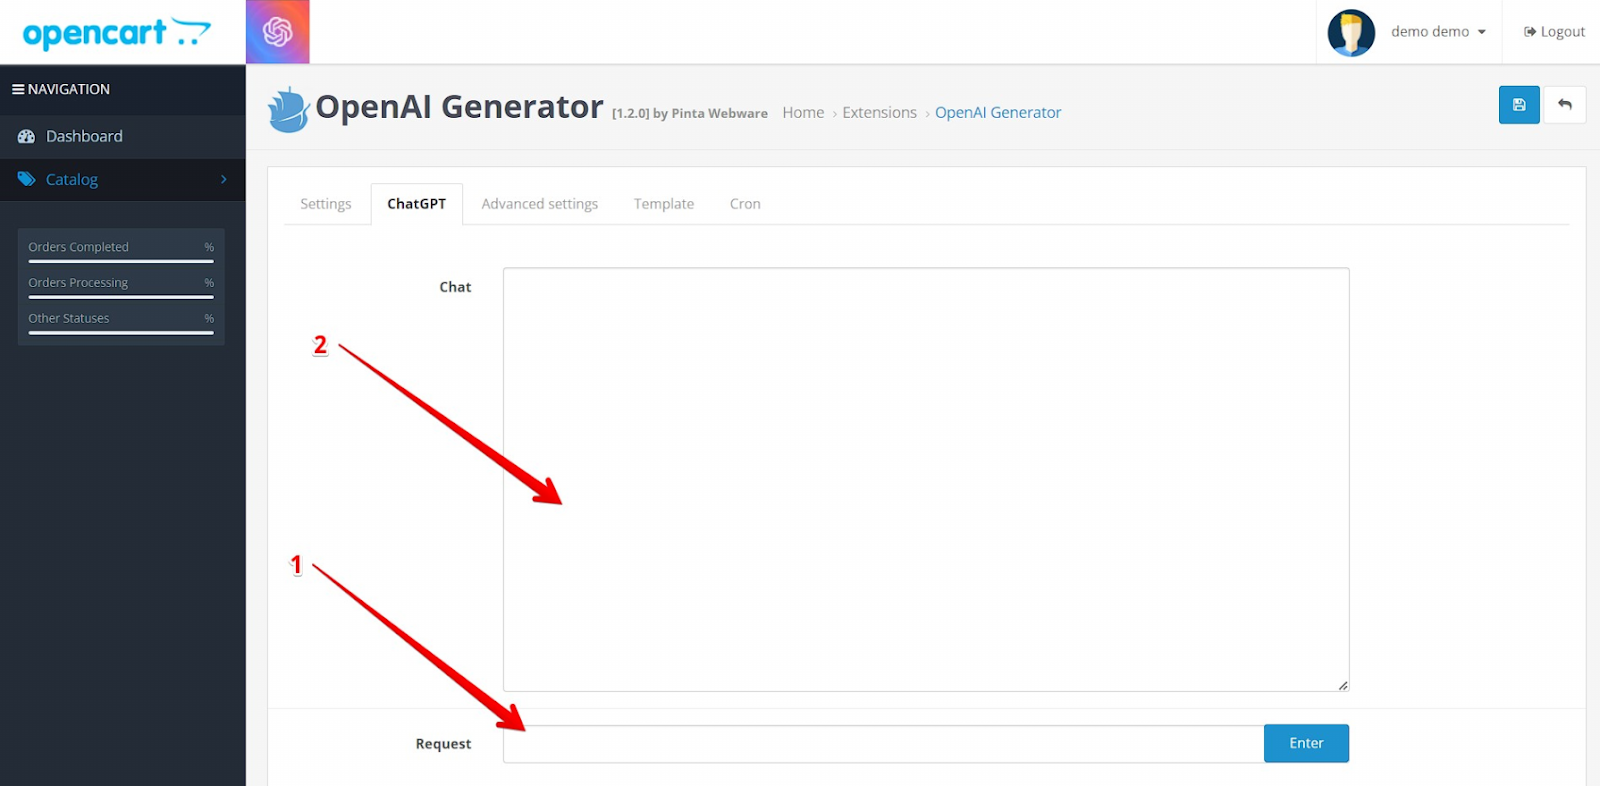
The content generation may take some time.
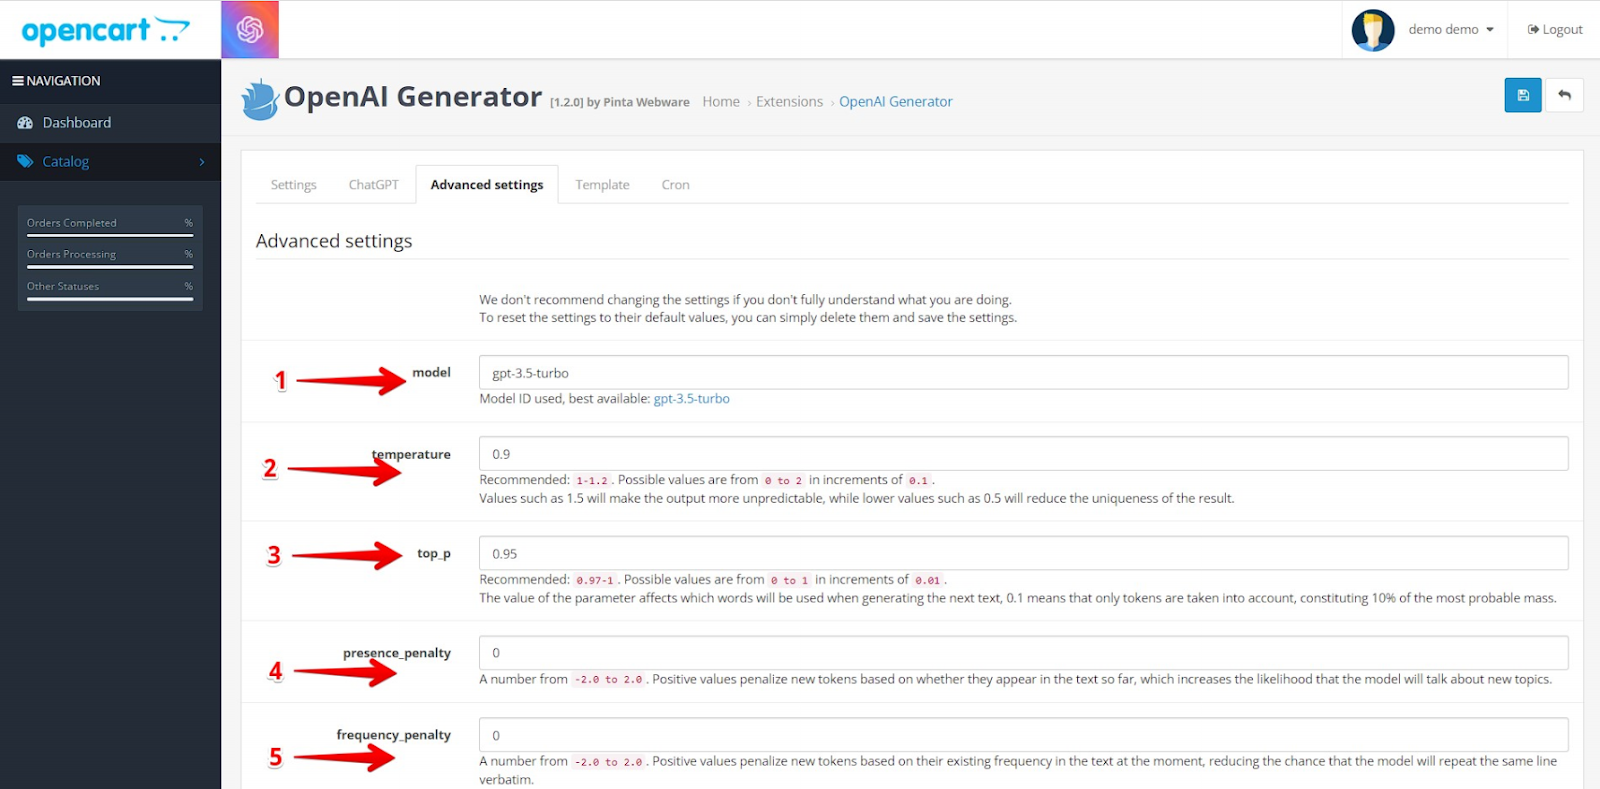
The Advanced settings tab allows you to select the content generation options.
This tab contains the fields:
model (1) - to select the model ID of the chat (the list of models - https://platform.openai.com/docs/models/overview).
Since the OpenAI API is based on a diverse set of models with different capabilities and price categories, you need to choose the appropriate chat model. In addition, you can customize the basic models to a limited extent for specific purposes using the advanced settings.
temperature (2) - to select a value from 0 to 2.0.
The higher the value of this parameter, the more random and varied the text will be generated. The model will tend to choose less likely words and phrases, which can lead to more original, but sometimes more illogical text.
top_p (3) - o select a value from 0 to 1.0.
If you choose a low value for this parameter, the generated text will be more consistent because the model only selects the most likely tokens that fit better with the previous context. However, a value that is too low can cause the generated text to be too rigid and repetitive. And choosing a high value can lead to a decrease in coherence in the generated text.
presense_penalty (4) - to select a value from -2.0 to 2.0.
The higher the value of this parameter, the more often new or similar words will be used in the text for repeating options. This can be useful for generating content with high originality and variety but can lead to more errors and inaccuracies in the generated text.
frequency_penalty (5) - to select a value from -2.0 to 2.0.
If the value of this parameter is high, the probability of repetitions in the text will decrease. The smaller the parameter value, the more often the phrases will be repeated, which can lead to unnatural responses.
You can also generate the content directly on pages of categories, products, and others.
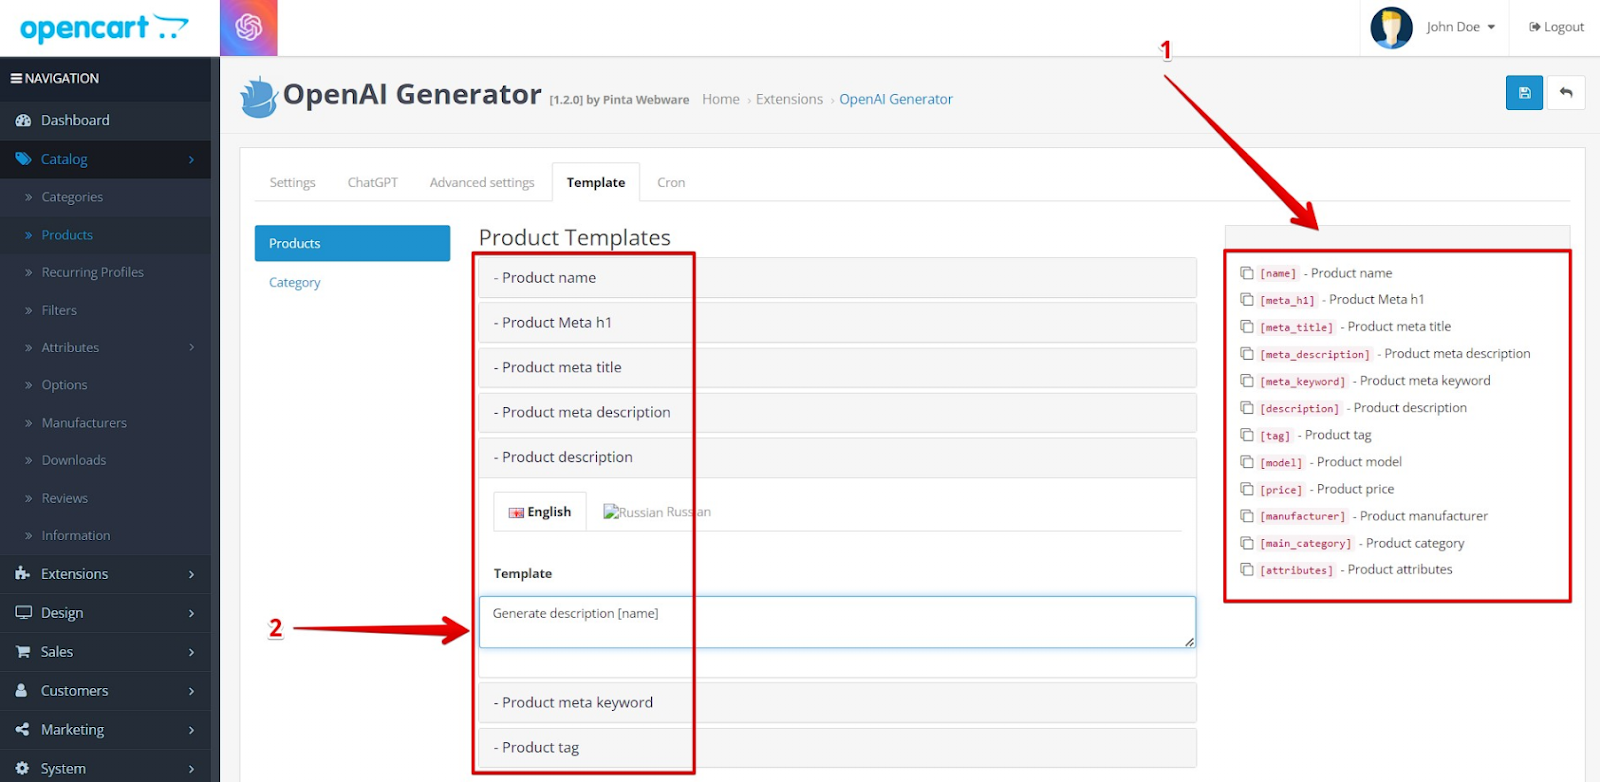
Template tab, consisting of additional tabs Products and Category - allows you to create templates for mass generation.
The Products tab contains:
Templates with variables to help with the formation of queries for generating text in products.
Fields Product name, Product Meta h1, Product meta title, Product meta description, Product description, Product meta keyword and Product tag - to enter the required template query.
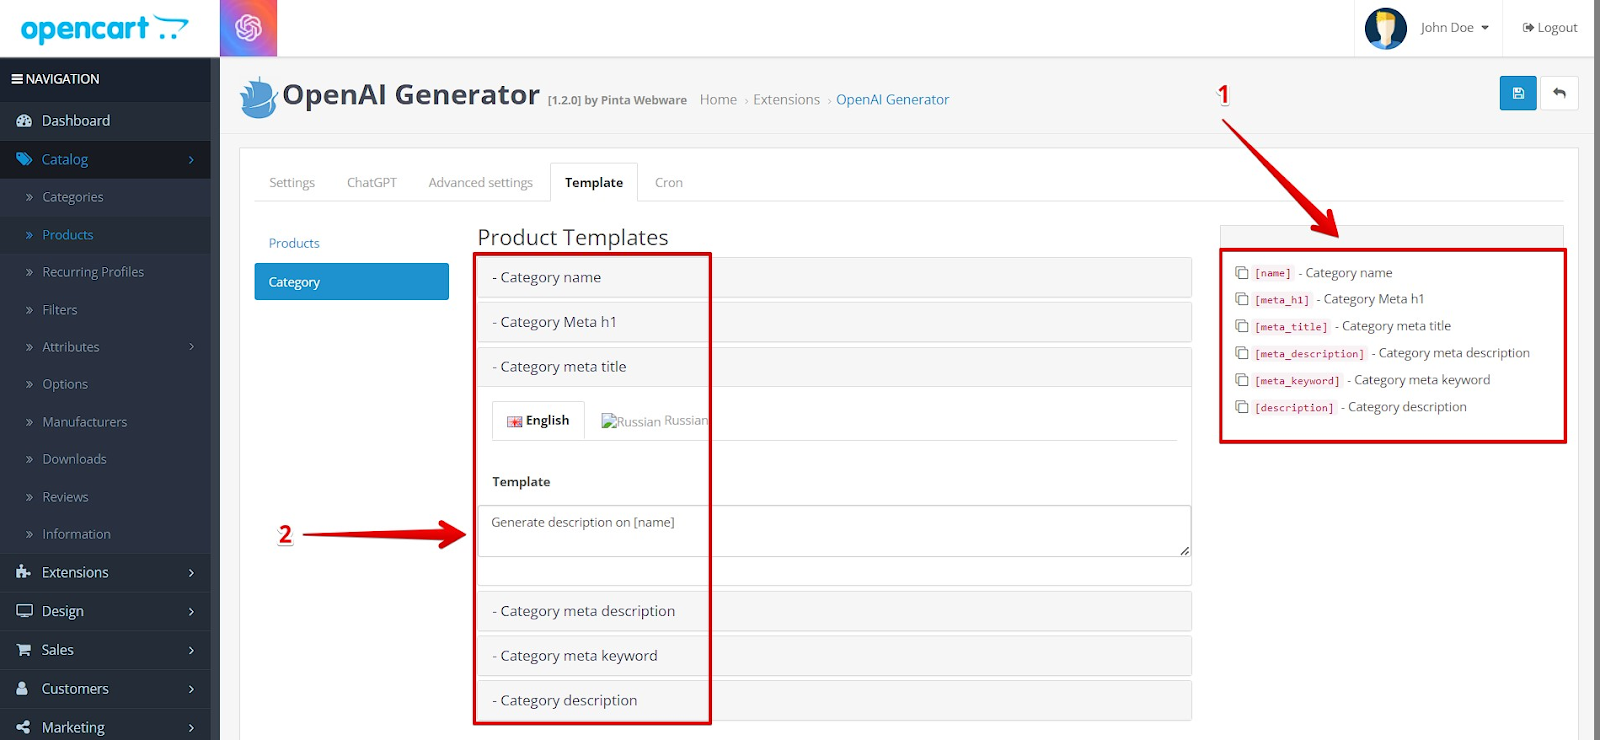
The Category tab contains:
Templates with variables to help with the formation of queries for generating text in categories.
Fields Category name, Category Meta h1, Category meta title, Category meta description, Category meta keyword and Category description - to enter the required template query.
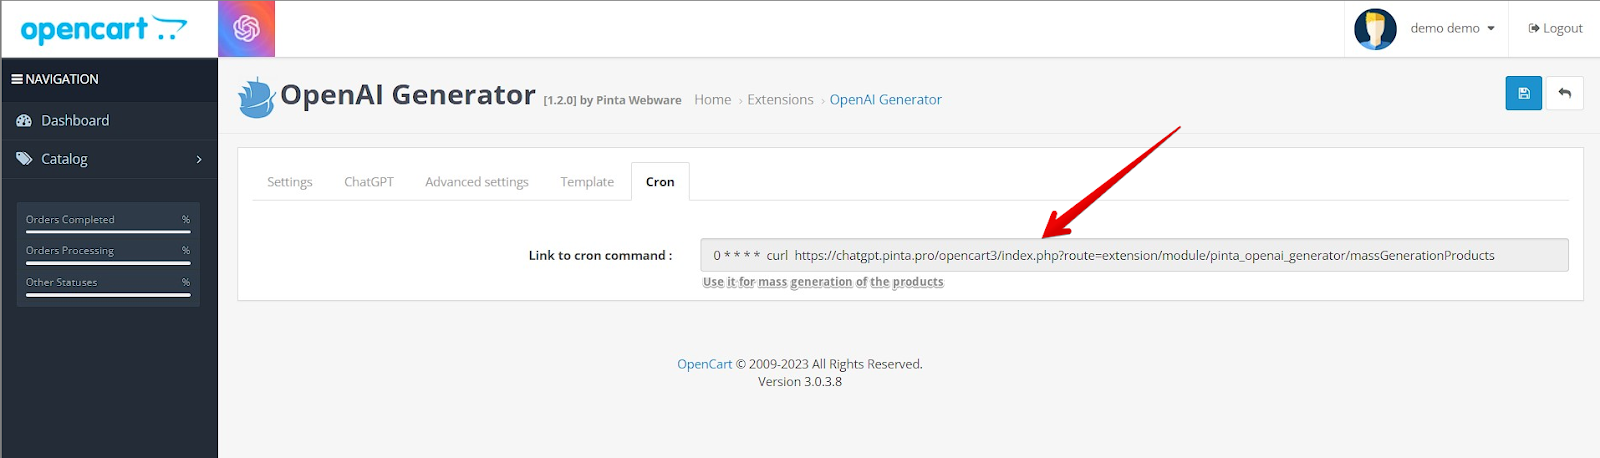
The Cron tab is for using the cron command. Copy the data in the Link to cron command field and paste it into cron.
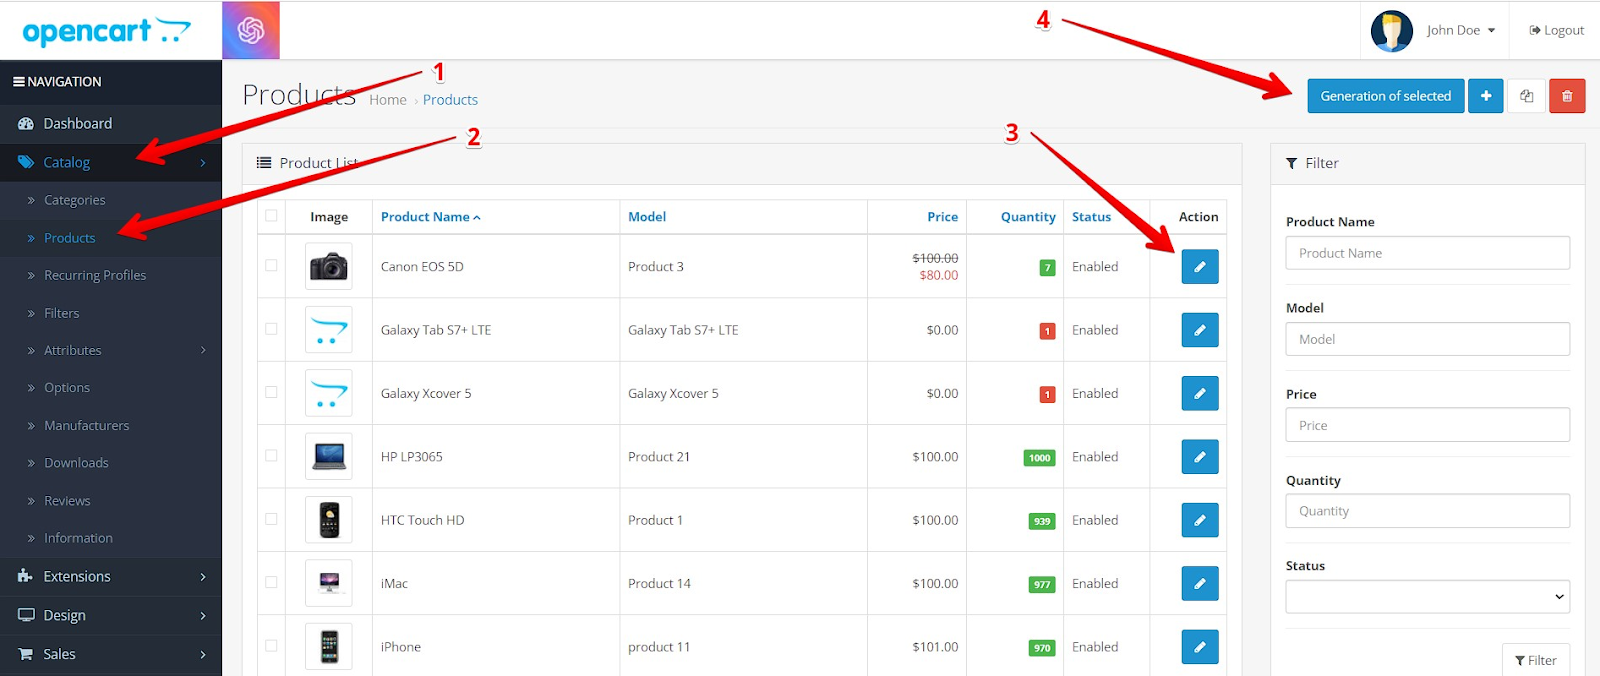
To generate the content on the Product page, go to the main menu Catalog (1) > Products (2).
Next, click on the Edit button (3).
For mass generation of content (if templates have been previously configured), select the desired products and click the Generation of selected button (4)
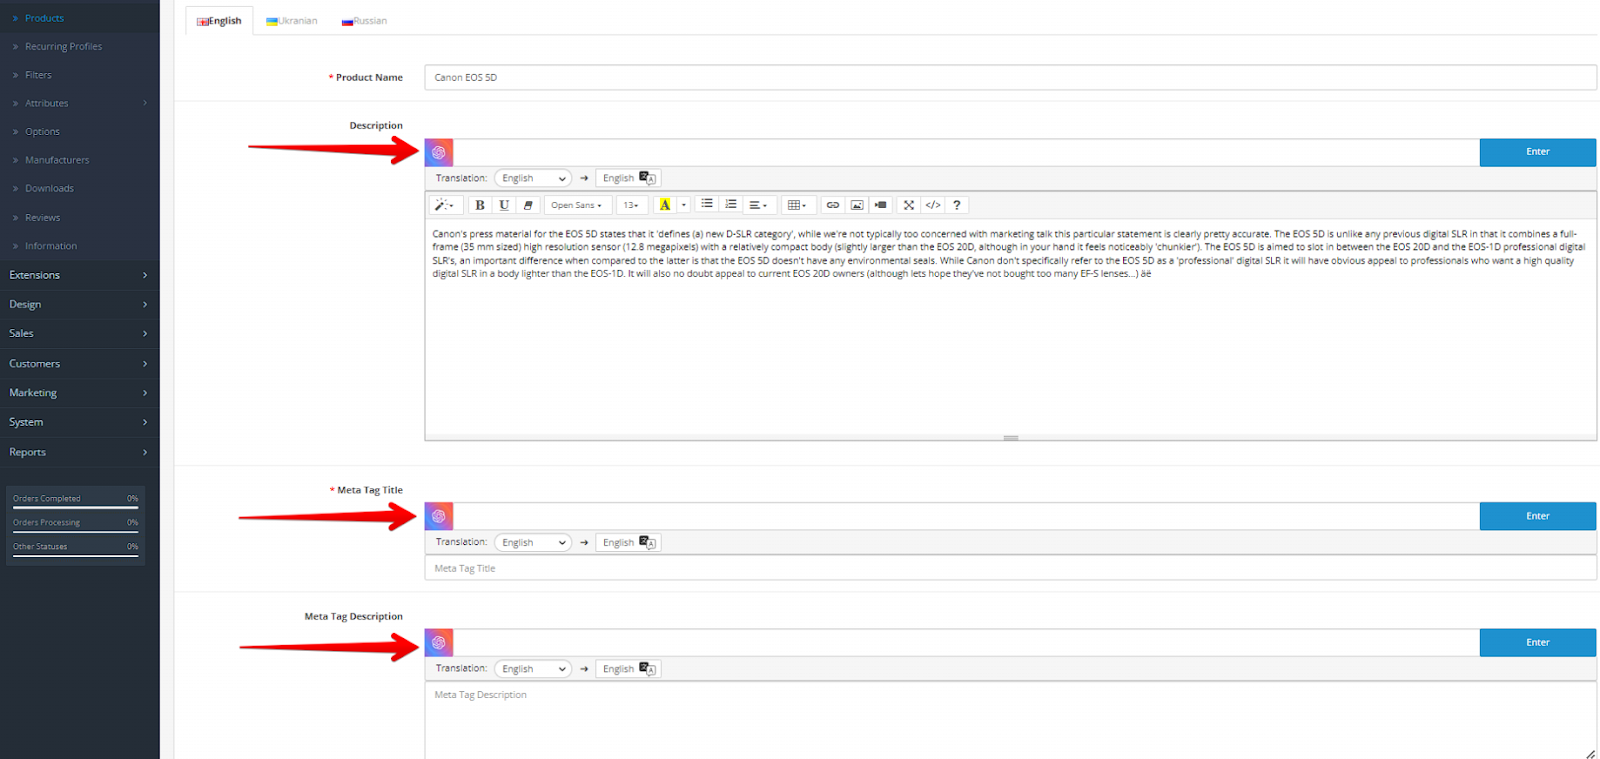
For fields of data editing, the request input field for Chat GPT will be displayed.
The content generation may take some time.
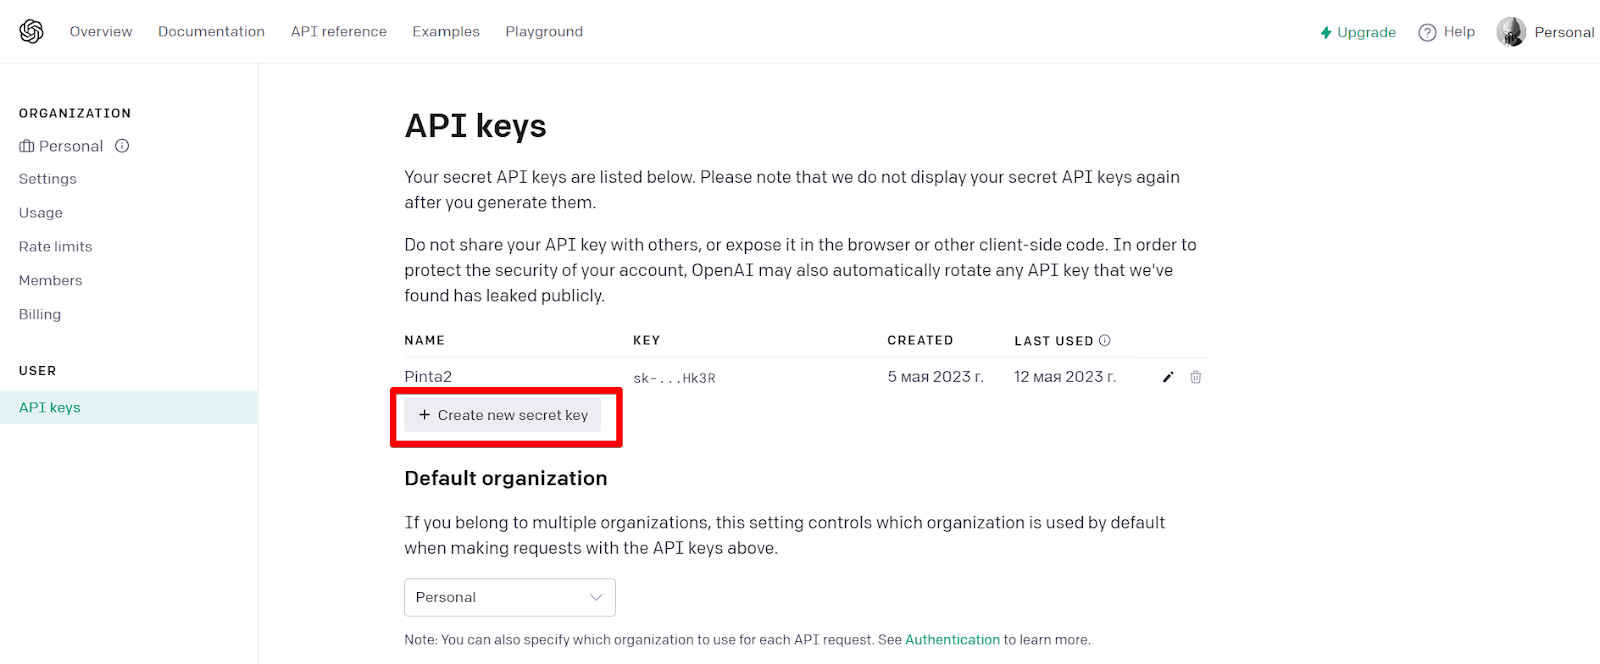
Connecting the OpenAI API
Sign up for a Chat GPT if you don't already have one, and create a new API key on https://platform.openai.com/account/api-keys.
For the plugin to work correctly, copy the secret key and add it to the plugin page (the OpenAI API key field).
VIDEO INSTRUCTION