How to Use ChatGPT AI for PrestaShop
Instruction CHAT GPT AI FOR PRESTASHOP 1.7
Download and install
Download the plugin archive from the Shop Pinta store and save it on your computer.
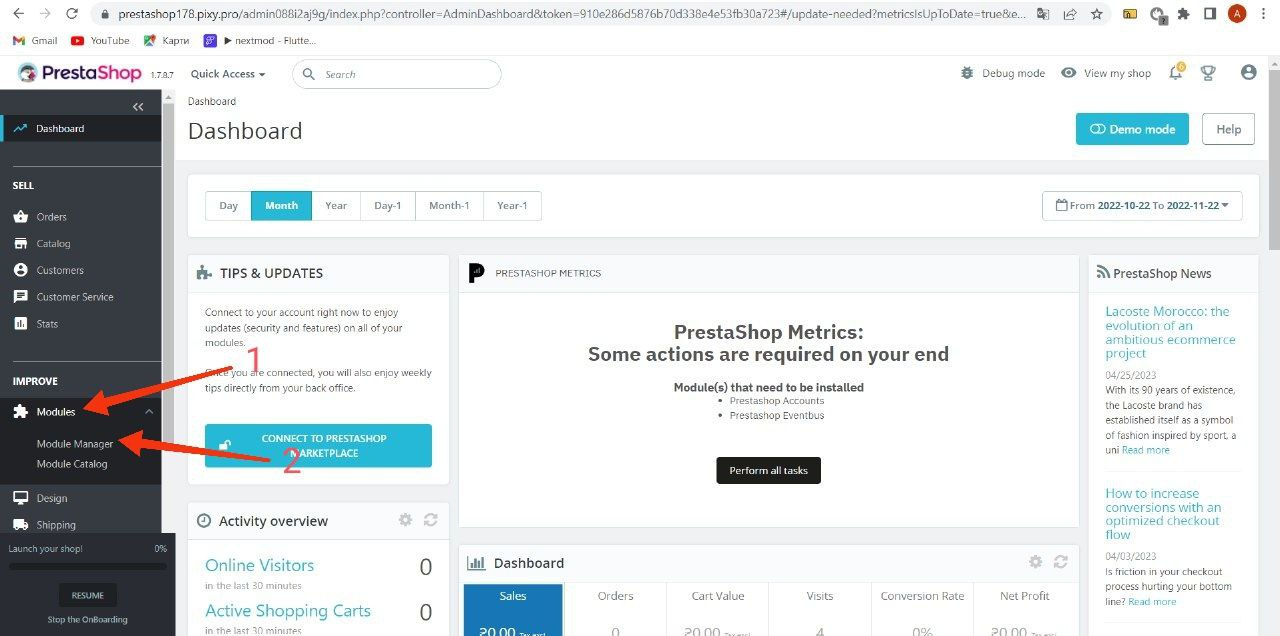
In the admin panel of your website, select Modules (1) > Module Manager (2).
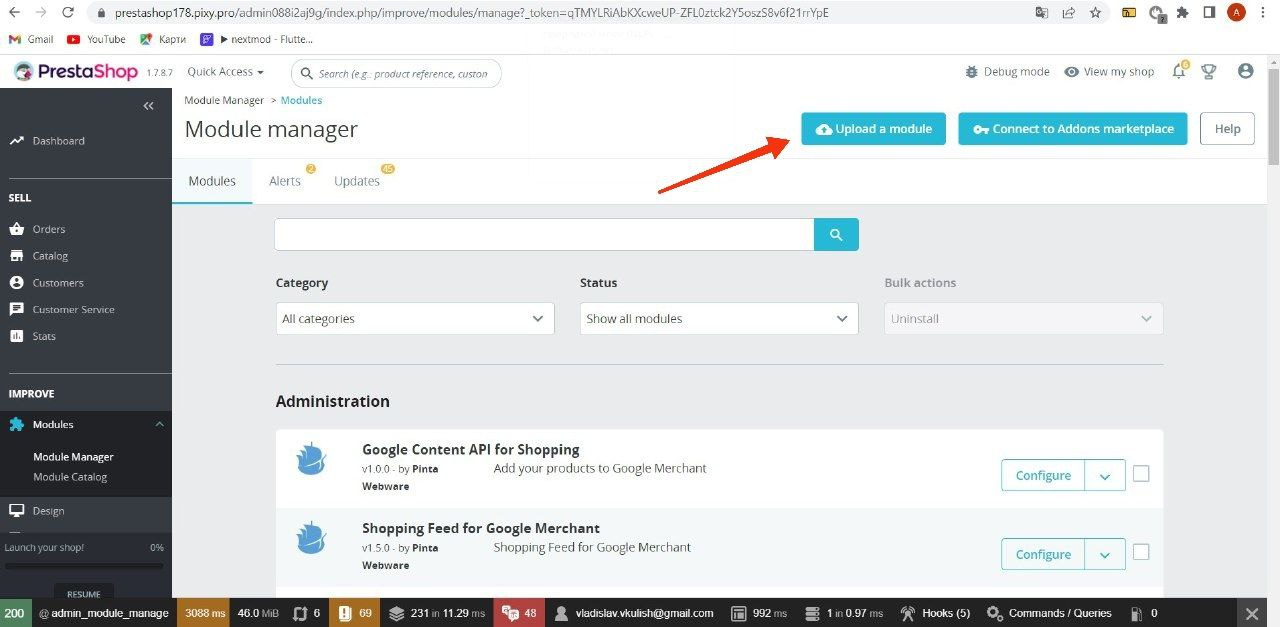
Next, click the Upload a module button.
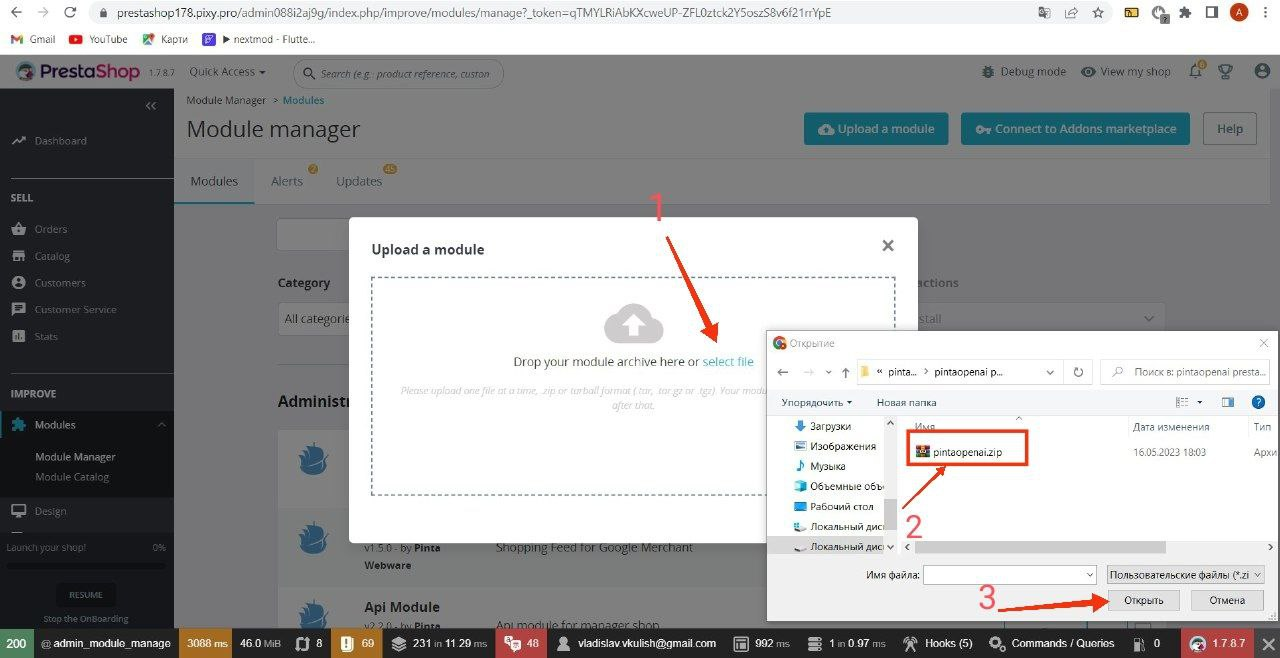
In the opened window, click on select file (1).
Next, select the plugin archive (2) and click the Open button (3).
To configure the plugin, click the Configure button.

Plugin page
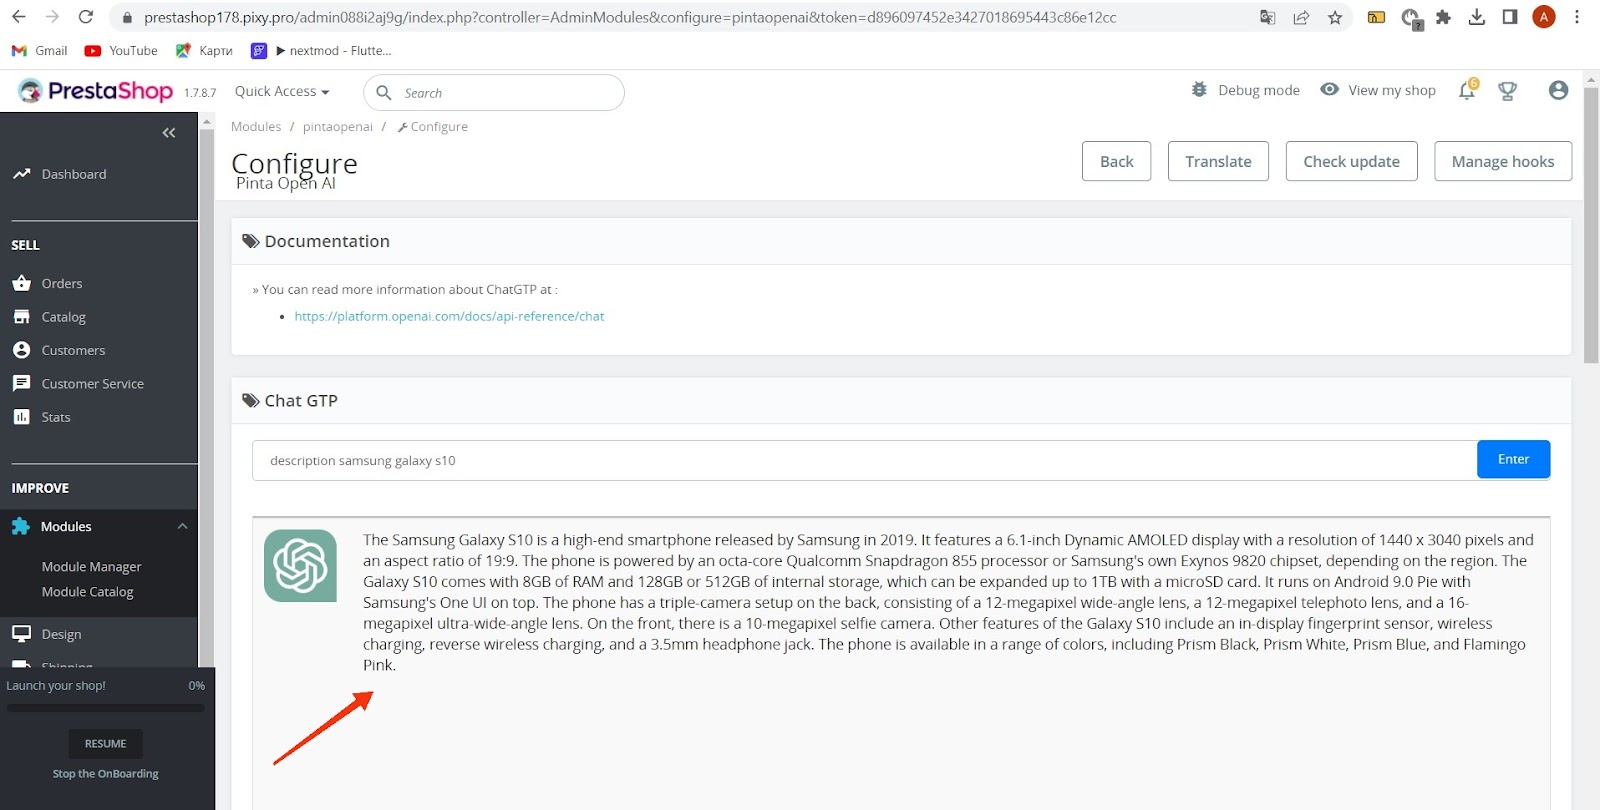
The plugin page consists of:
The Documentation block contains a ChatGPT API reference.
The ChatGPT block allows you to generate the content with the selected settings.
This block contains:
The request field (1) - to enter a request to be sent to Chat GPT. To start generation, click the Enter button.
The field for displaying the results (2).

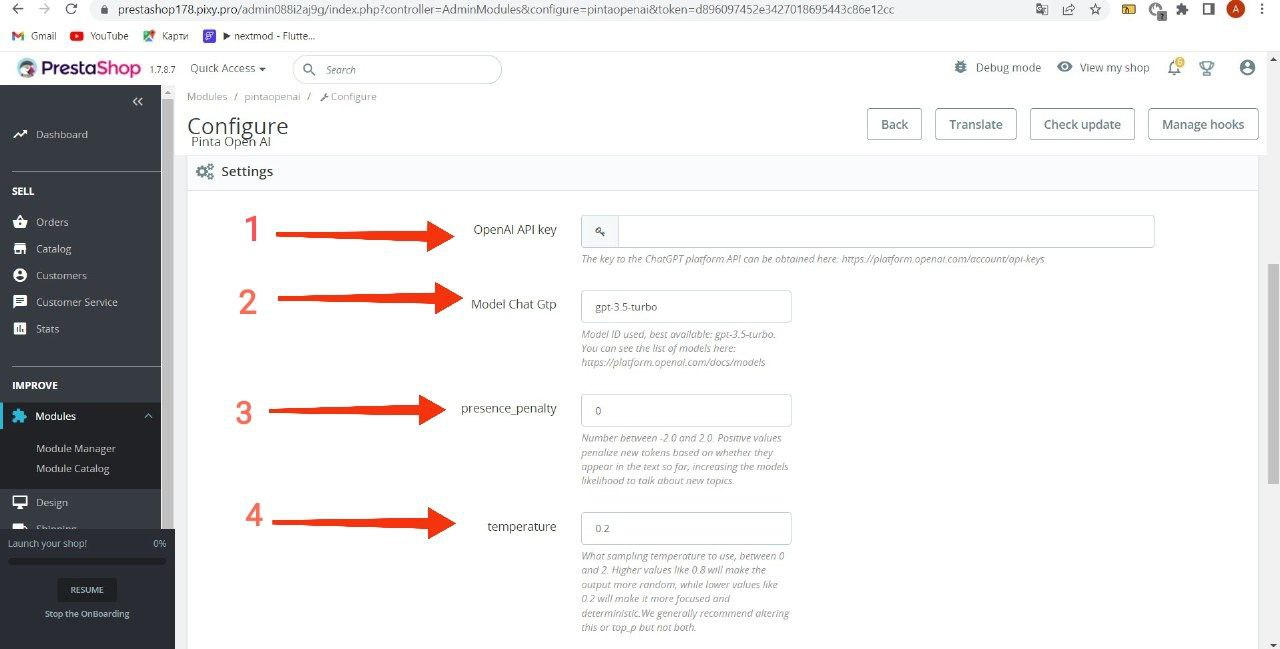
The Settings block allows you to activate the plugin and to select the content generation options.
This block contains the fields:
OpenAI API key (1) - to enter an API key generated in the OpenAi service.
Model Chart GPT (2) - to select the model ID of the chat (the list of models - https://platform.openai.com/docs/models/overview).
Since the OpenAI API is based on a diverse set of models with different capabilities and price categories, you need to choose the appropriate chat model. In addition, you can customize the basic models to a limited extent for specific purposes using the advanced settings.
presense_penalty (3) - to select a value from -2.0 to 2.0.
The higher the value of this parameter, the more often new or similar words will be used in the text for repeating options. This can be useful for generating content with high originality and variety but can lead to more errors and inaccuracies in the generated text.
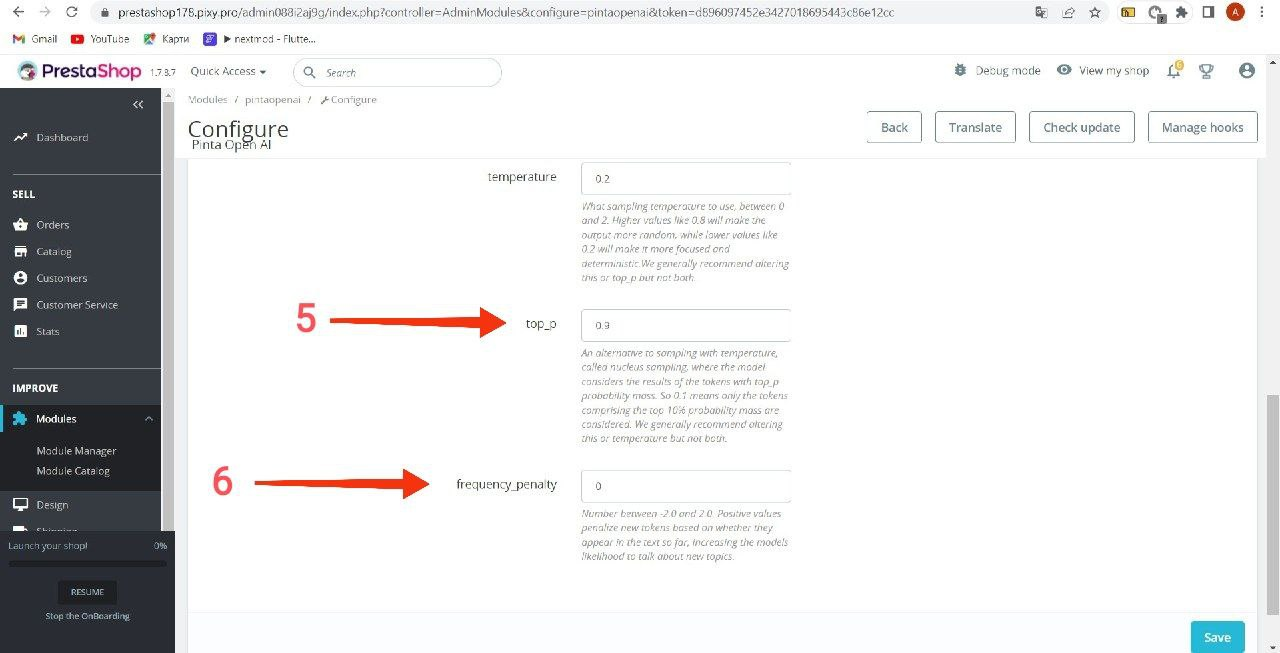
temperature (4) - to select a value from 0 to 2.0.
The higher the value of this parameter, the more random and varied the text will be generated. The model will tend to choose less likely words and phrases, which can lead to more original, but sometimes more illogical text.
top_p (5) - o select a value from 0 to 1.0.
If you choose a low value for this parameter, the generated text will be more consistent because the model only selects the most likely tokens that fit better with the previous context. However, a value that is too low can cause the generated text to be too rigid and repetitive. And choosing a high value can lead to a decrease in coherence in the generated text.
frequency_penalty (6) - to select a value from -2.0 to 2.0.
If the value of this parameter is high, the probability of repetitions in the text will decrease. The smaller the parameter value, the more often the phrases will be repeated, which can lead to unnatural responses.
To generate content with the selected settings, enter a request and click the Enter button.
The content generation may take some time.
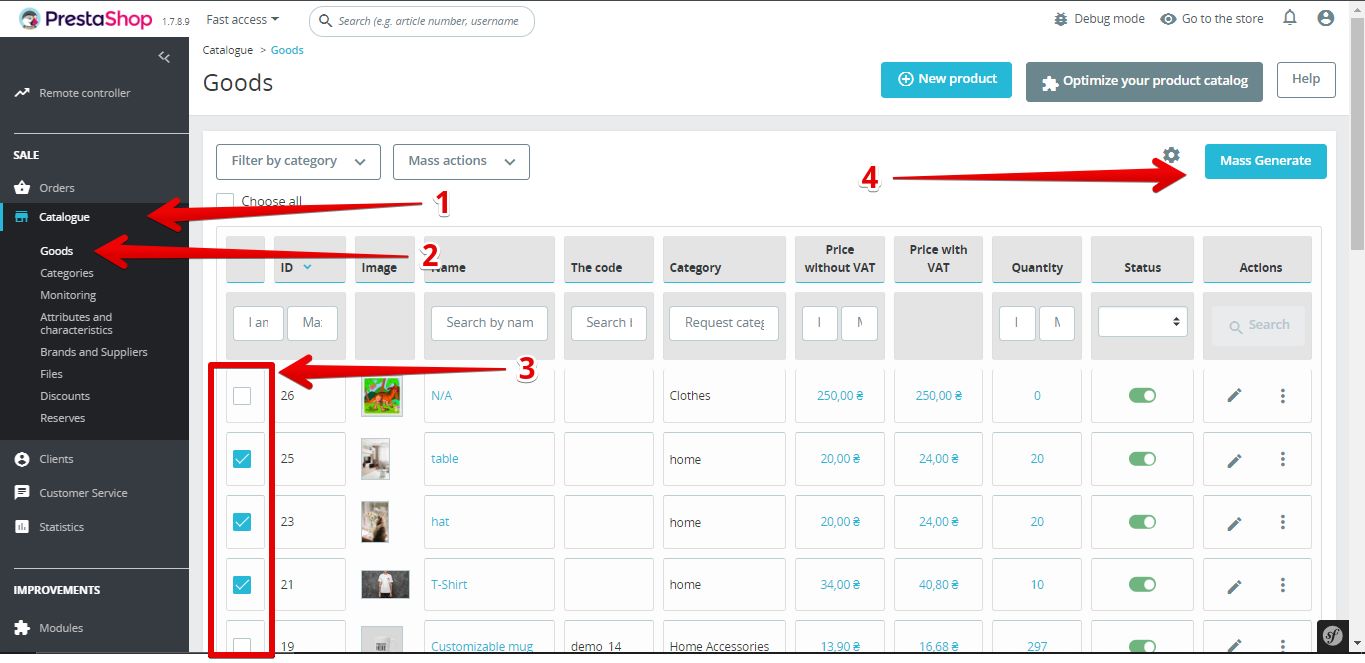
For the mass content generation, go to the main menu Catalog (1) > goods (2) after the creating templates in the Product Templates block.
Next, mark the checkboxes of the desired products and click the mass generate button (4)
You can also generate the content directly on pages of products, categories, and others.
To generate the content on the Product page, go to the main menu Catalog (1) > Products (2).
Next, click on the Edit button (3).

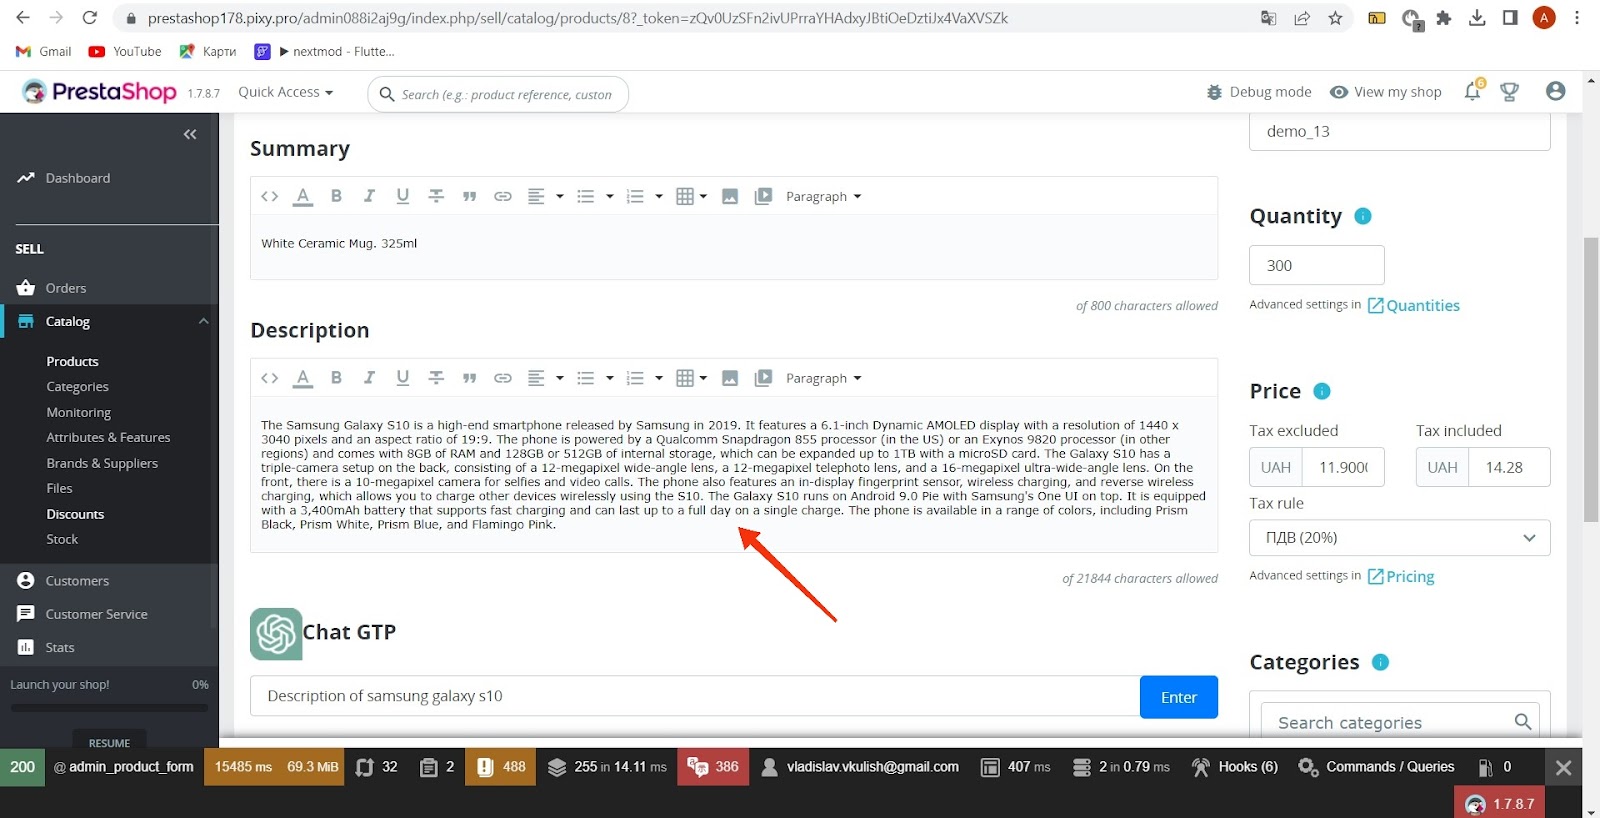
To generate descriptions, go to the Basic settings tab.

Select the field for which content will be generated (1) - Description of product or Summary of product.
And in the request input field, enter a request for Chat GPT (2).
Click the Enter button (3) to start generation.
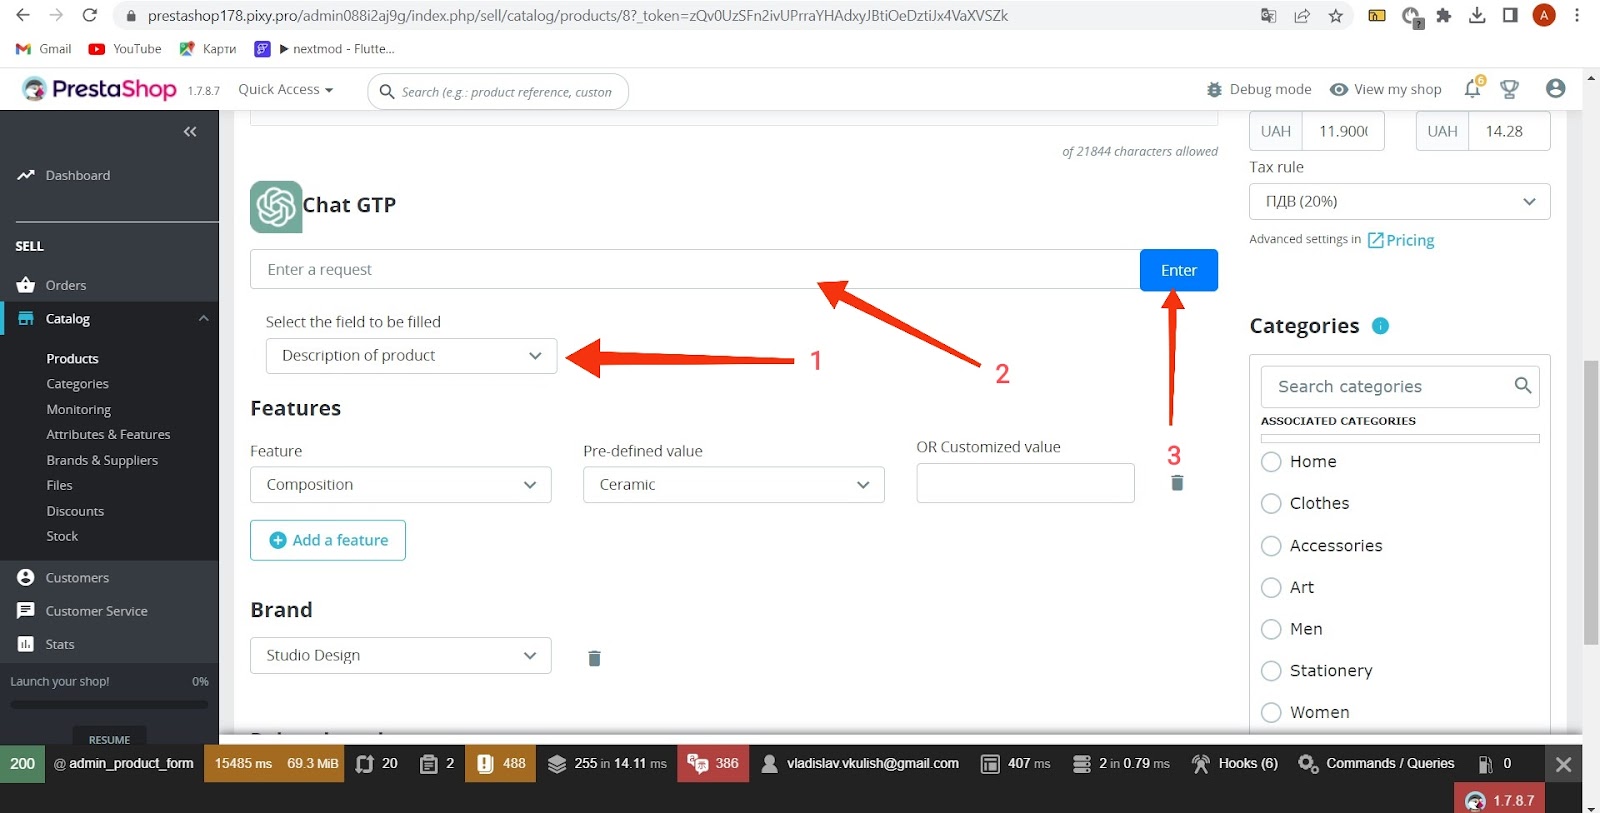
The generated content will be displayed in the corresponding field - Description or Summary. It depends on the item selected in the drop-down list.
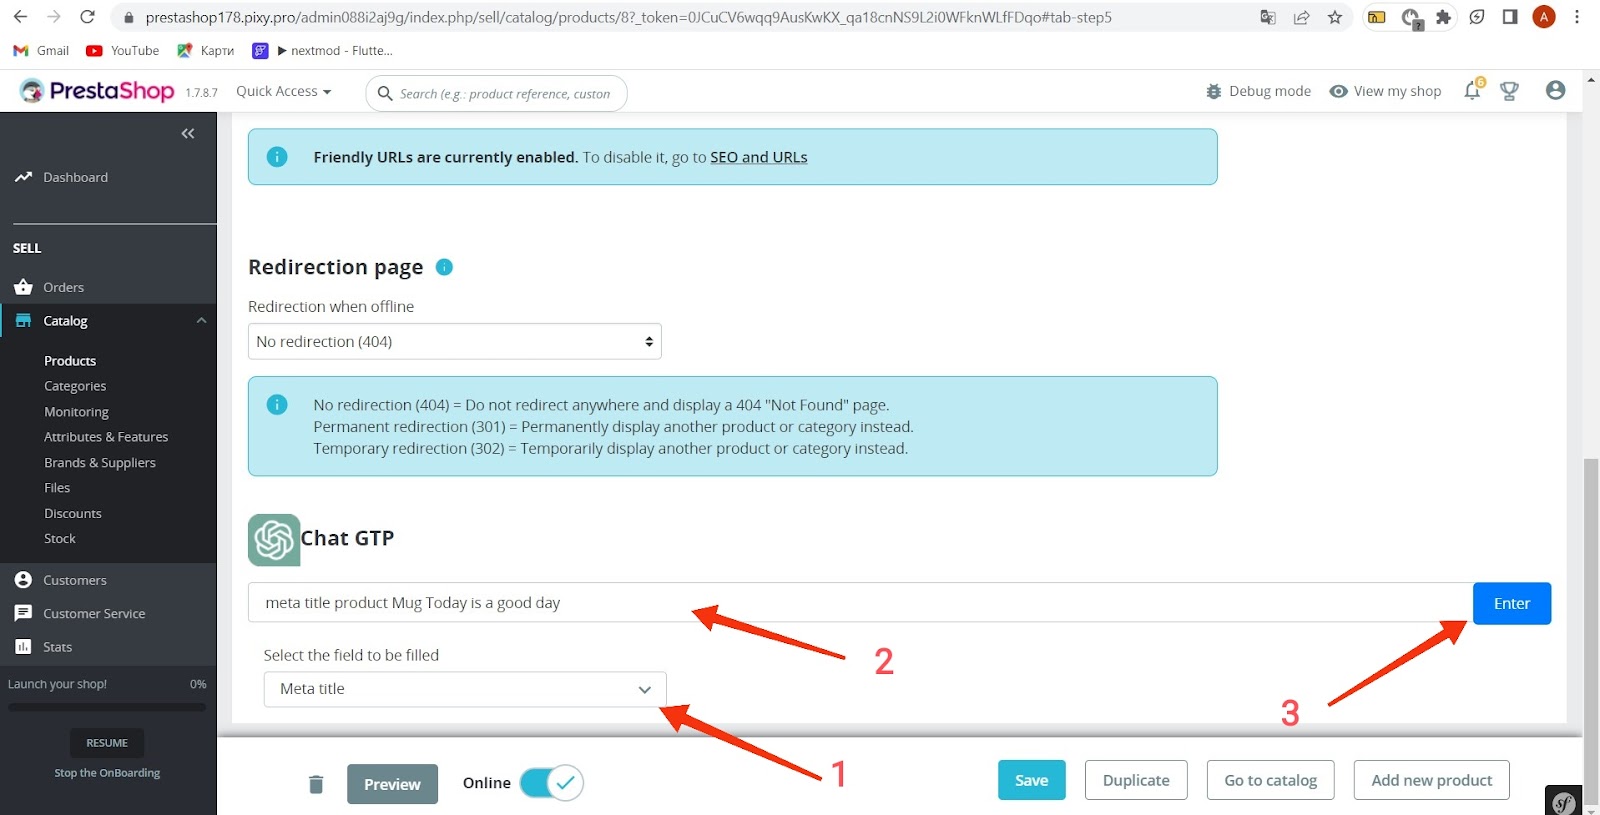
To generate meta tags, go to the SEO tab.

Select the field for which content will be generated (1) - Meta title or Meta description.
And in the request input field, enter a request for Chat GPT (2).
Click the Enter button (3) to start generation.
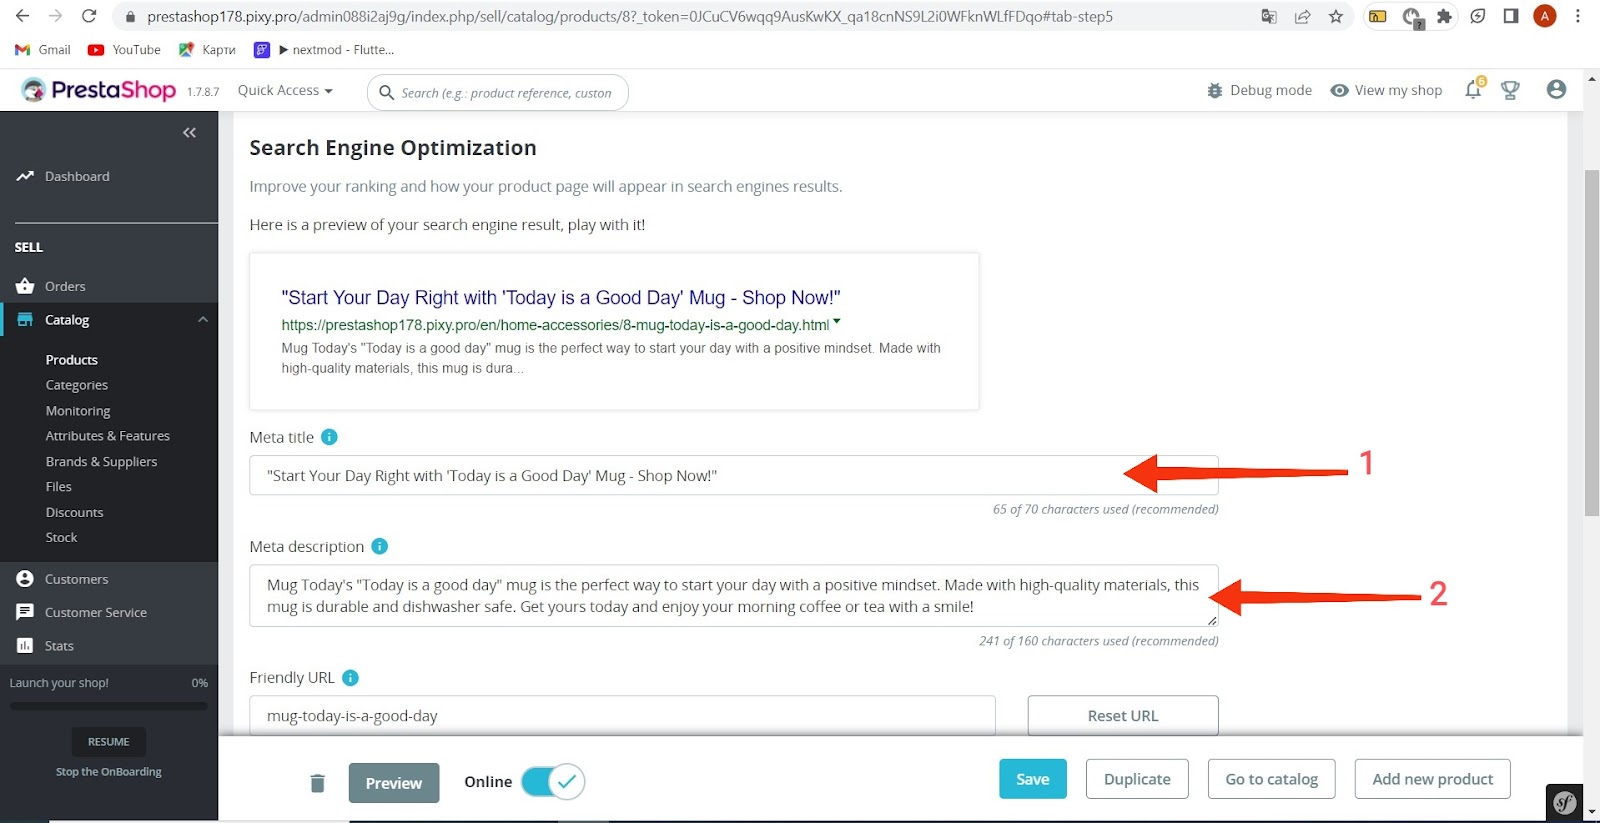
The generated content will be displayed in the corresponding field - Meta title (1) or Meta description (2). It depends on the item selected in the drop-down list.
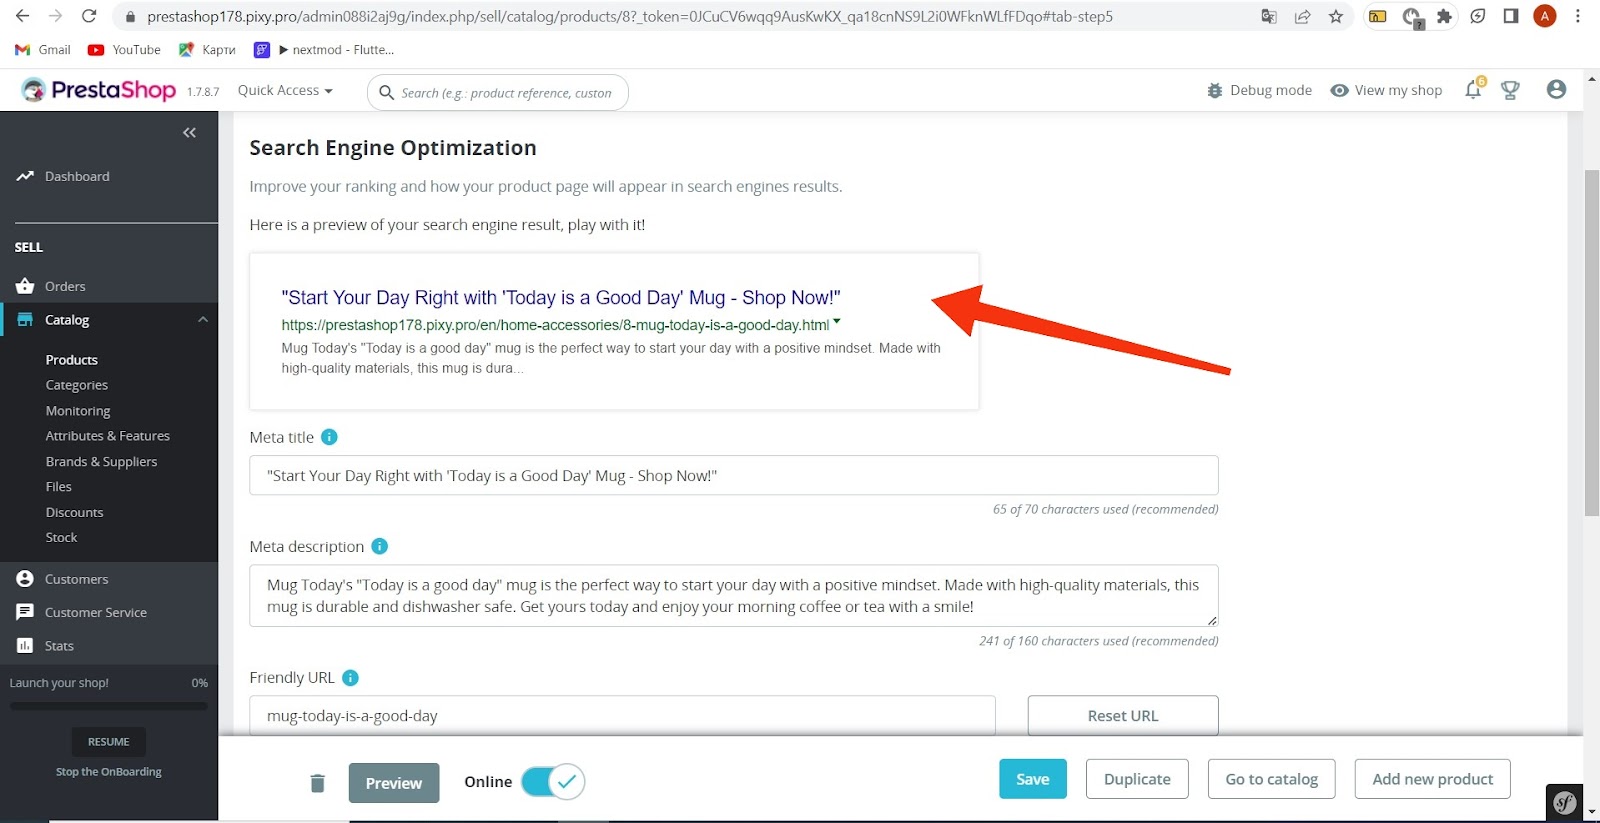
You can also see how the result of generating meta tags will be displayed in the search results.
Connecting the OpenAI API
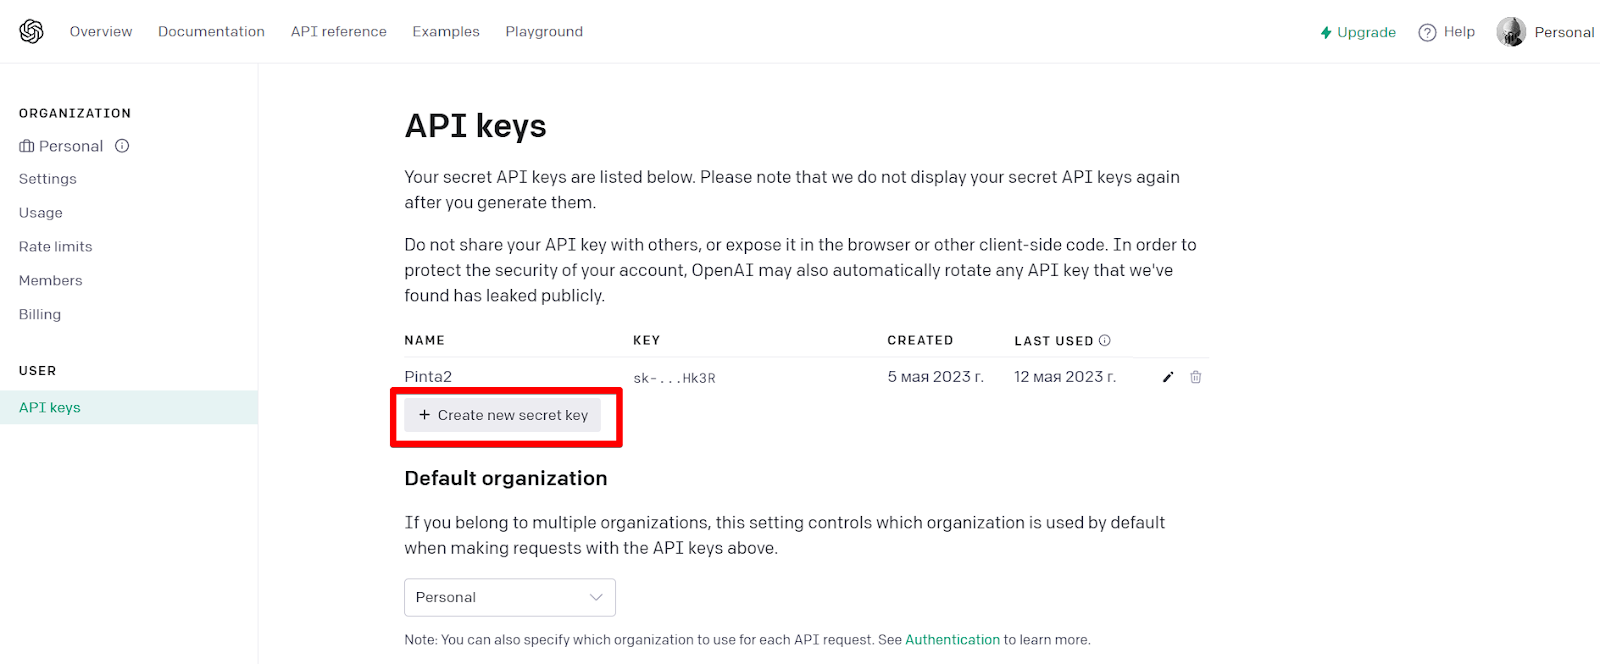
Sign up for a Chat GPT if you don't already have one, and create a new API key on https://platform.openai.com/account/api-keys.
For the plugin to work correctly, copy the secret key and add it to the plugin page (the OpenAI API key field).
VIDEO INSTRUCTION