How to Use Contact Form History for CS-Cart
INSTRUCTIONS CONTACT FROM HISTORY FOR CS-CART
Download and install
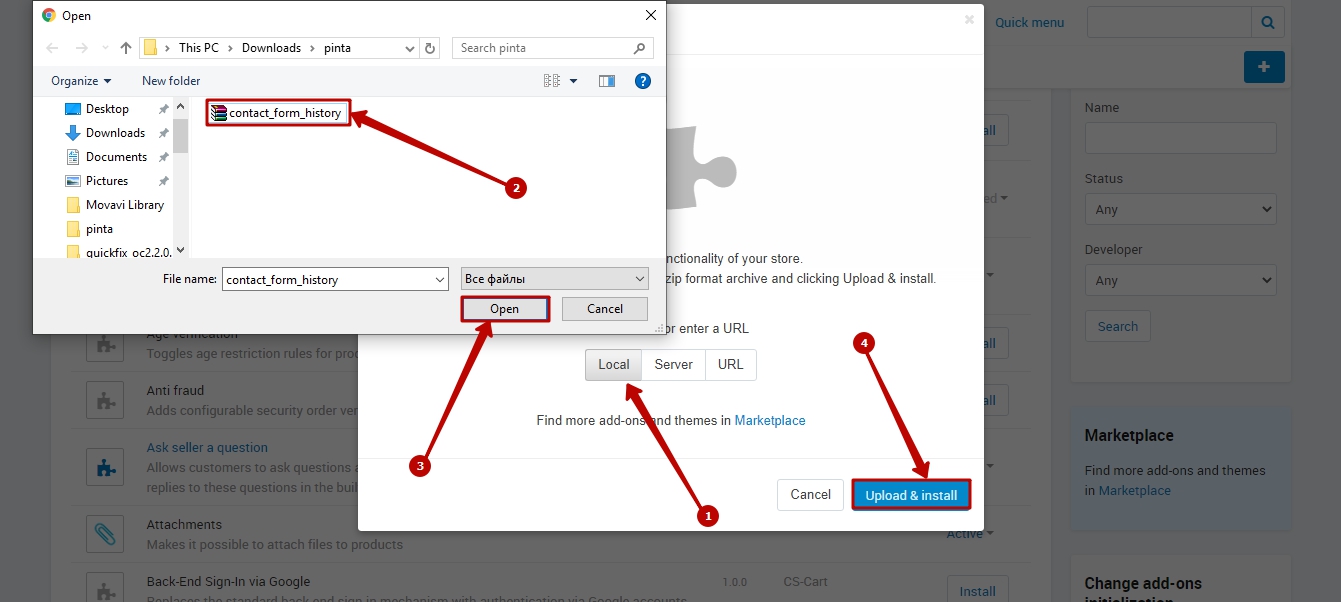
Download the plugin archive from Shop Pinta store and save it on your computer.
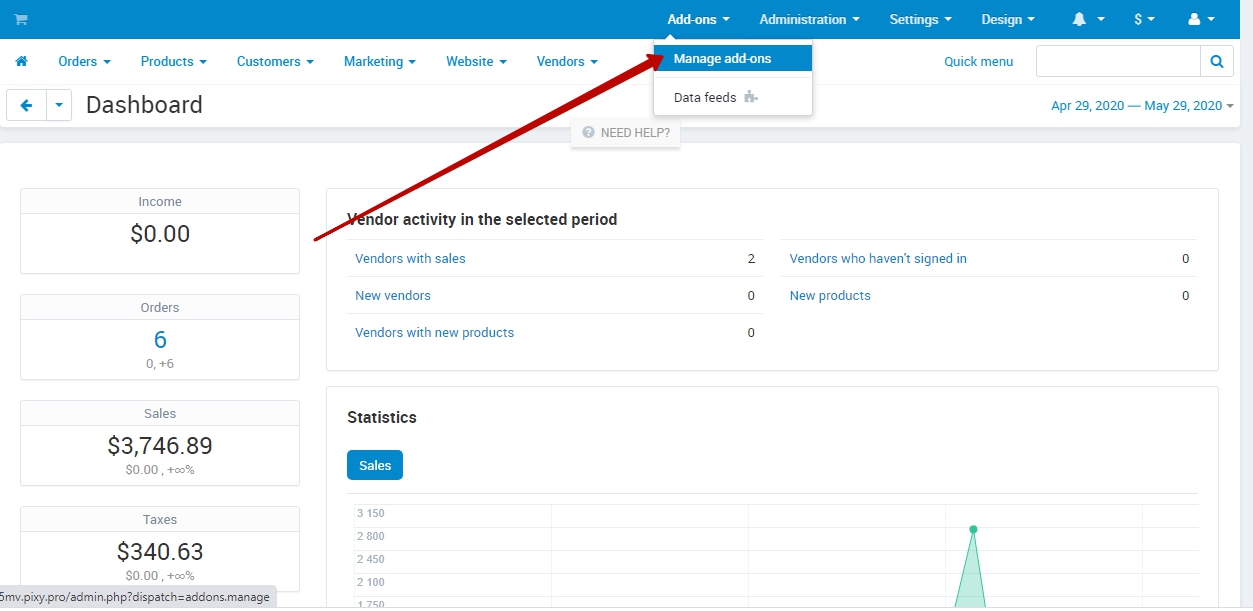
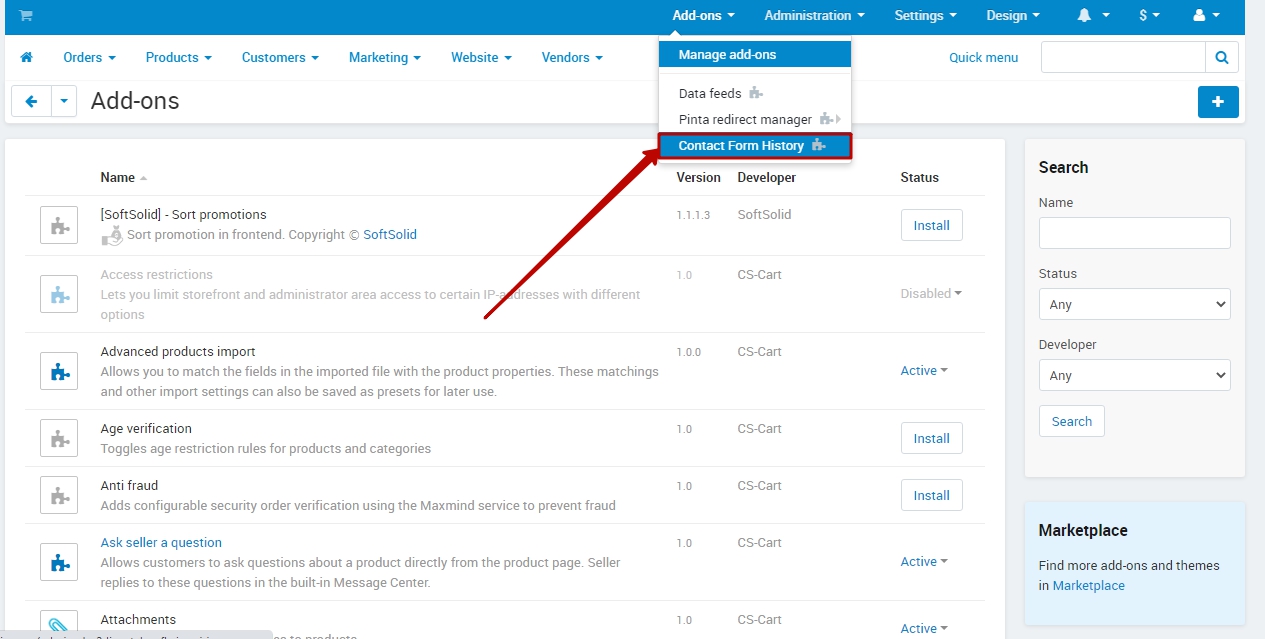
In the admin panel of your site, select Add-ons> Manage add-ons.
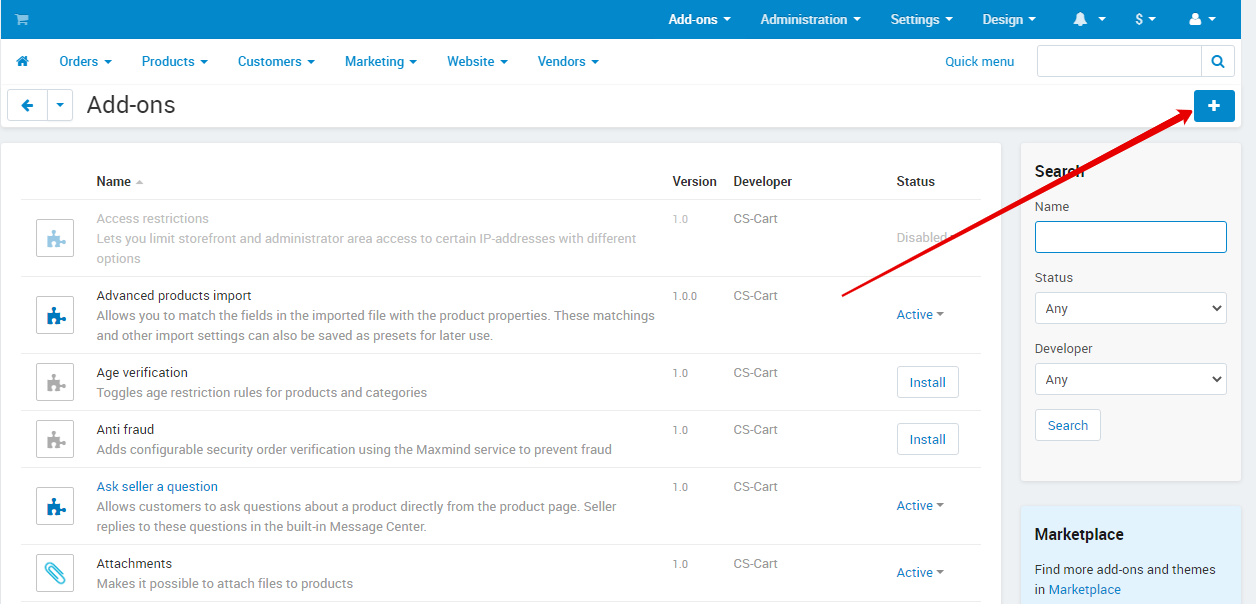
Click the "Upload & install add-on" button.
Download the plugin archive from your computer (1,2) and click the “Upload & install” button (3).
To configure the plugin, select the Add-ons> Contact Form History subsection that appears in the main menu of the admin panel after installation.
Plugin page
Plugin page consists of Inquiries from 'Contact Us' block (1) and table (2).
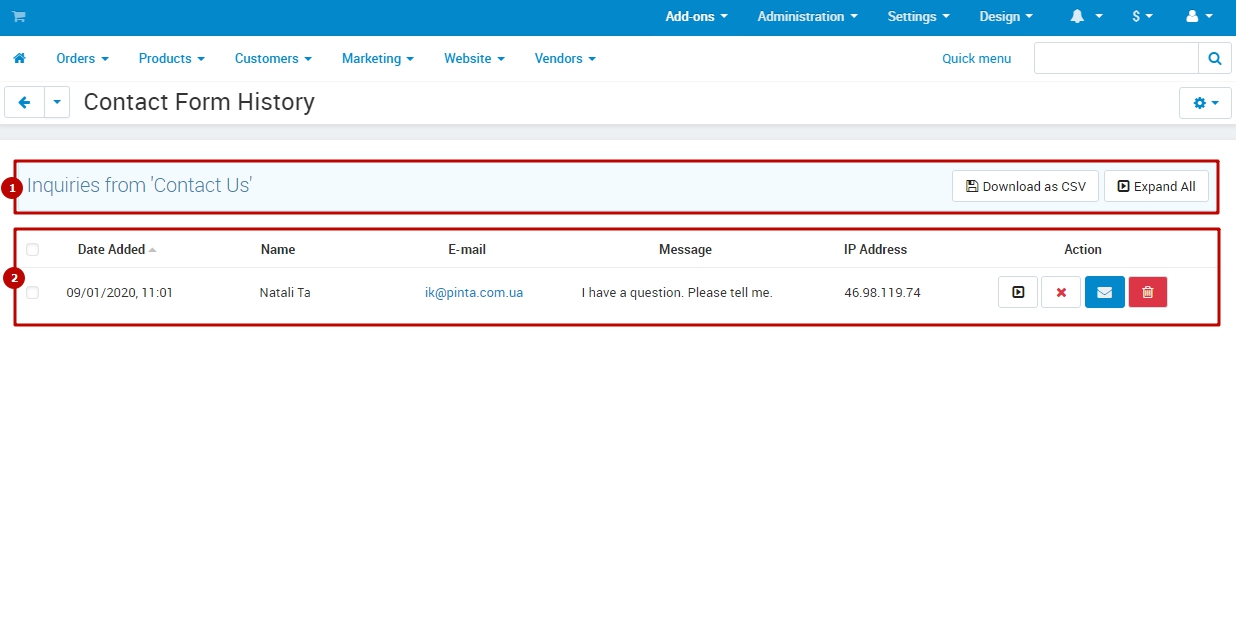
The Inquiries from 'Contact Us' block contains:
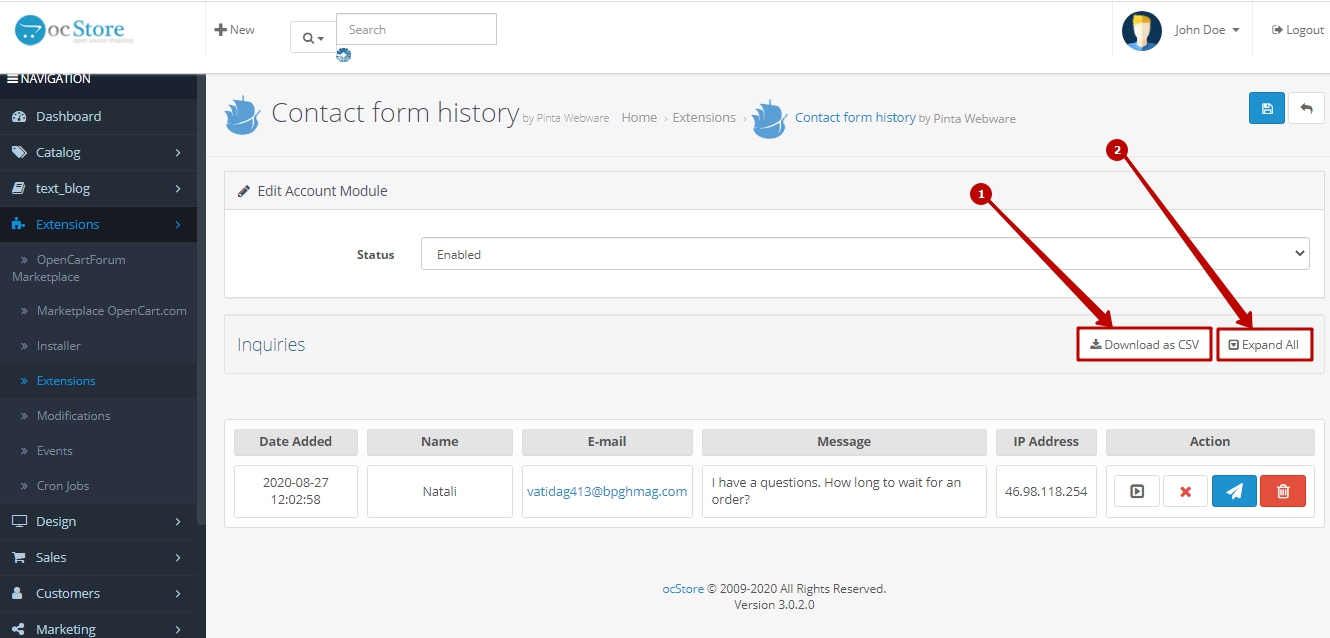
Download as CSV button (1) for downloading all messages from the table into one file.
Expand All button (2) to display the complete content of all messages.
The table consists of:
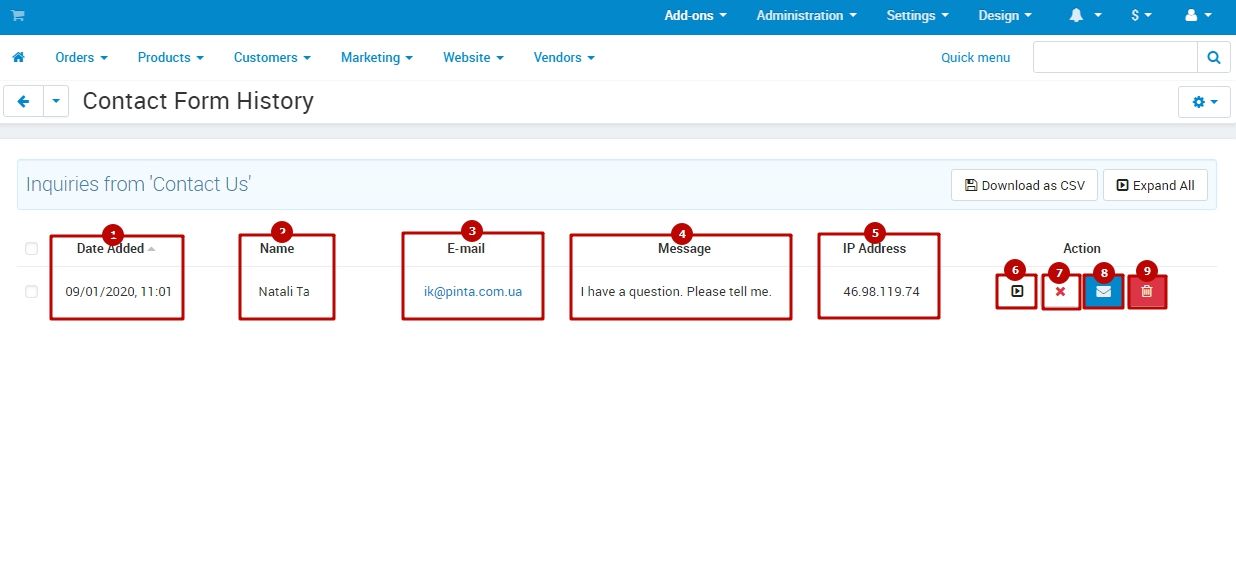
Column Date Added (1) where the date the message was sent is displayed.
Name column (2) where the client's name is displayed.
Column E-mail (3) where the client's email address is displayed.
Column Message (4) where the client's message sent through the “Contact Us” form is displayed.
Column IP Address (5) where the client's IP address is displayed.
The Action column, which has an Expand (6) button to display the entire message; Answered button (7) to mark whether the answer was sent to the client or not; the Reply button (8) to write a response to the client; the Delete button (9) to delete the message.
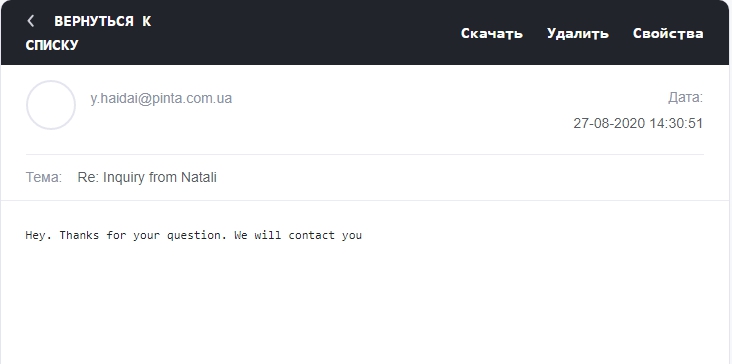
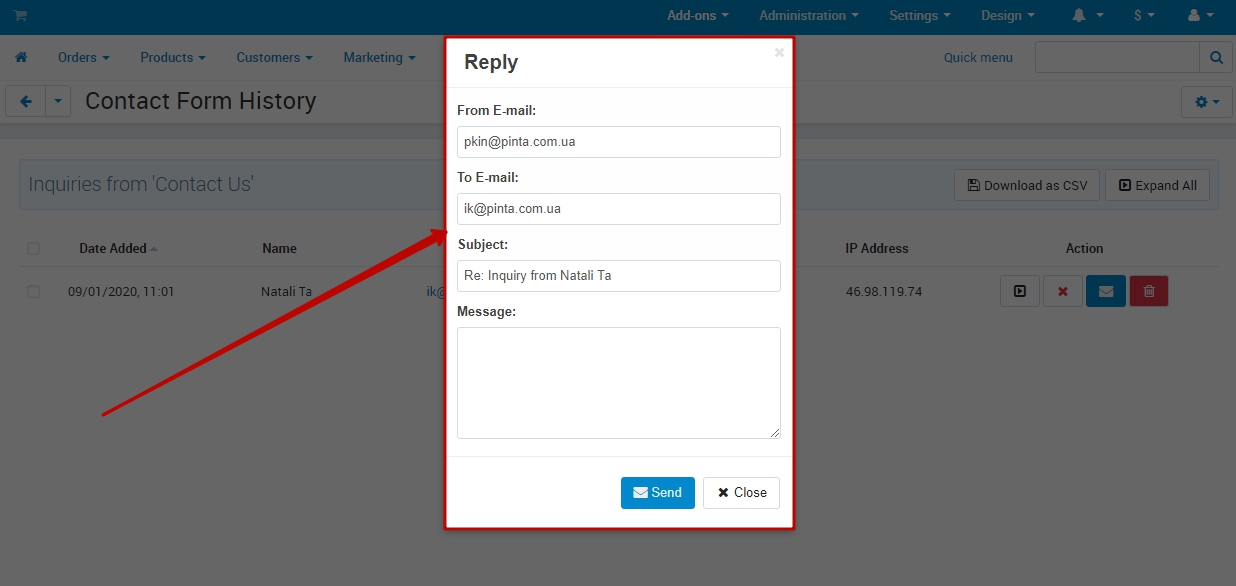
After pressing the Reply button (8), a pop-up window for entering / sending a reply is displayed.
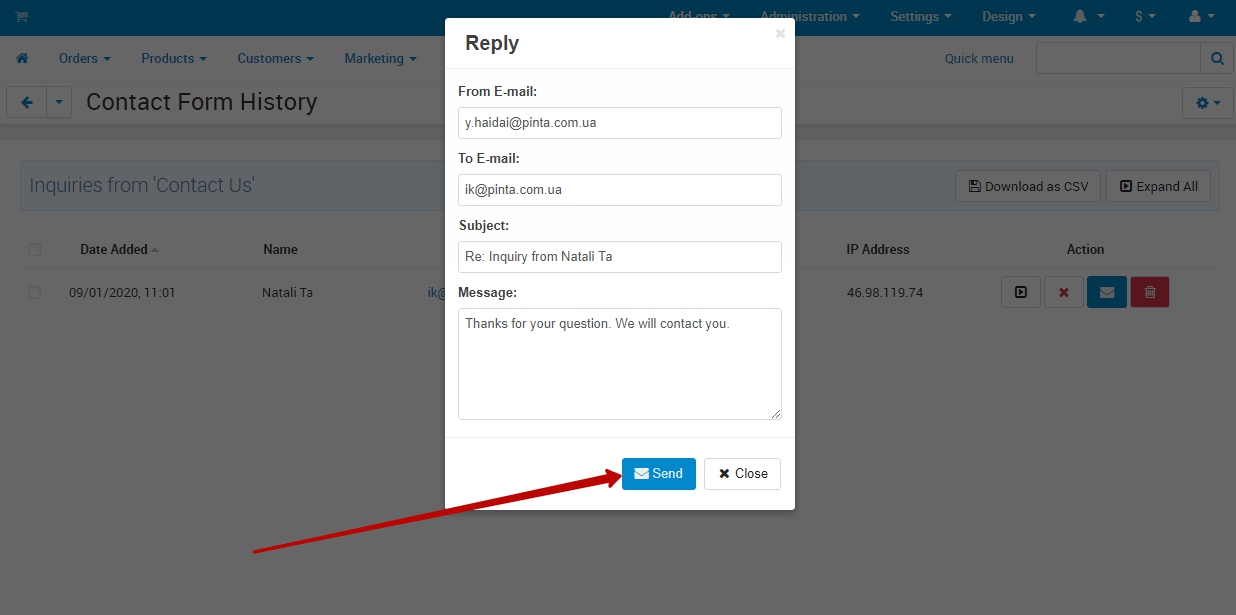
After filling in all the fields, click the Send button to send the form.
After installing / configuring the plugin, you can receive all messages sent by your customers through the Contact Us form. And you can easily send them answers: