How to Use Contact Form History for OpenCart
INSTRUCTIONS CONTACT FORM HISTORY FOR OPENCART 3.0
Download and install
Download the plugin archive from the Shop Pinta store and save it on your computer.
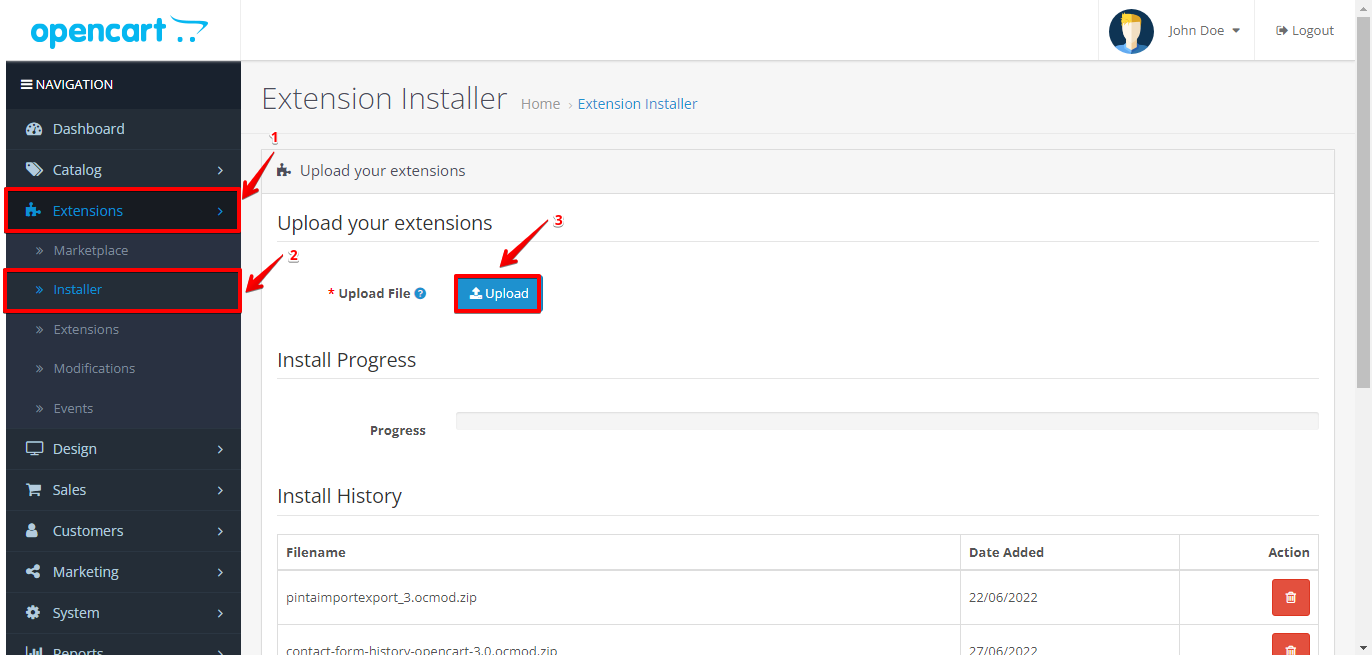
In the admin panel of your website, select Extensions (1) > Installer (2).
In the Upload your extensions block, click the Upload button (3).
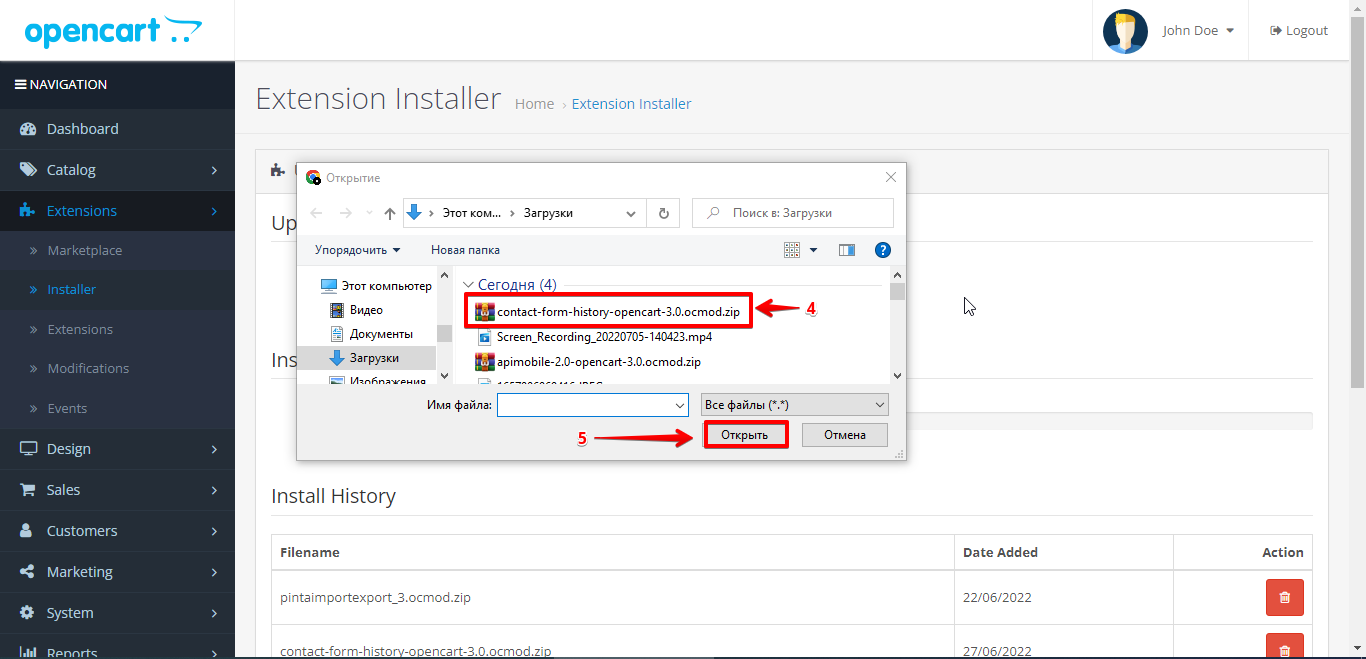
In the opened window, select the plugin archive (4) and click the Open button (5).
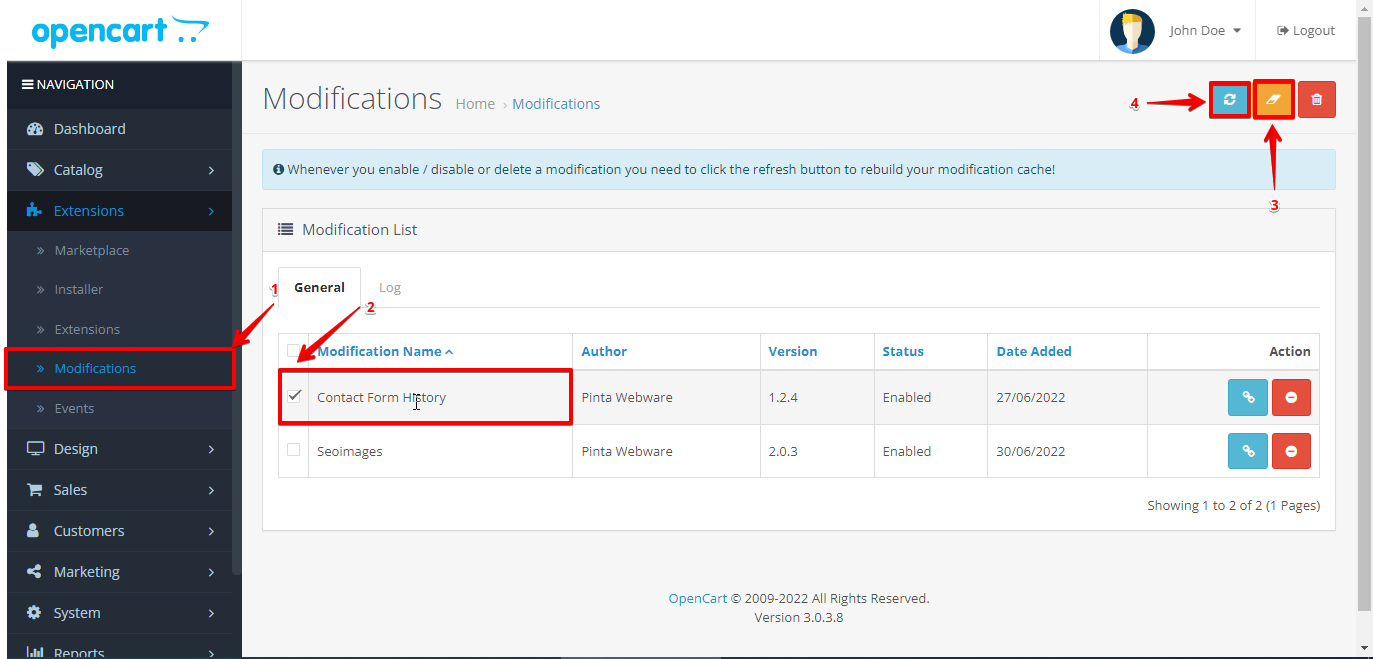
Clear the cache (recommended). Go to the Modifications subcategory (1), check the Contact Form History checkbox (2), click the Clear (3) and Refresh (4) buttons.
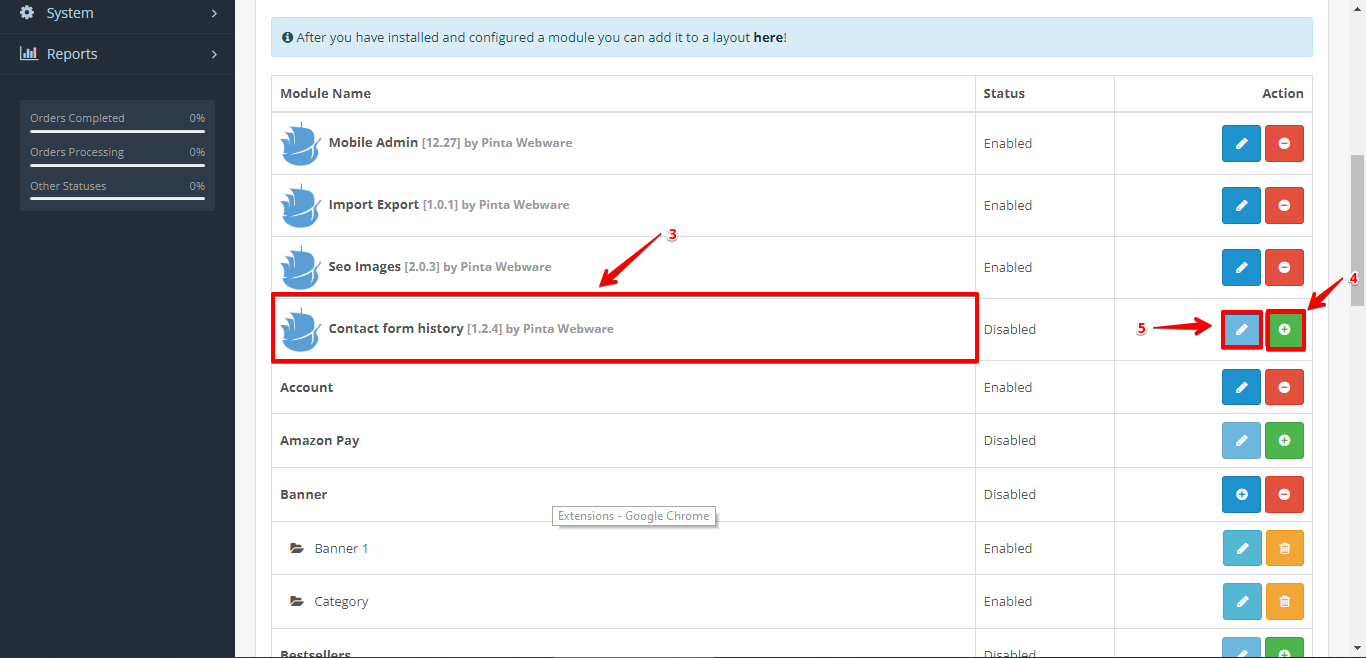
Go to the Extensions subcategory (1) > the list of Modules (2).
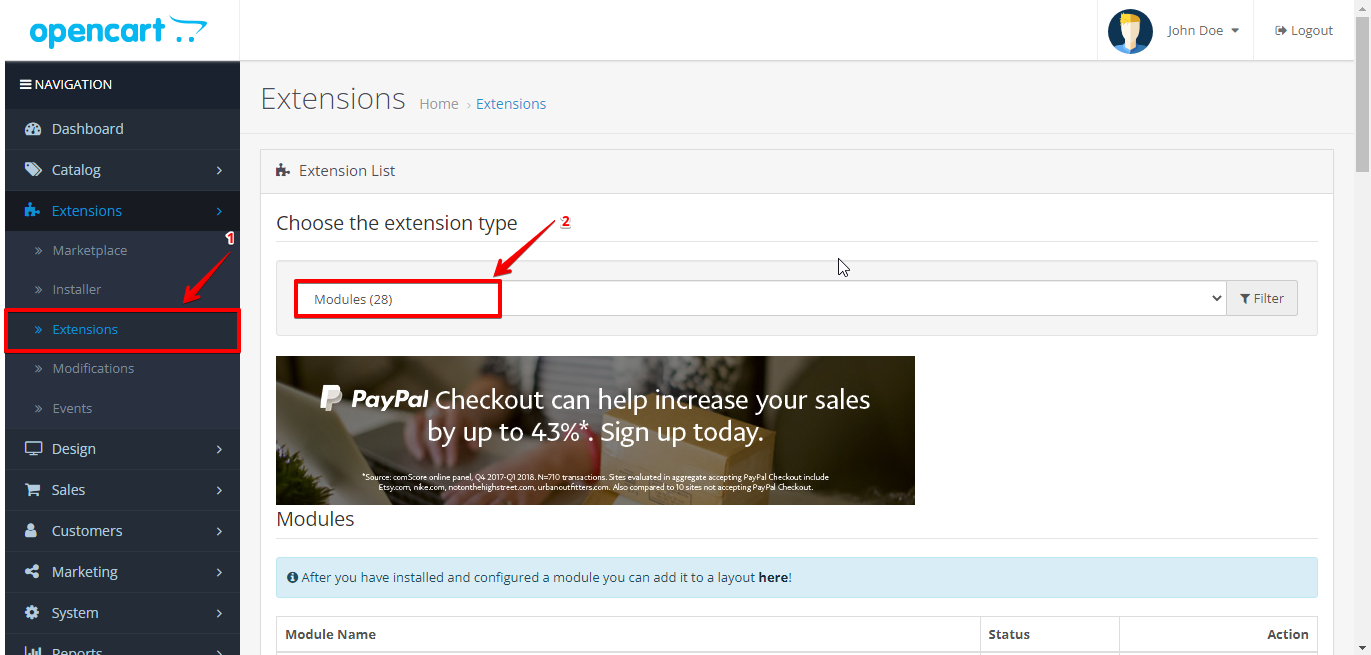
Find the Contact Form History plugin (3) and click the Install button (4).
To configure the plugin, click the Edit button (5).
Plugin page
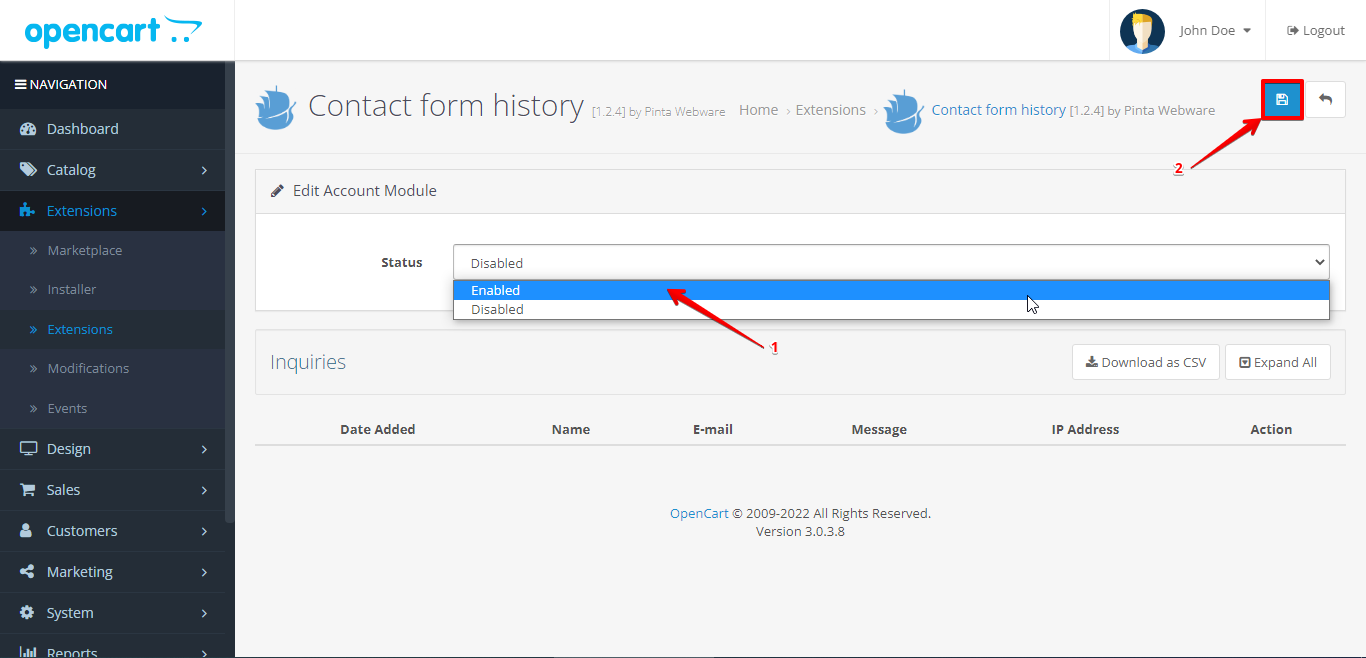
To enable the plugin, select the Enabled position in the Status field (1).
Next, to save the settings, click the Save button (2).
The plugin page consists of the Inquiries block (1) and a table (2).
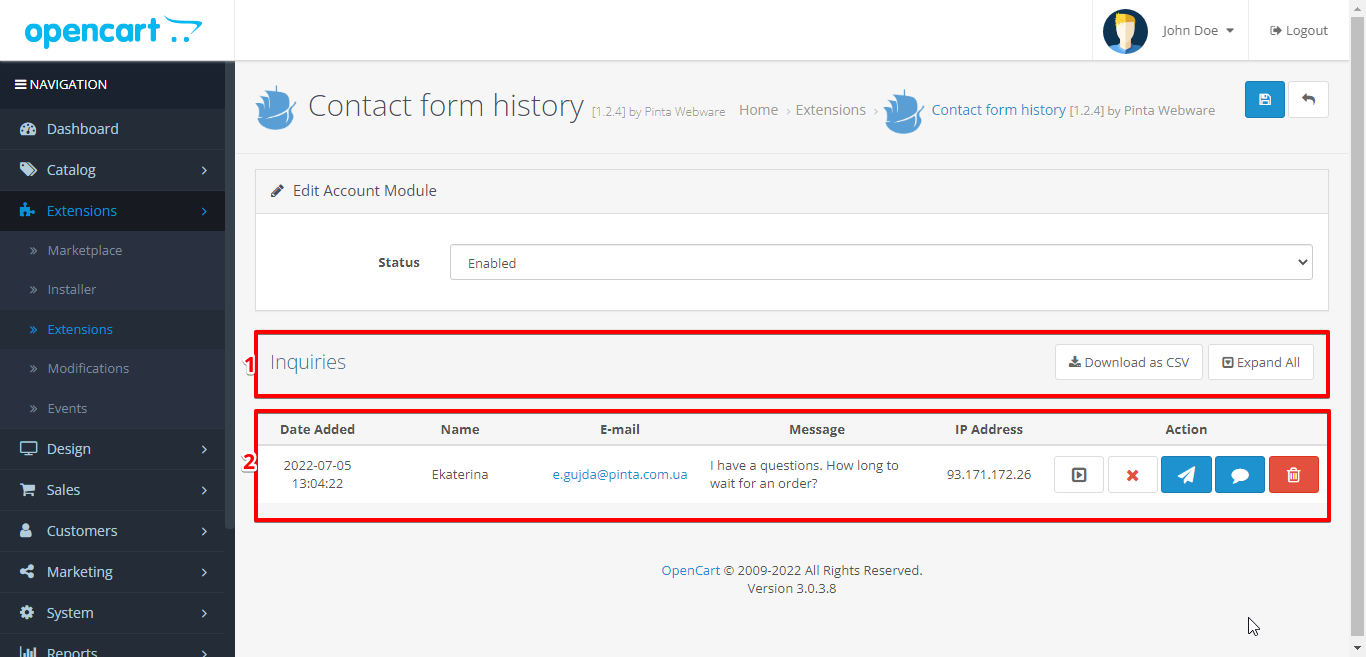
The Inquiries block contains:
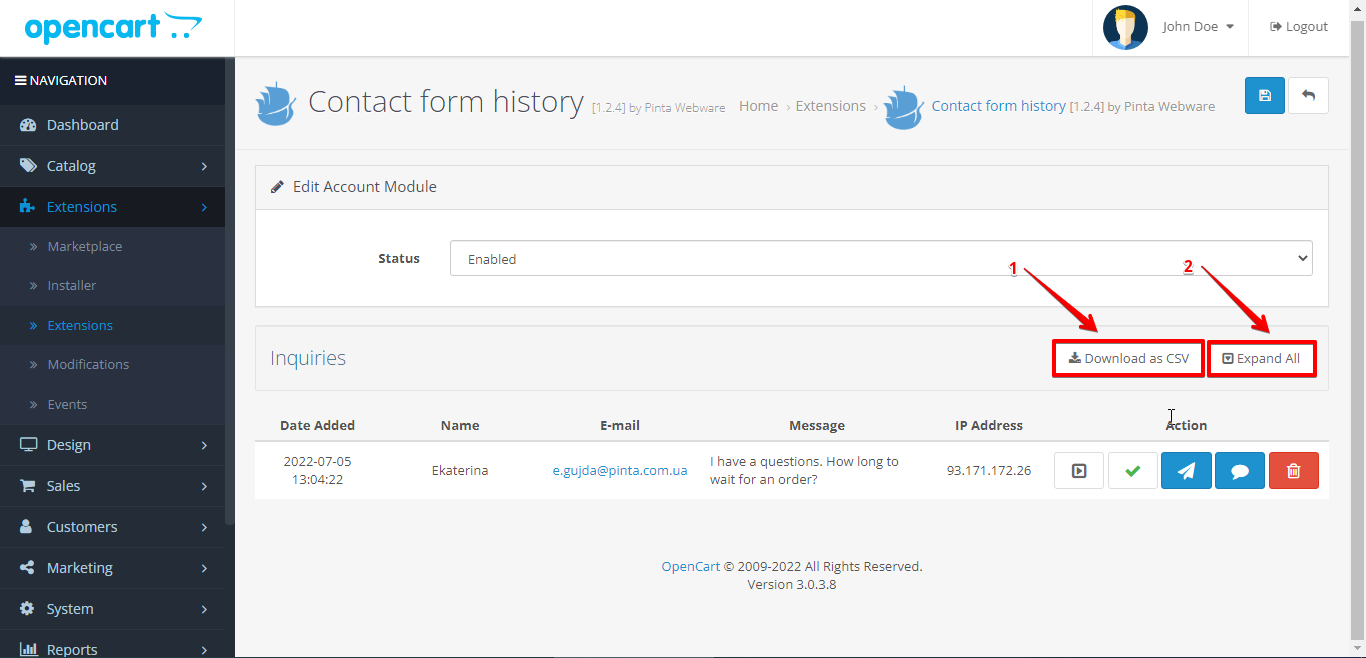
The Download as CSV button (1) - to download all messages from the table into one file.
The Expand All button (2) - to display all messages in full.
The table contains the information about all messages sent by customers through the Contact Us form.
This table consists of columns:
Date Added (1) - displays the date the message was sent.
Name (2) - displays the name of the client.
E-mail (3) - displays the e-mail address of the client.
Message (4) - displays the message text sent by the client.
IP Address (5) - displays the IP address of the client.
Action, which contains:
The Expand button (6) - to display the message in full.
The Answered button (7) - to mark if you sent the response to the client.
The Reply button (8) - to send the response to the client message.
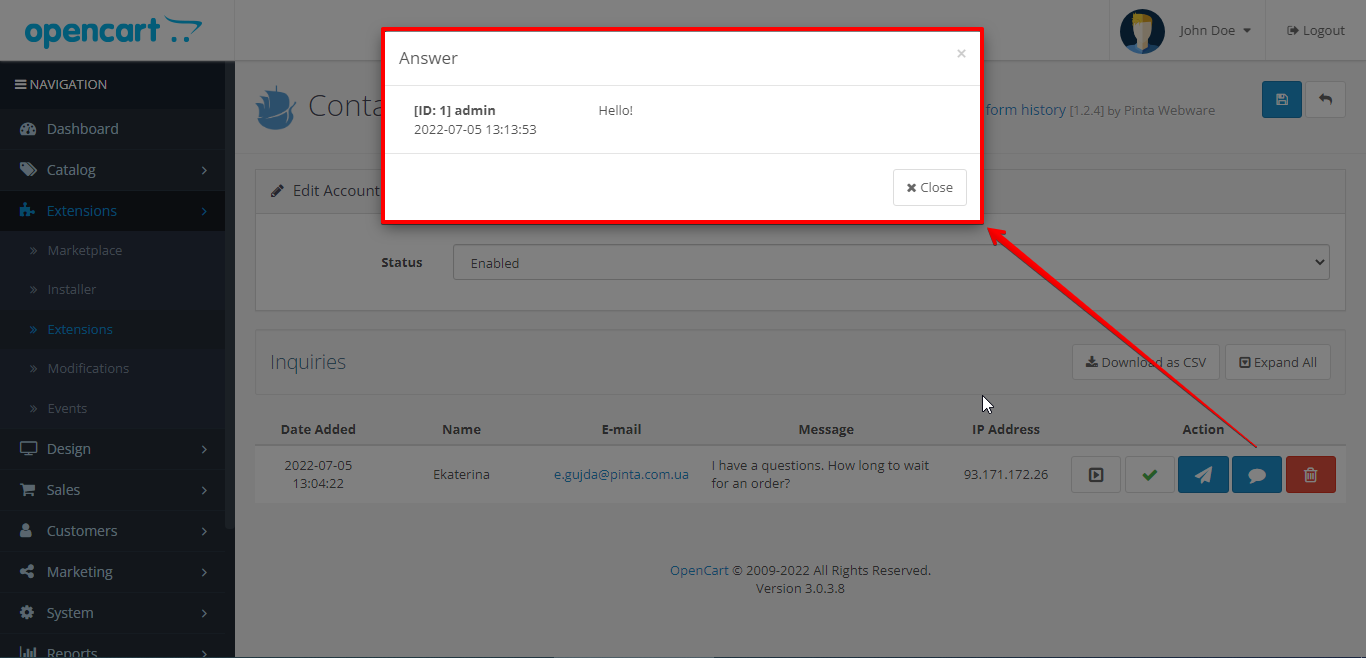
The Answer button (9) - to display the response sent to the client.
The Delete button (10) - to delete the message data from the table.

To open the form for sending a message to the client, click the Reply button (8).
In this form, you can add your e-mail, the message subject, and the message text.
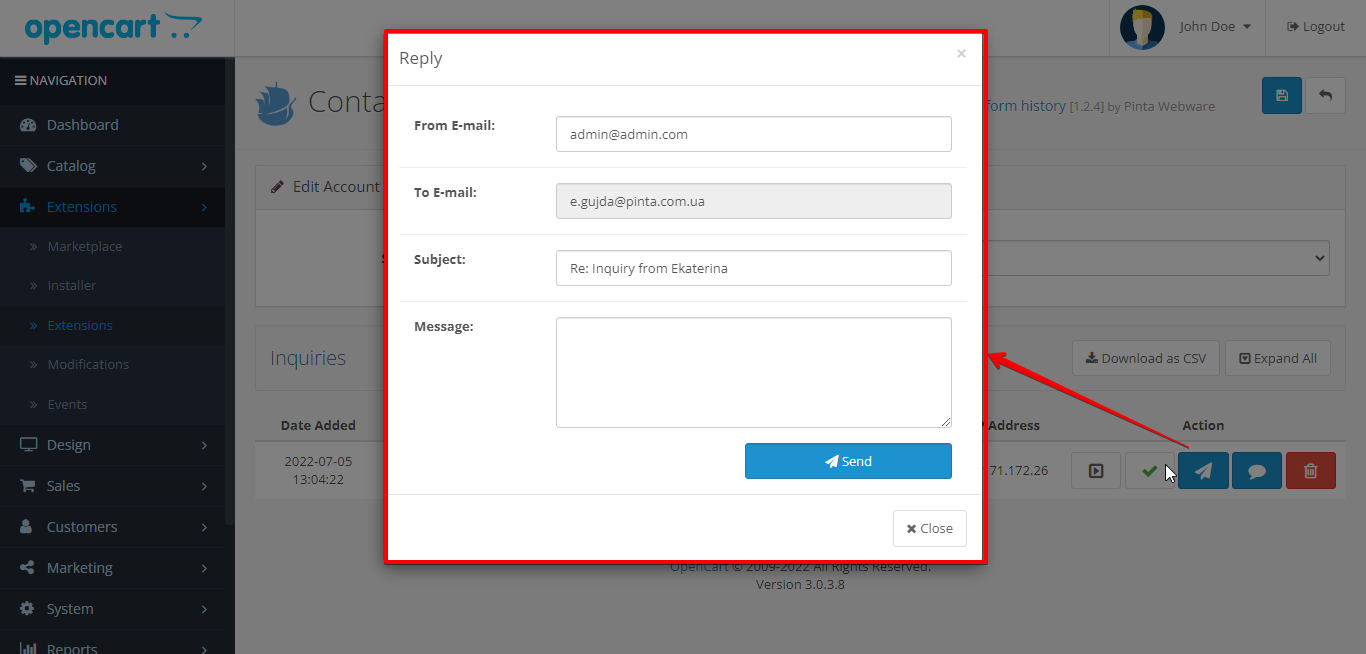
Next, to send the response to the client's message, click the Send button.

Now all messages sent by your customers through the Contact Us form are added to a convenient table. And you can easily answer them directly from the admin panel of your website.
VIDEO INSTRUCTION