How to Use Easy WaterMark PRO for OpenCart
INSTRUCTION ADD WATERMARK FOR OPENCART
Download and install
Download the plugin archive from Shop Pinta store and save it on your computer.
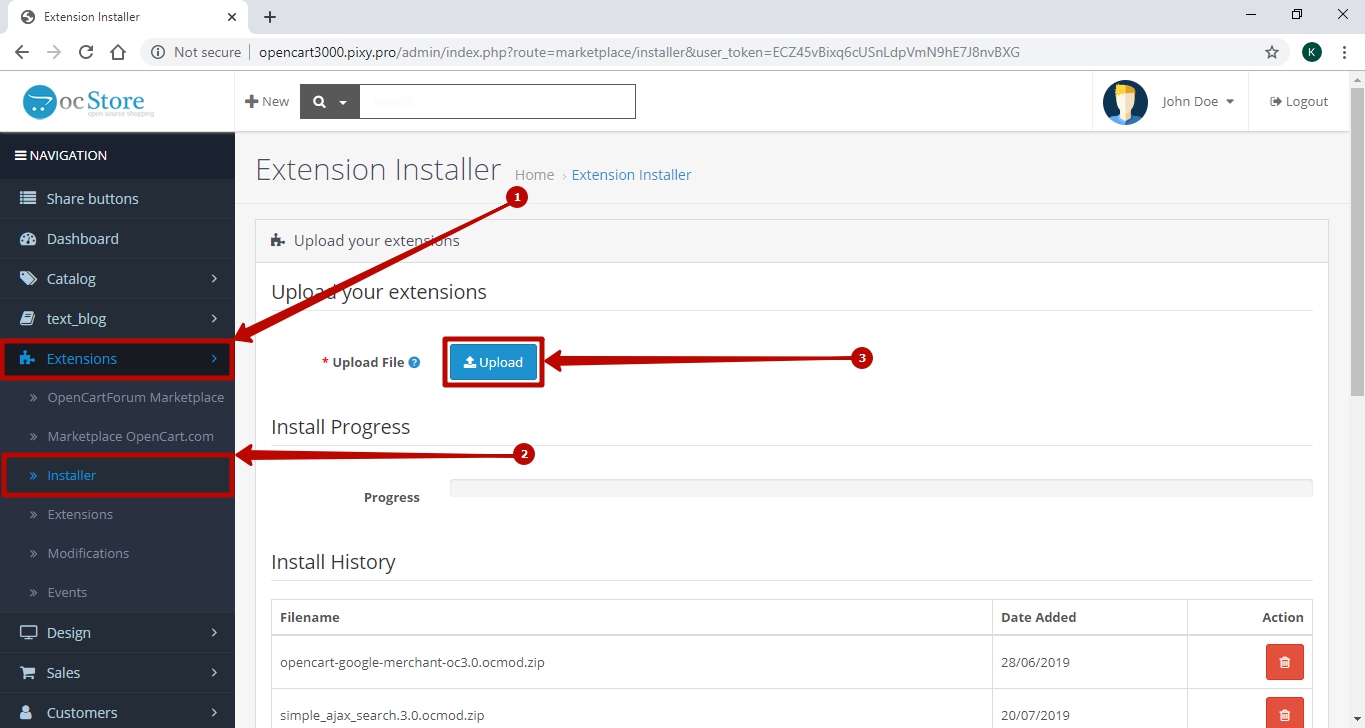
In the admin panel of your site, select Extensions (1) > Installer (2).
In the Upload your extensions block, click the Upload button (3).
Download the plugin archive from Shop Pinta store and save it on your computer.
In the admin panel of your site, select Extensions (1) > Installer (2).
In the Upload your extensions block, click the Upload button (3).
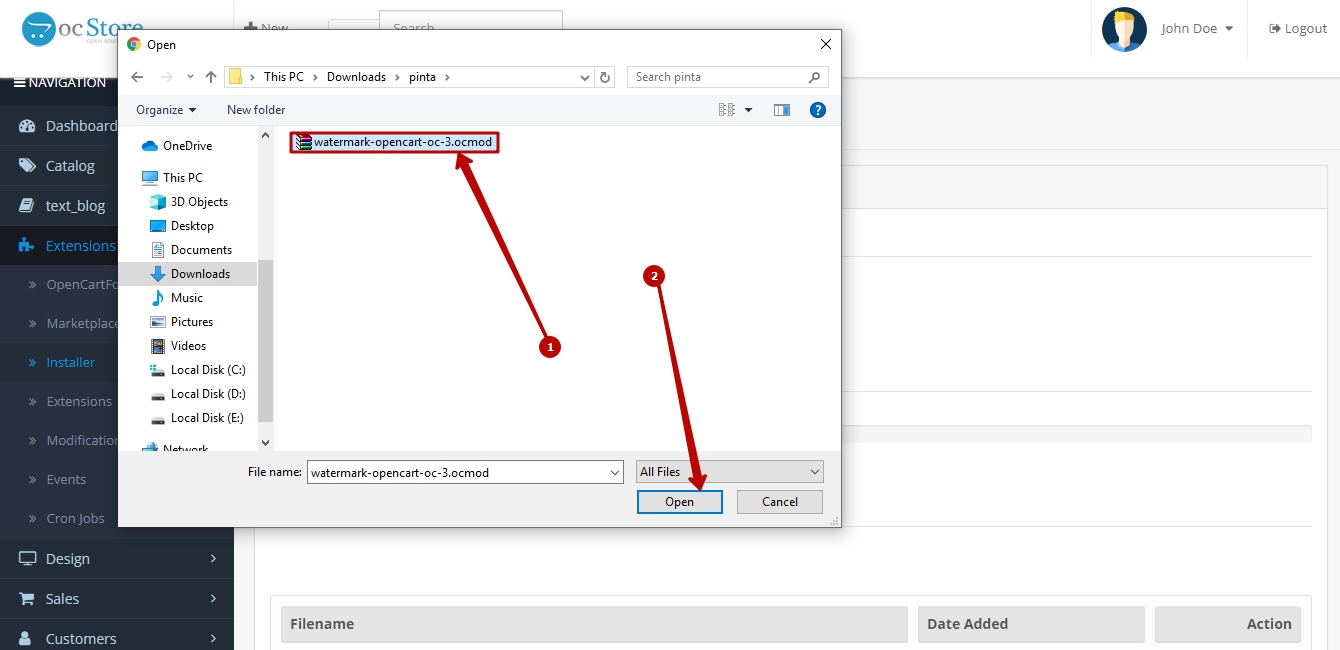
In the opened window, select the plugin archive (1) and click the Open button (2).
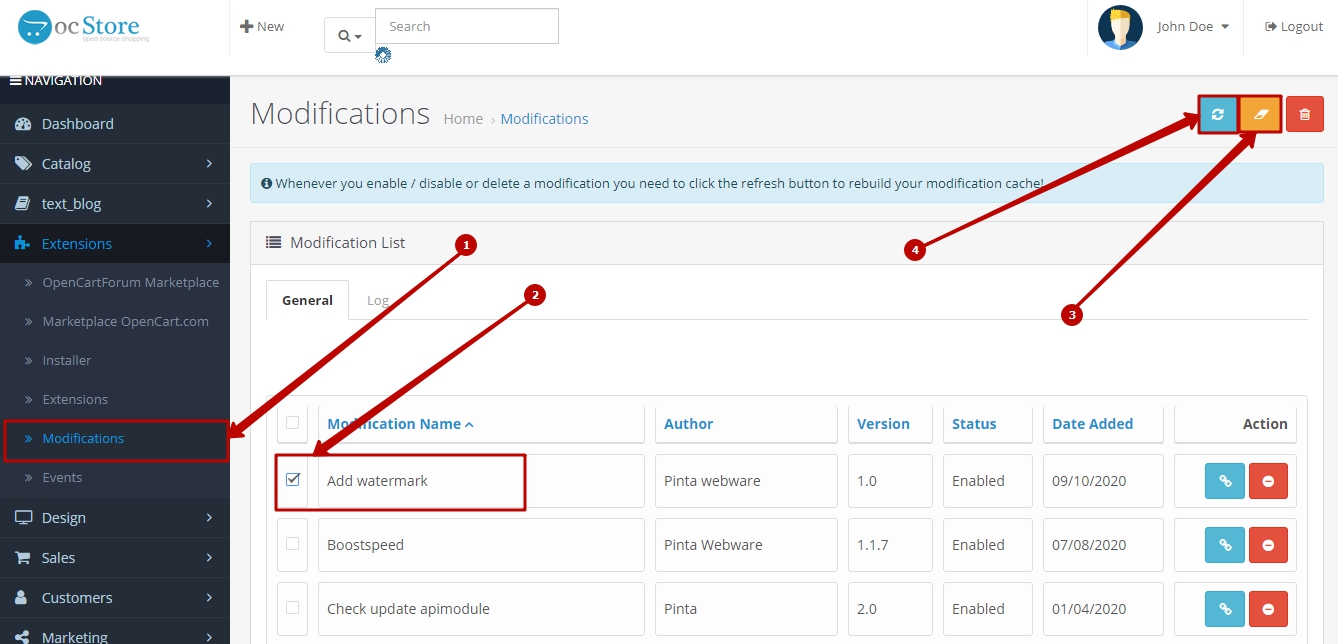
Clear the cache. Go to the Modifications subcategory (1), check the Add Watermark checkbox (2), click the Clear (3) and Refresh (4) buttons.
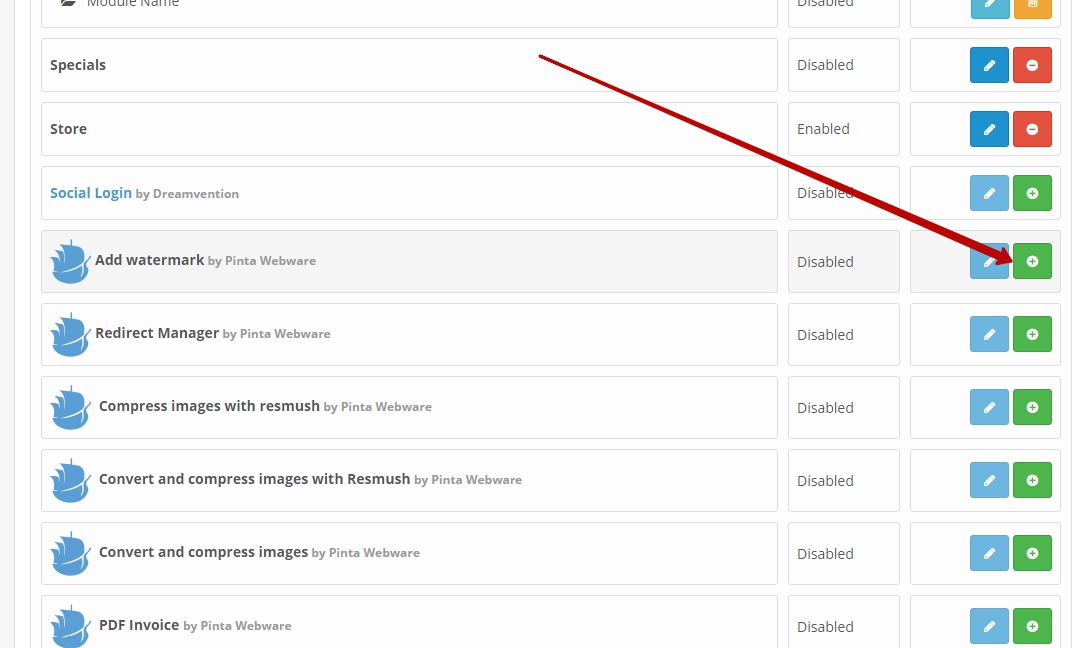
Go to the Extensions subcategory (1) in the list of Modules (2).
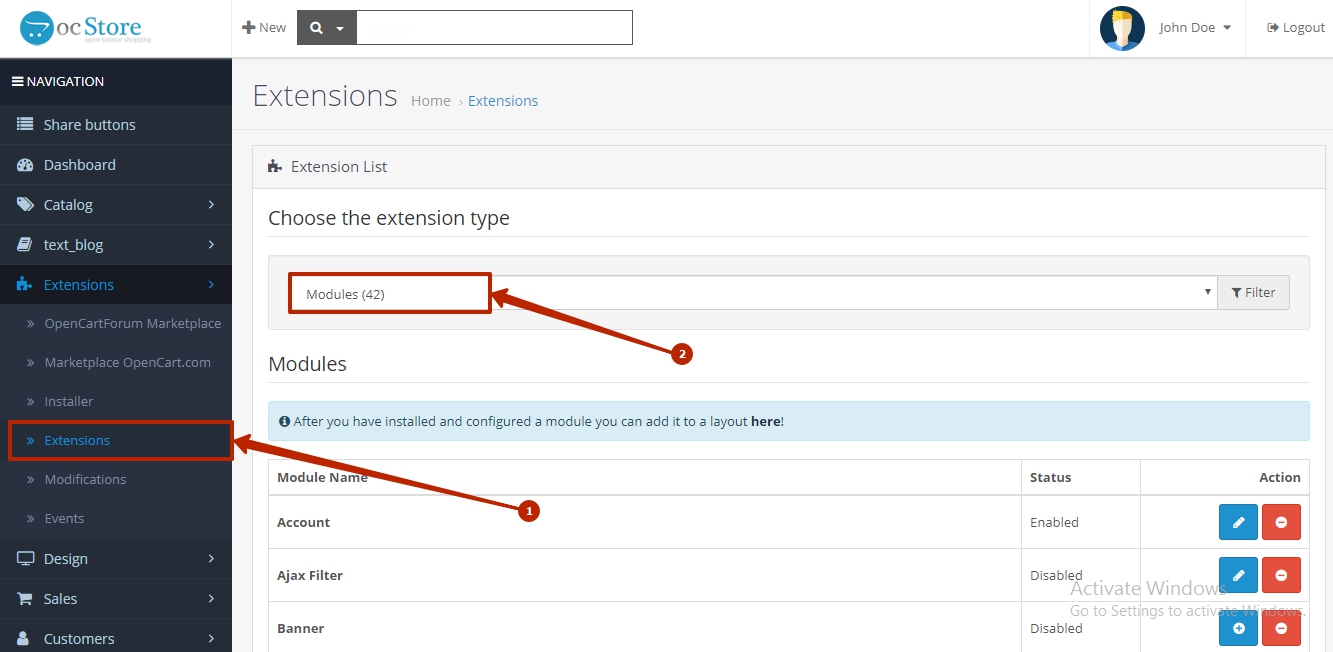
Find the Add Watermark plugin and click the Install button (3).
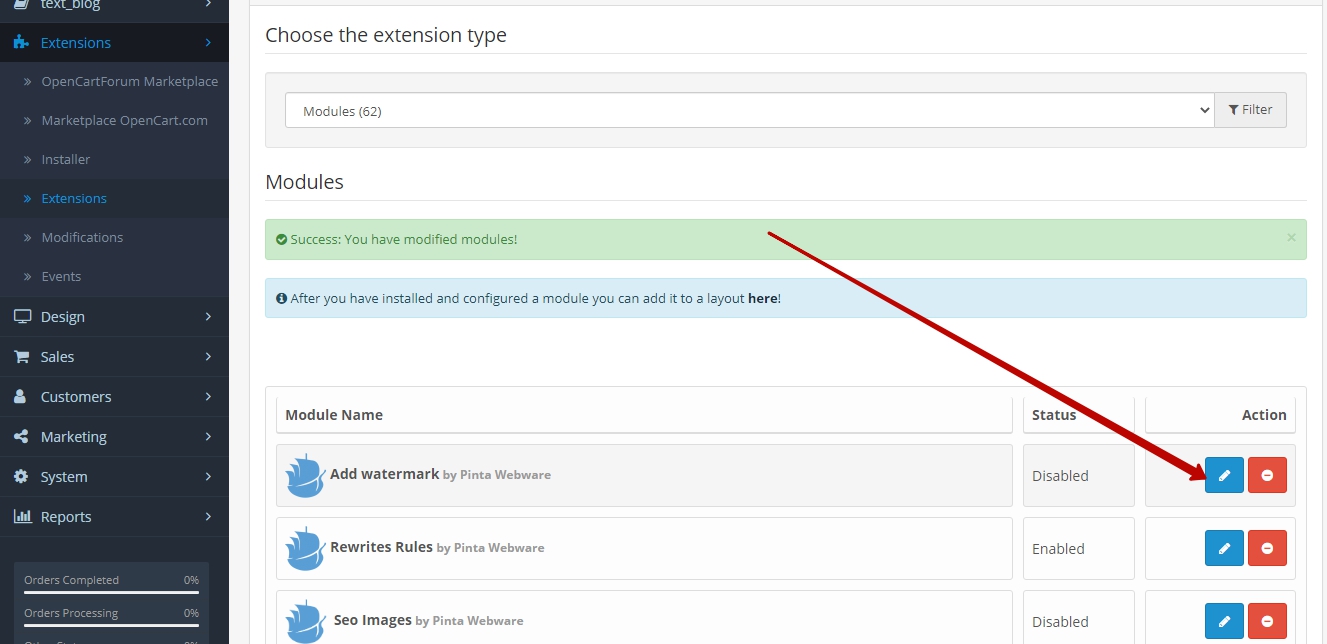
To configure the plugin, click the Edit button.
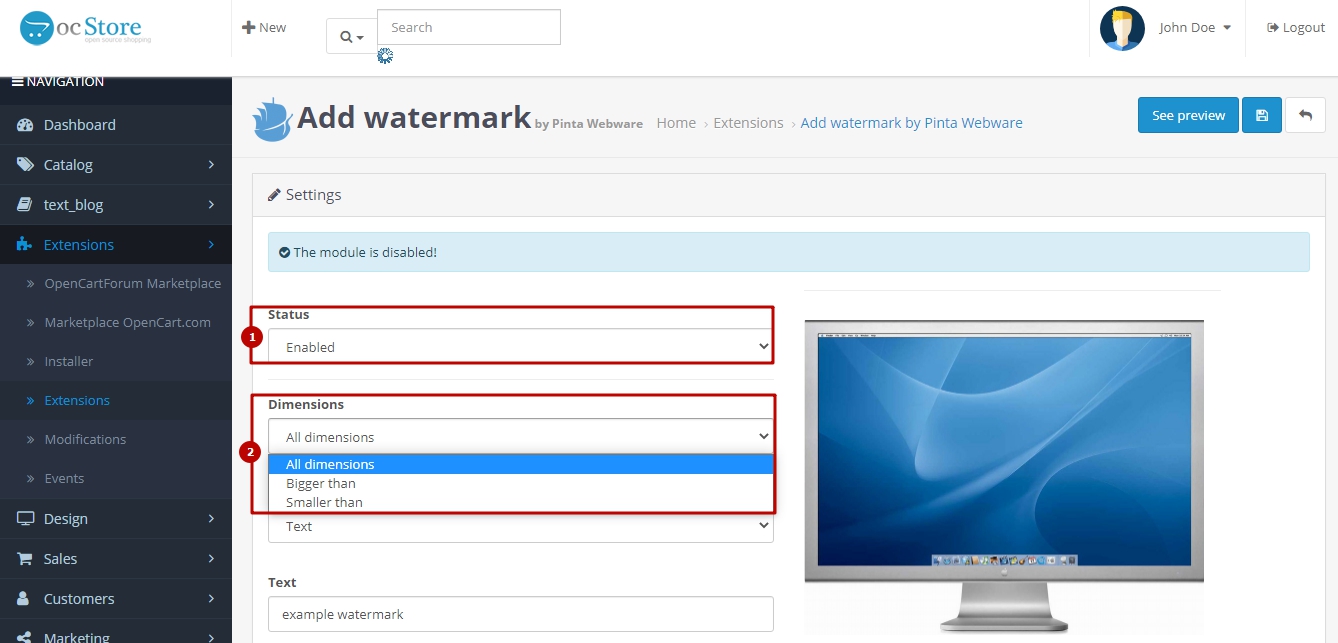
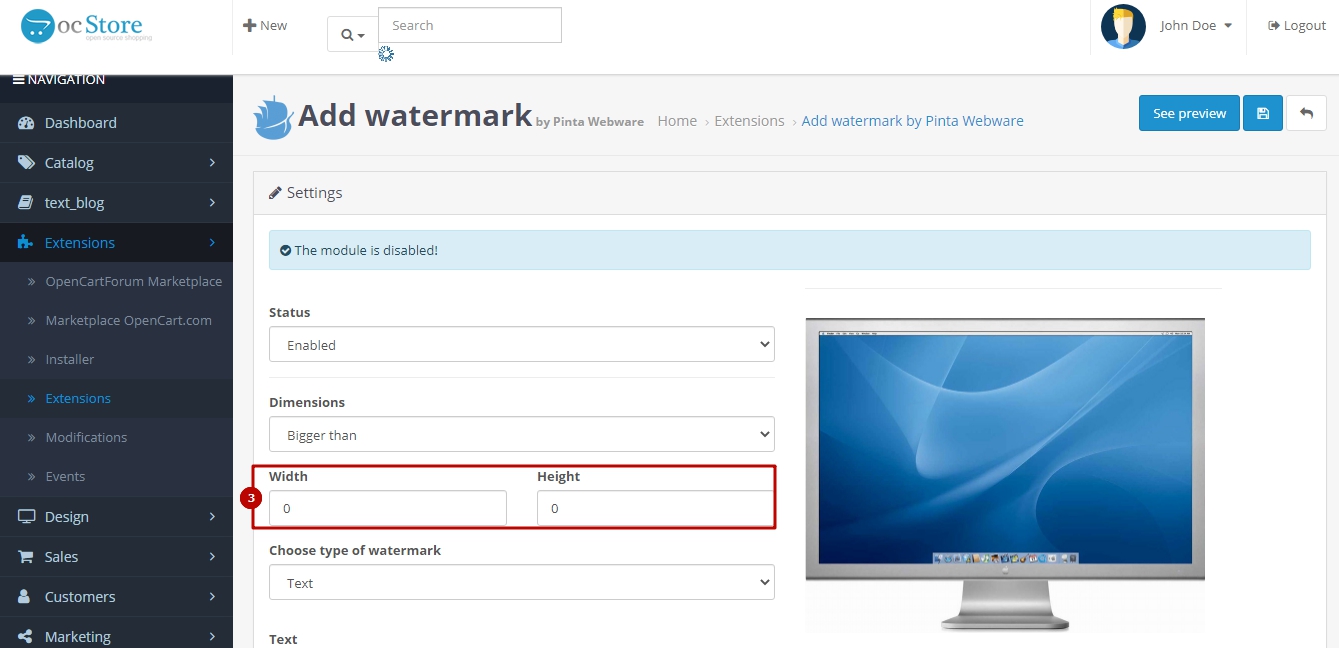
Plugin page
To enable the plugin, select Enabled in the Status field (1).
In the Dimensions field (2), you can select at what image sizes the watermark will be displayed:
All dimensions - images of any size will be displayed with a watermark.
Bigger than - images with a size larger than specified in the Width / Height fields (3) will be displayed with a watermark.
Smaller than - images with a size less than specified in the Width / Height fields (3) will be displayed with a watermark.
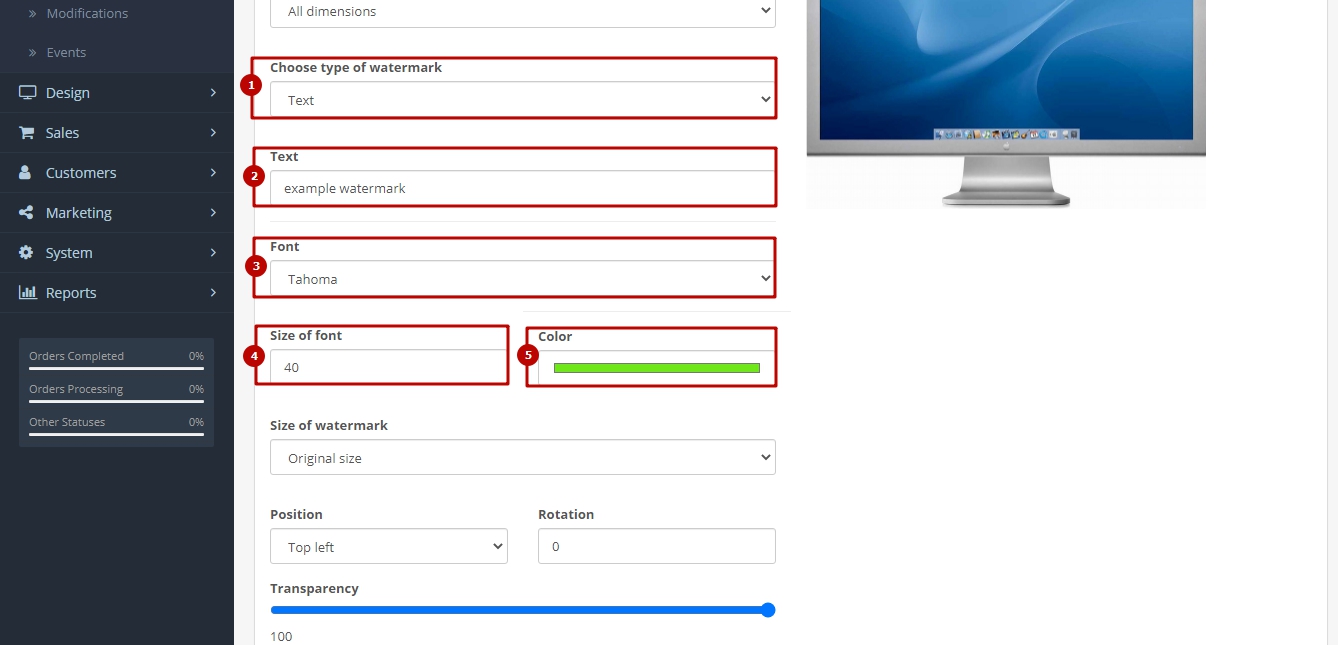
If you want a watermark as text, select Text in the Choose type of watermark field (1). And in the Text field (2) enter the text for the watermark.
You can also customize the text style of the watermark:
In the Font field (3) select the font of the text for the watermark.
In the Size of font field (4) select the font size for the watermark.
In the Color field (5) select the font color for the watermark.
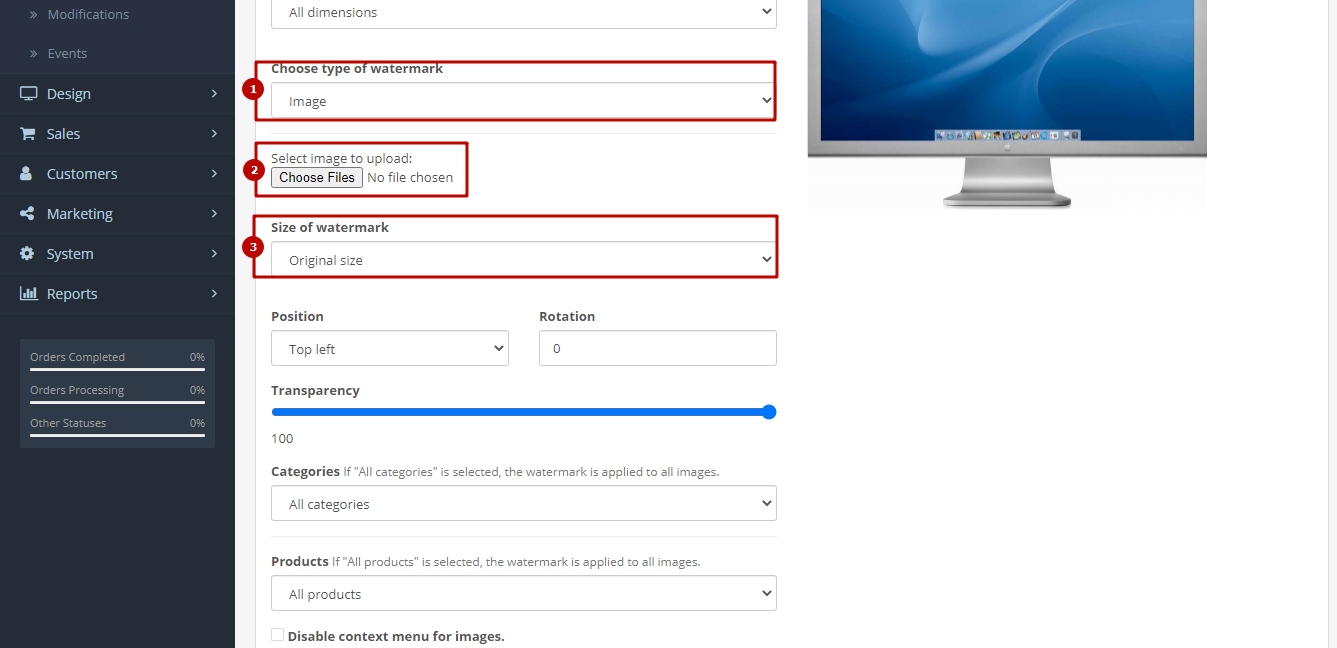
To create a watermark as an image, select Image in the Choose type of watermark field (1) and click the Choose files button (2) to upload an image from your computer.
In the Size of watermark field (3) you can select the size of the watermark:
Original size. After selecting Original size, the original size of the watermark will be displayed.
Change size. After selecting Change size, the Width / Height fields (4) are displayed to enter the required image size for the watermark.
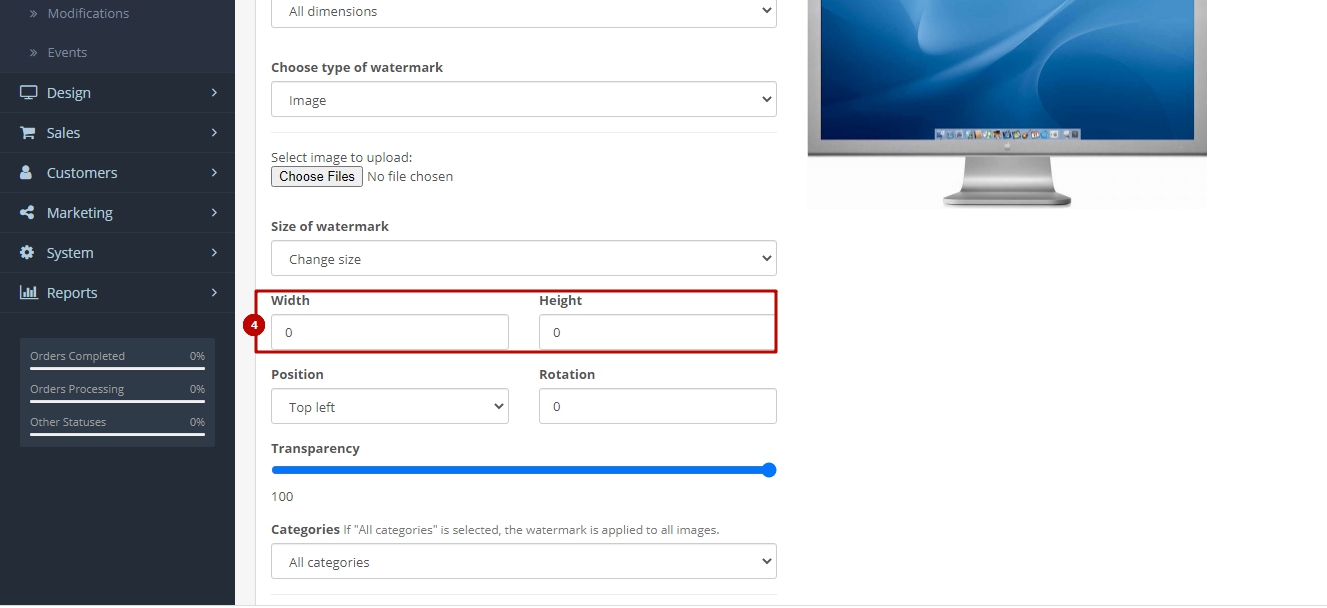
To select the location of the watermark, relative to the product image on which this watermark will be placed, you can select in the Position field (1).
If you want to change the angle of inclination for the watermark, select it in the Rotation field (2).
Also on the Transparency scale (3) you can choose how transparent your watermark will be, where 100 is completely non-transparent.
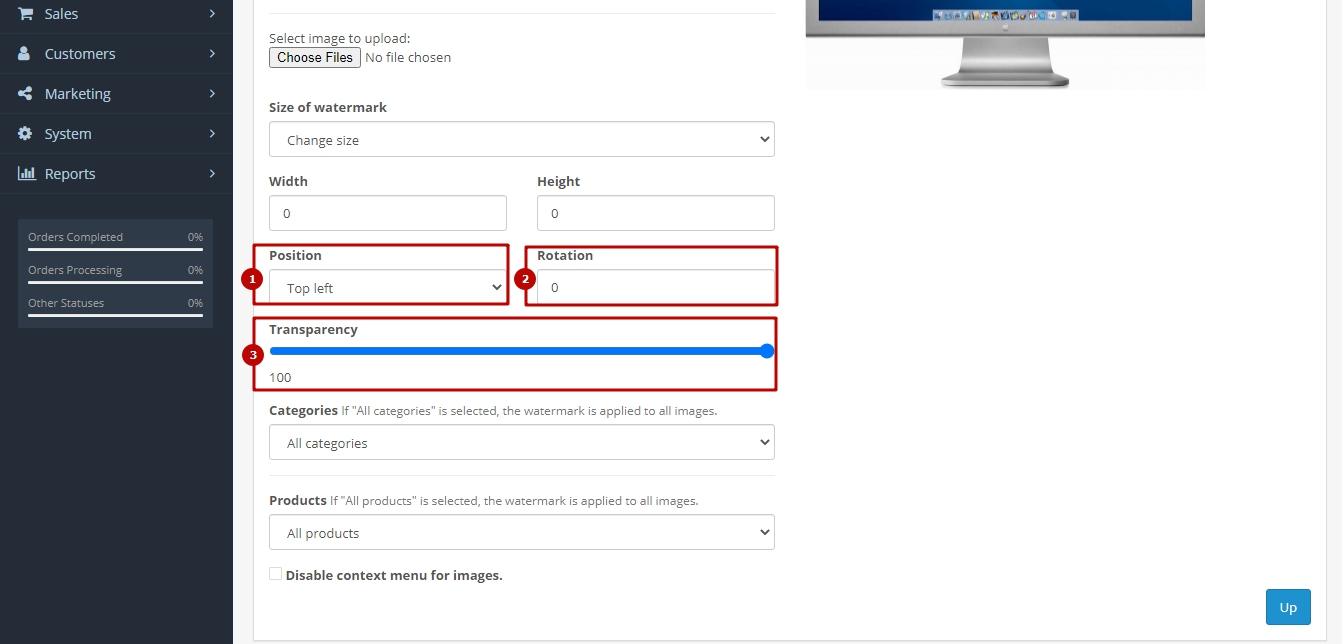
If you want the watermark to be displayed only in specific categories, select the Select categories position in the Categories field (1). Then in the opened Select categories field (2), enter the name of the categories for which the watermark will be displayed.
If you want the watermark to be displayed only for a specific product, select the Select products position in the Products field (3). Then in the opened Select products field (4), enter the name of the product for which the watermark will be displayed.
Select the Disable context menu for images checkbox (5), if you want to disable the context menu for product images. This will help protect your images from copying.
To scroll up the plugin page, press the Up button (6).

To save the plugin settings, click the Save button.

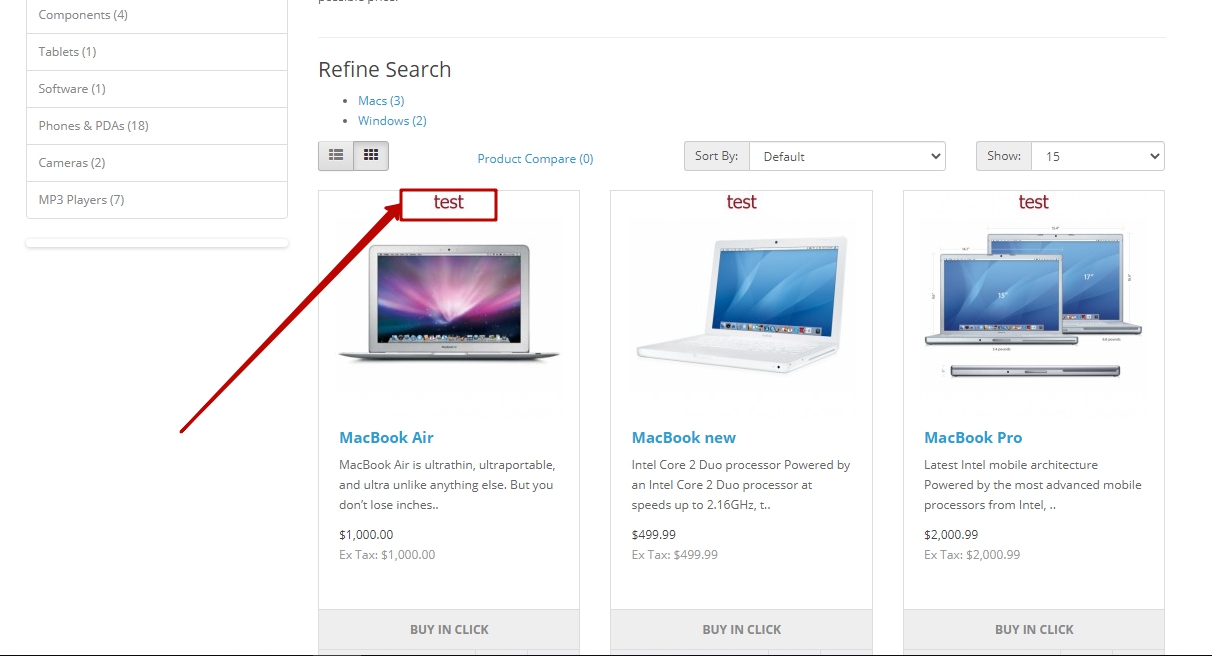
If you want to see the watermark you created (1), click the See preview button (2).
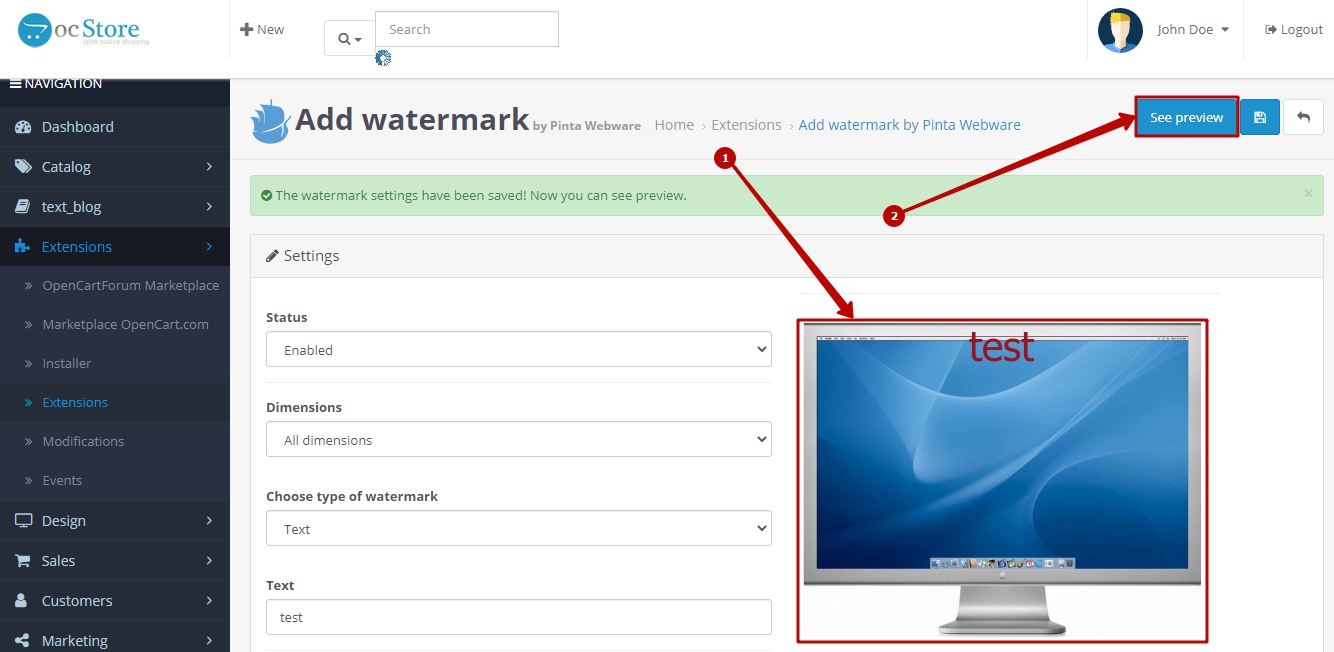
Now your site displays the created watermark on product images.