How to Use Easy WaterMark PRO for PrestaShop
INSTRUCTION EASY WATERMARK PRO FOR PRESTASHOP 1.7
Download and install
Download the plugin archive from Shop Pinta store and save it on your computer.
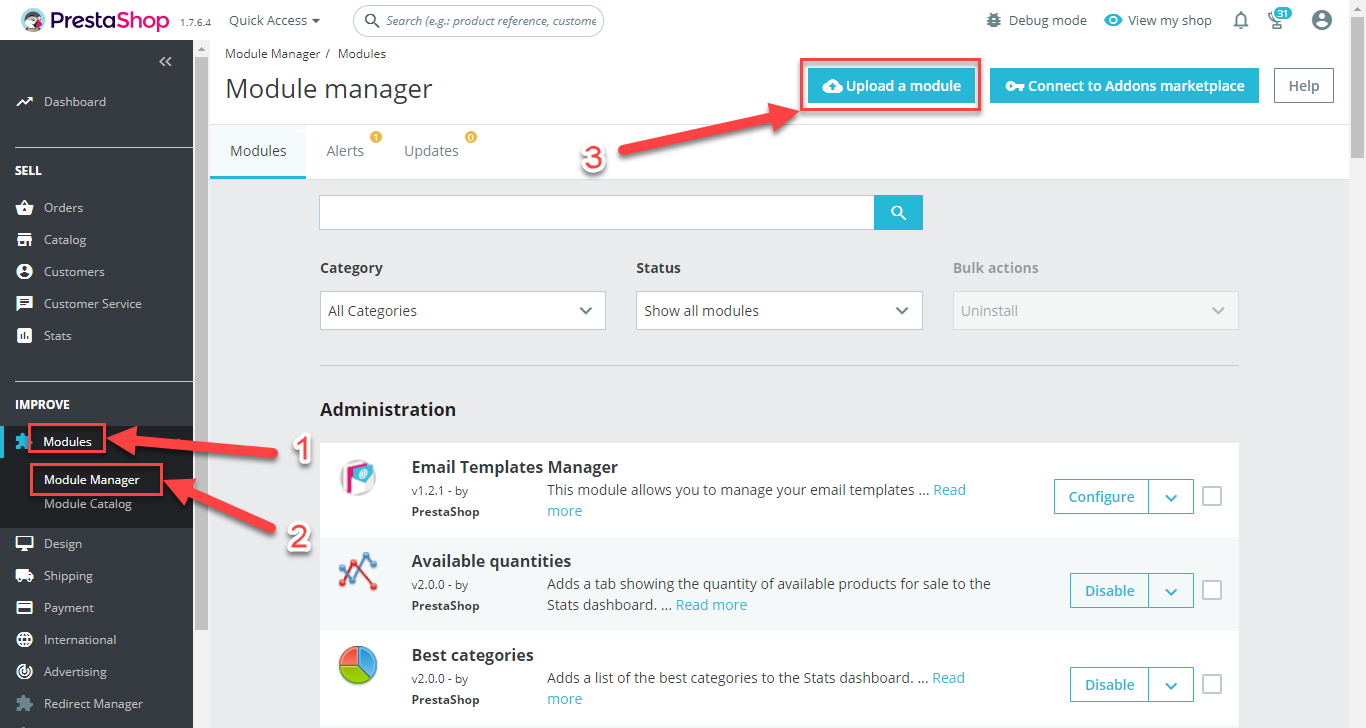
In the admin panel of your website, select Modules (1) > Module manager (2).
Click the Upload a module button (3).
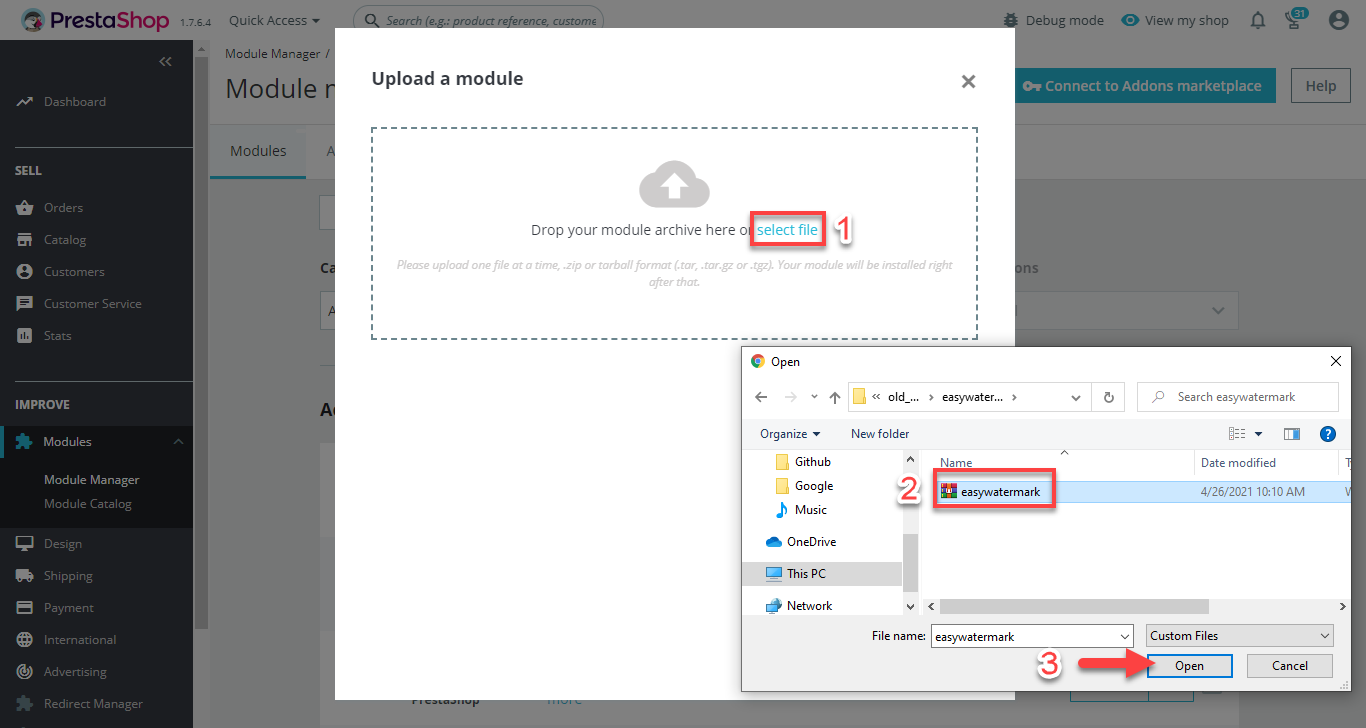
In the opened window, click the select file button (1).
Next, select the plugin archive (2) and click the Open button (3).
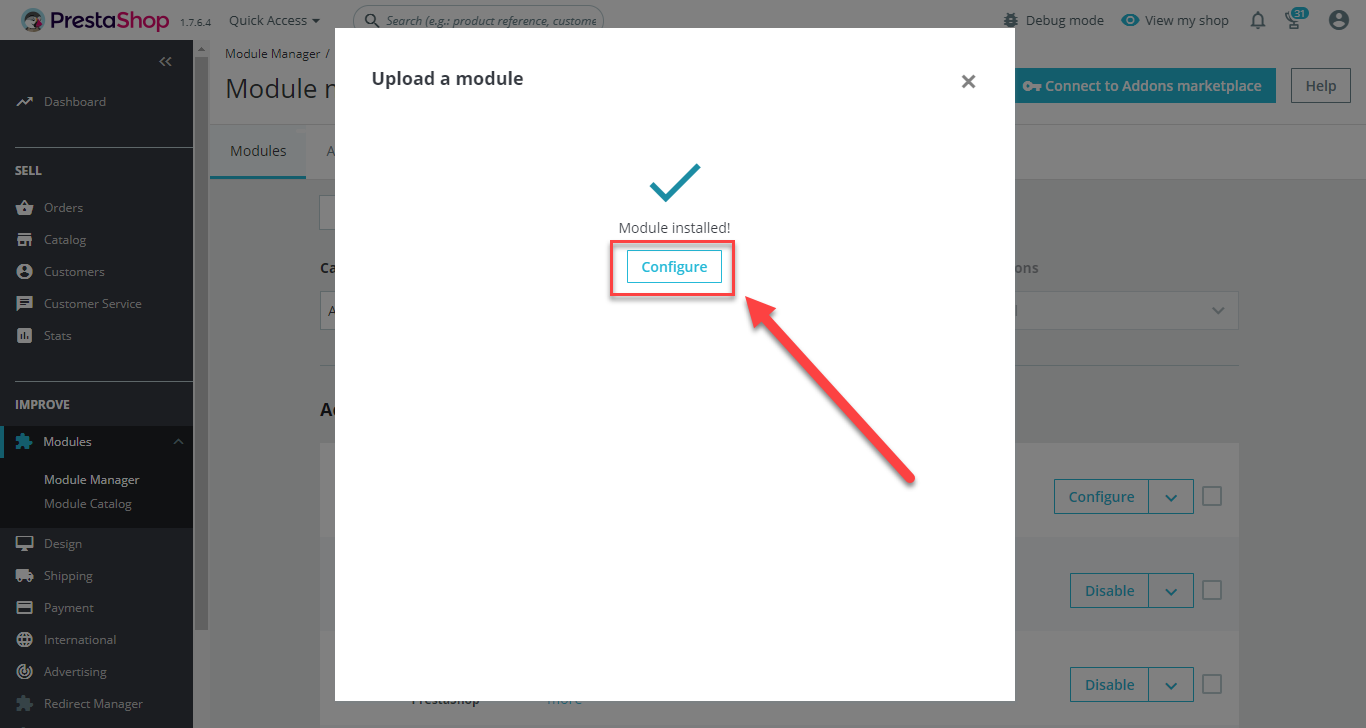
Wait for a message about "Module installed!" and click the Configure button.
Plugin page
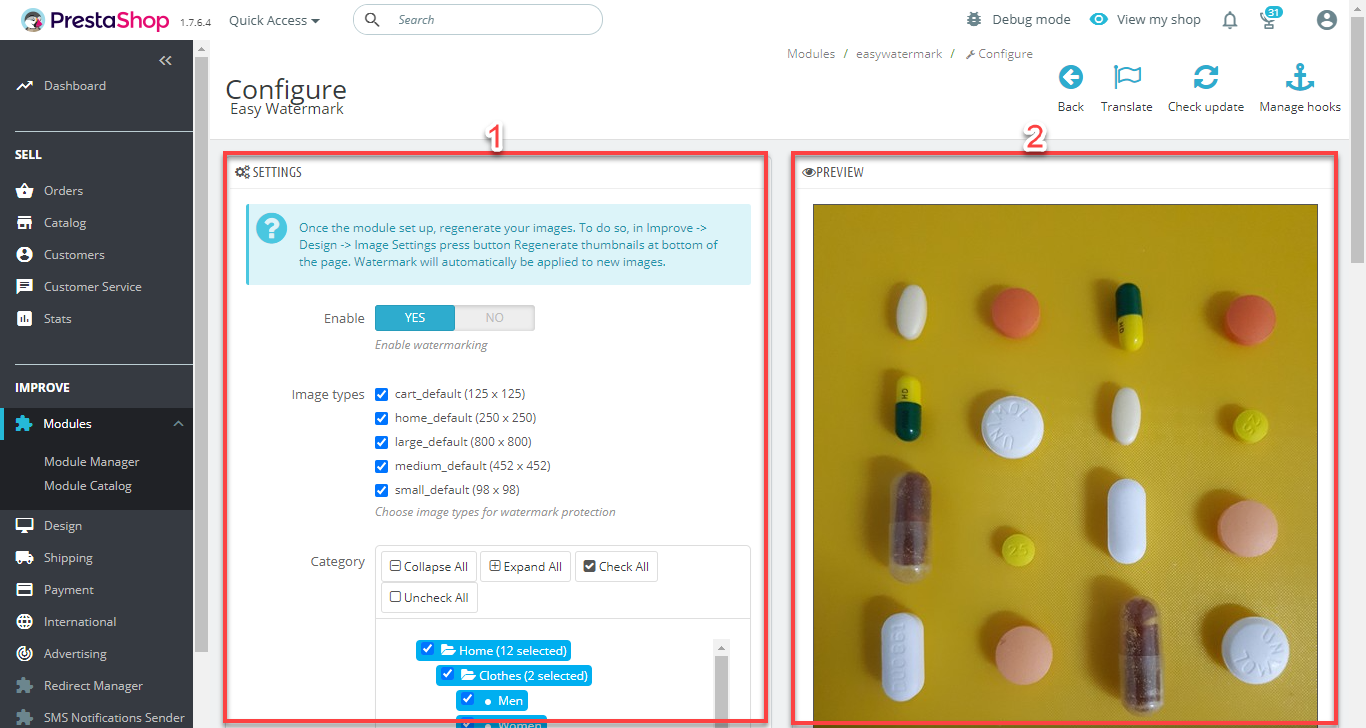
The plugin page consists of:
The SETTINGS block (1) - to select plugin settings.
The PREVIEW block (2) - to preview how images with watermark are looking on a website page.
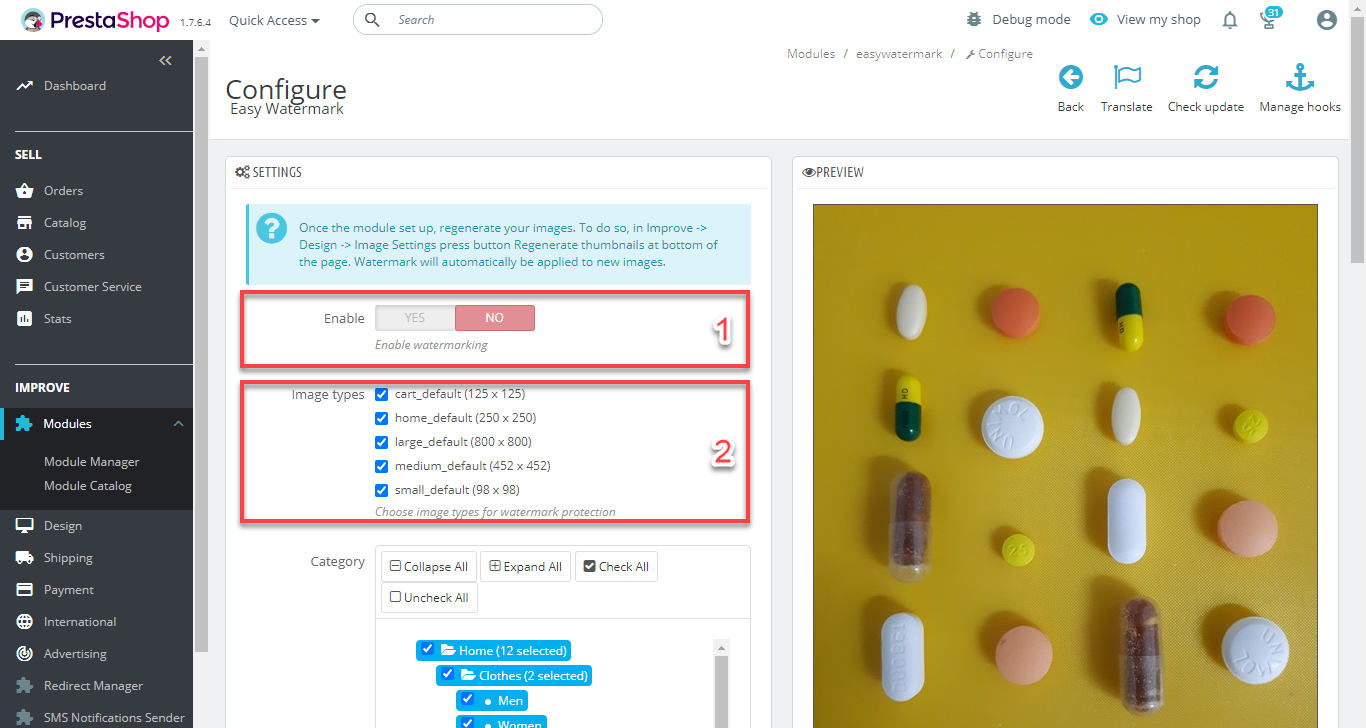
The SETTINGS block on the plugin page consists of:
The Enable field (1) - to enable / disable the plugin (position YES / NO).
The Image types block (2) - for selecting the images type on which the watermark will be displayed.
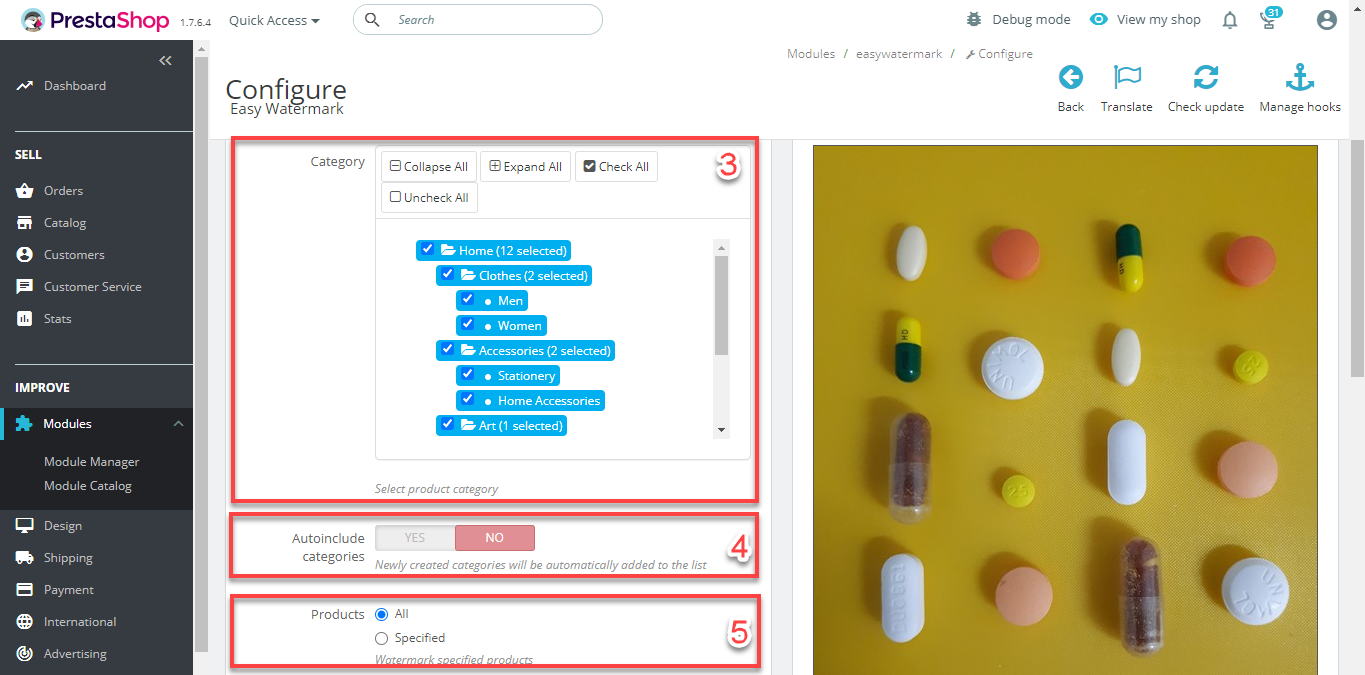
The Category block (3) - to select the categories on which the watermark will be displayed.
The Autoinclude categories field (4) - to automatically add new categories to the list of categories from the Category field.
The Products block (5) - to select products from categories on which the watermark will be displayed. You can select specific products (checkbox Specified) or all products (checkbox All).
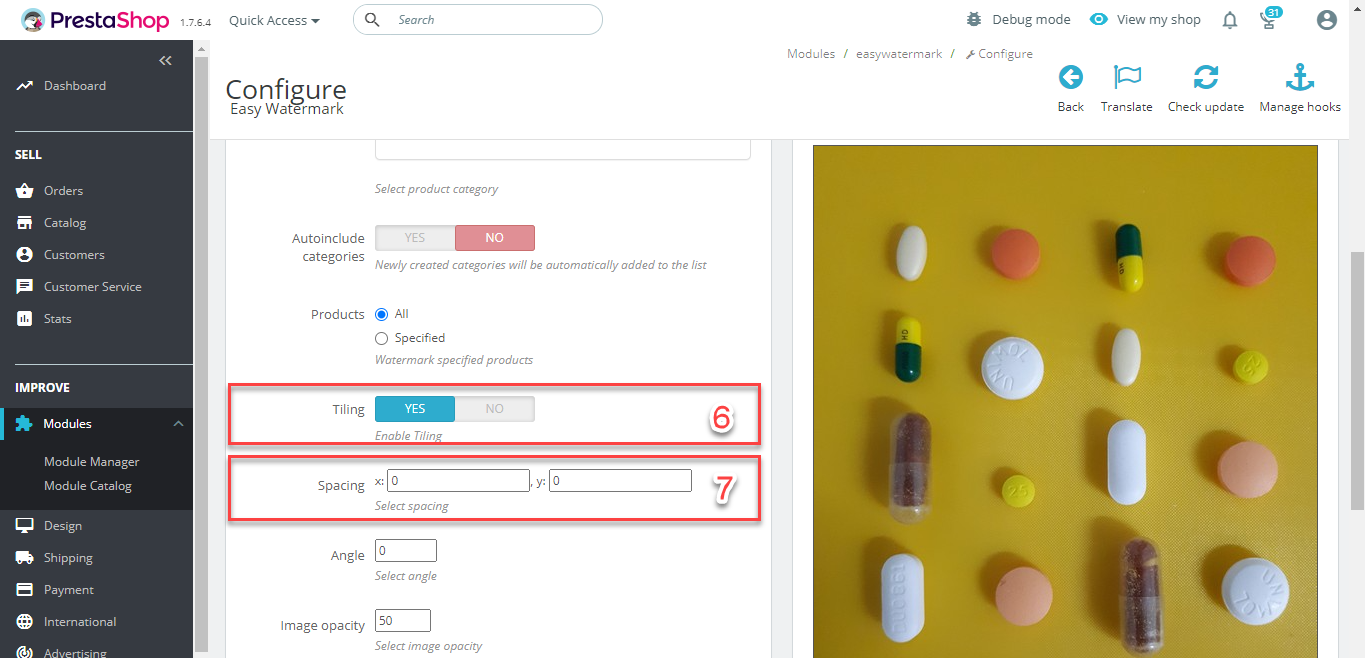
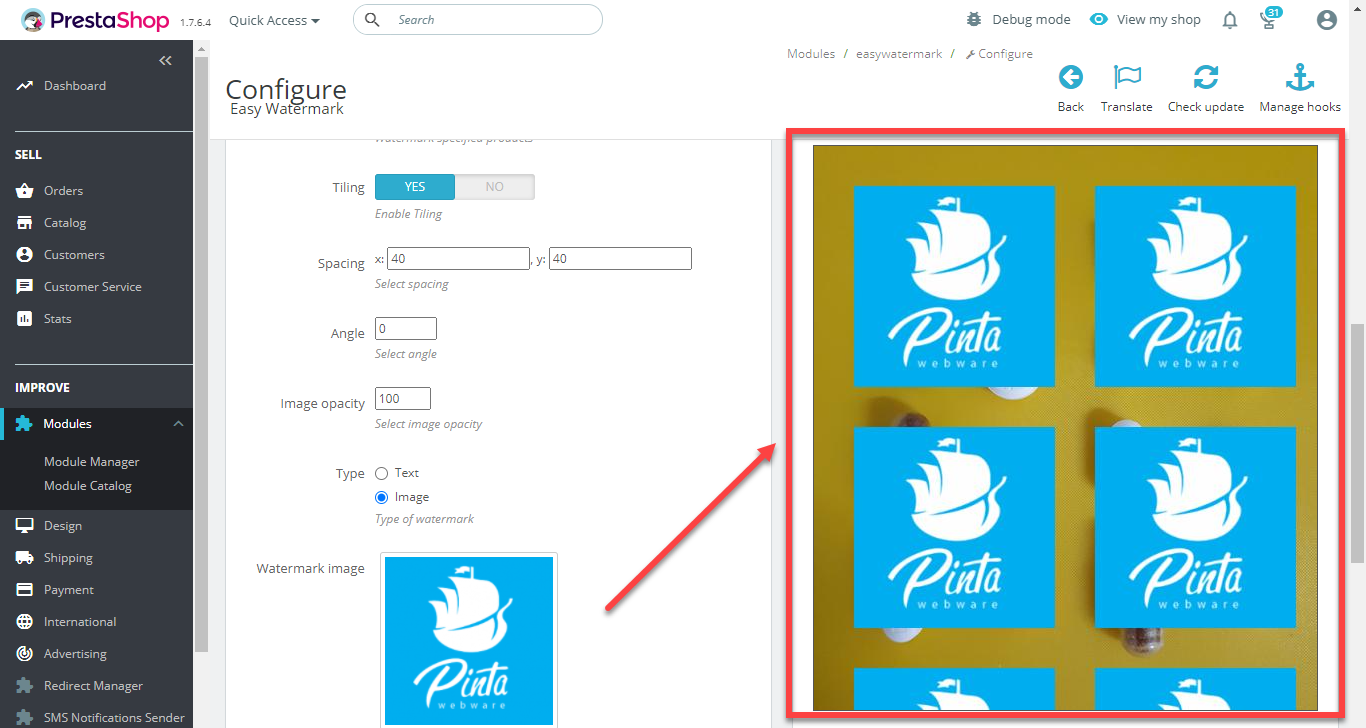
The Tiling field (6) - allows you to choose a tiling of the watermark (position YES / NO).
Select the YES position to replicate and distribute the watermark throughout the image it is imposed on.
Next, in the Spacing field (7), specify the interval at which the watermark will repeat (x: - horizontally, y: - vertically).
If you want the watermark to be displayed as a single image (text), select the NO position (6).
In the Shift field (7) specify the amount of interval to move the watermark (x: - horizontally, y: - vertically).
The Align field (8) - to select the location of the watermark.
The Angle field (9) - to select the angle of the watermark.
The Image opacity field (10) - to select the opacity of the watermark.
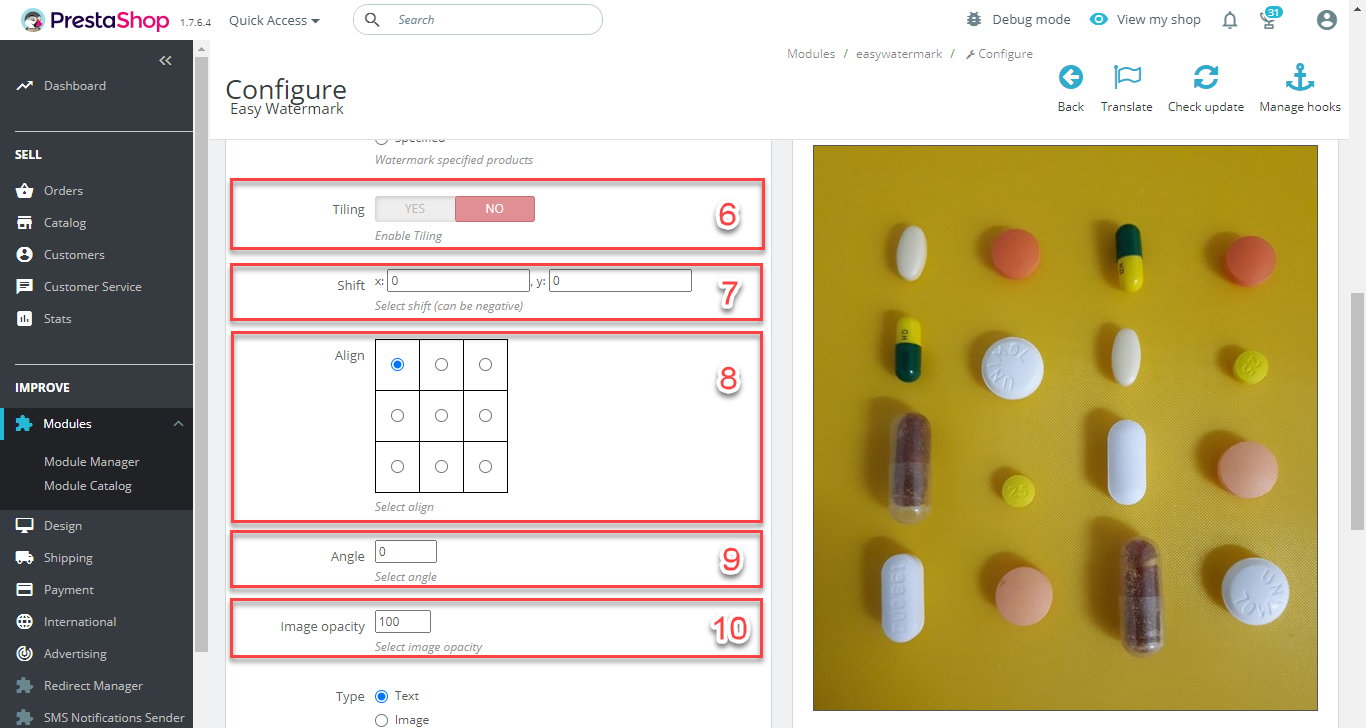
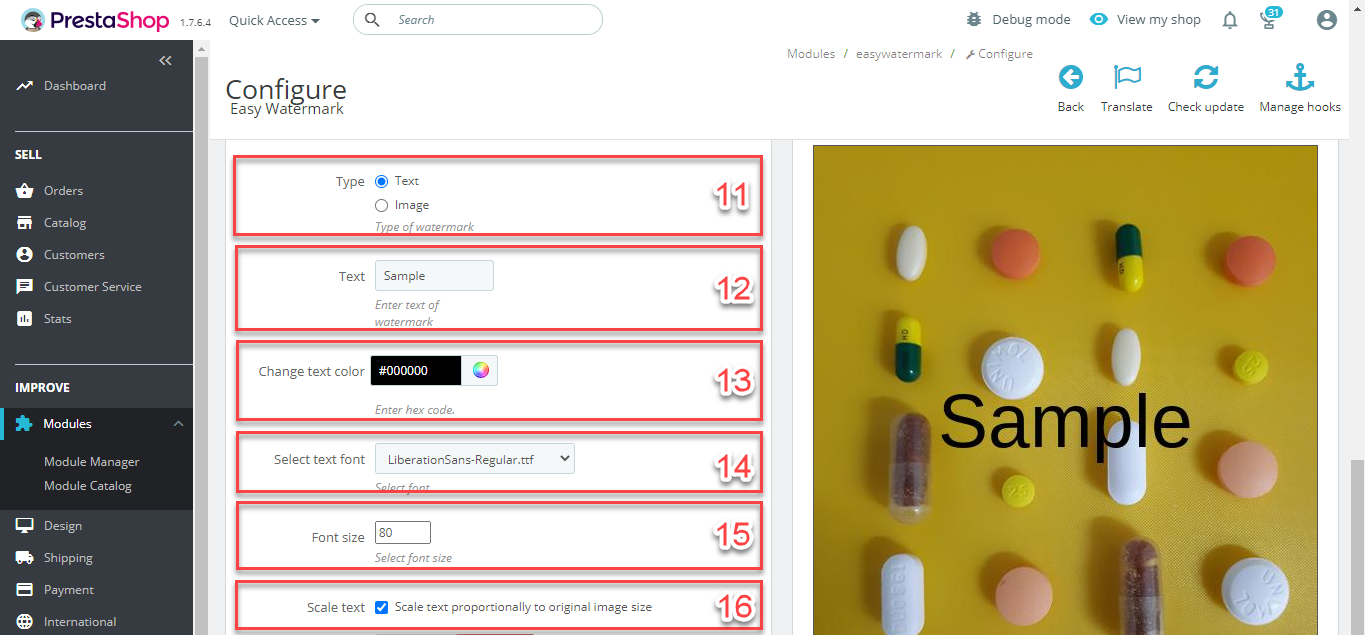
The Type block (11) - to choose the watermark as a text / image.
If you want the watermark to be displayed as text, in the Type block (11) select the Text checkbox and define the text parameters:
The Text field (12) - to enter text that will be displayed as a watermark.
The Change text color field (13) - to select the color of the text that will be displayed as a watermark.
The Select text font field (14) - to select the font of the text that will be displayed as a watermark.
The Font size field (15) - to select the font size of the text that will be displayed as a watermark.
The Scale text checkbox (16) - allows you to select scale text proportionally to the original image size (to be marked).
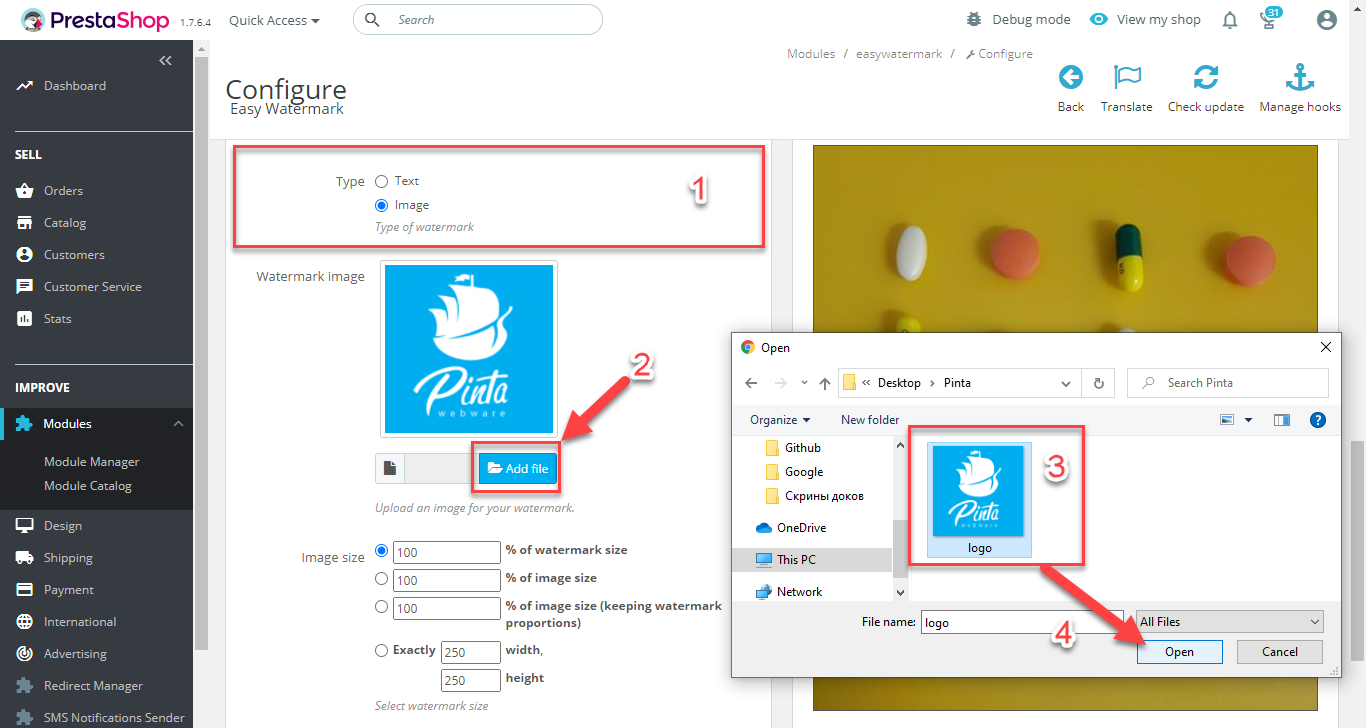
If you want the watermark to be displayed as an image, in the Type field select the Image checkbox (1) and define the image parameters:
The Watermark image block - to choose an image that will be displayed as a watermark.
Click the Add file button (2) and upload an image from your computer that will be displayed as a watermark.
In the opened window, choose an image for the watermark (3) and click the Open button (4).
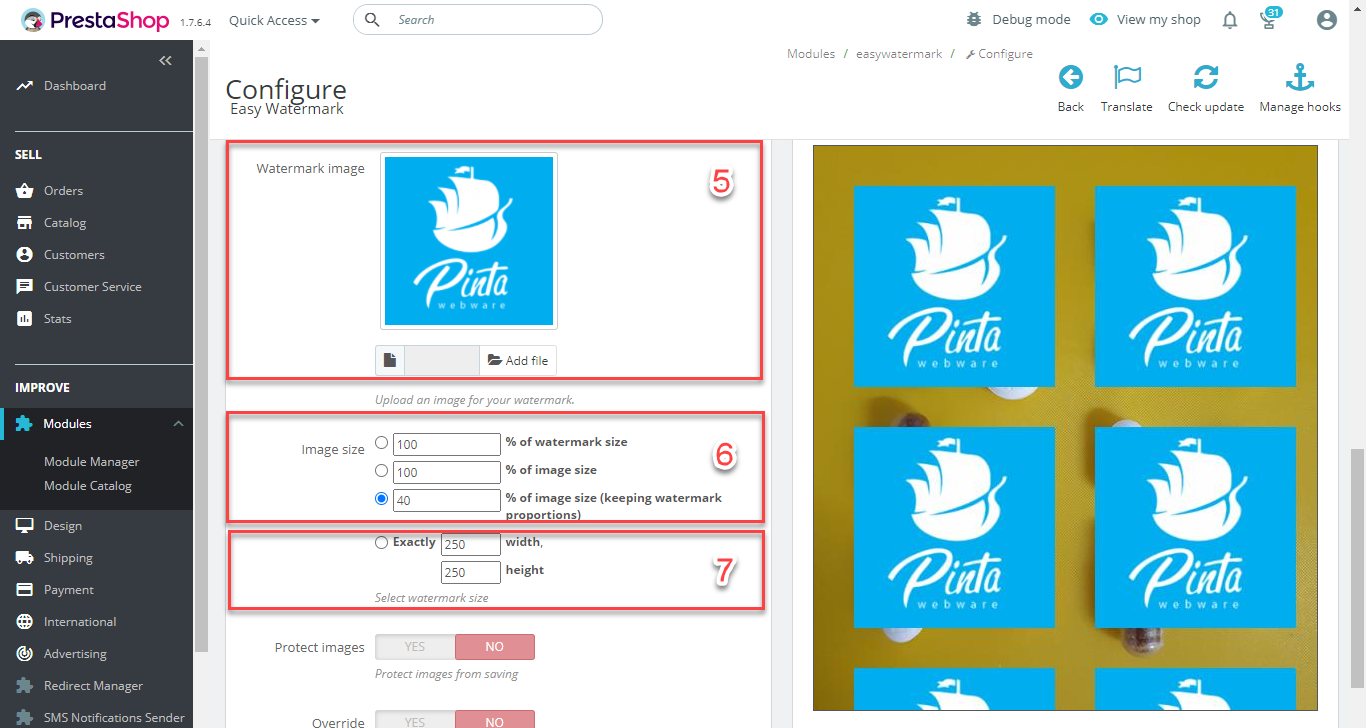
Selected image is displayed in the Watermark image preview (5).
If necessary, you can replace it with any other image.
The Image size block - to choose size parameters of watermark image.
You can specify the size of the image in relative values (6) - % of the size of the watermark, % of the size of the image, % of the size of the image with keeping the proportions of the watermark.
Or select the size of the image with absolute values - width, height (7).
The Protect images field (17) - to protect your images from saving (position YES / NO).
The Override regeneration field (18) - to avoid timeout errors during thumbnail regeneration (position YES / NO).
Select the YES position, if on your website a large quantity of images there is. This will help you correctly apply the watermark to all your images without interrupting the processing.
After completing the watermark settings, click the Save button (19).
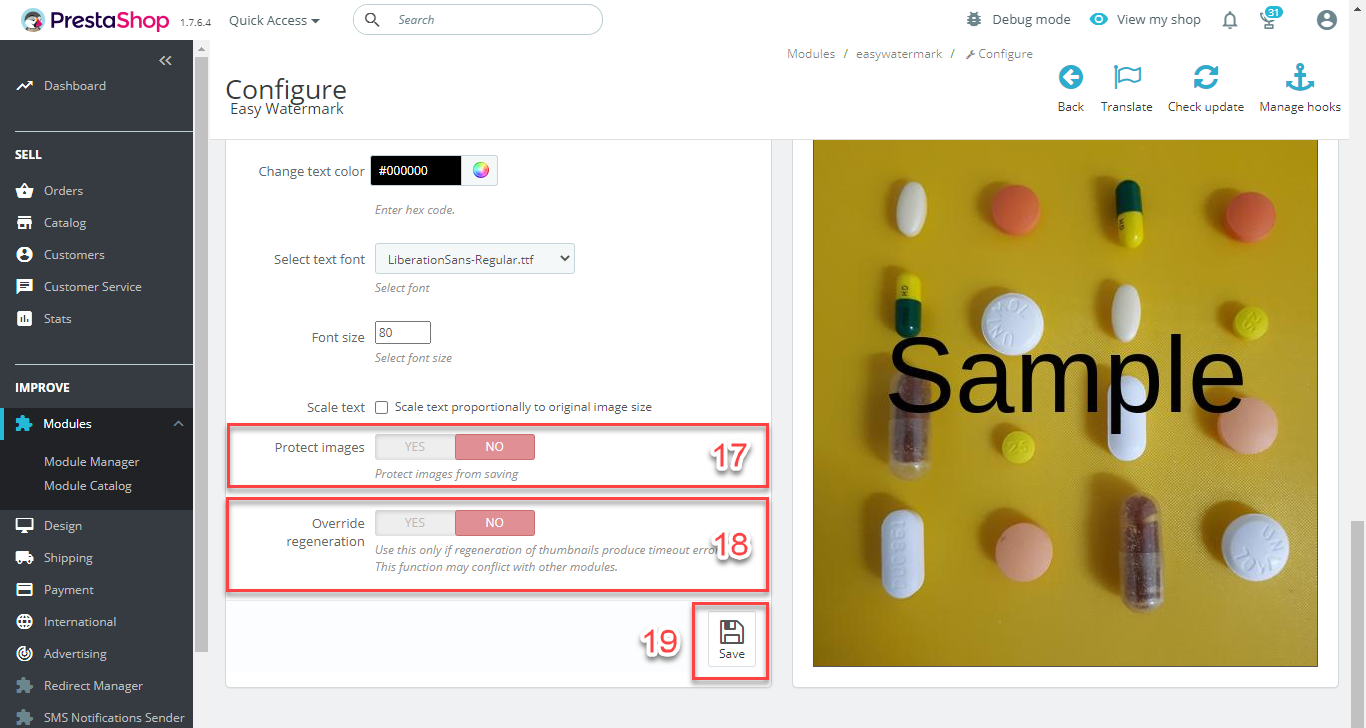
After saving the plugin settings, the resulting watermark can be seen in the PREVIEW block.
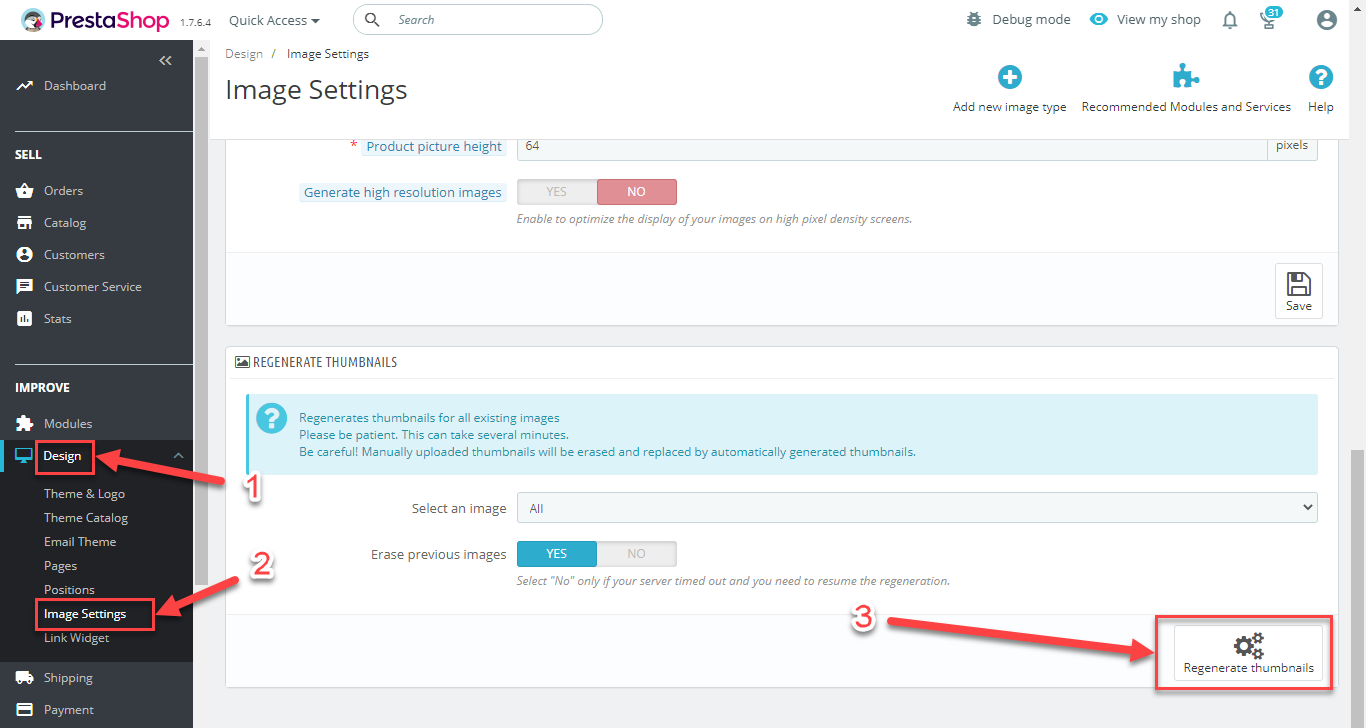
Next, go to the main menu Design (1) > Image settings (2).
Click the Regenerate thumbnails button (3) to update all images. Pay attention to the settings that were previously selected in this block.
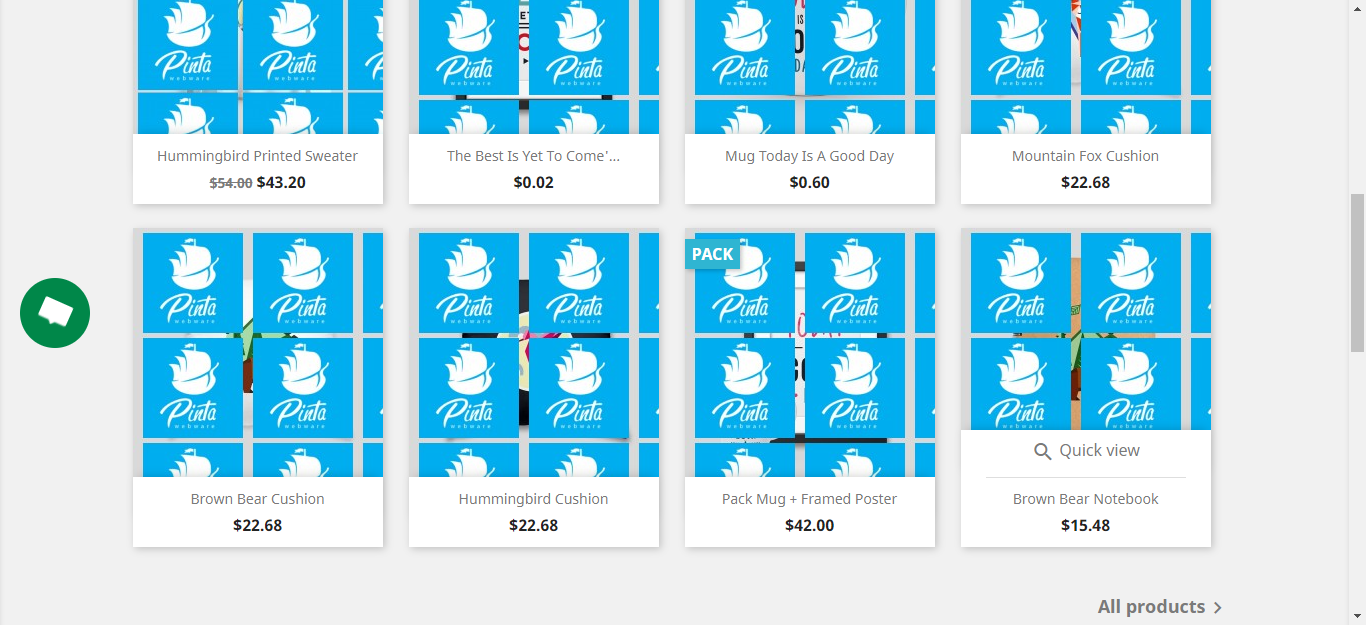
Go to your website page and refresh it.
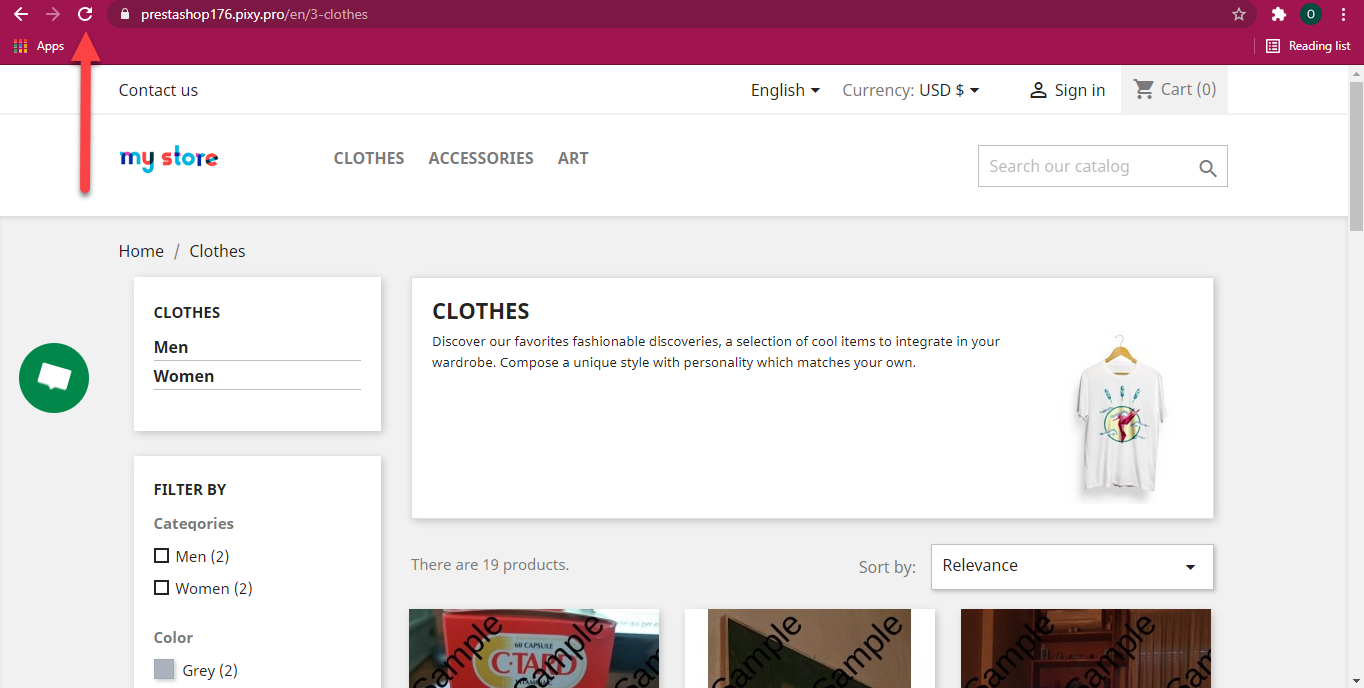
Now on your website the created watermark is displayed on product images.