How to Use Facebook Feed for PrestaShop
Download and install
Download the plugin archive in the Shop Pinta store and save it on your computer.
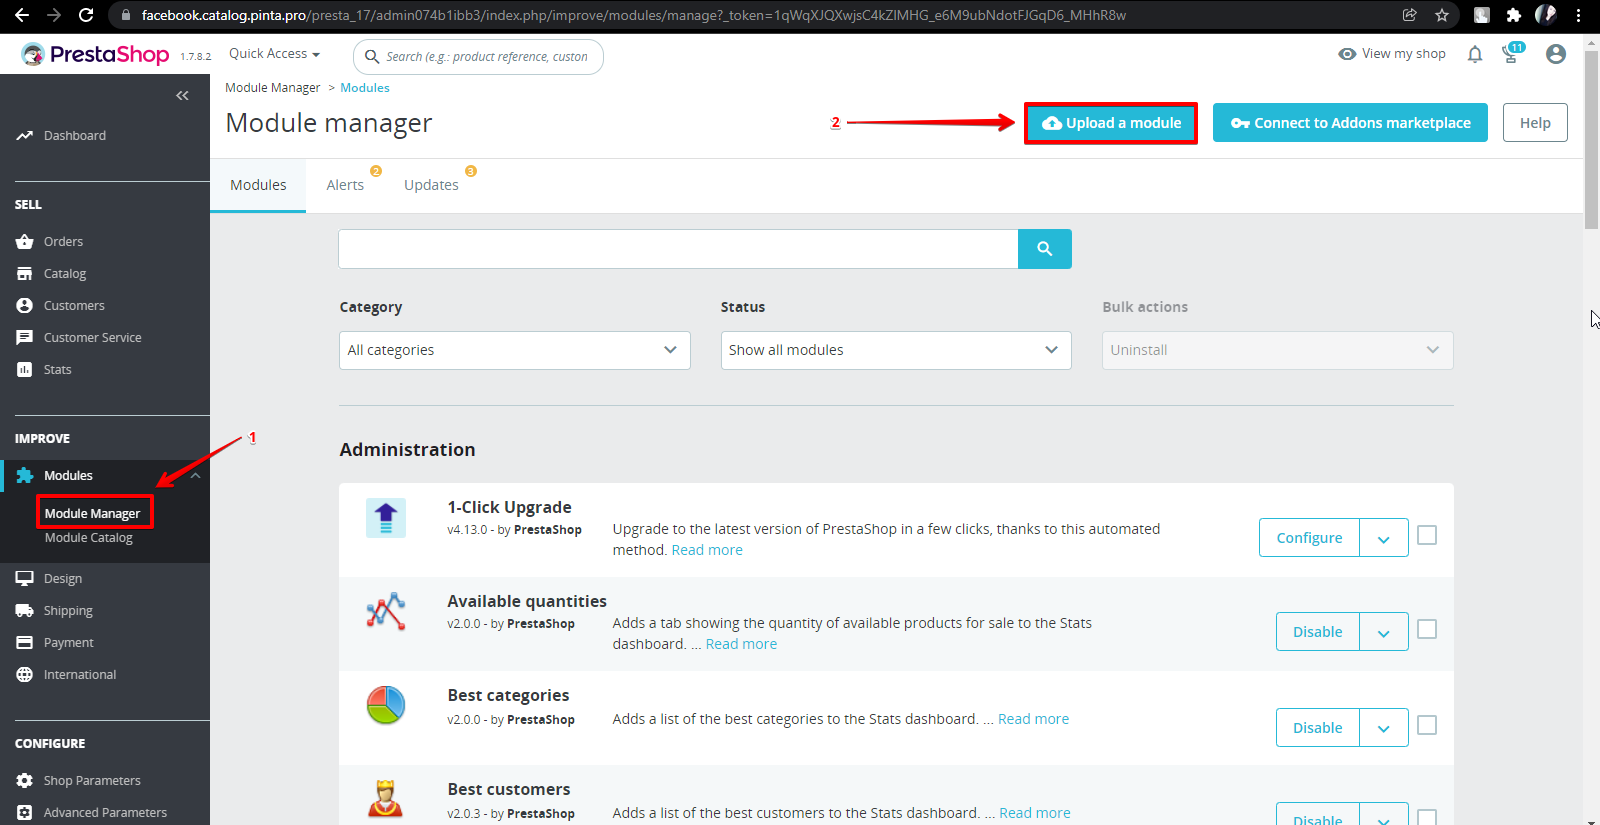
In the admin panel of your website, select Modules > Module Manager (1) and click the Upload a module button (2).
Select the plugin archive to install (1, 2, 3).
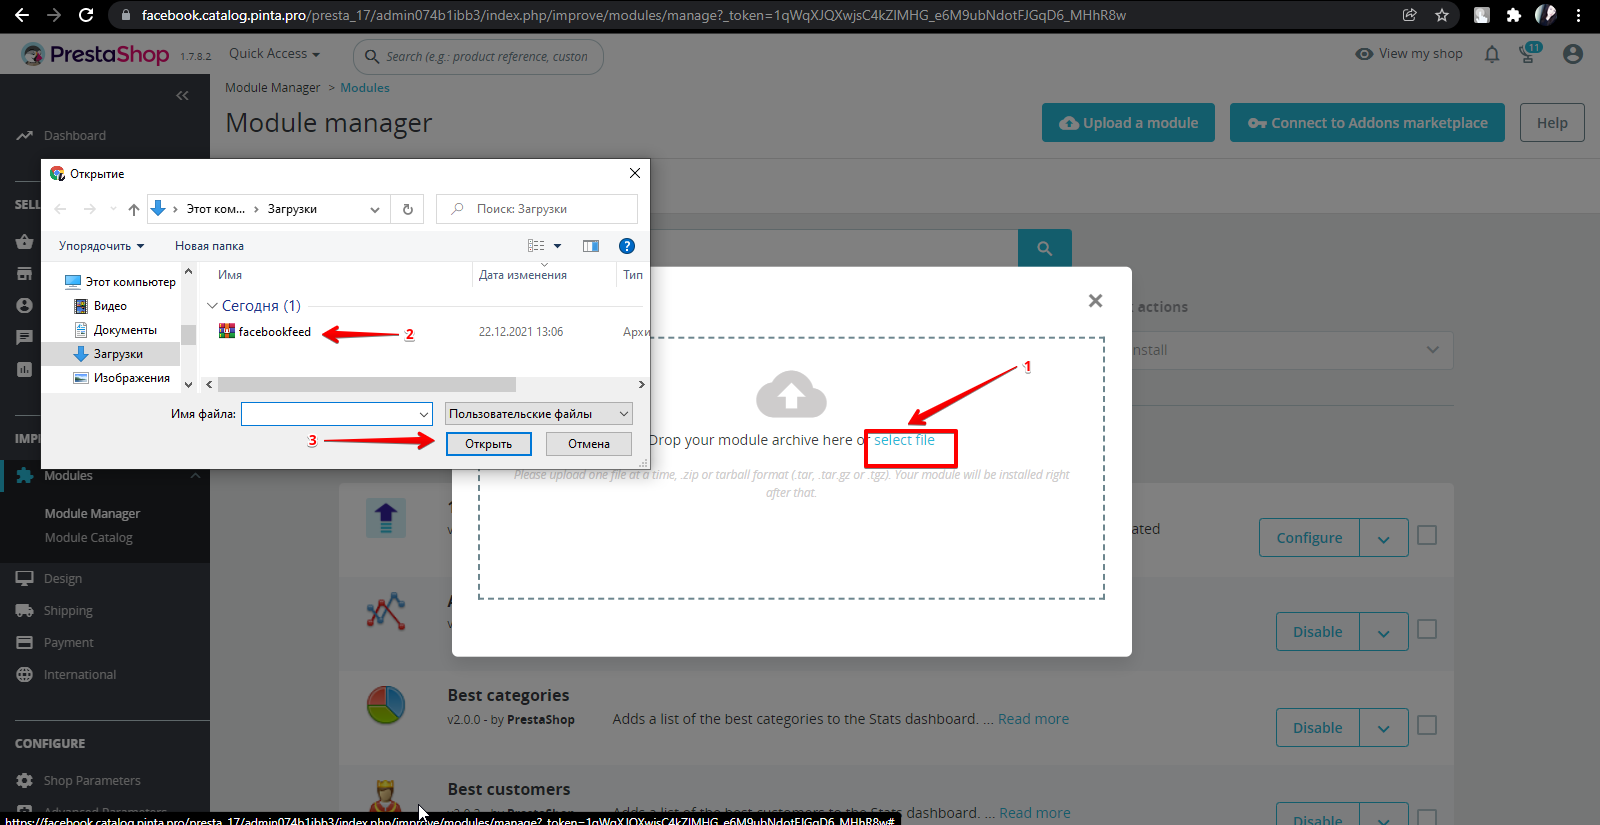
Wait for the download to finish.
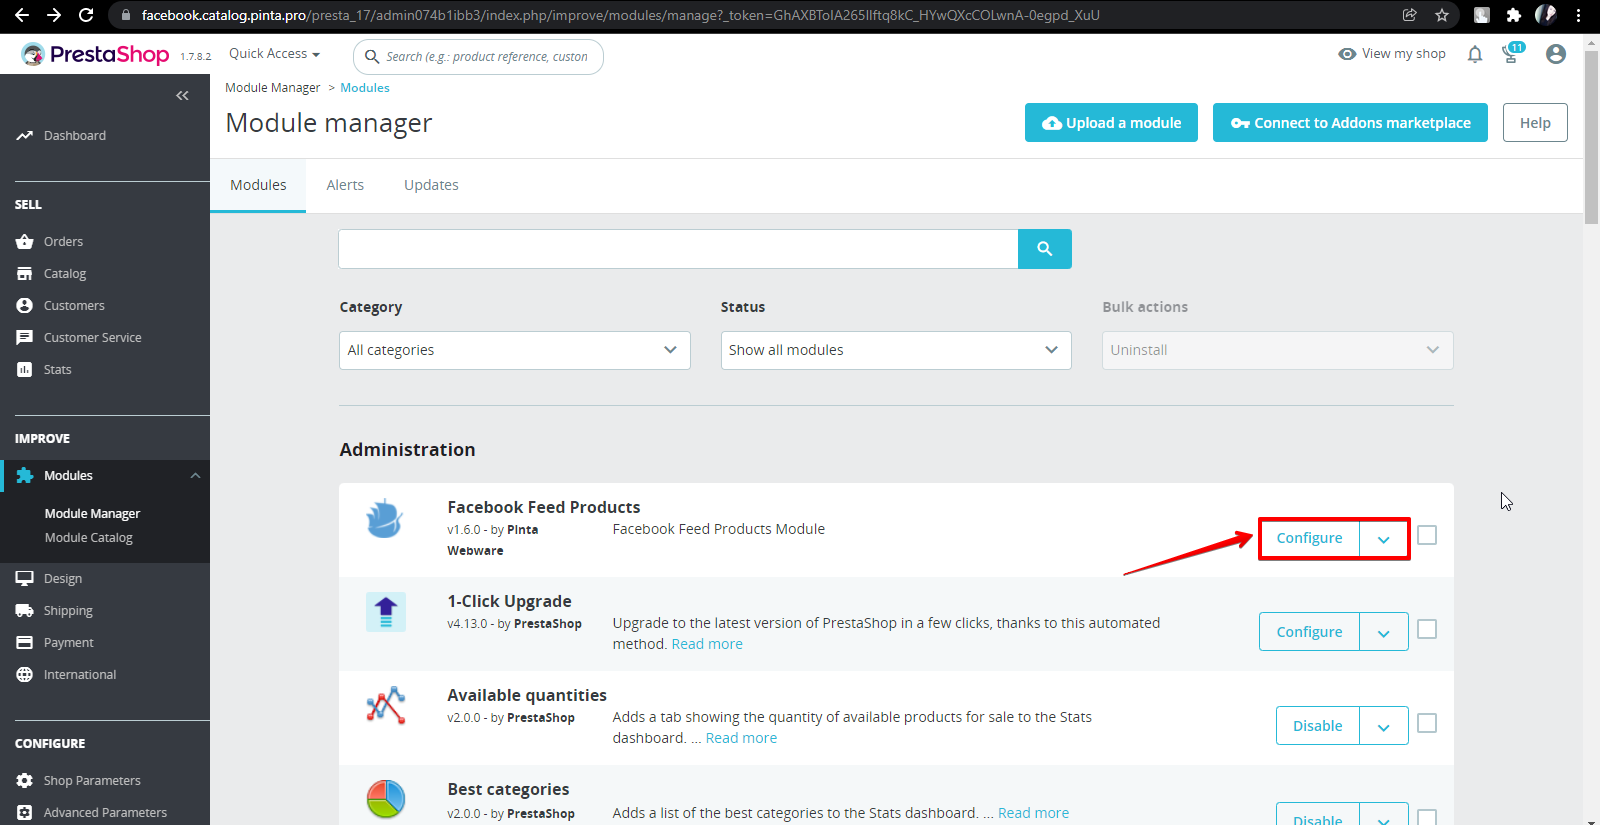
To configure the plugin, go to the Module Manager menu and click the Configure button next to the Facebook Feed Product plugin.
Plugin Page
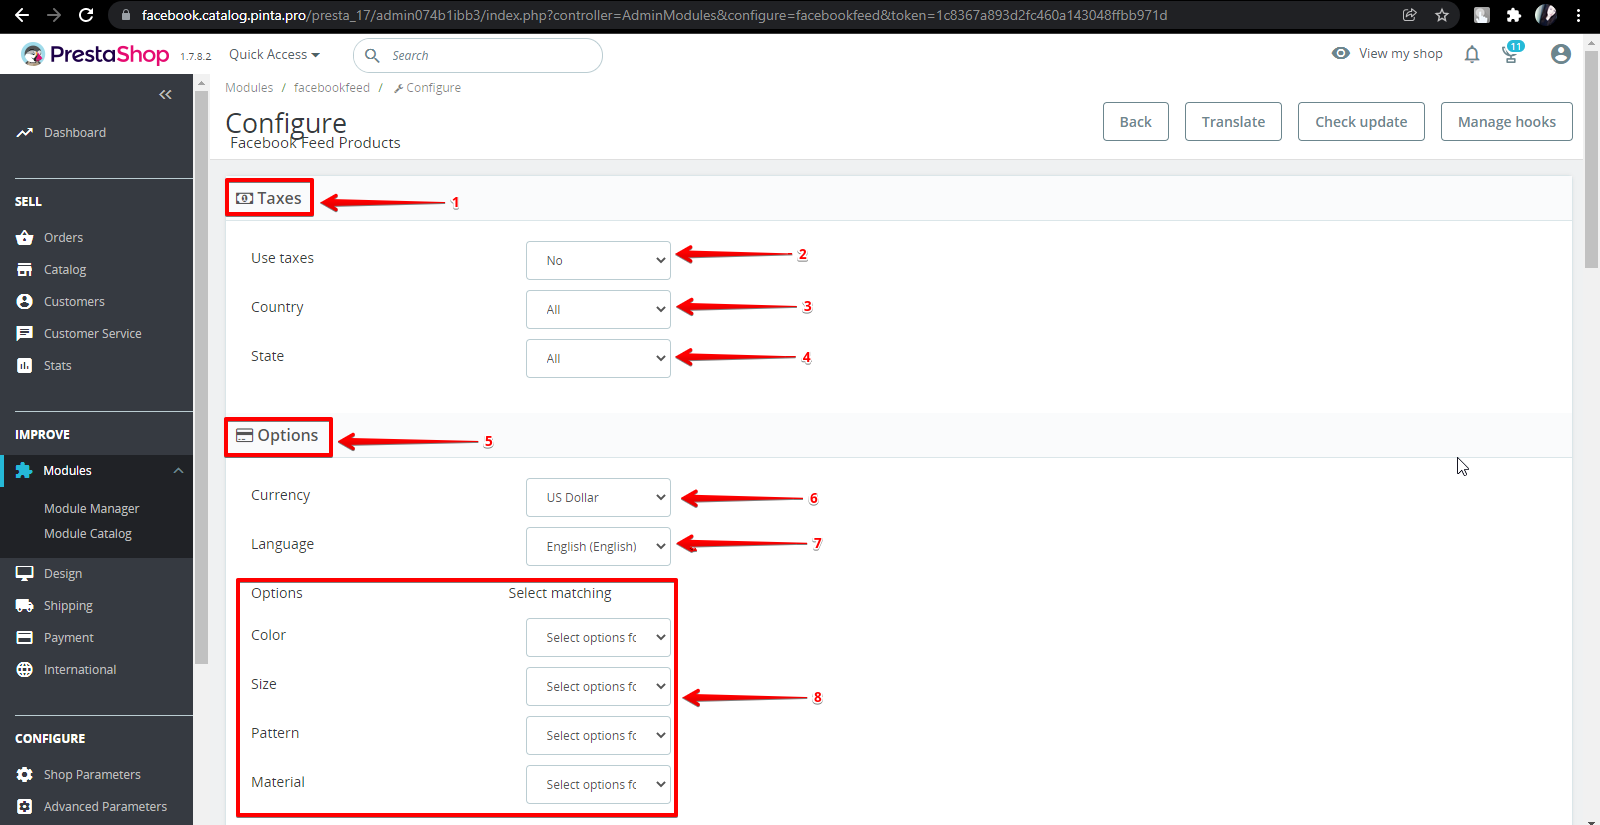
The plugin page consists of such block as Taxes, Options, Mapping for replace empty fields и Google / Facebook categories.
The Taxes block (1) includes fields:
Use taxes (2) - to enable / disable the use of tax in the feed.
Country (3) - to select the country whose tax will be displayed in the feed.
State (4) - to select the state whose tax will be displayed in the feed.
The Options block (5) includes fields:
Currency (6) - to select the currency type of your products.
Language (7) - to select the language for displaying products in the feed according to the language of the products on your website.
Color, Size, Pattern, Material of the options table (8) - to choose to match the options of your website to the Facebook options.
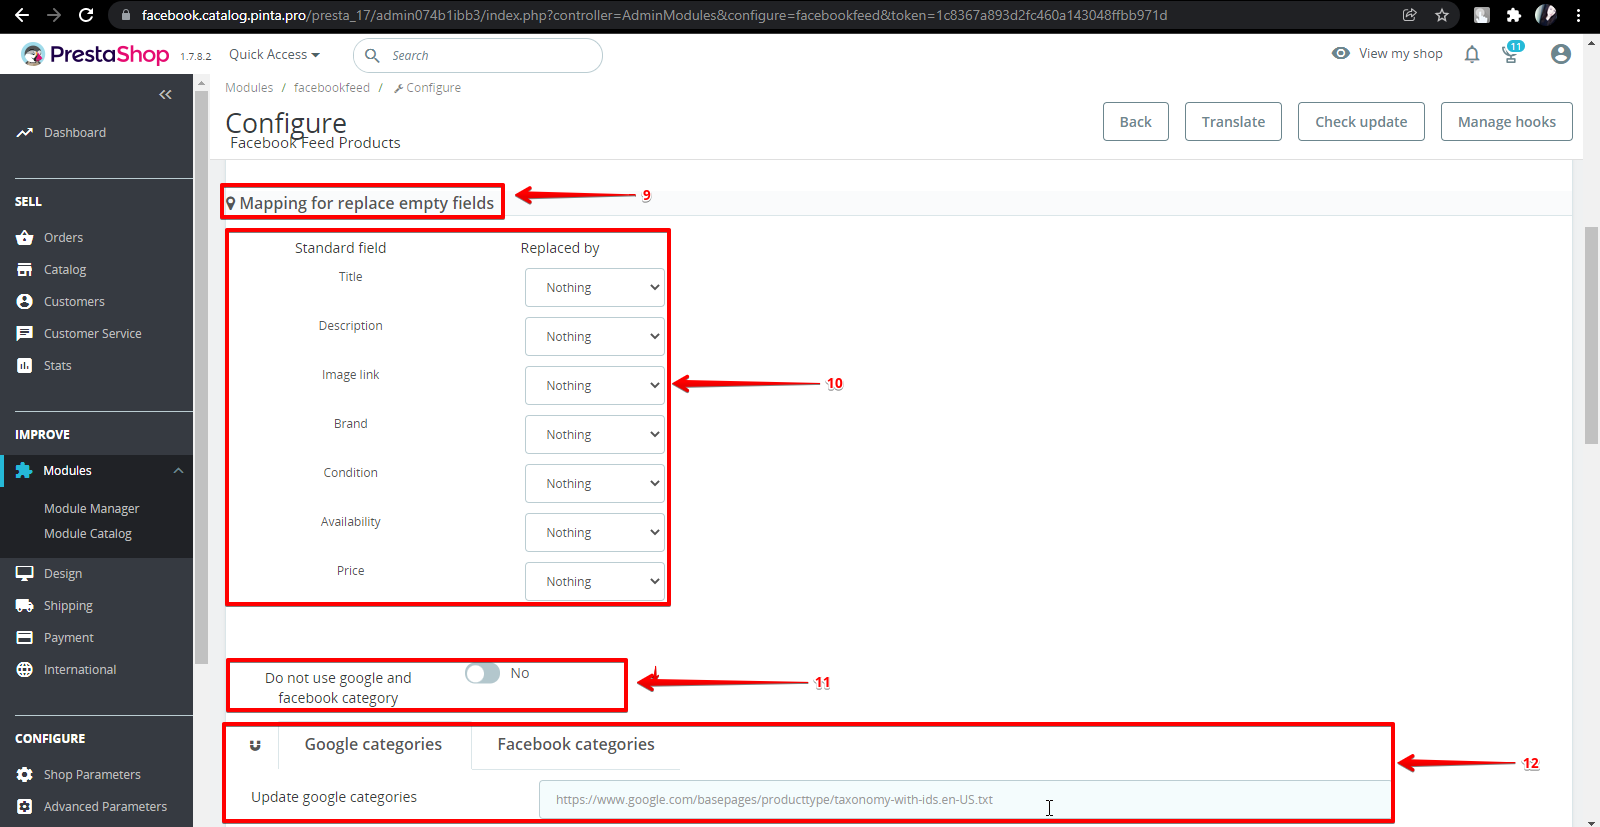
The Mapping for replace empty fields block (9) contains such fields as Title, Description, Image link, Brand, Condition, Availability, Price (10).
Select the needed values for these fields in the Replaced by column, if they are empty.
The Google / Facebook categories block contains:
The Do not use google and facebook category field (11). If you don't want to use Google and Facebook categories in your feed, move the slider to the YES position.
The Google categories tab allows you to use Google categories.
To update the list of Google categories, in the Update google categories field (12), enter the URL with the Google categories location. By default, the list of Google categories is already in the plugin.
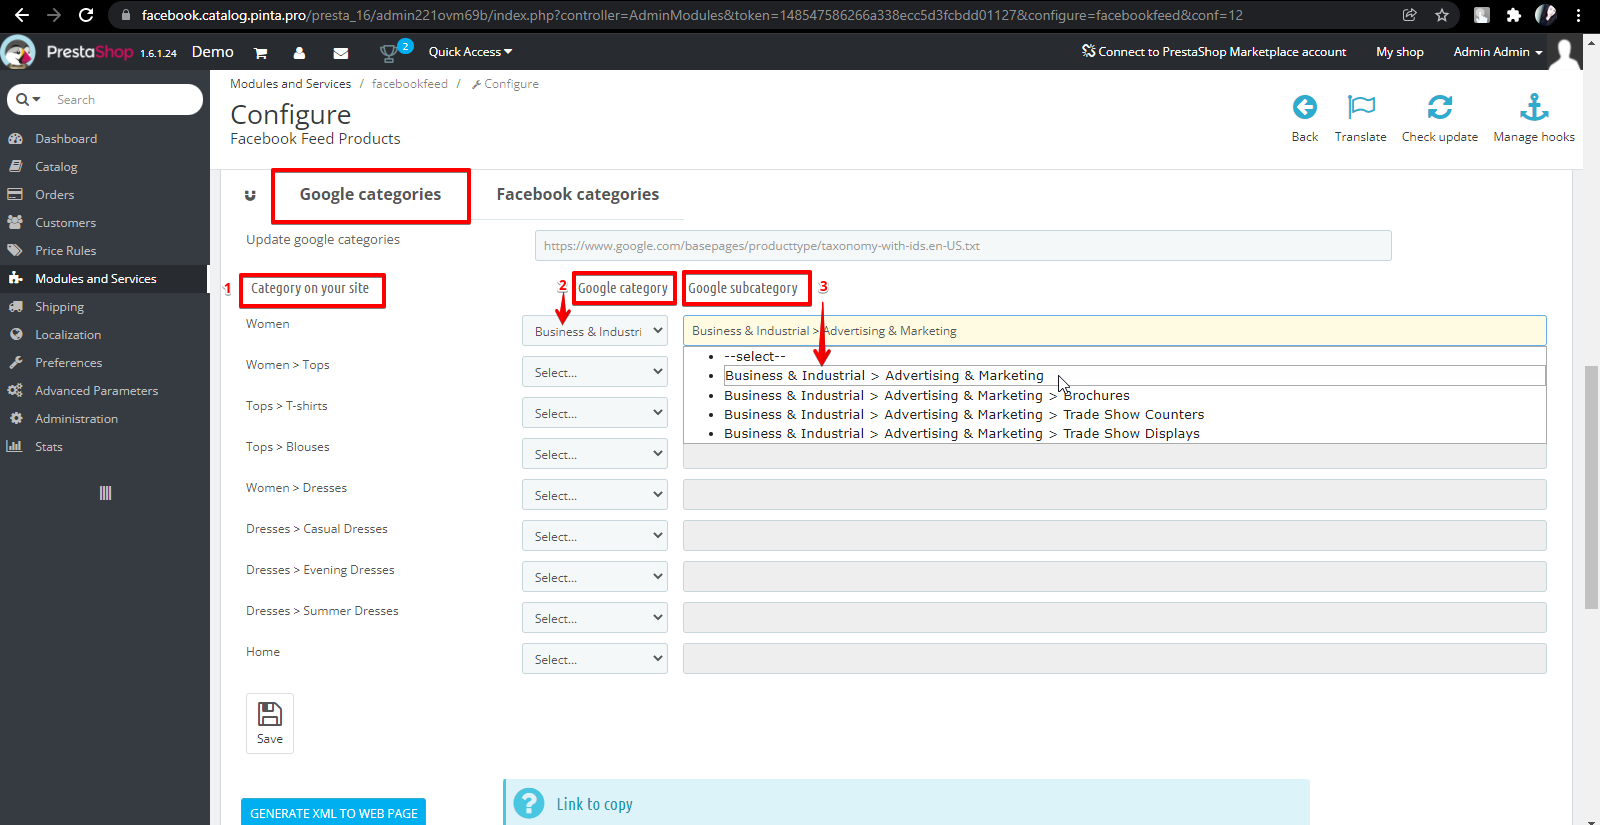
Next, you need to select the correspondence between the categories of your website and Google categories.
To do this, in the category table, select the categories of your website - the Category on your site column (1) - and the corresponding main Google categories (required) - the Google category column (2).
Additionally, you can specify the subcategories of Google in the Google subcategory column (3).
The Facebook categories tab allows you to use Facebook categories.
To update the list of Facebook categories, in the Update facebook categories (13), enter the URL with the Facebook categories location. By default, the list of Facebook categories is already in the plugin.
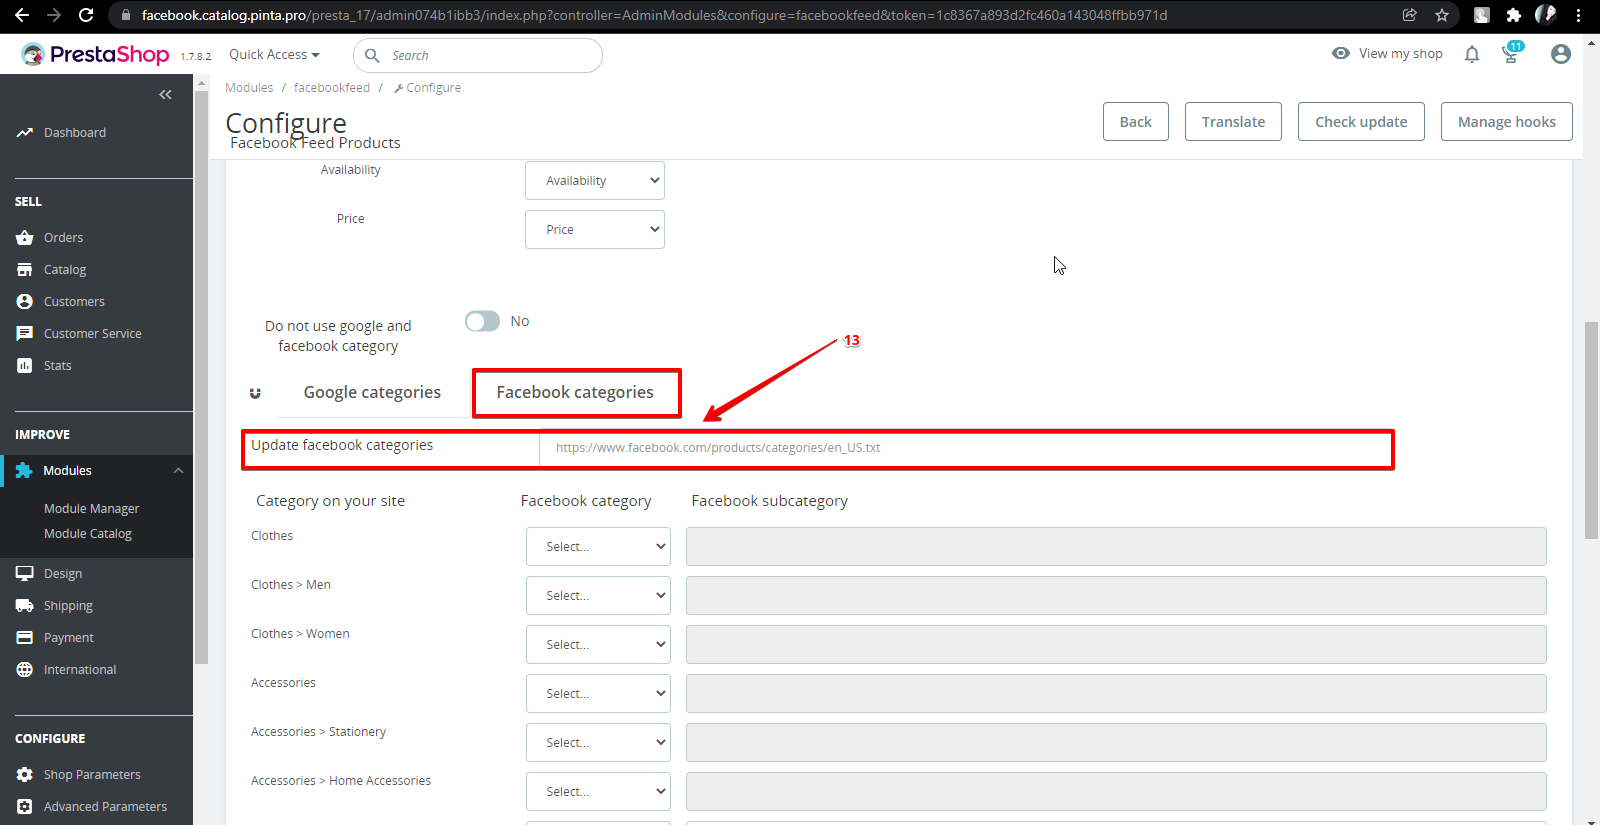
Next, you need to select the correspondence between the categories of your website and Facebook categories.
To do this, in the category table, select the categories of your website - the Category on your site column (1) - and the corresponding main Facebook categories (required) - the Facebook category column (2).
Additionally, you can specify the subcategories of Facebook in the Facebook subcategory column (3).
After selecting the product categories to be uploaded to the feed, save the changes. To do this, click the Save button (4).

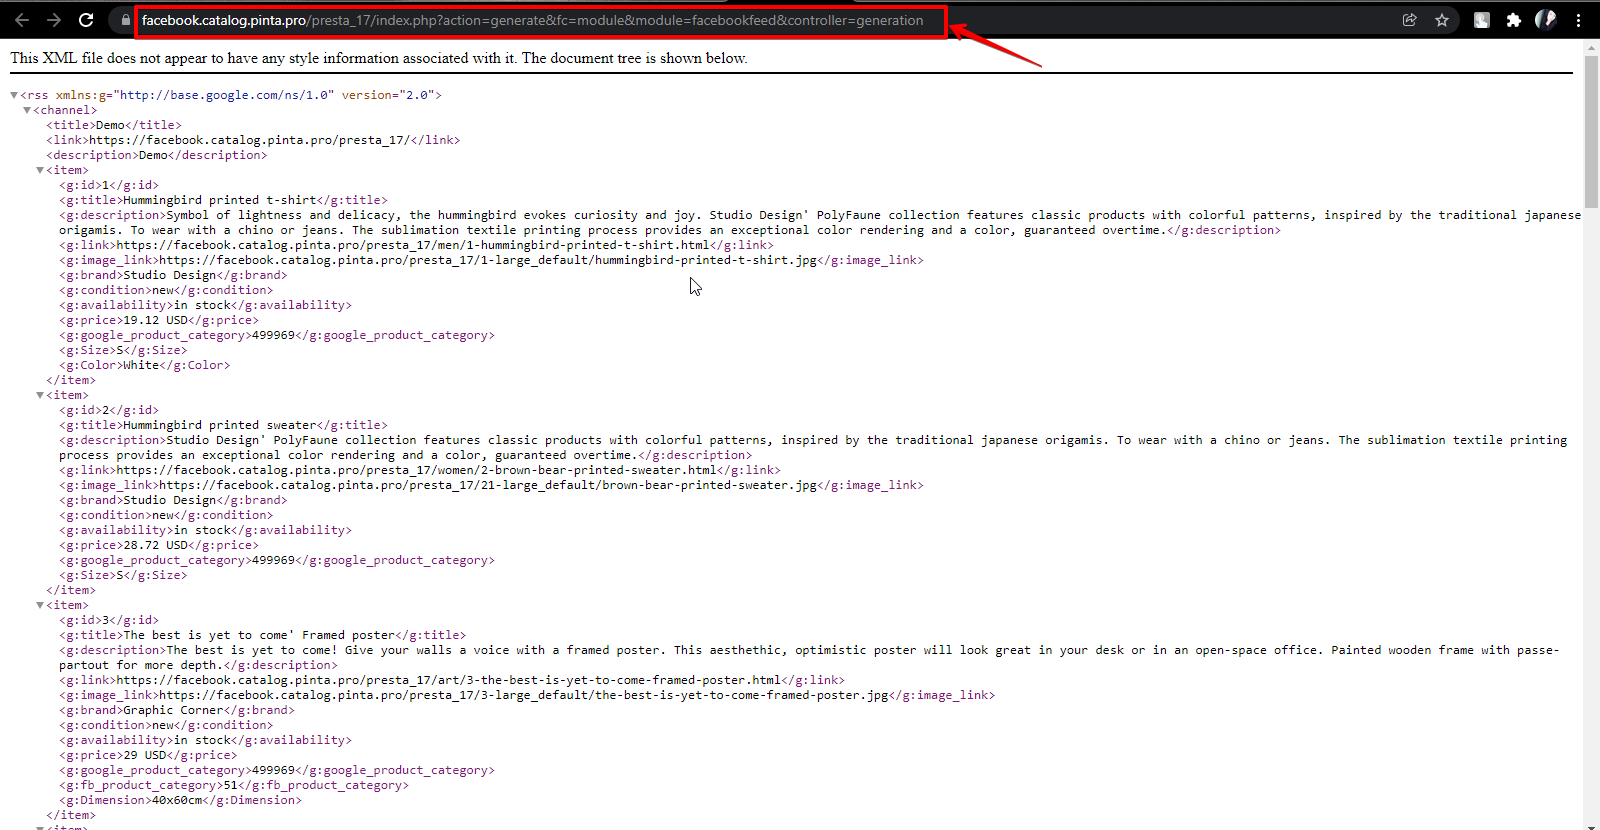
To generate the feed as a web page, click the GENERATION XML TO WEB PAGE button (1). The generated feed will open in a new browser window.
In the Link to copy field (2), you can copy the link to integrate the generated feed into Facebook Catalog.
To generate the feed as an xml file, click the GENERATION XML TO FILE button (3). The generated feed will be saved to your computer.
To use the cron command, copy the data into the Command for cron block (5) and paste it into cron.
The URL to feed file field contains the URL of the feed updated with the cron command.
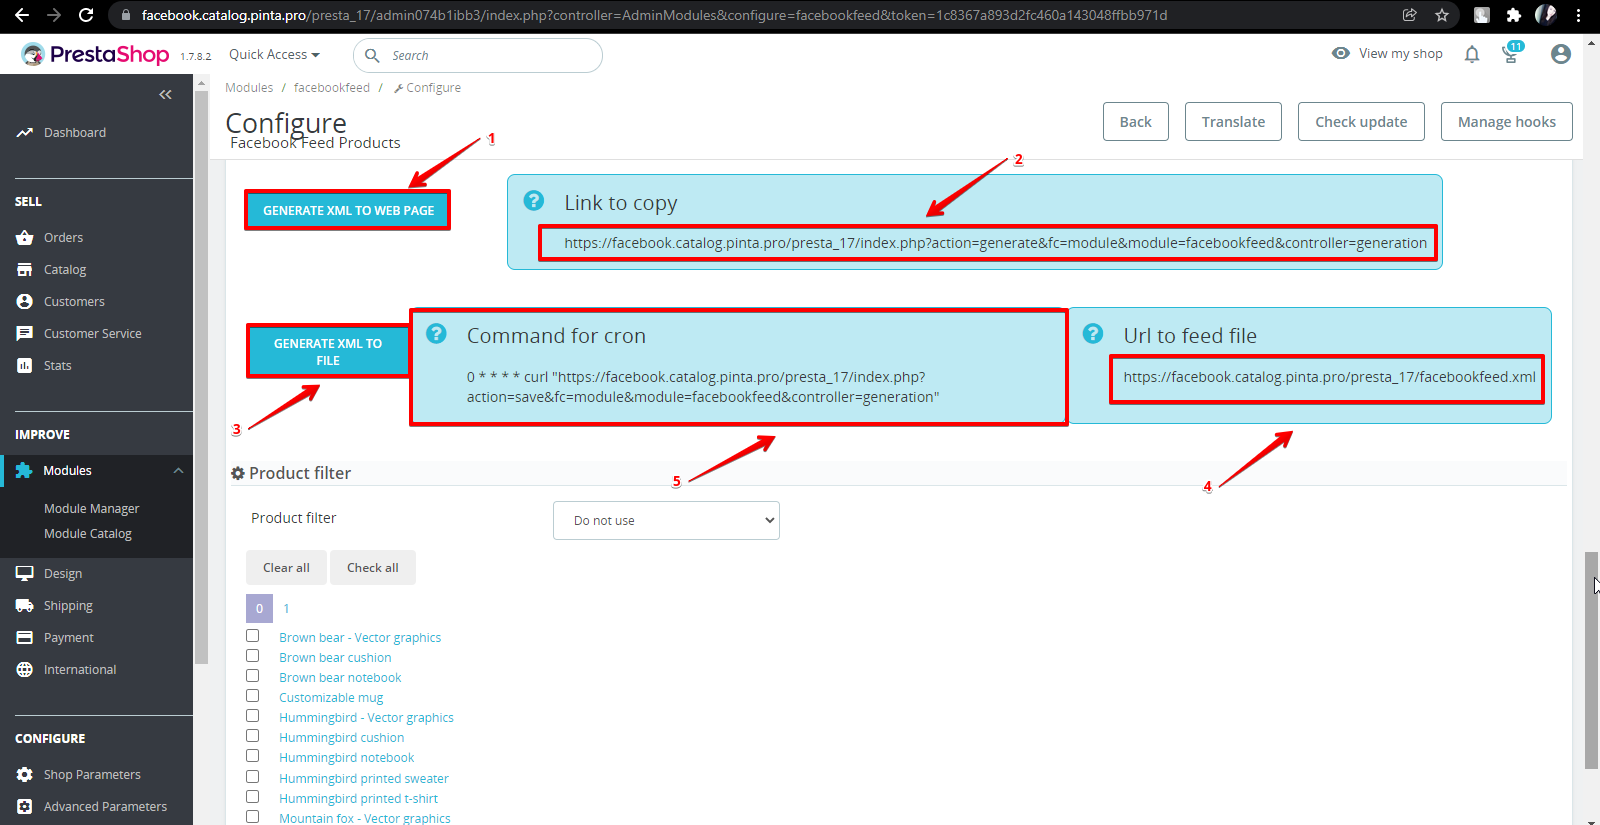
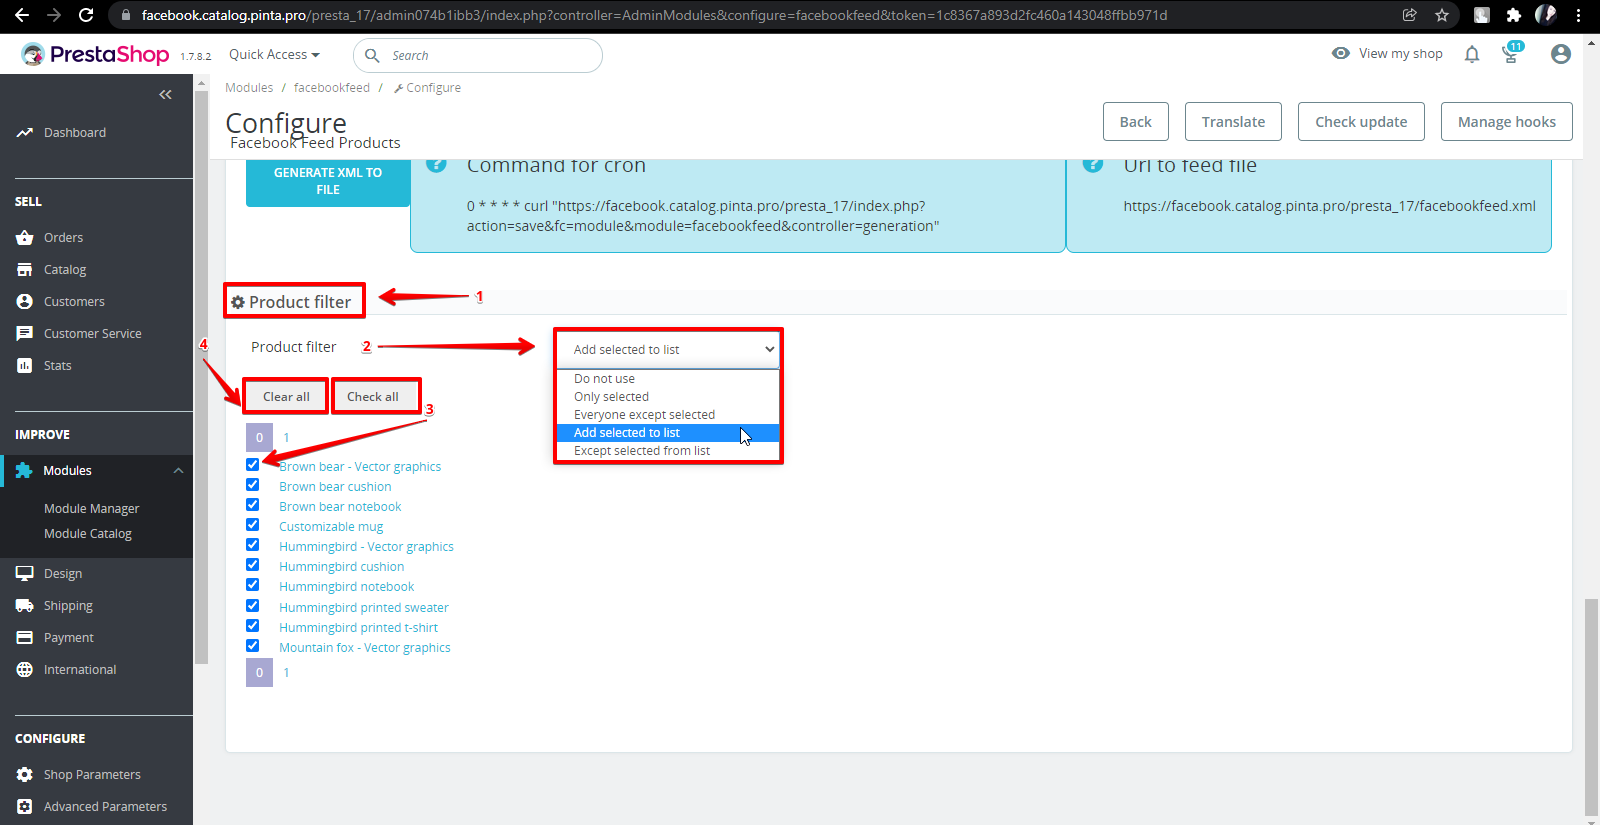
The Product filter block (1) allows you to add / exclude specific products.
To do this, check the product checkboxes (3, 4), and in the Product filter field (2), specify which products to use when generating feed:
only selected products,
all products except selected,
add selected products to list,
exclude selected products from the list.
Next, click the Save button and generate the feed.
Feed upload on the Facebook
Sign up for a Facebook account and create Catalog in your Facebook advertising account (if this hasn’t been done in advance).
To upload the feed to your Facebook Сatalog, in the Items tab (1), click the Add Items > Add Multiple Items button (2).

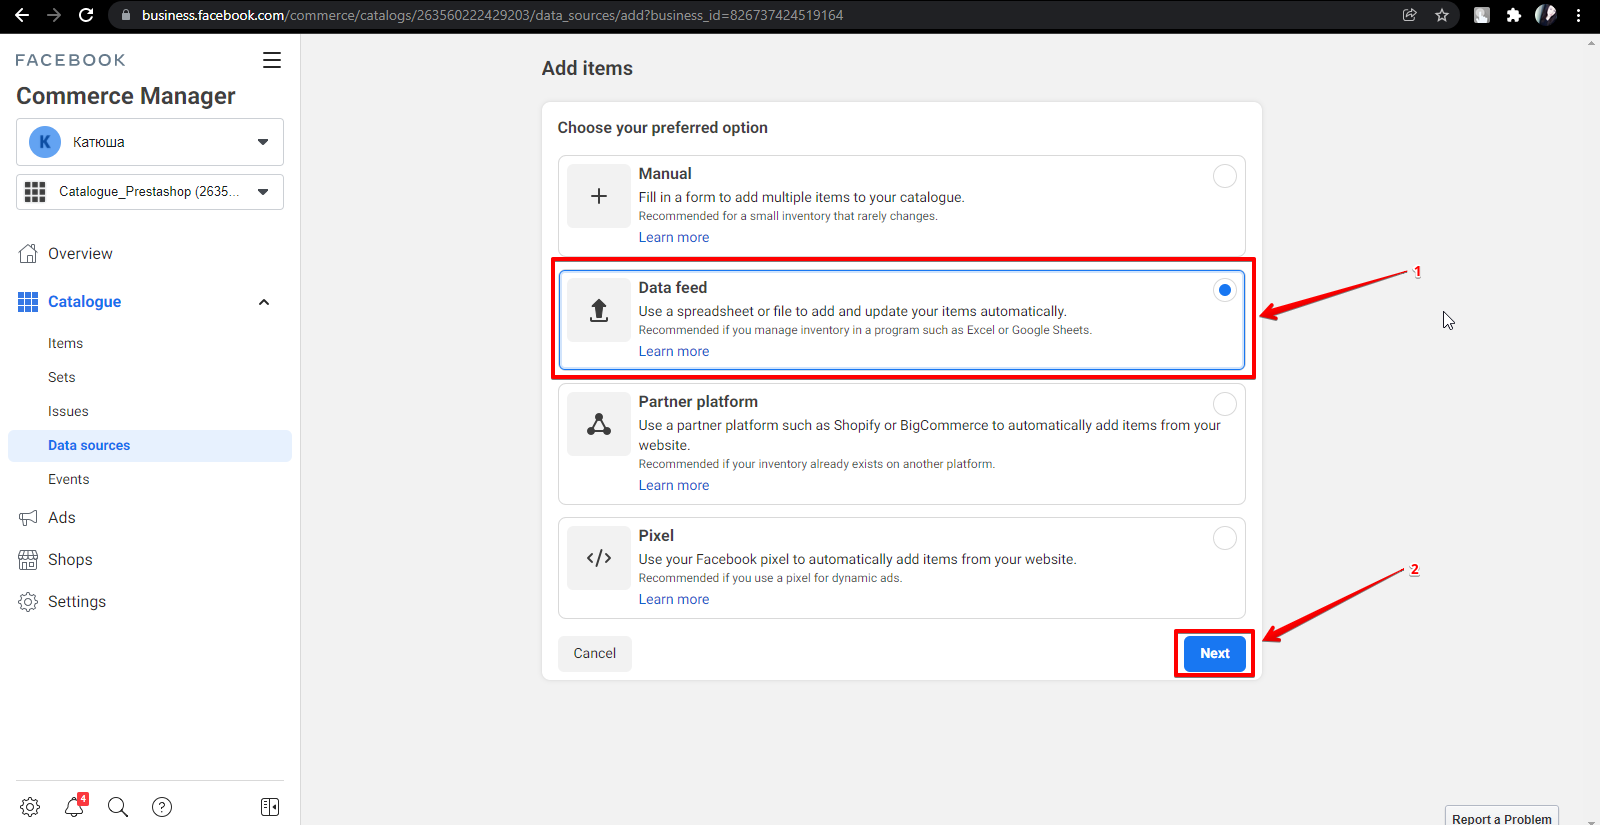
Next, on the Add items page, select the Data feed block (1) and click the Next button (2).
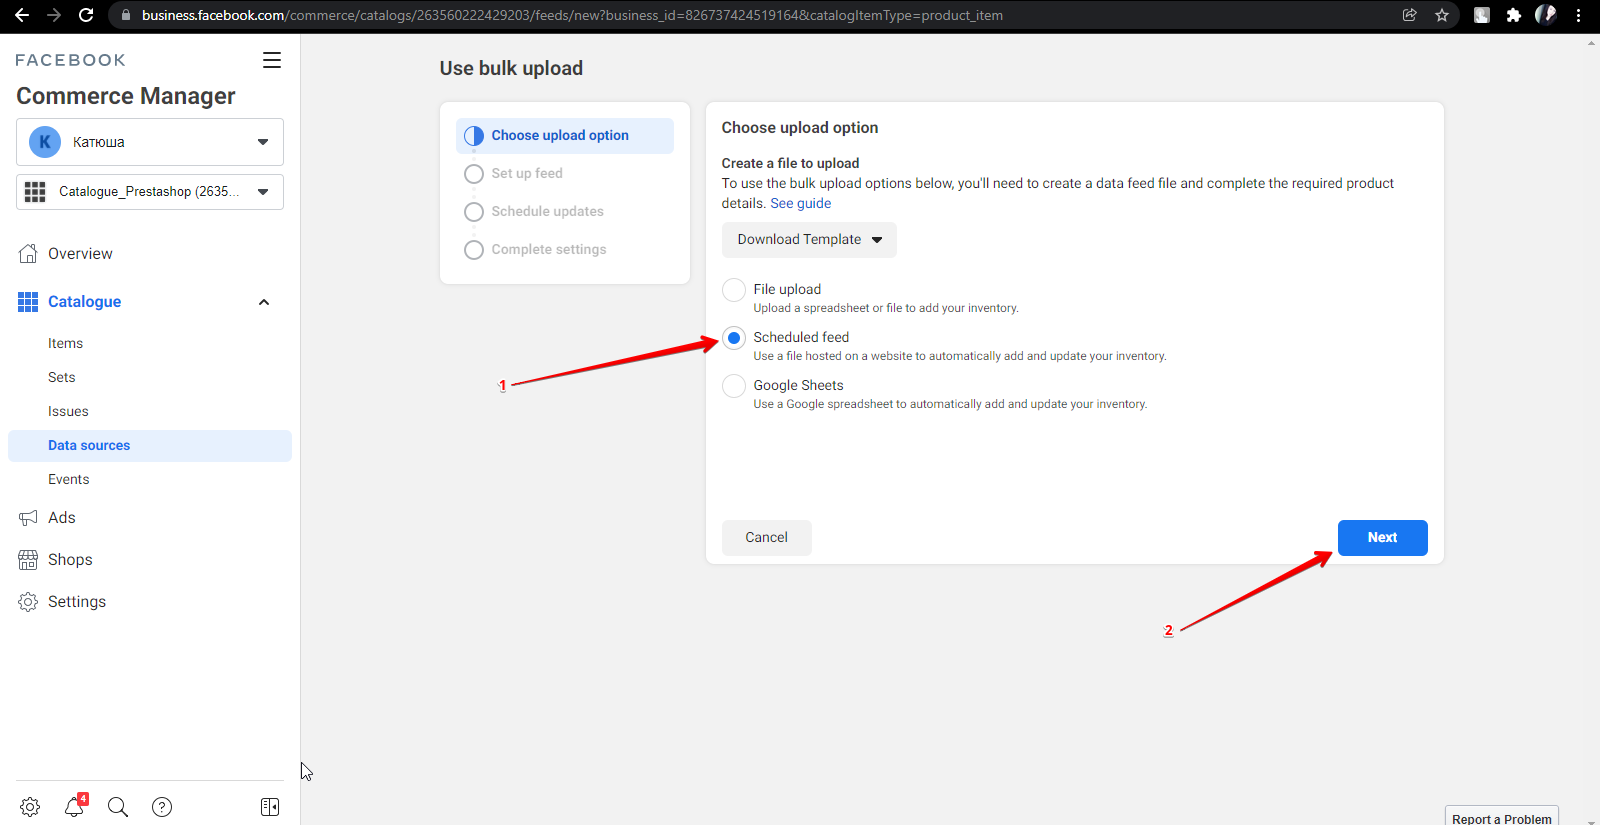
In the Use bulk upload block, that opens, select the Scheduled feed option (1) and click the Next button (2).
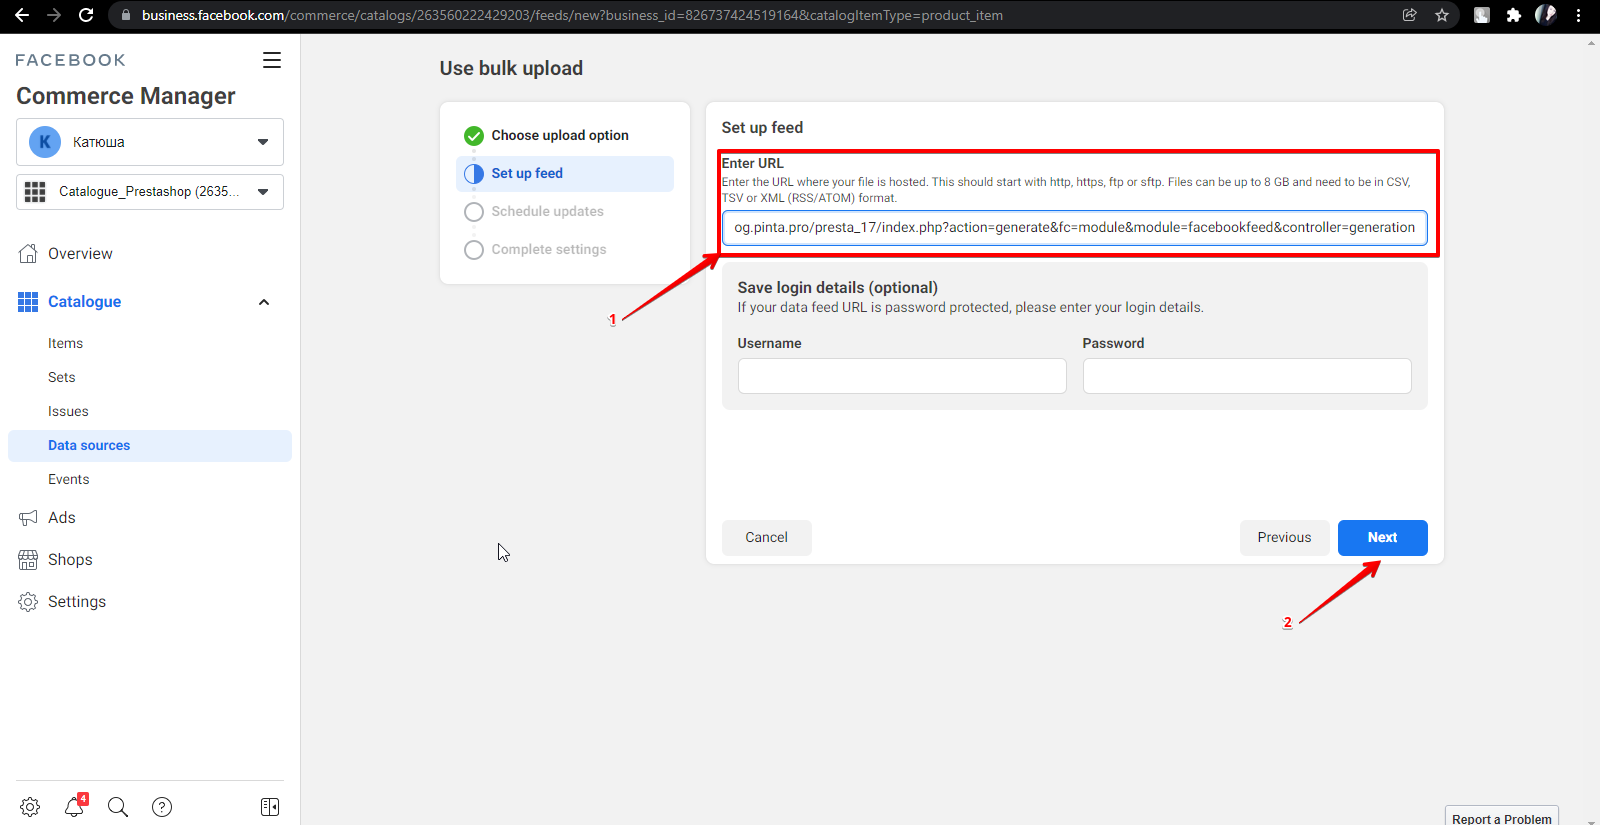
Copy the URL of the generated feed into the browser bar.
Paste the copied URL into the Enter URL field (1) and click the Next button (2).
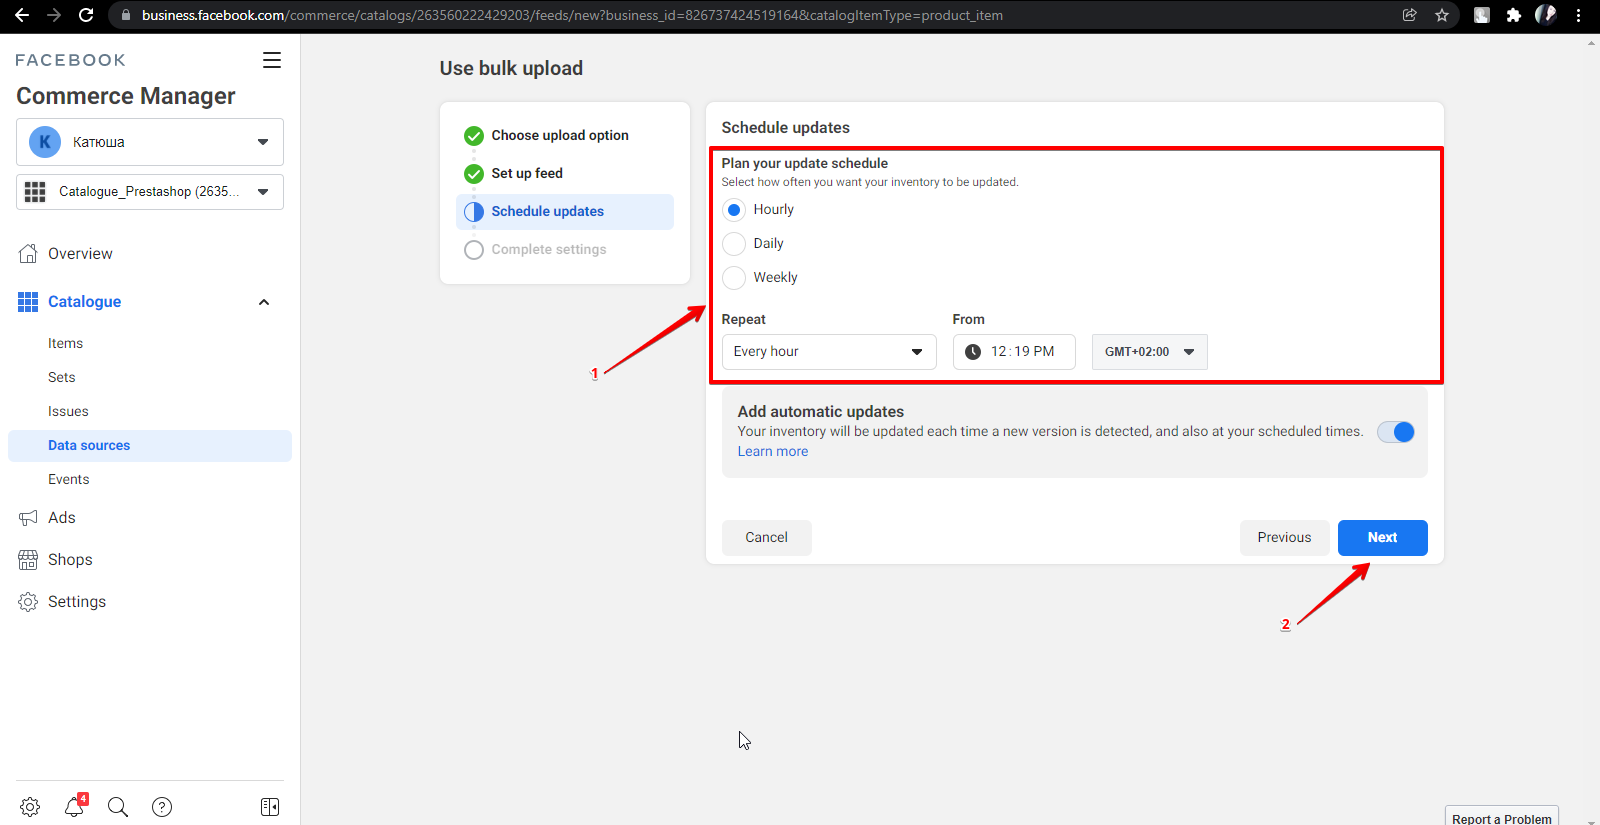
In the opened tab, select the needed option for Plan of update schedule (1) and click the Next button (2).
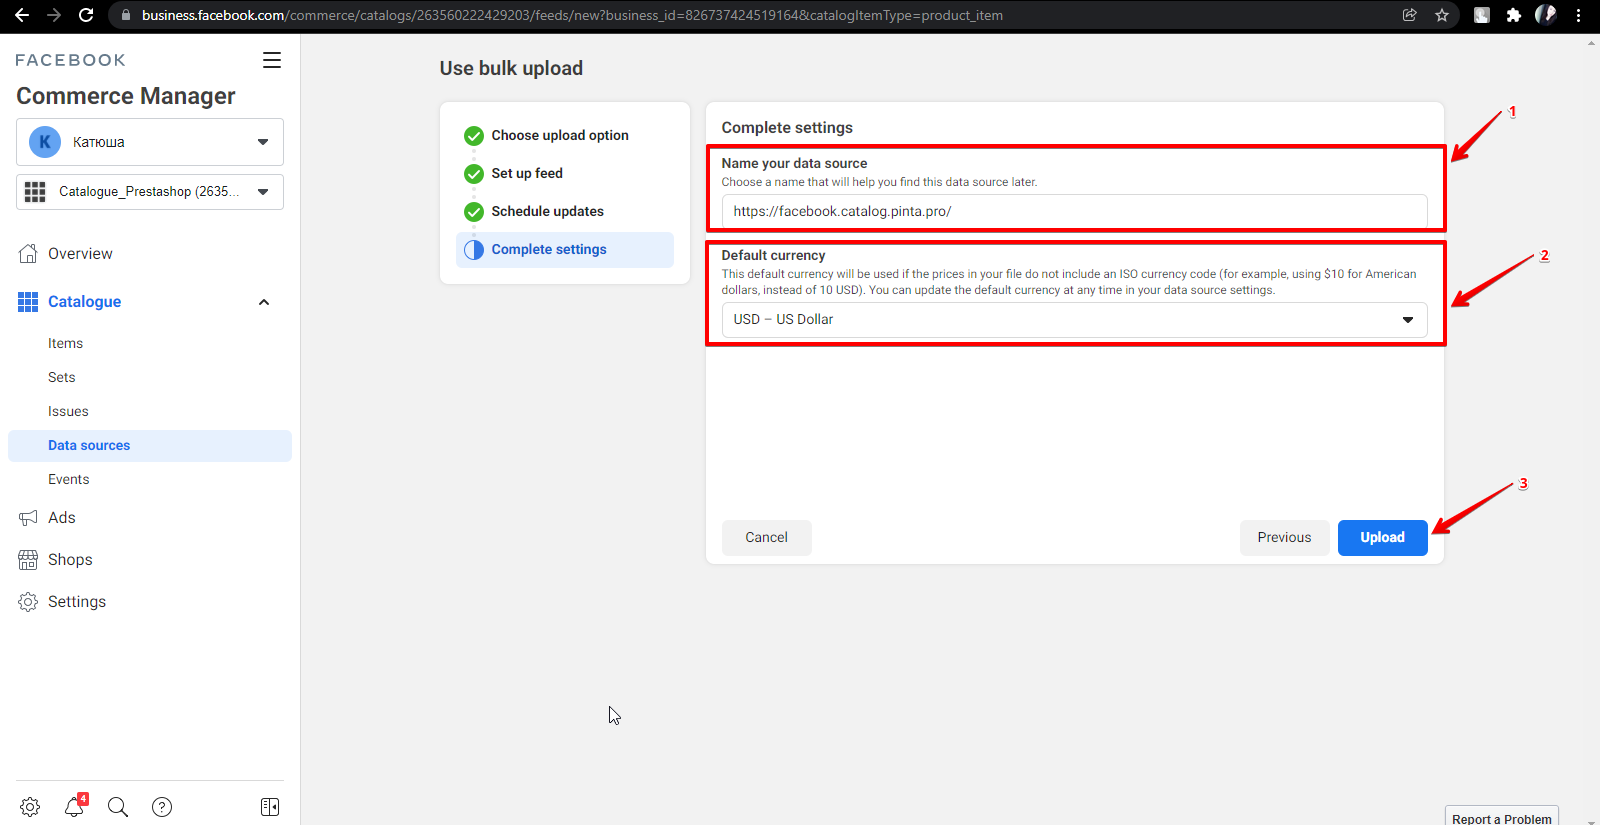
Next, name your data source (1), select currency (2), and click the Upload button (3).
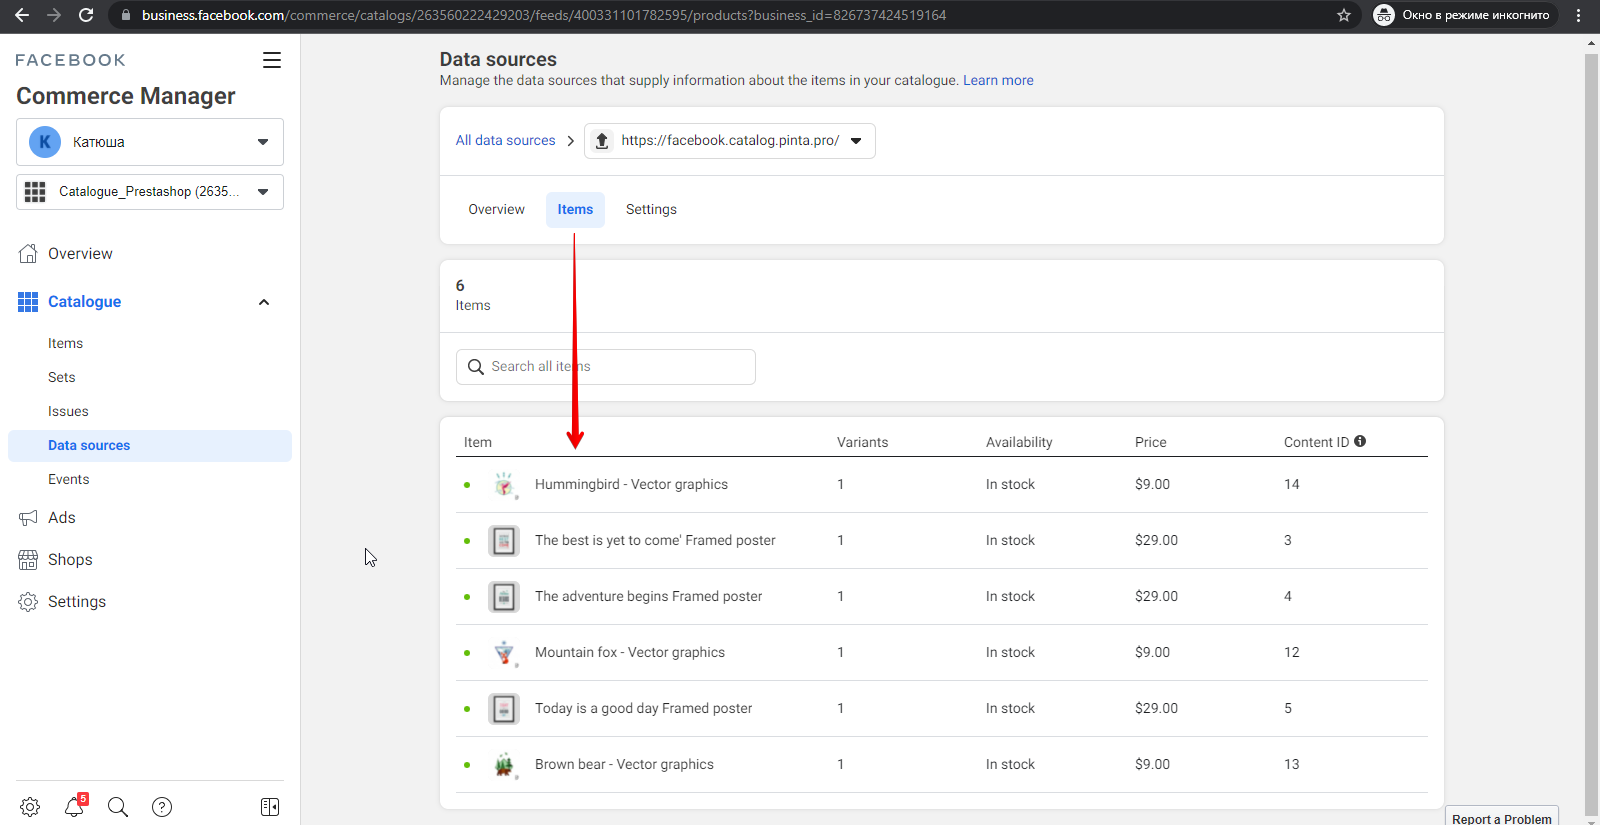
Wait for the product to load from the feed (1) and click the Items button (2).

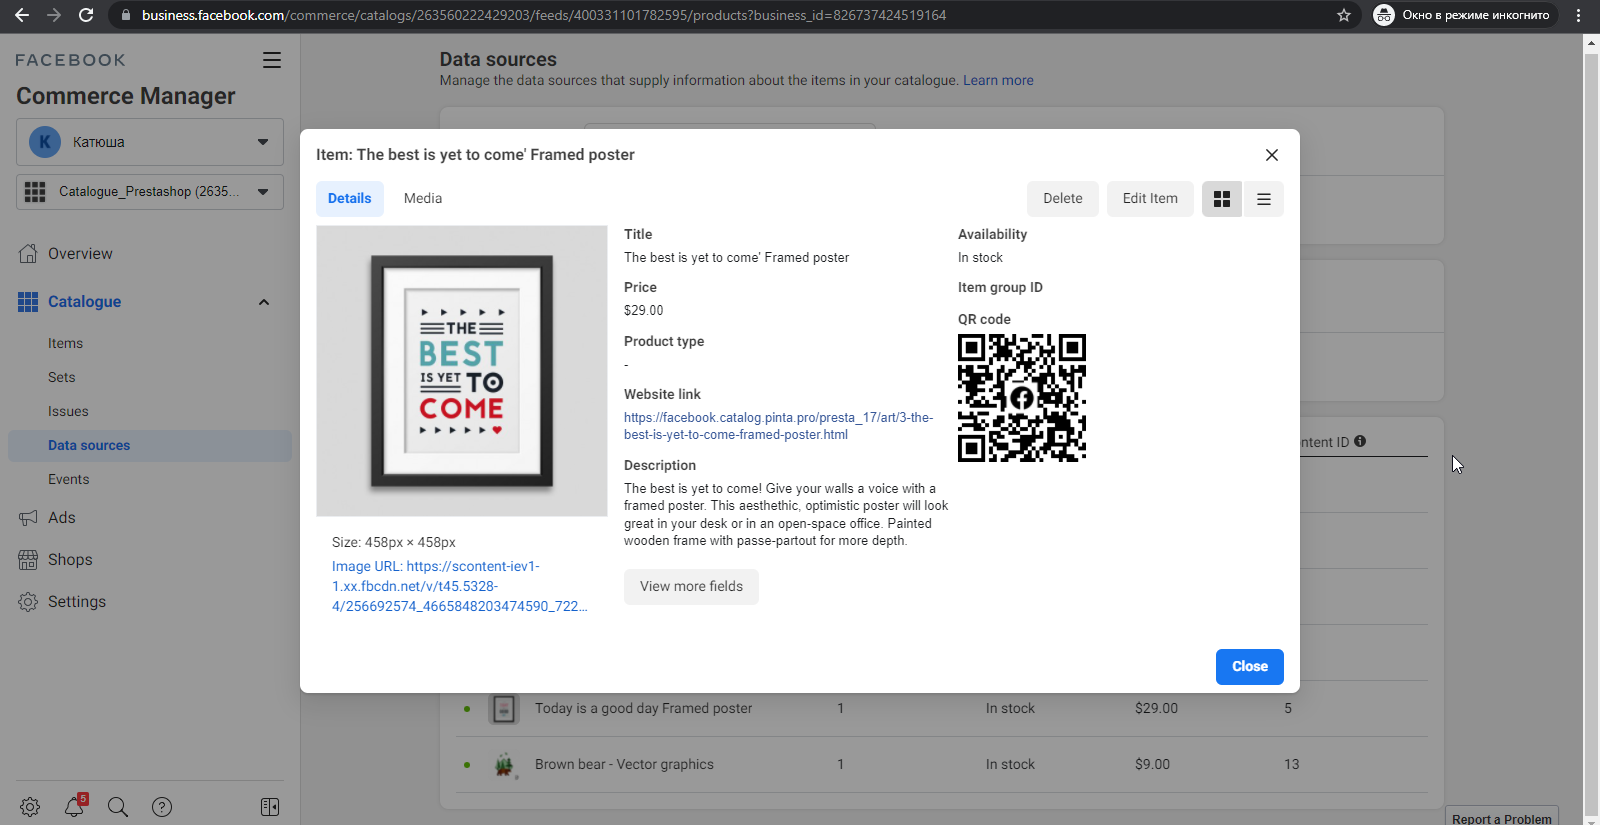
All products on your website corresponding to the selected categories are uploaded to the Facebook Catalog and displayed in a table.
A detailed description of the product is on the Product Card. To open the product card, click on the product in the table.
VIDEO INSTRUCTION