Installation Guide for Fast Cache PRO in Prestashop1.7
Download and install
Download the plugin archive from the Shop Pinta store and save it on your computer.
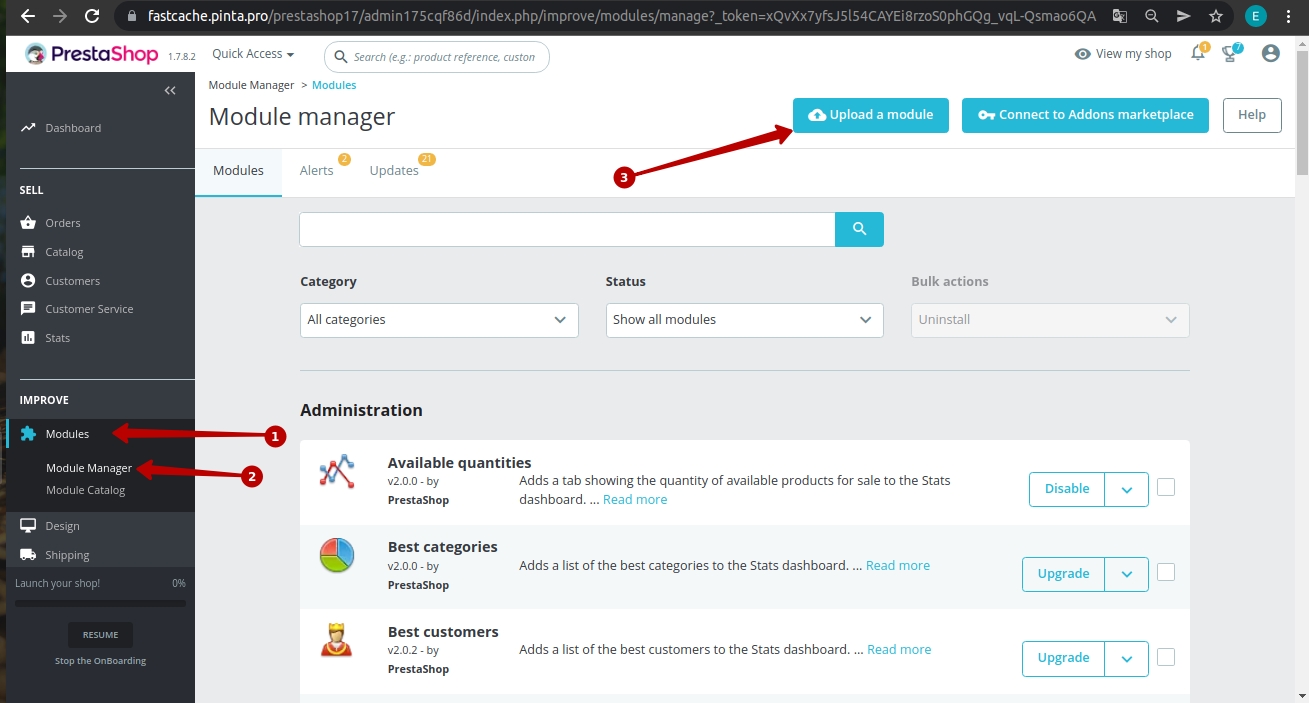
In the admin panel of your website, select Modules (1) > Module Manager (2).
Сlick the Upload a module button (3).
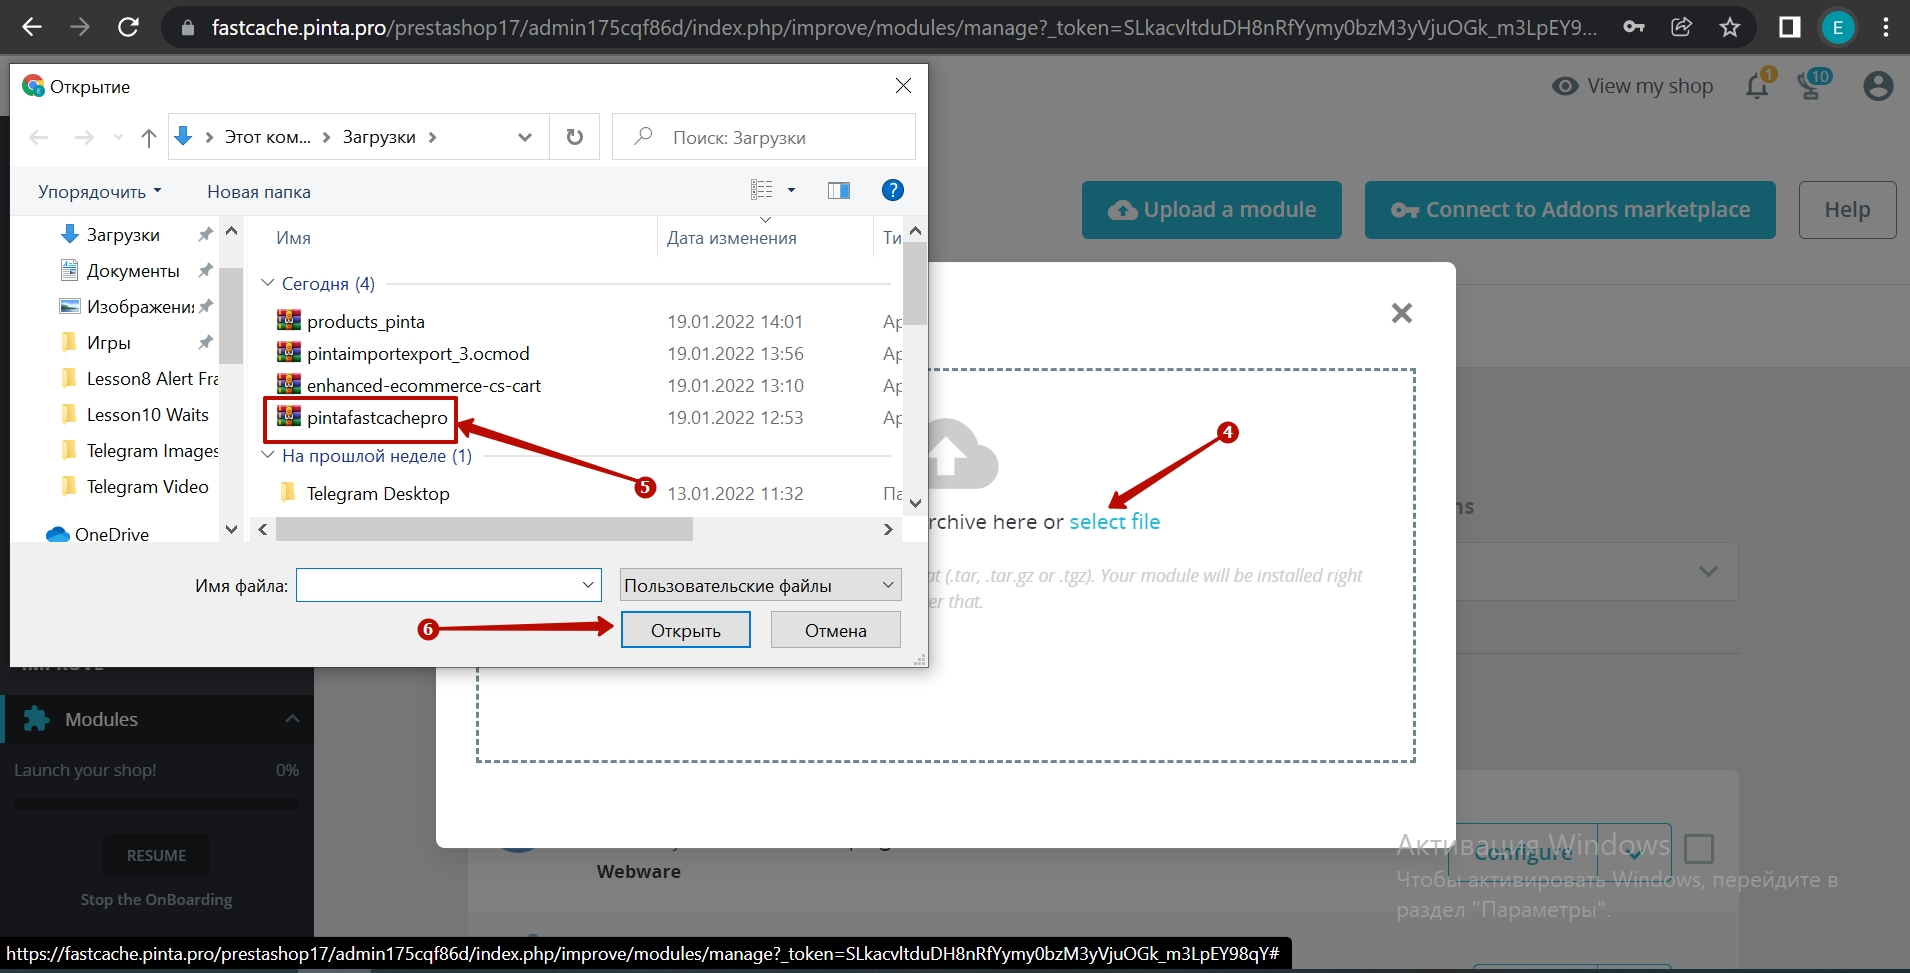
In the opened window, click on select file (4).
Next, select the plugin archive (5) and click the Open button (6).
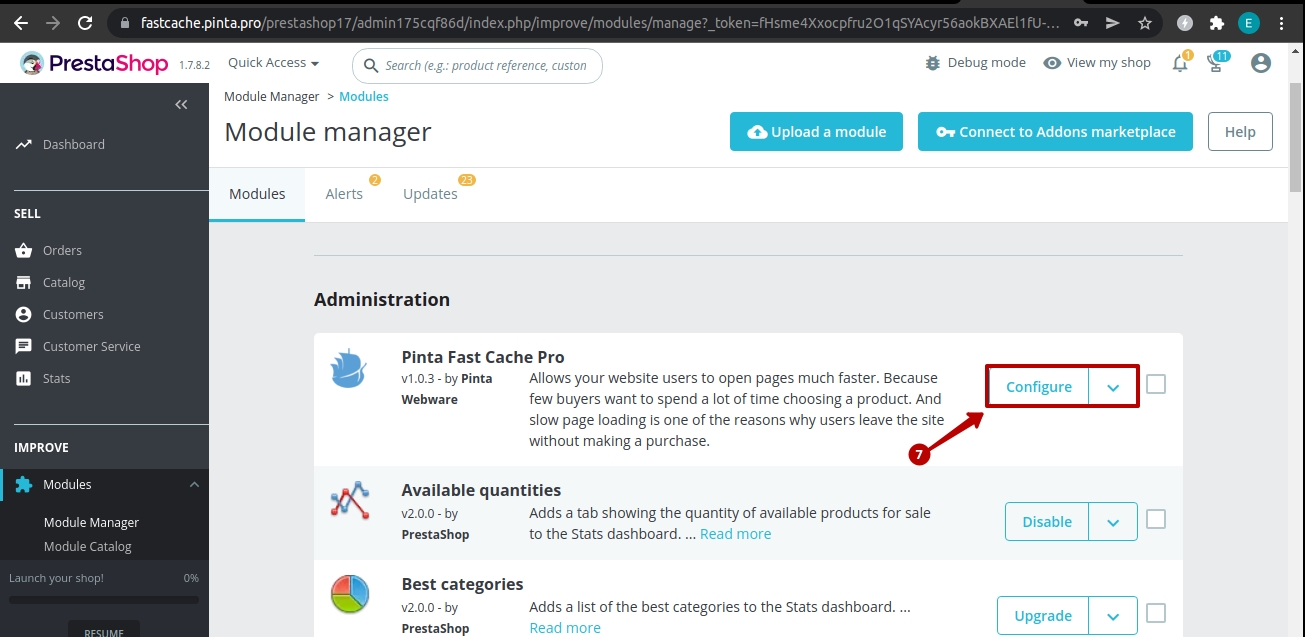
Wait for a message about "Module installed!" and click the Configure button (7).
Plugin page
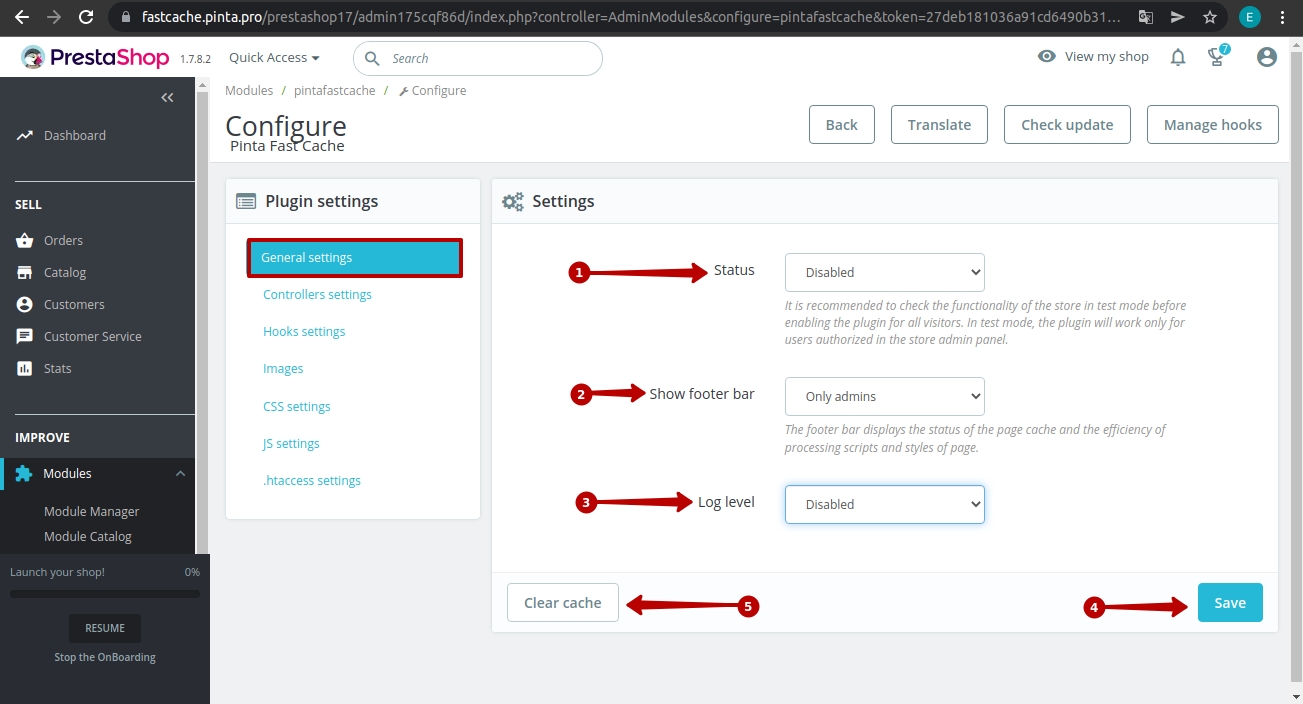
The General settings tab allows you to select general settings of the plugin and includes:
The Status field (1) - to enable / disable the plugin (position Enabled / Test mode / Disabled).
The Show footer bar field (2) - to select the caching panel display on the website for different user groups (for everyone, for the admin, or for no one).
The Log level field (2) - to unload the .log file and track the occurred errors.
To activate the plugin, click the Save button (4).
To clear the cache of your website, click the Clear cache button (5).
The Controllers settings tab allows you to select the caching time for your website pages.
For each controller (1), specify the time during which the cache exists.
If the controller cache is disabled, the plugin does not modify or cache the page content.
To save the selected settings, click the Save button (2).

The Hooks settings tab allows you to enable dynamic loading of the module hooks.
Any cached page renders anonymous content. With dynamic modules, you can load content with data for the current user.
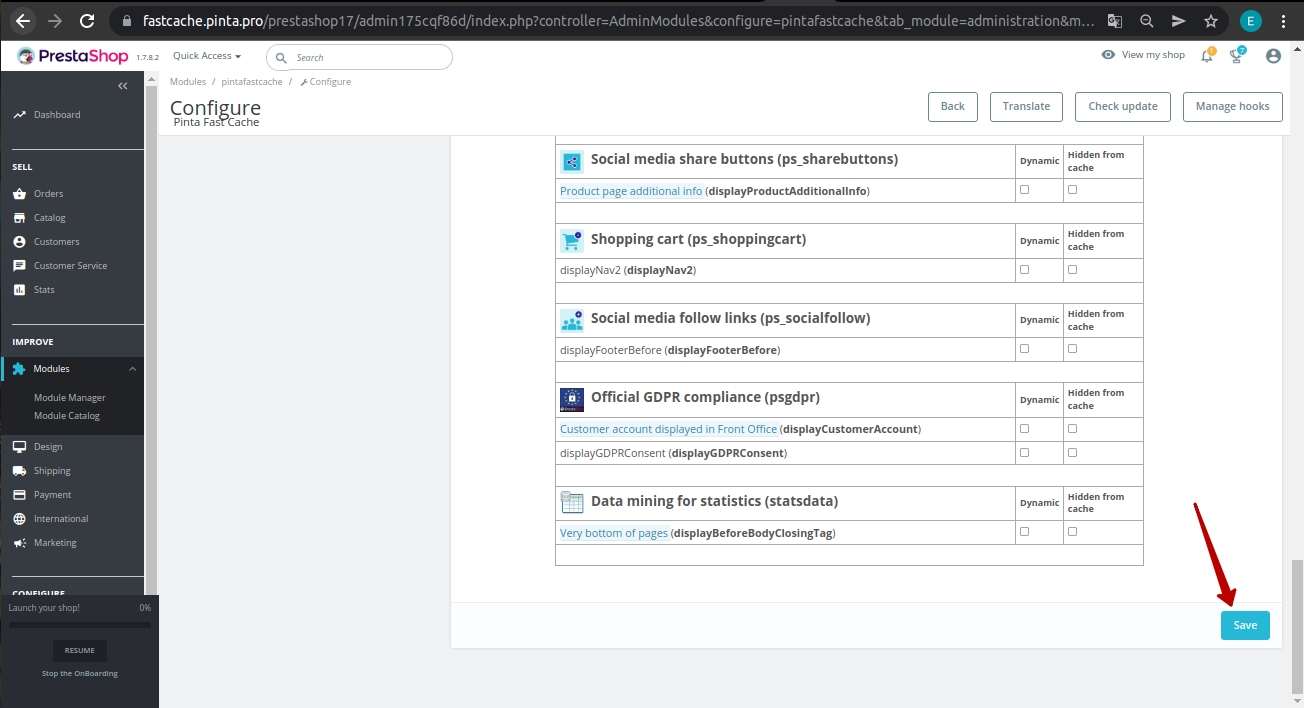
To do this, select the checkboxes for the required modules (Dynamic, Hidden from cache).
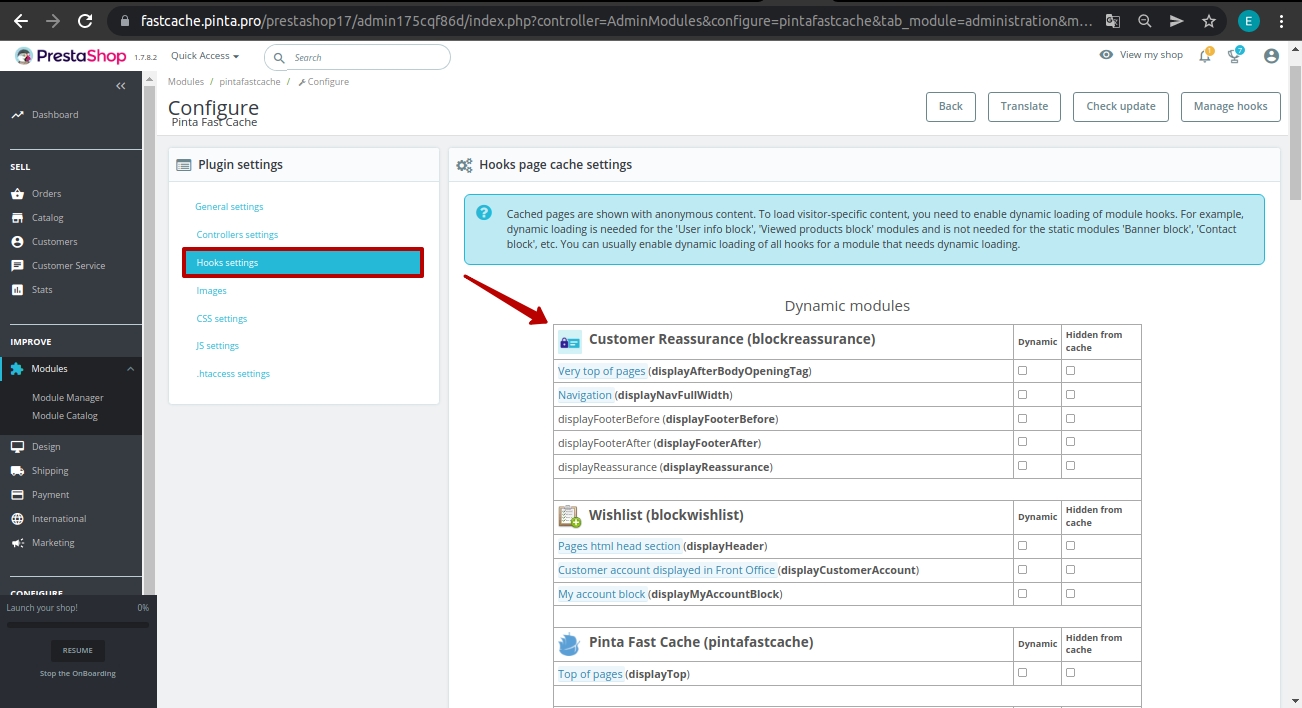
Next, click the Save button.
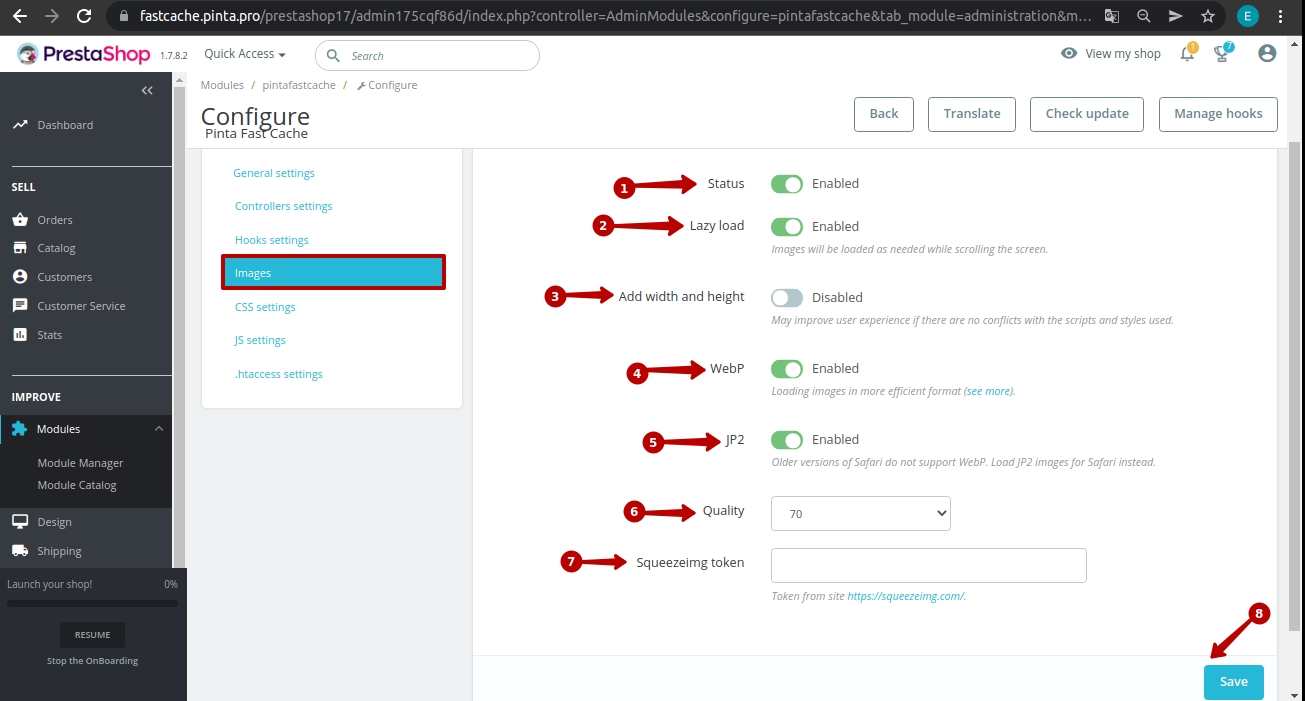
The Images tab allows you to select the image compression settings and includes:
The Status checkbox (1) - to enable / disable the image compression / conversion with the Squeezeimg Image Optimizer (position Enabled / Disabled).
The Lazy load checkbox (2) - to apply lazy loading of images (position Enabled / Disabled).
The Add width and height checkbox (3) - to display the sizes of images in the html code of the page (position Enabled / Disabled).
The WebP checkbox (4) - to convert images to WebP format (position Enabled / Disabled).
The JP2 checkbox (5) - to convert images to JP2 format (position Enabled / Disabled).
The Quality field (6) - select a value for the compression quality.
The Squeezeimg token field (7) - to enter the API key generated after registration of a Squeezeimg account.
The Save button (8) - to save the settings.
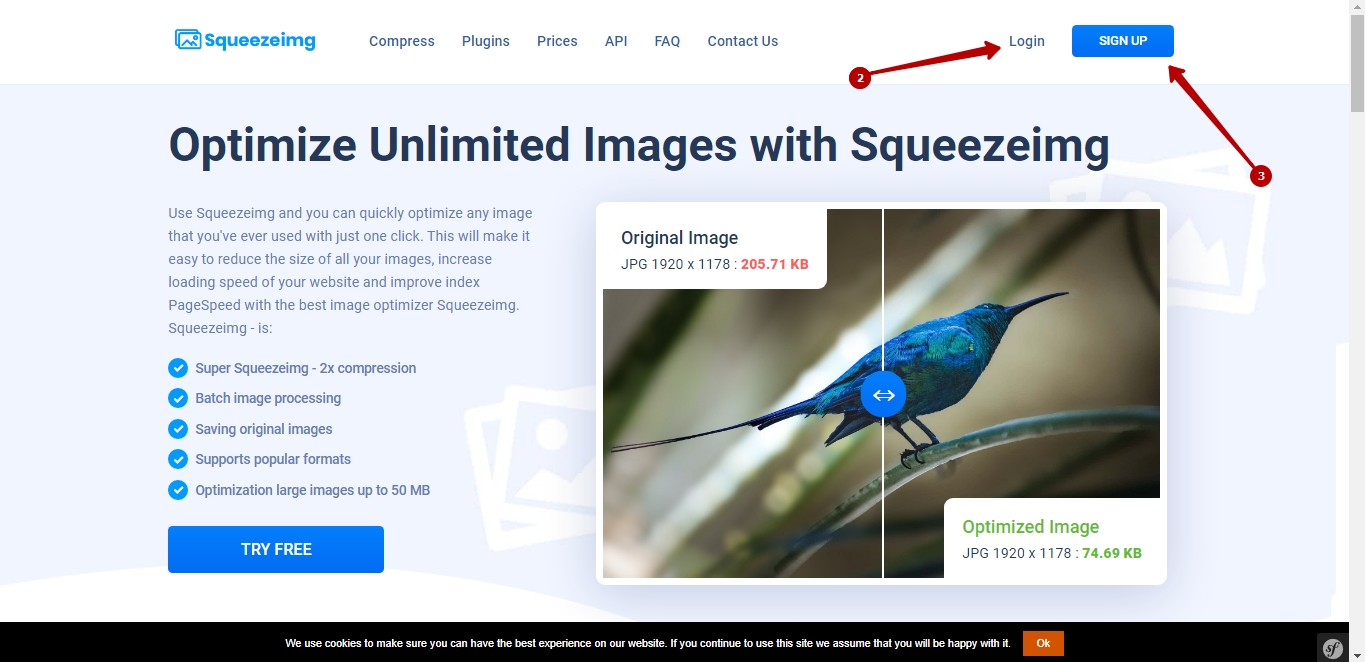
To fill in the Squeezeimg token field, you need to receive an API key.
To do this, go to https://squeezeimg.com.
Next, in the Squeezeimg service window that opens, Login (2), if you are already registered with the service, or create a new account - SIGN UP (3).
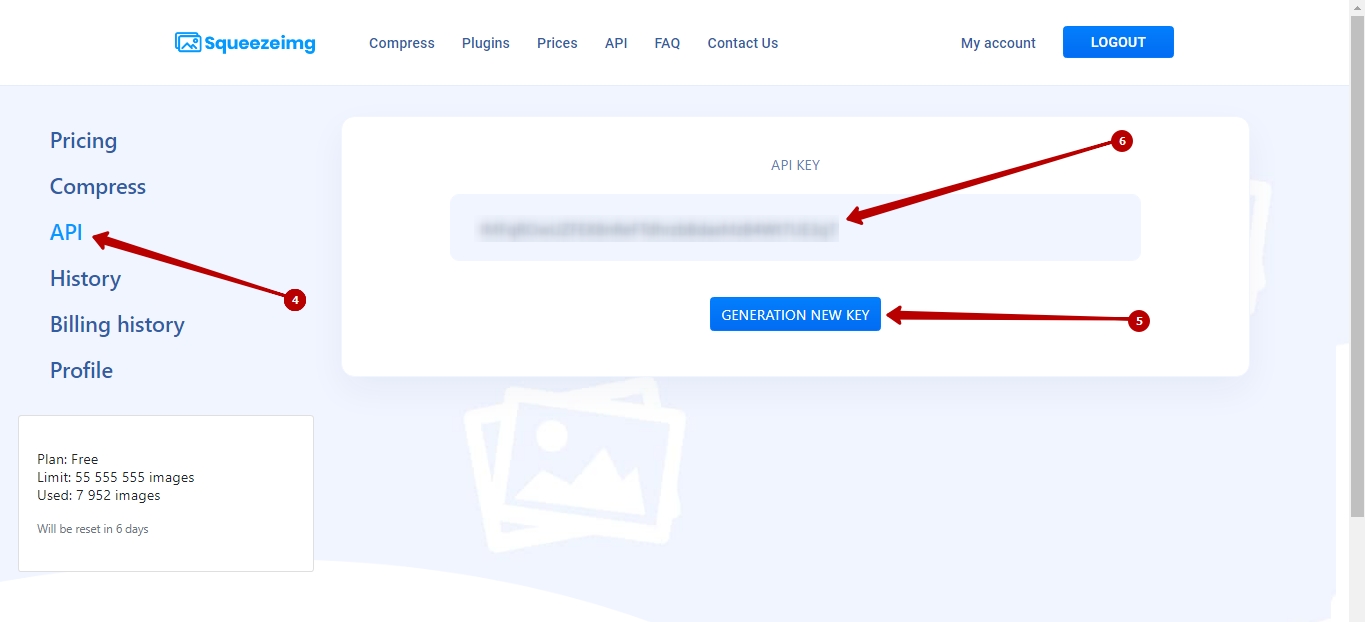
In your account (My account) go to the API tab (4) and click on the GENERATION NEW KEY button (5) to generate an API key.
Next, copy the generated API key (6).
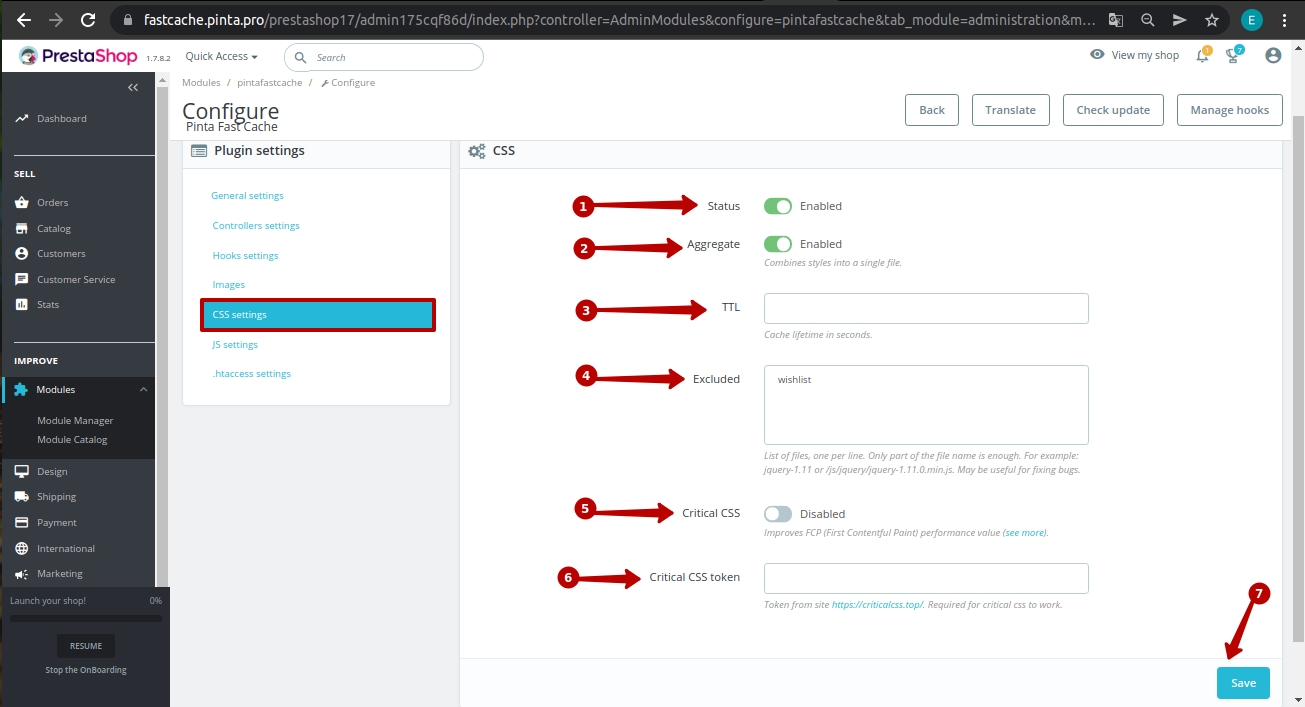
The CSS settings tab allows you to optimize CSS styles and includes:
The Status checkbox (1) - to enable / disable the optimization of CSS styles (position Enabled / Disabled).
The Aggregate checkbox (2) - for combining CSS styles into one file (position Enabled / Disabled).
The TTL field (3) - for specifying the time during which the cache exists (in seconds). After this time, the cache will be updated.
The Excluded field (4) - enter CSS files that will be ignored during processing.
The Critical CSS checkbox (5) - to activate the output of CSS styles using the Critical CSS service. That is, it includes the ability to initially load important styles.
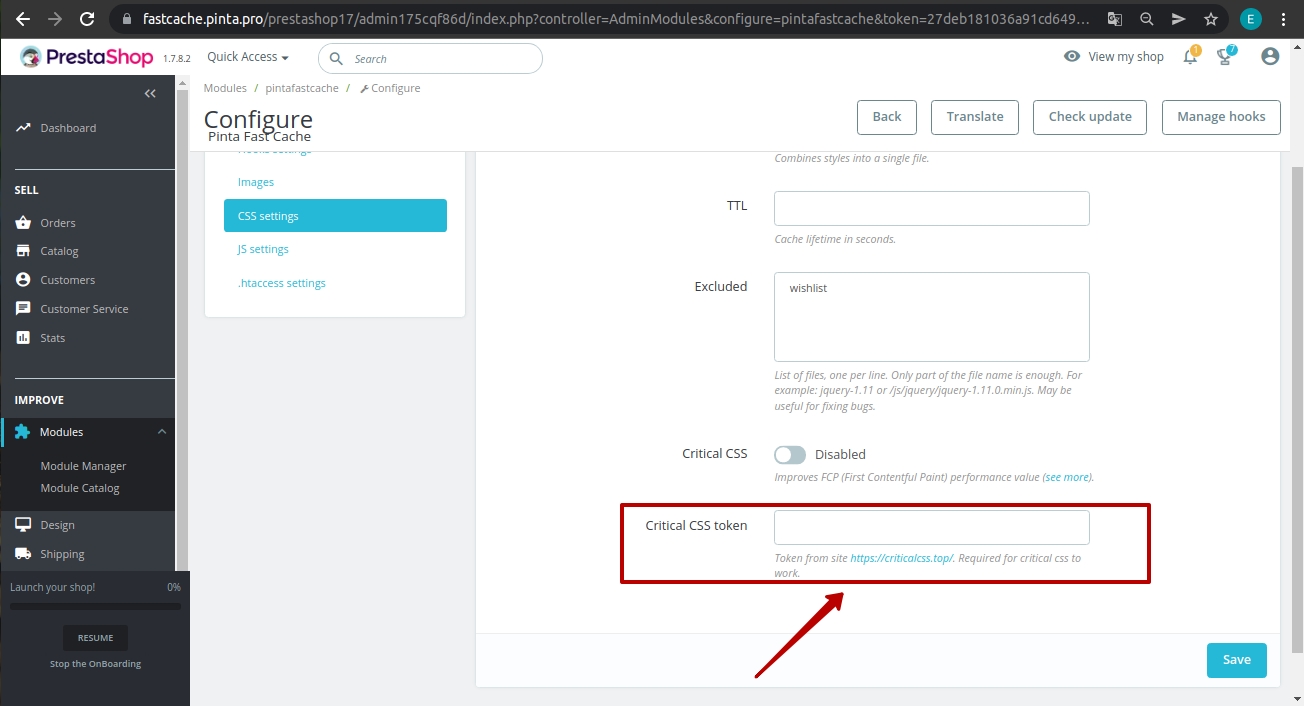
The Critical CSS token field (6) - to enter the token generated after registration of a Critical CSS account.
The Save button (7) - to save the settings.
To fill the Critical CSS token field, you need to get a token.
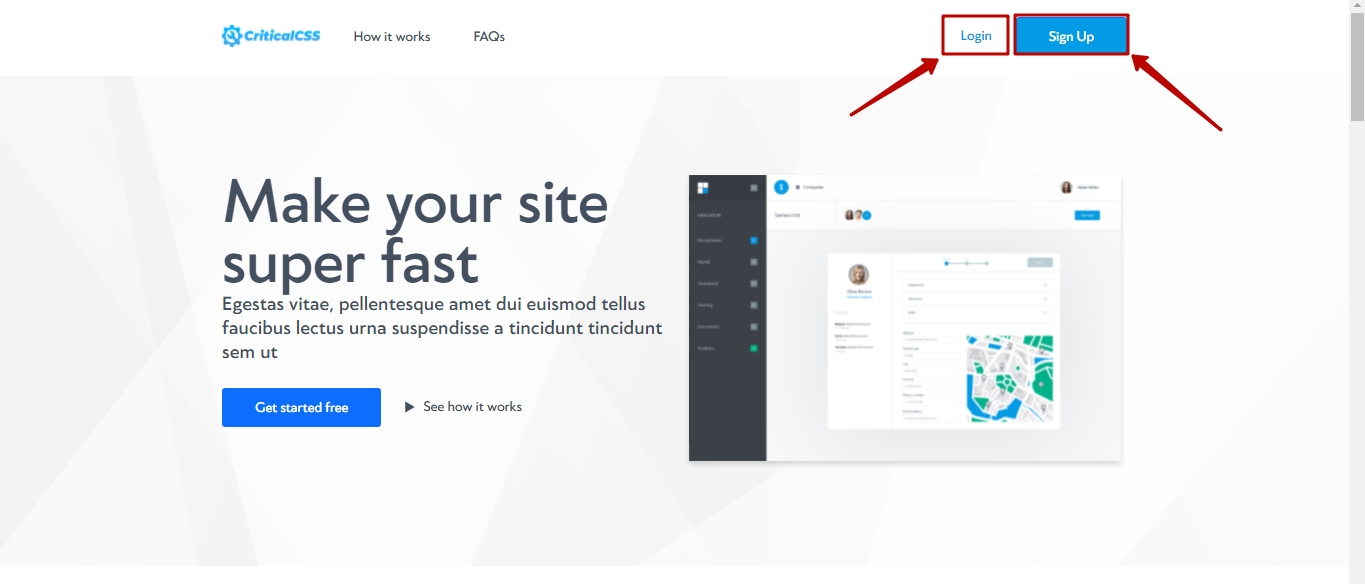
To do this, go to the website https://criticalcss.top/.
Next, in the Critical CSS service window that opens, Login if you are already registered with the service, or create a new account - Sign Up.
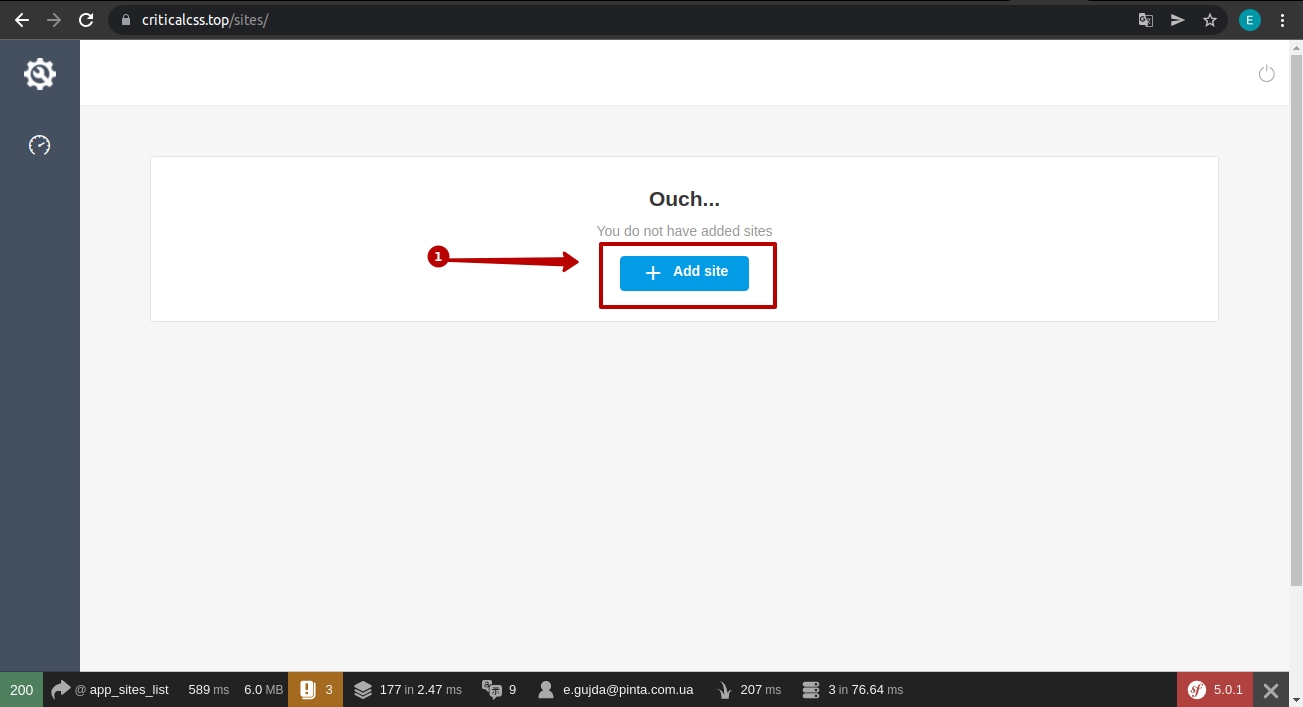
In your account, click on the Add site button (1).
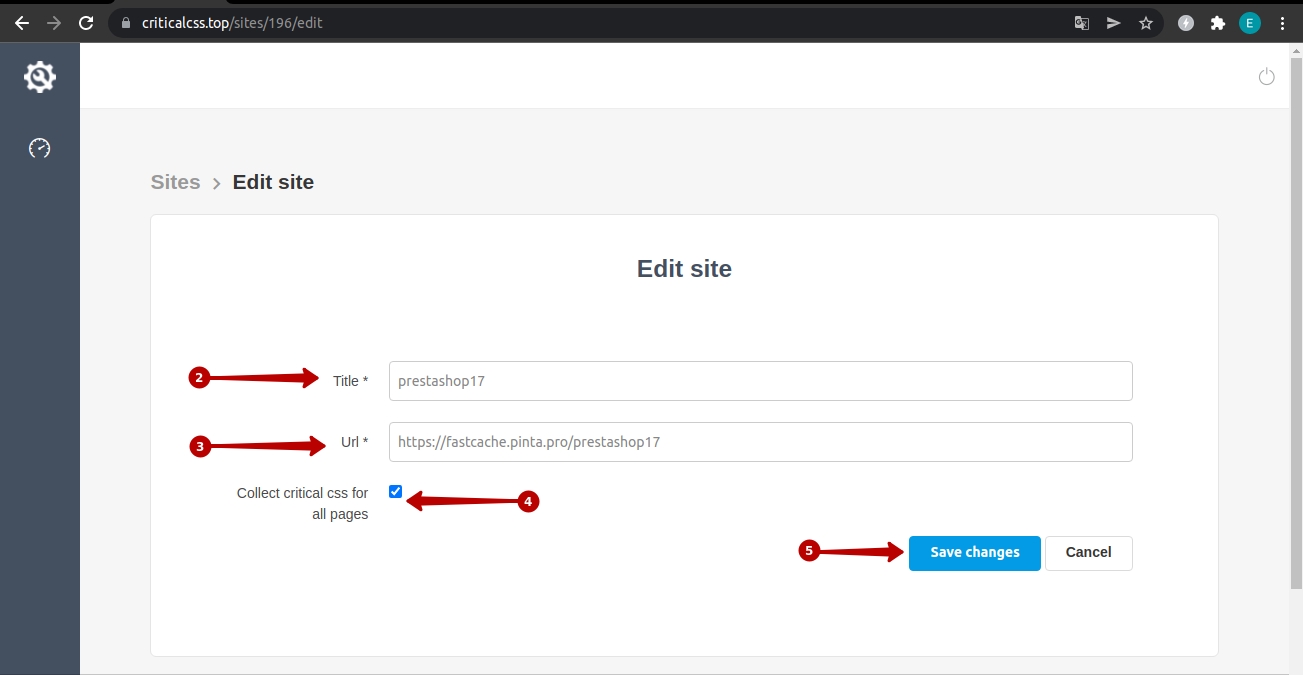
Fill in data on the Title (2) and Url (3) fields.
To apply CSS optimization to all website pages, select the Collect critical css for all pages checkbox (4).
And click the Save changes button (5).
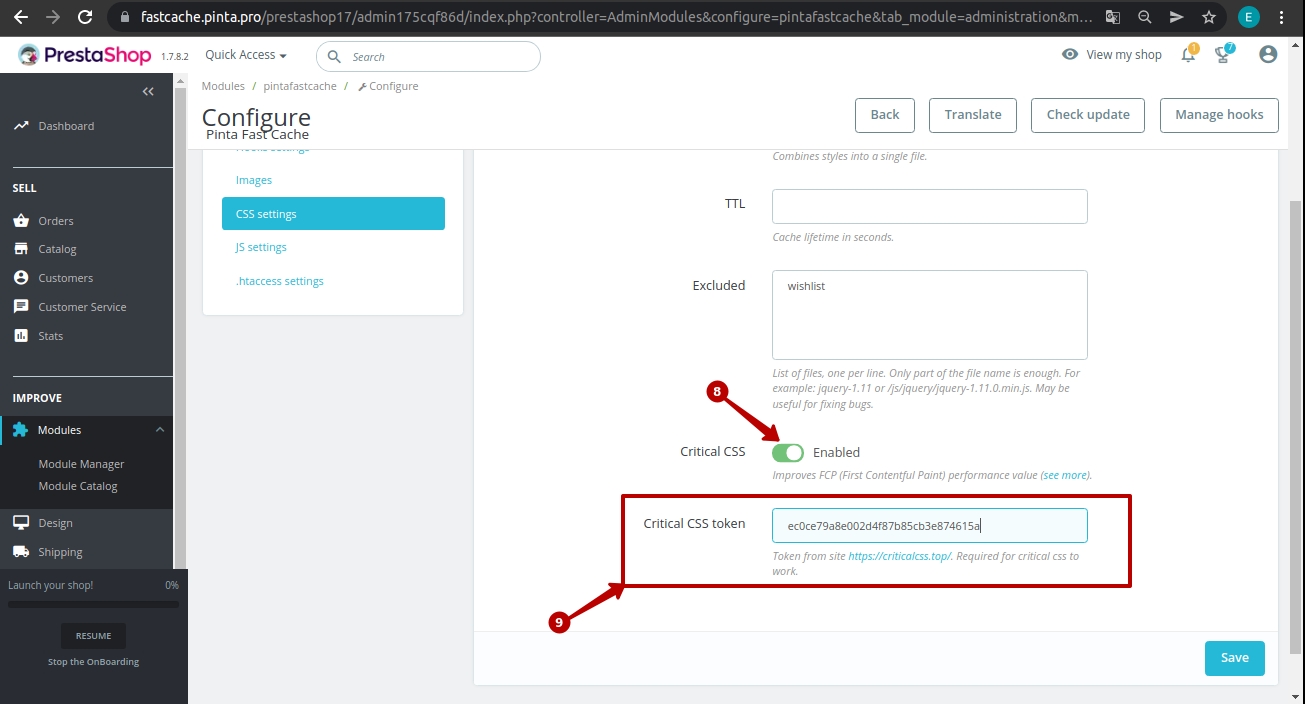
Next, go to the Sites page (6) and copy the token of the selected site (7).

On the plugin page activate the Critical CSS block (8) and paste the generated token into the Critical CSS token field (9).
And click the Save button.
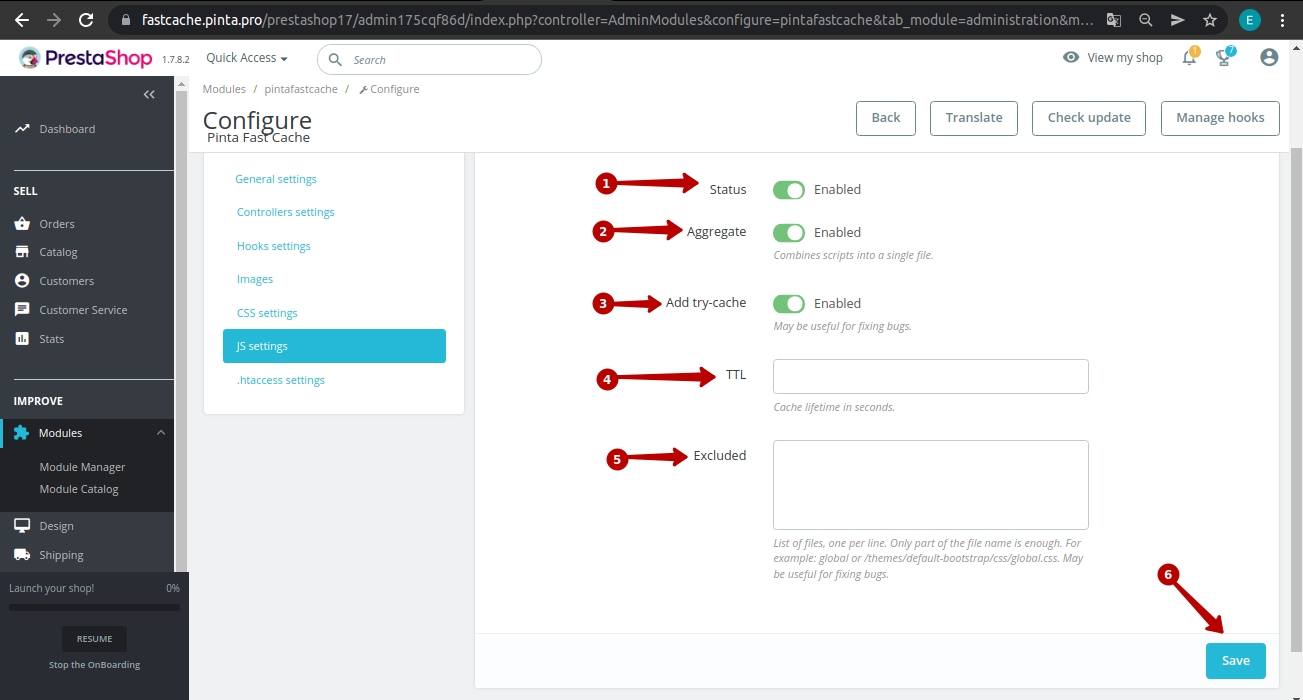
The JS settings tab allows you to optimize JS scripts and includes:
The Status checkbox (1) - to enable / disable the optimization of JS scripts (position Enabled / Disabled).
The Aggregate checkbox (2) - for combining JS scripts into one file (position Enabled / Disabled).
The Add try-catch checkbox (3) - to ignore existing JS scripts that are executed with errors (position Enabled / Disabled).
The TTL field (4) - for specifying the time during which the cache exists (in seconds). After this time, the cache will be updated.
The Excluded field (5) - for entering JS files to ignore during processing.
The Save button (6) - to save the settings.
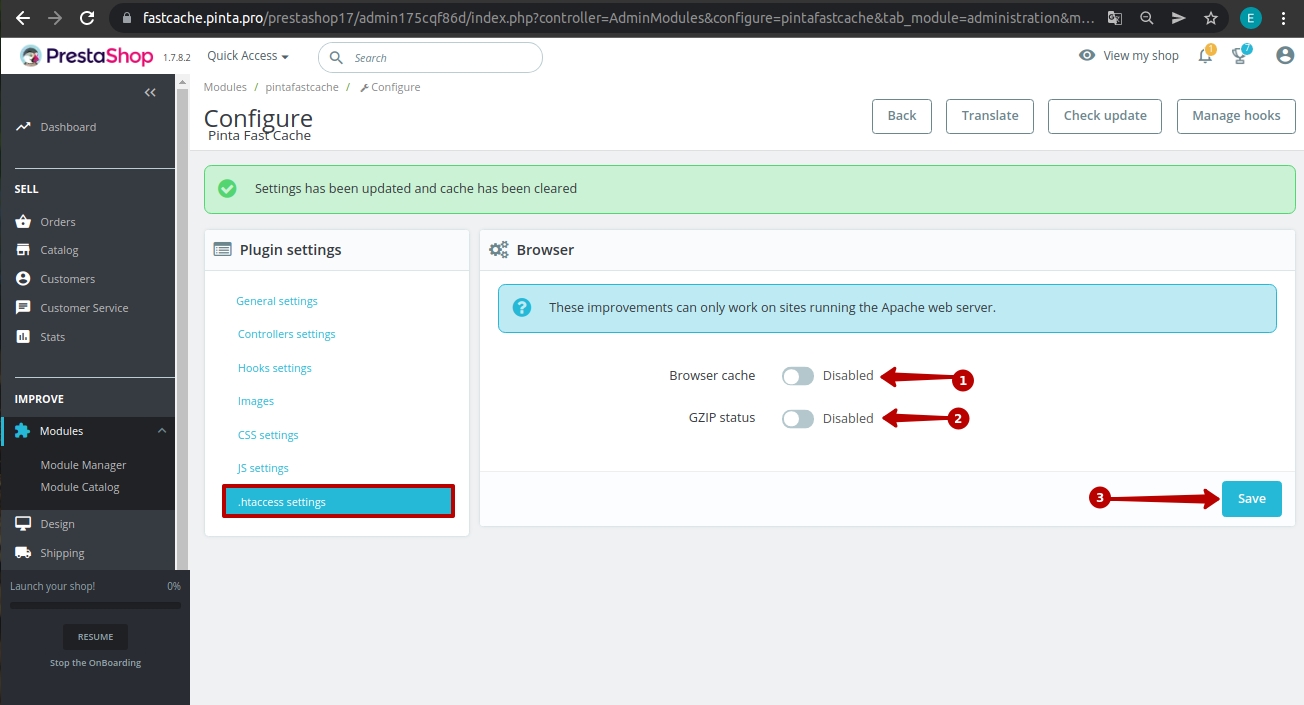
The .httaccess settings tab allows you to select the browser cache settings and includes:
The Browser cache checkbox (1) - to enable / disable browser caching (position Enabled / Disabled).
The GZIP status checkbox (2) - for applying to gzip compression on your website (position Enabled / Disabled).
The Save button (3) - to save the settings.
Now, using caching for your website allows users to open pages faster.
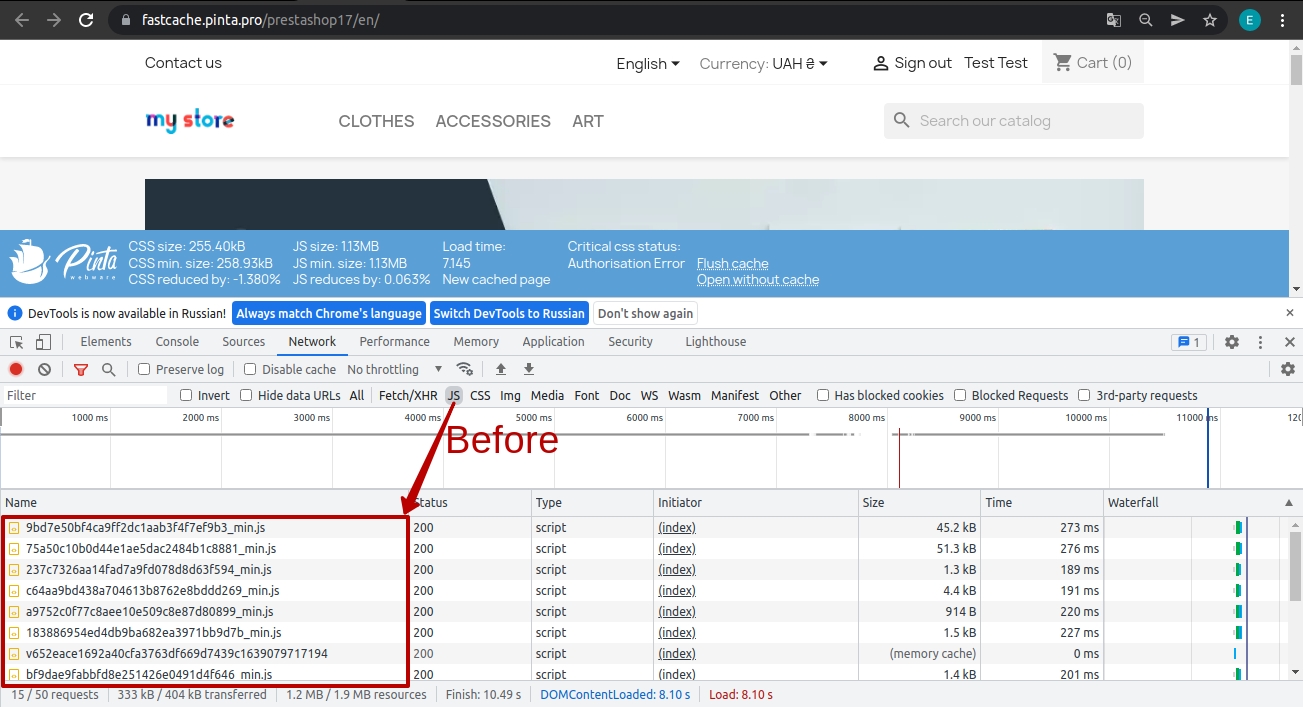
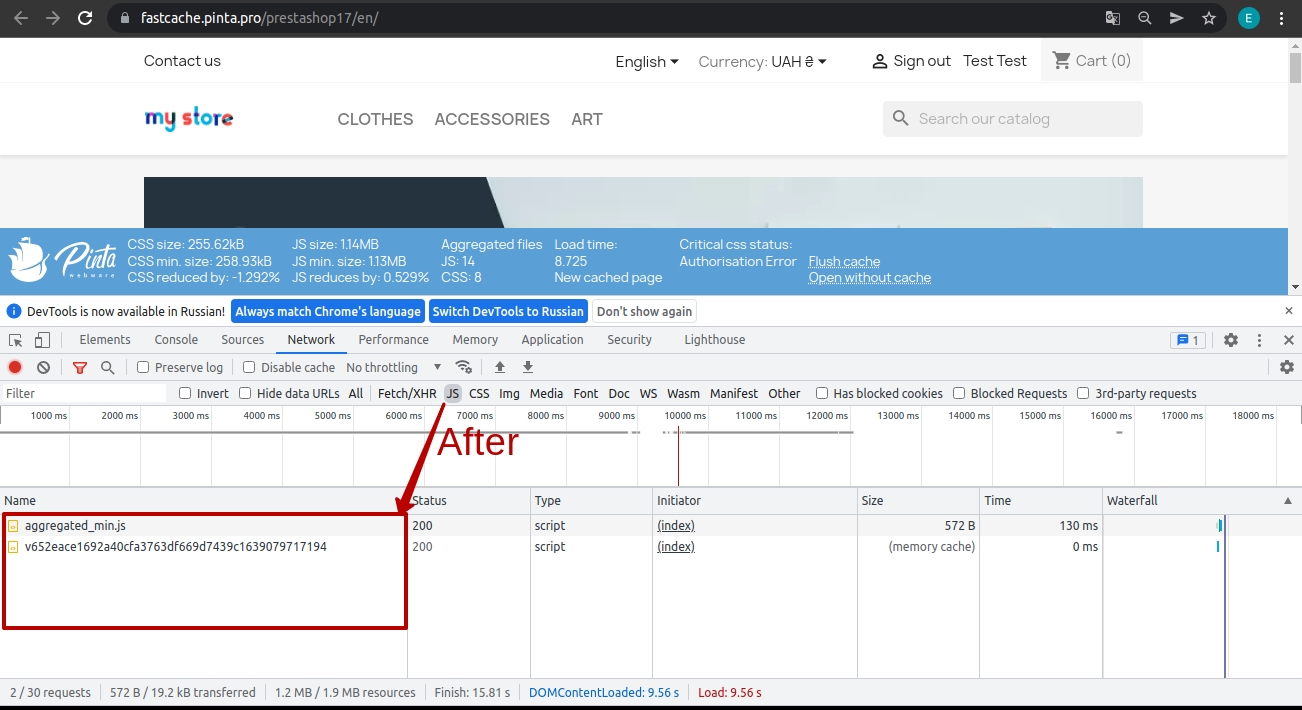
An example of displaying JavaScript files with the Aggregate option.
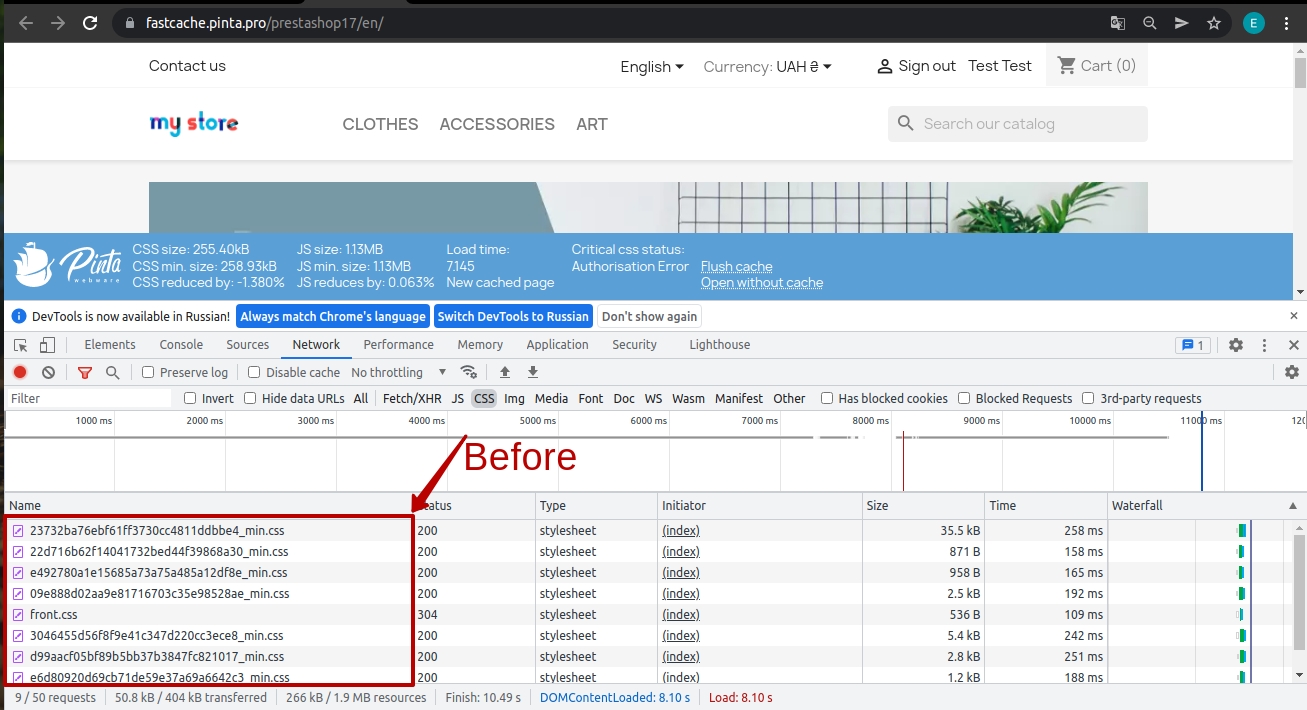
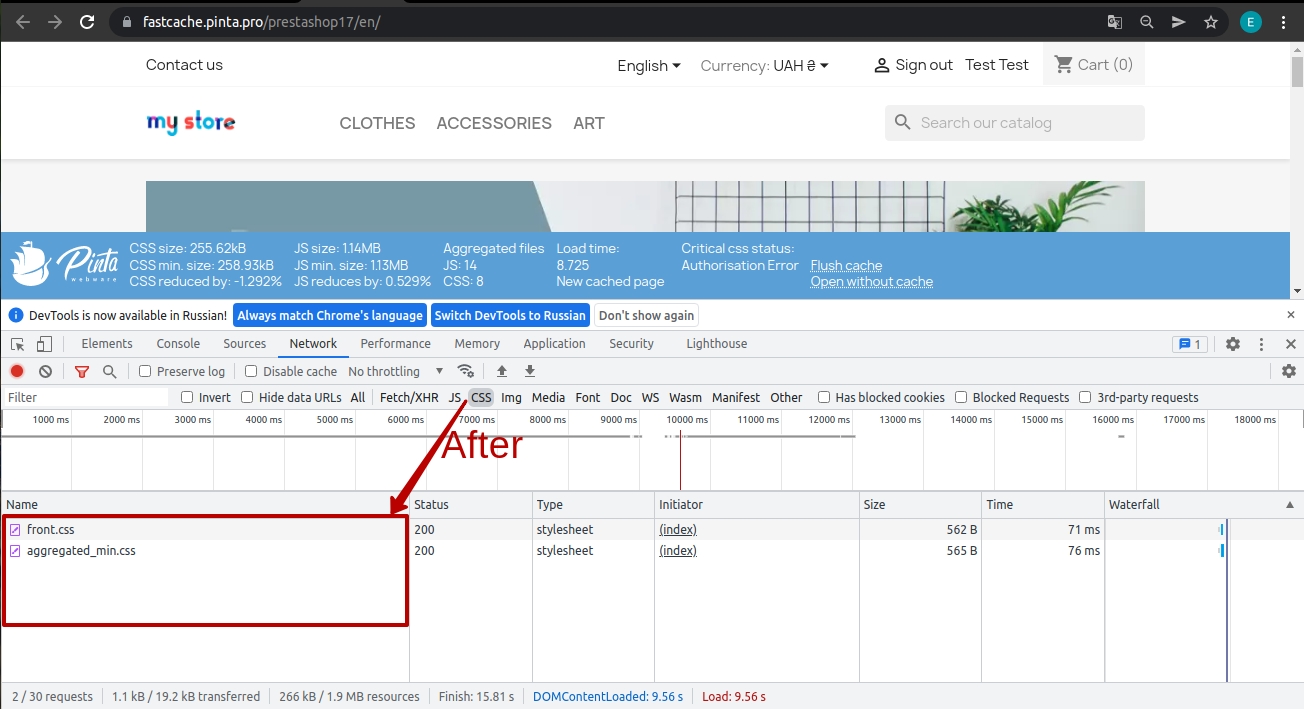
An example of displaying CSS files with the Aggregate option.
VIDEO INSTRUCTION