Installation Guide for Google Content API in Opencart3.0
INSTRUCTION GOOGLE CONTENT API FOR SHOPPING FOR OPENCART 3.0
Download and install
Download the plugin archive from the Shop Pinta store and save it on your computer.
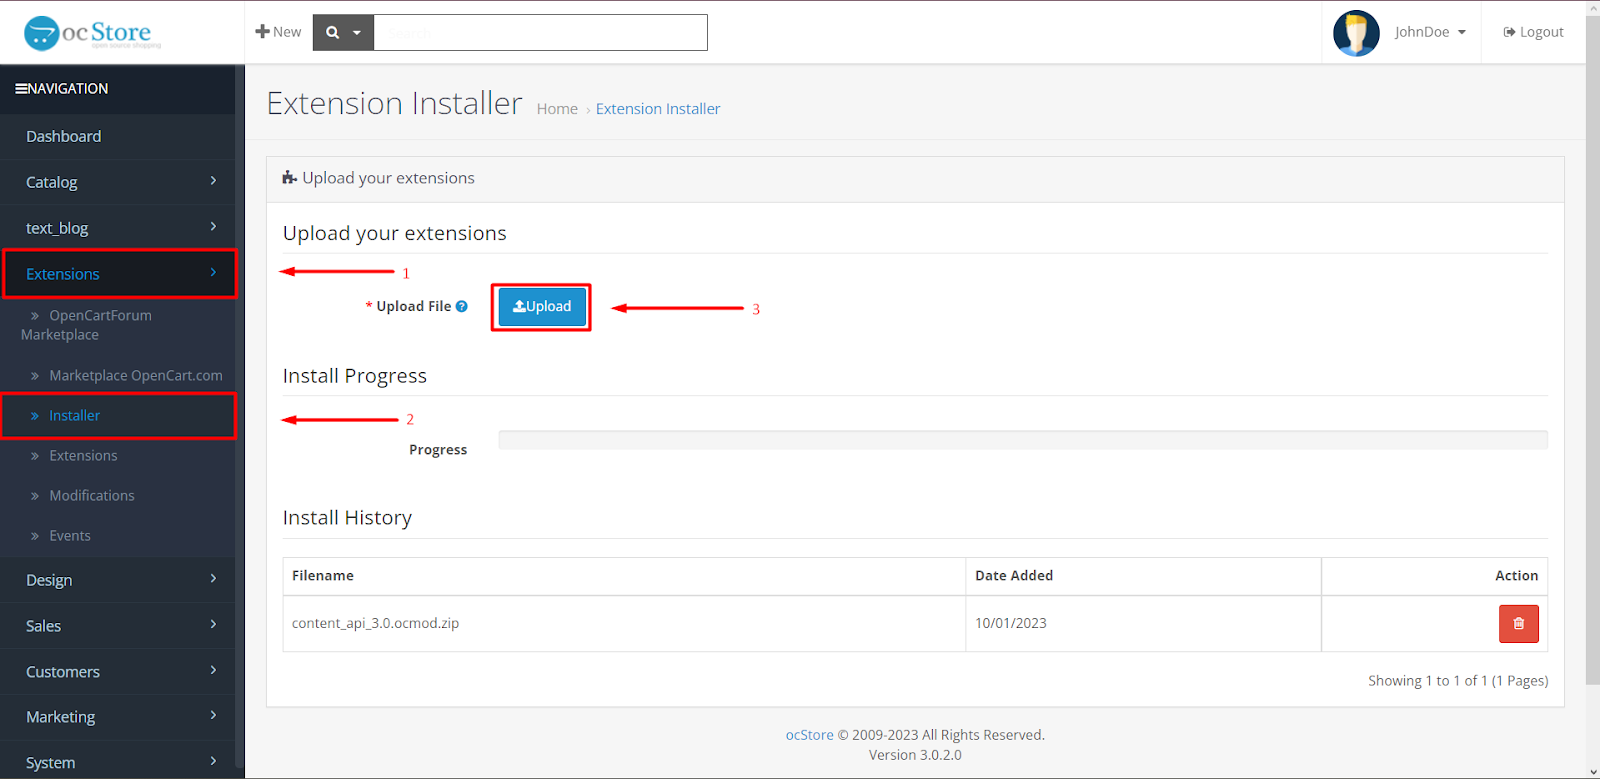
In the admin panel of your website, select Extensions (1) > Installer (2).
In the Upload your extensions block, click the Upload button (3).
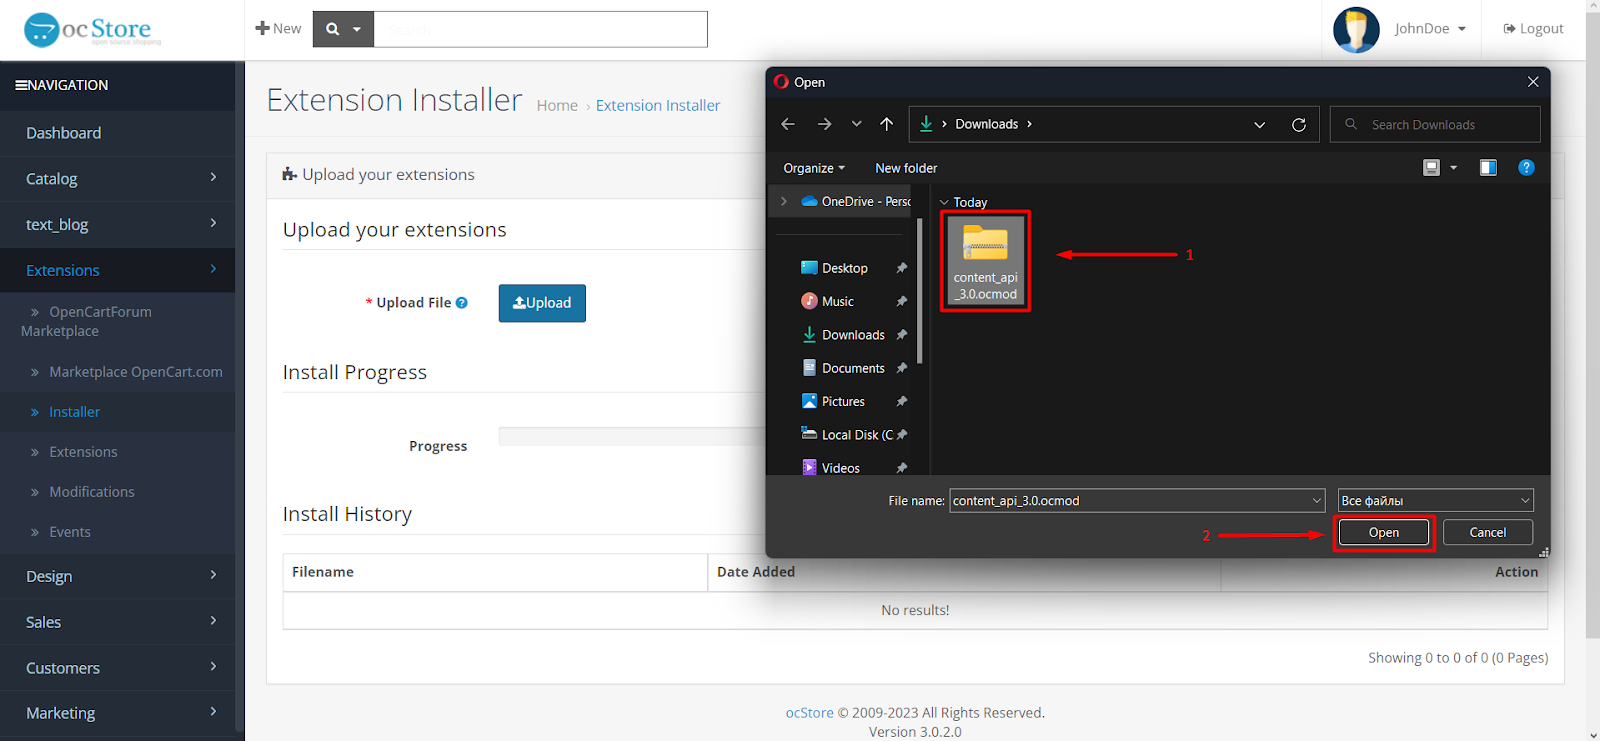
In the opened window select the plugin archive (1) and click the Open button (2).
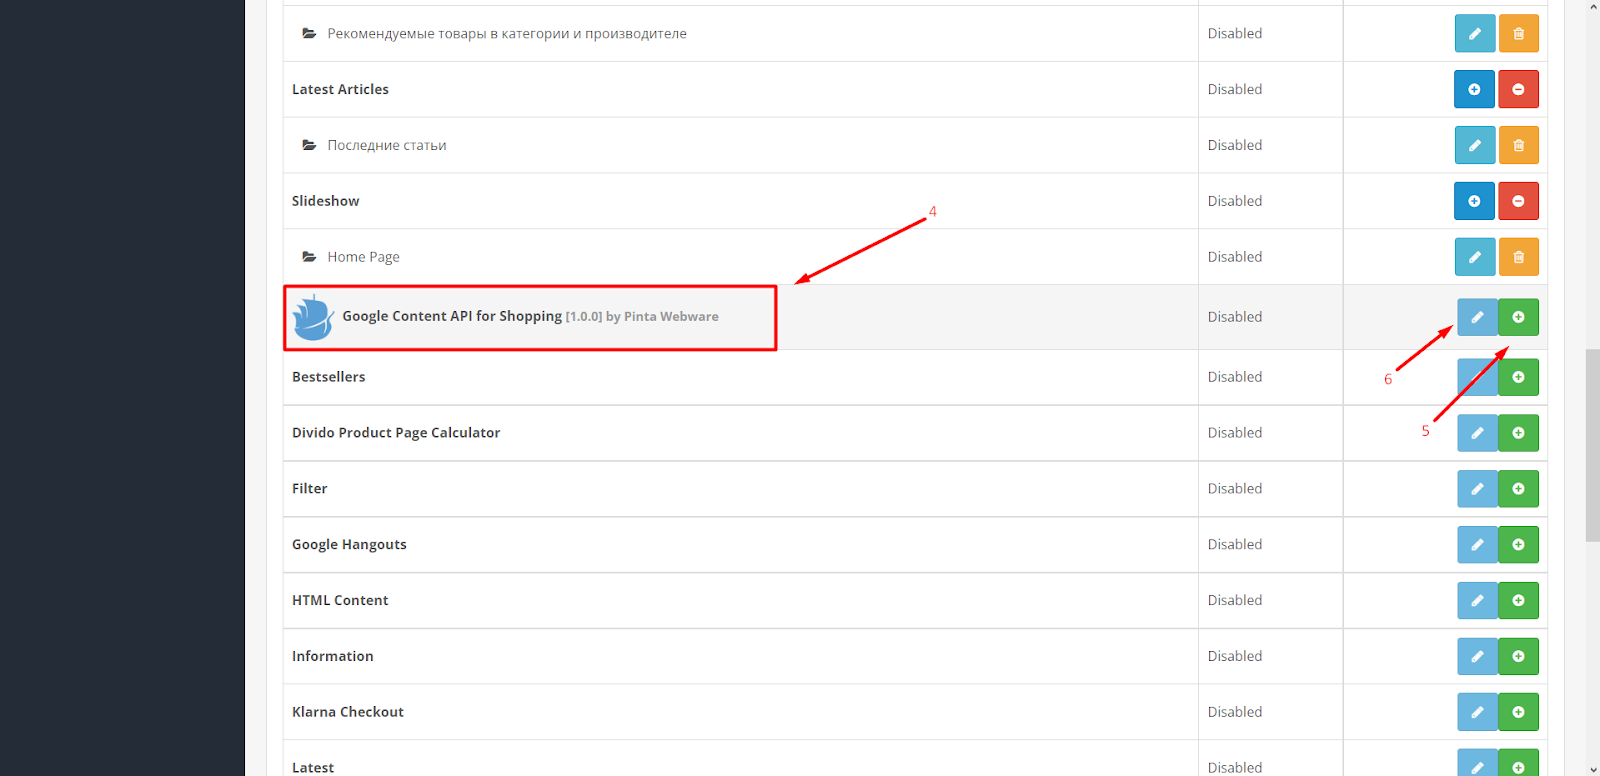
Go to the Extensions subcategory (1, 2). In the Extension List, select the Modules type (3).

Find the Google Content API for Shopping plugin (4) and click the Install button (5).
To configure the plugin, click the Edit button (6).
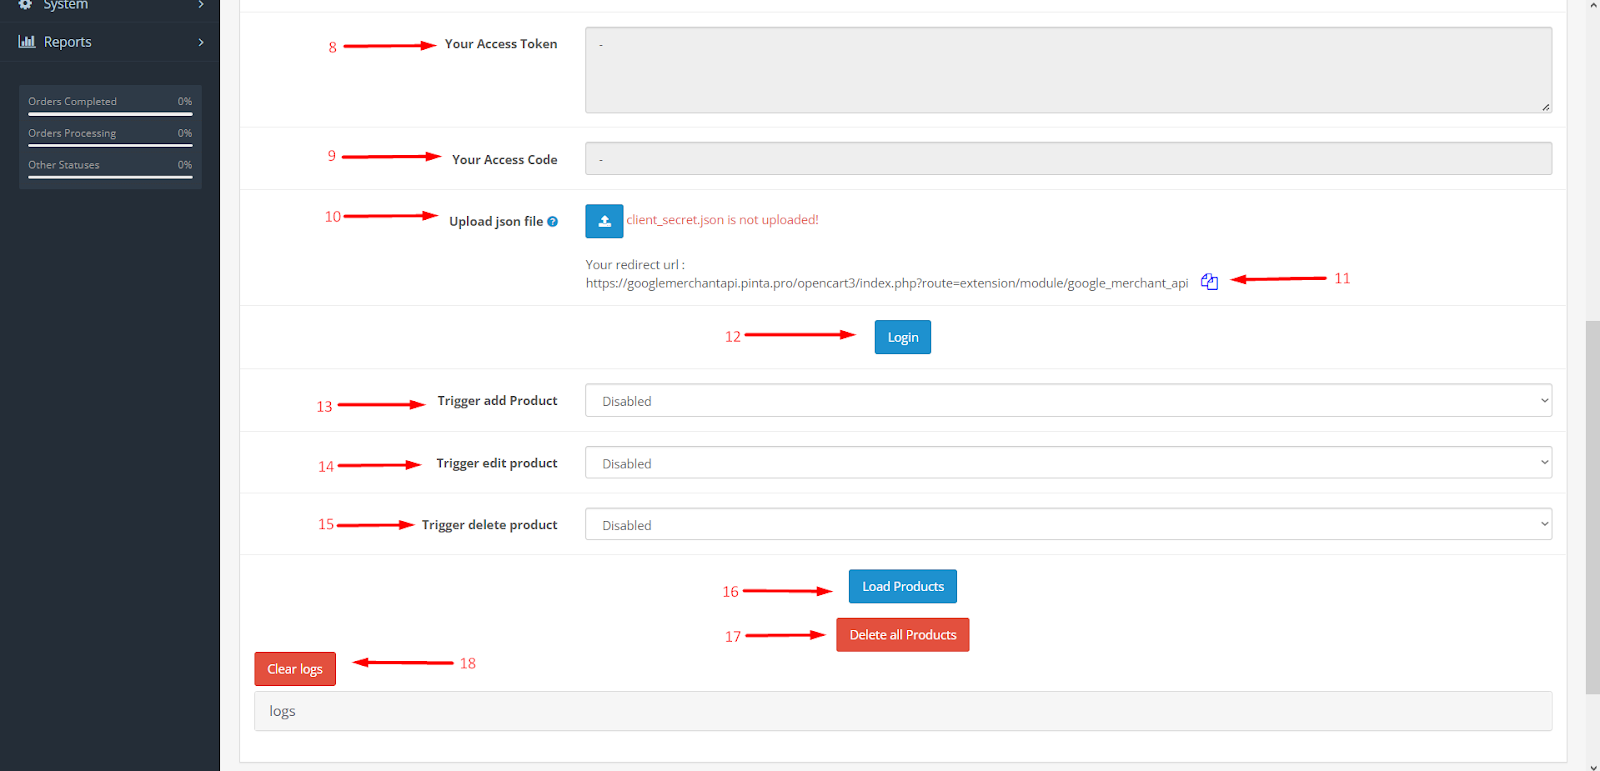
Plugin page
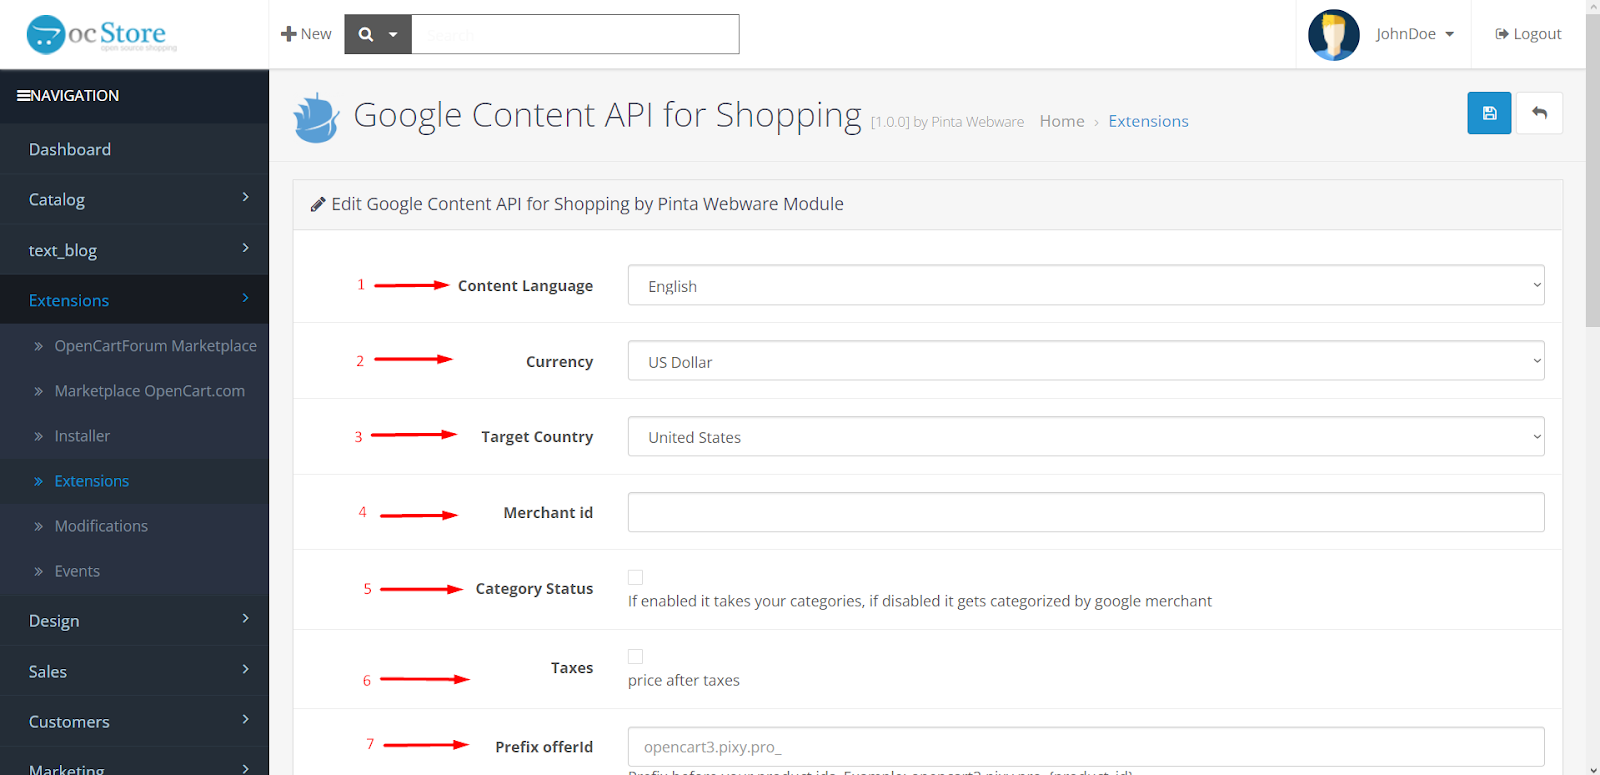
The plugin page includes:
The Content Language field (1) - to select the language of the uploaded data.
The Currency field (2) - to select the product currency.
The Target Country field (3) - to select the target country.
The Merchant id field (4) - to enter the account ID from Google Merchant Center.
The Category Status checkbox (5) - to enable / disable the use of Google categories.
The Taxes checkbox (6) - to enable / disable the display of the price with tax.
The Prefix offer Id field (7) - to enter a prefix for the product ID. You can add any word to the product ID, if necessary.
The Your Access Token field (8) - to enter the token after setting up an account in the Google Merchant Center.
This field is filled in automatically when uploading a json file.
The Your Access Code field (9) - to enter the code after setting up an account in the Google Merchant Center.
This field is filled in automatically when uploading a json file.
The Upload json file block (10) allows you to synchronize your website with account in the Google Merchant Center. This block consists of:
The Upload json file button - to load a json file with the access token and the access code.
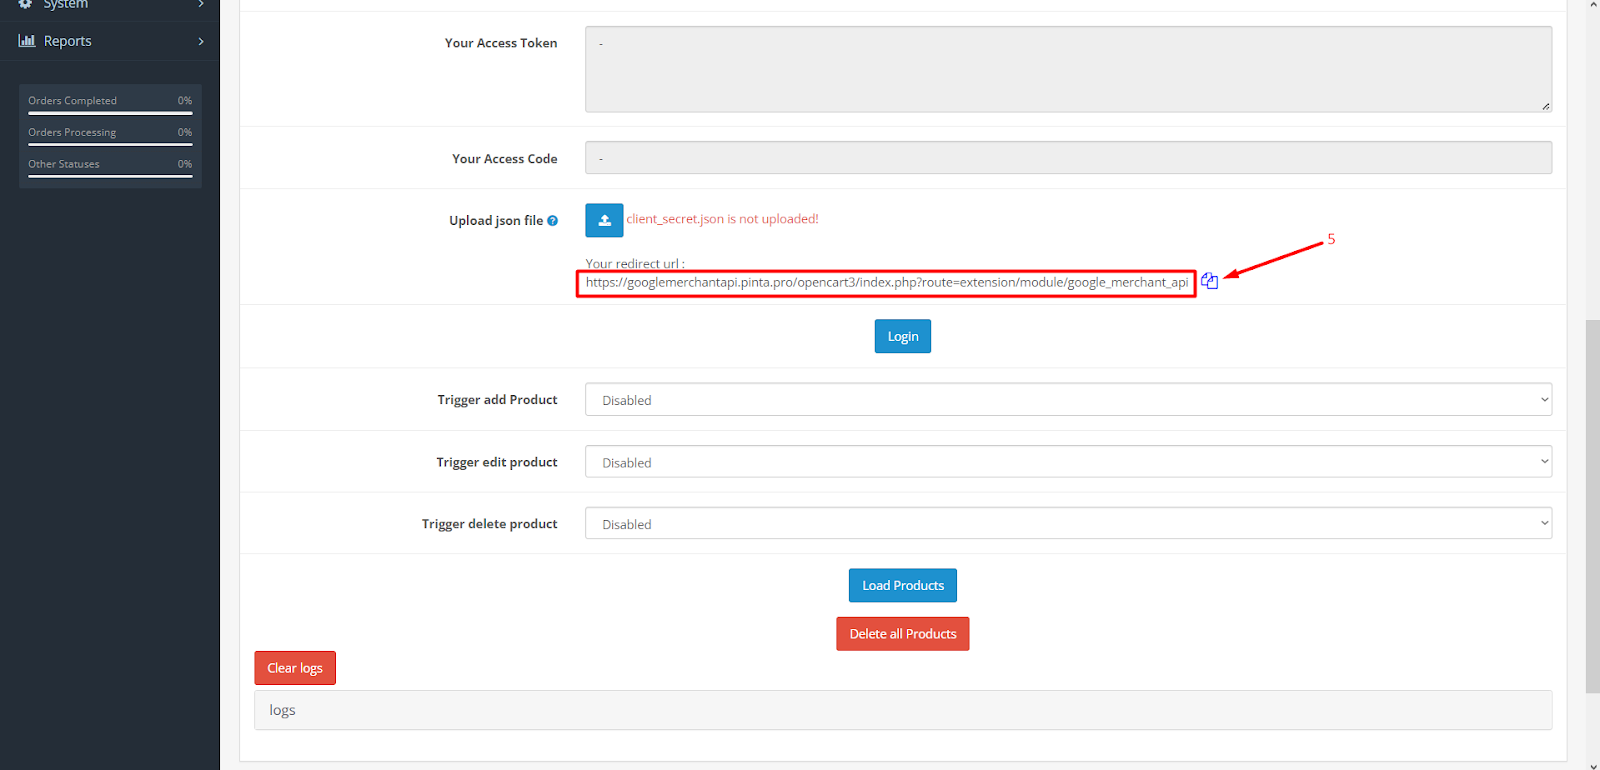
The button for copying of Your redirect url (11) - use this redirect URL when setting up an account in the Google Cloud Console.
The Login button (12) - to authorize data.
After successful authorization, the Your Access Token and the Your Access Code fields are automatically filled.
The Trigger add product field (13) - to enable / disable automatic updating of product data in the Merchant Center. To update the data after the creation of products, select the Enabled position.
The Trigger edit product field (14) - to enable / disable automatic updating of product data in the Merchant Center. To update the data after the editing of products, select the Enabled position.
The Trigger delete product field (15) - to enable / disable automatic updating of product data in the Merchant Center. To update the data after the deleting of products, select the Enabled position.
The Load Products button (16) - to load all products of your website in the Google Merchant Center.
The Delete all Products button (17) - to remove all products of your website from the Google Merchant Center.
The Clear logs button (18) - to delete logs of the using the plugin.
Uploading products to Google Merchant Center
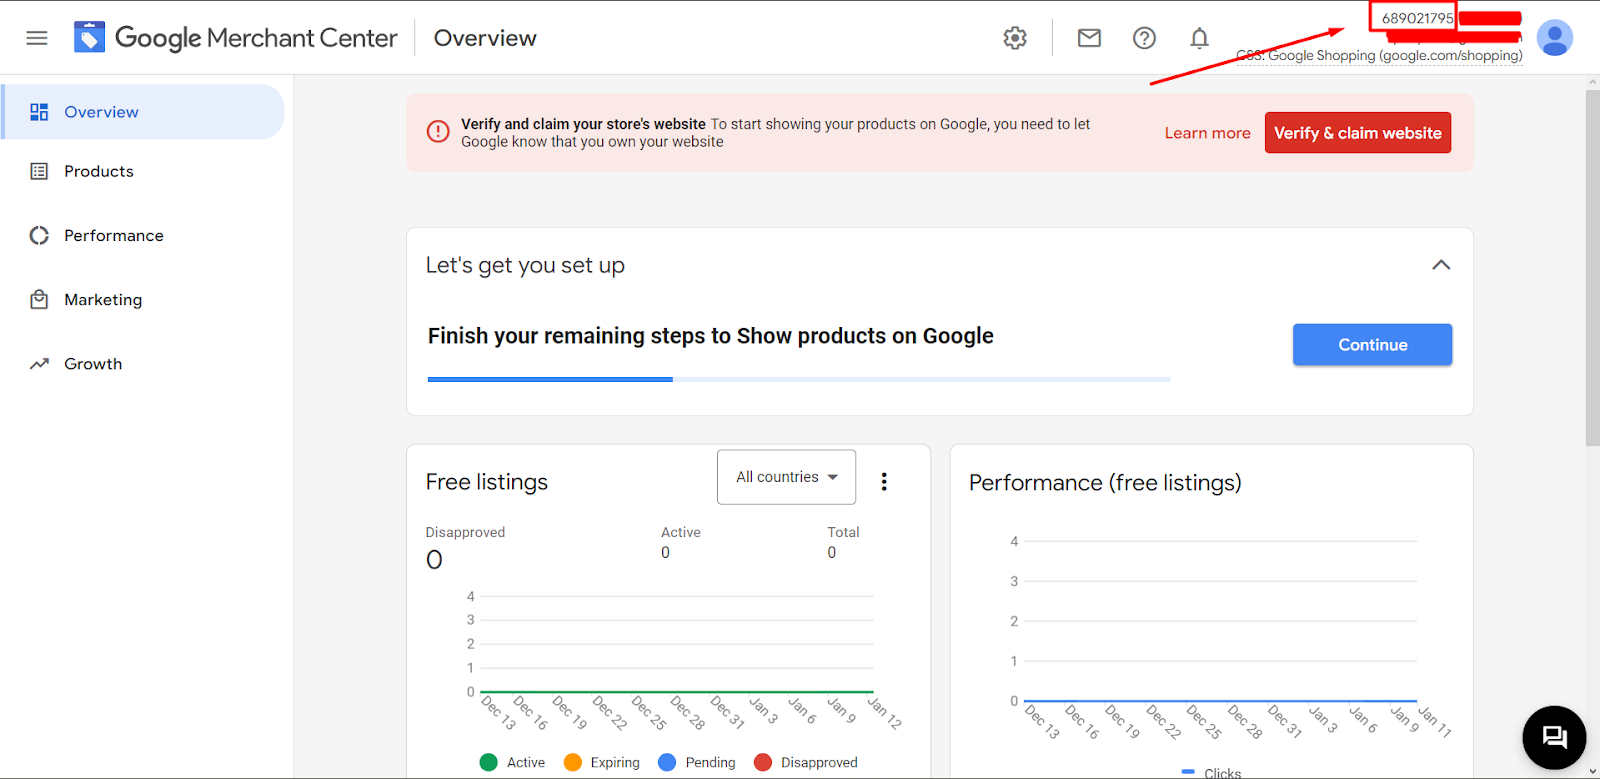
Sign up for a Google account if you don't already have one, and create an account with Google Merchant Center.
* https://support.google.com/merchants/answer/188924
Copy the account ID and add it on the plugin page (to the Merchant id field).
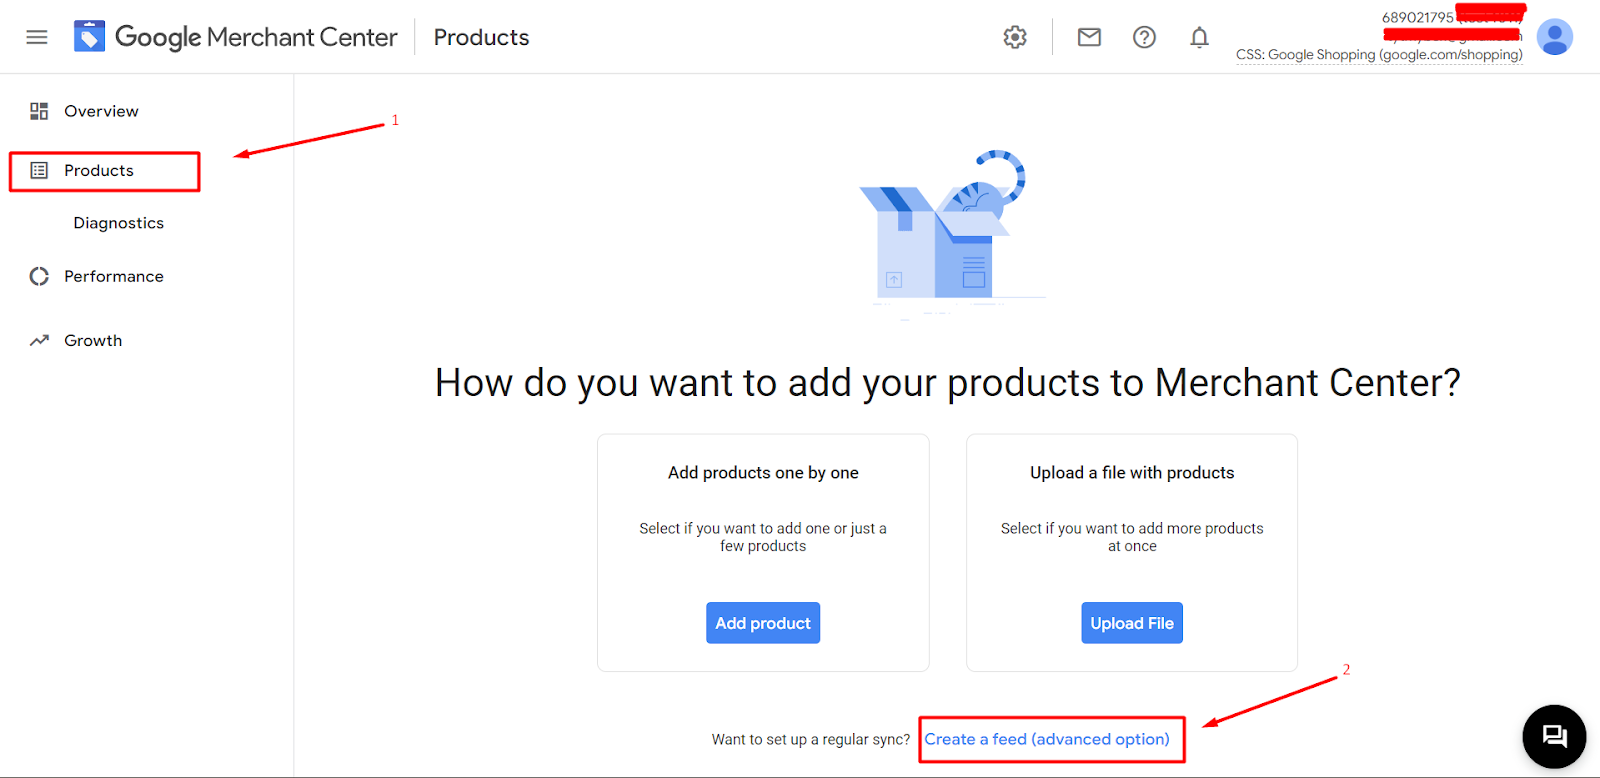
Next, add a feed to your account.
To do this, go to the Products menu (1) and click Create a feed (2).
And fill in the following data:
In the Basic information tab, select the targeted countries (the Target countries block) and the language (the Language field).
In the Name and input method tab (1) add the feed name (the Primary feed name field (2)) and select Content API (3) as the data input method.
Click the Create feed button (4).

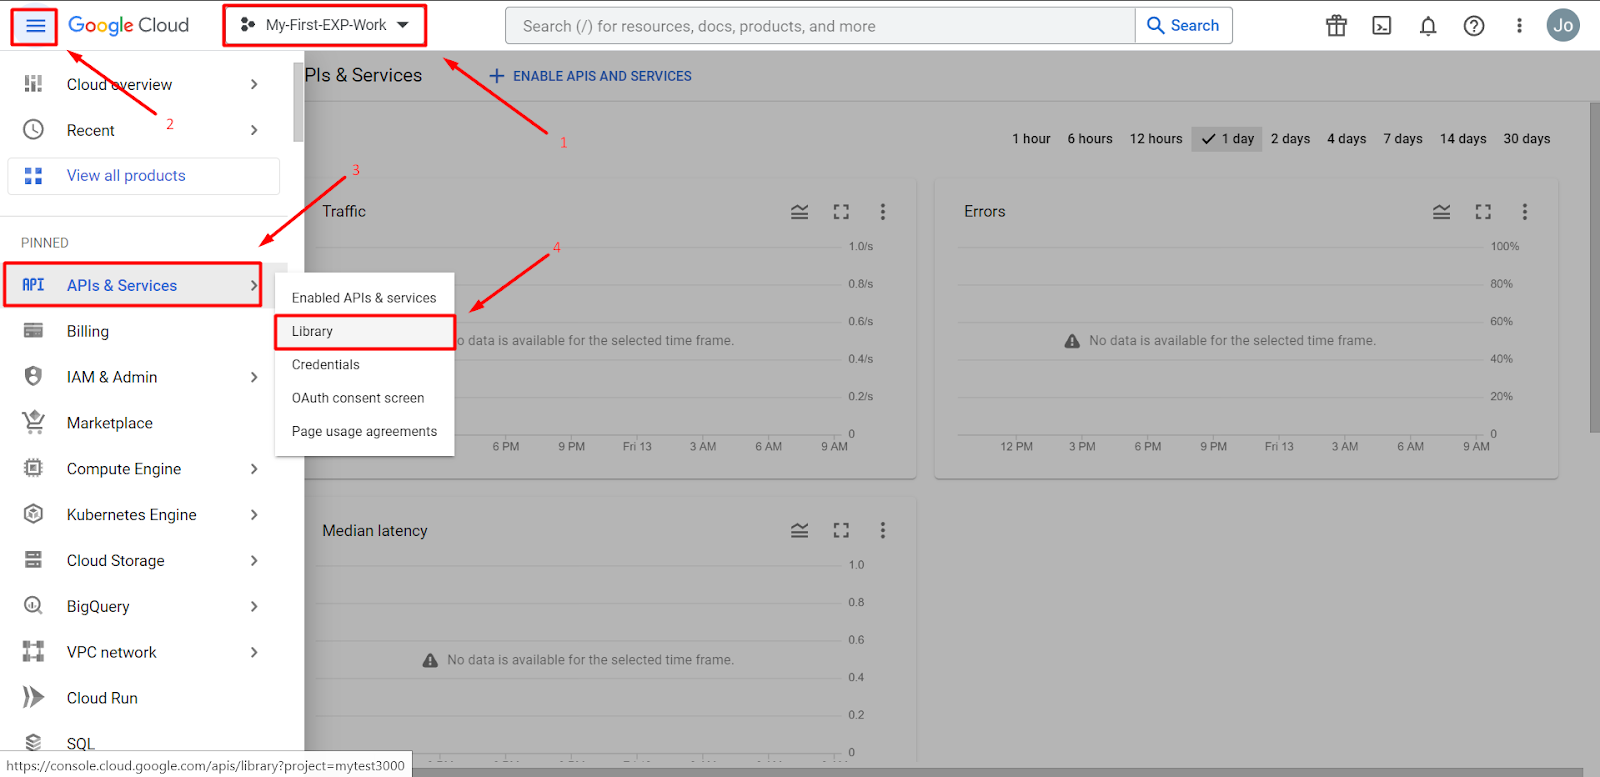
Use the Google API to set up integration with the Google Merchant Center.
To do it, you need to create a new project in the Google Cloud Console. For example, My-First-EXP-Work (1).
* https://support.google.com/cloudidentity/topic/7555414
Next, go to the Library menu (2, 3, 4).
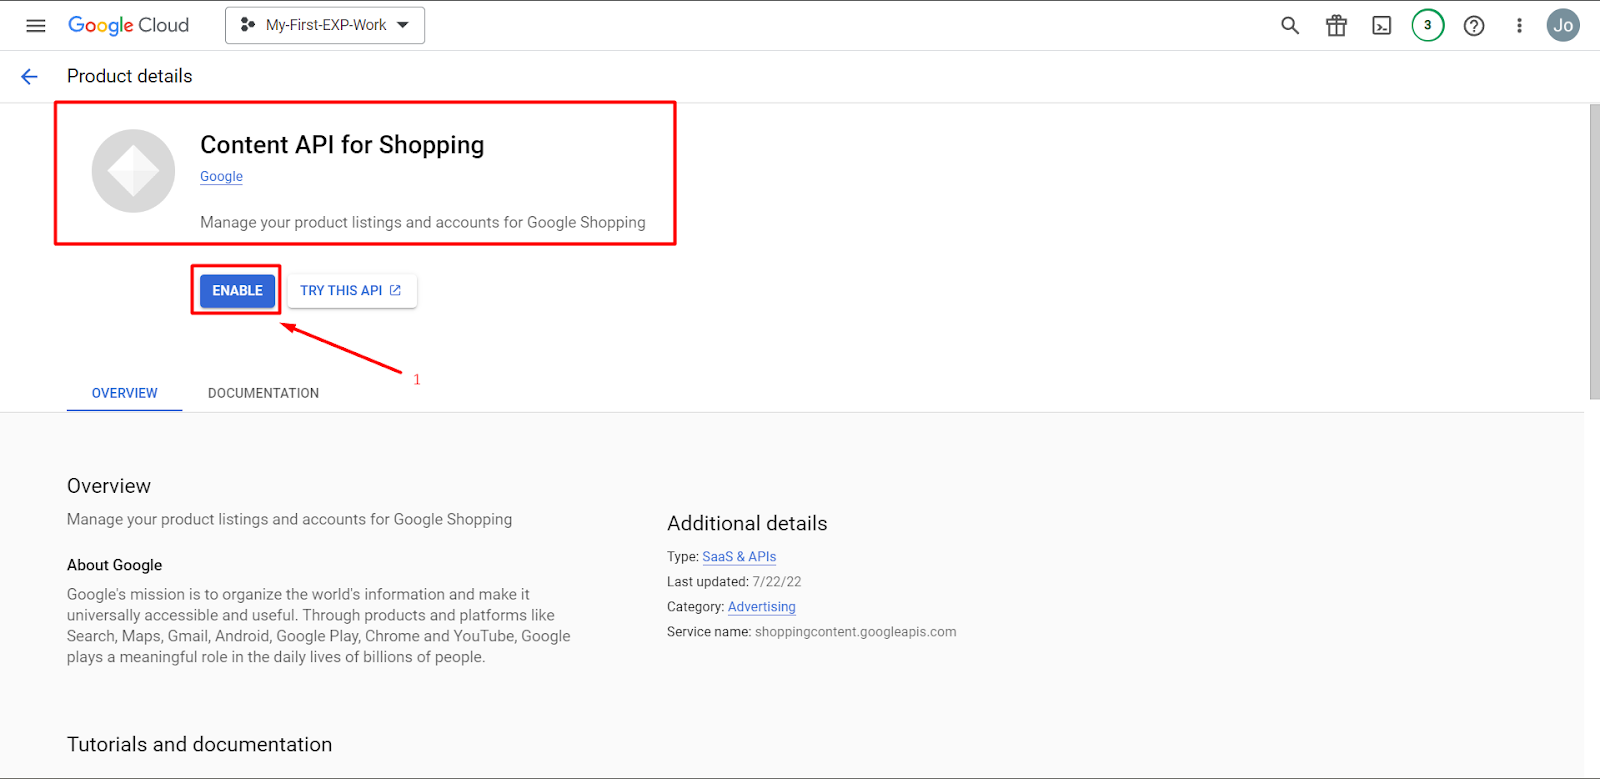
Using the search, find the required library - Content API for Shopping.
After selecting, confirm the connection of this library to the project (the ENABLE button (1)).
Next, you need to generate a json file with authorization data:
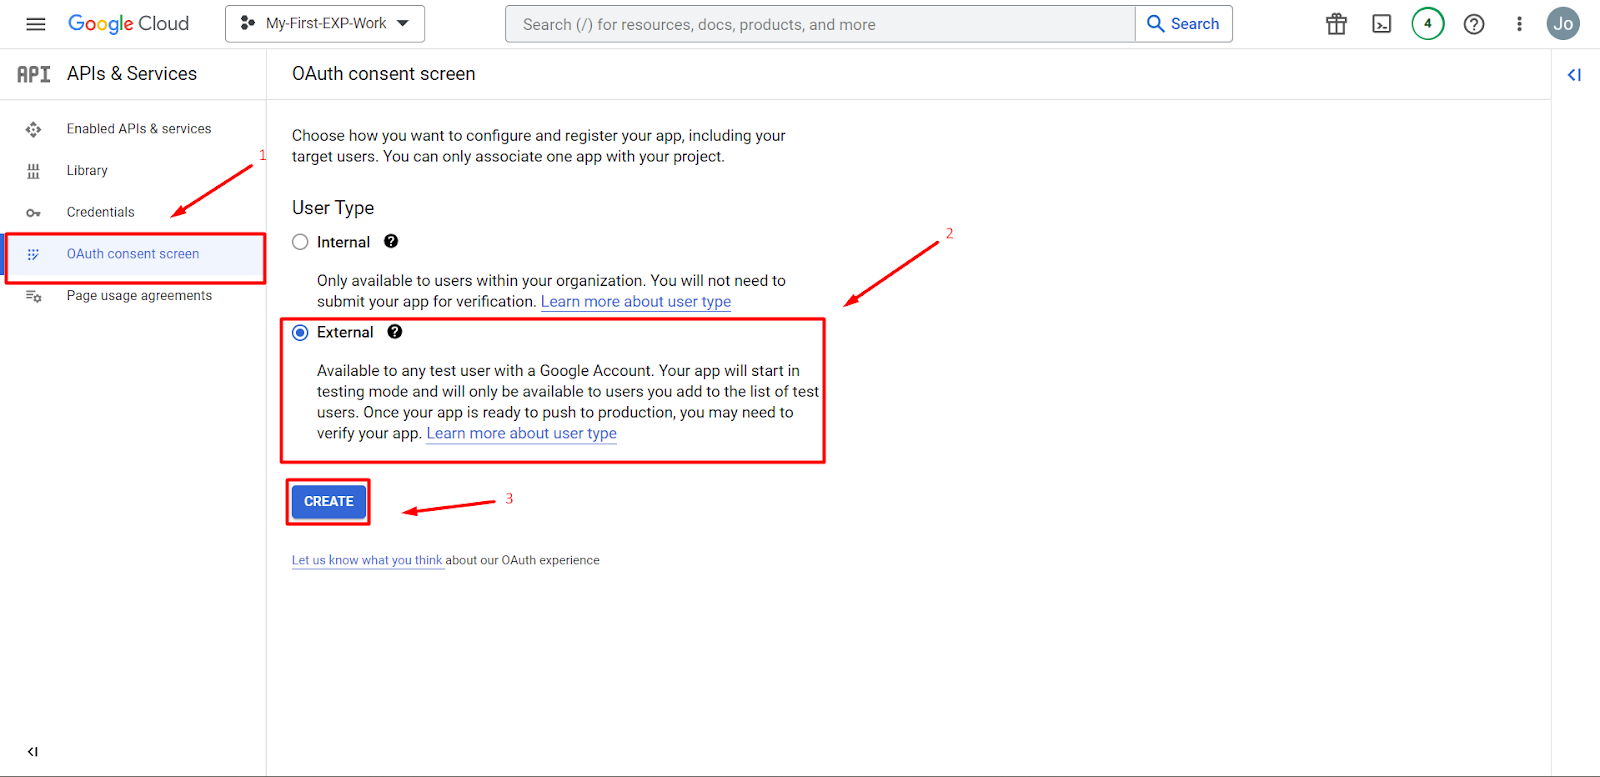
Go to the OAuth consent screen menu (1), select the External option (2), and click the CREATE button (3).
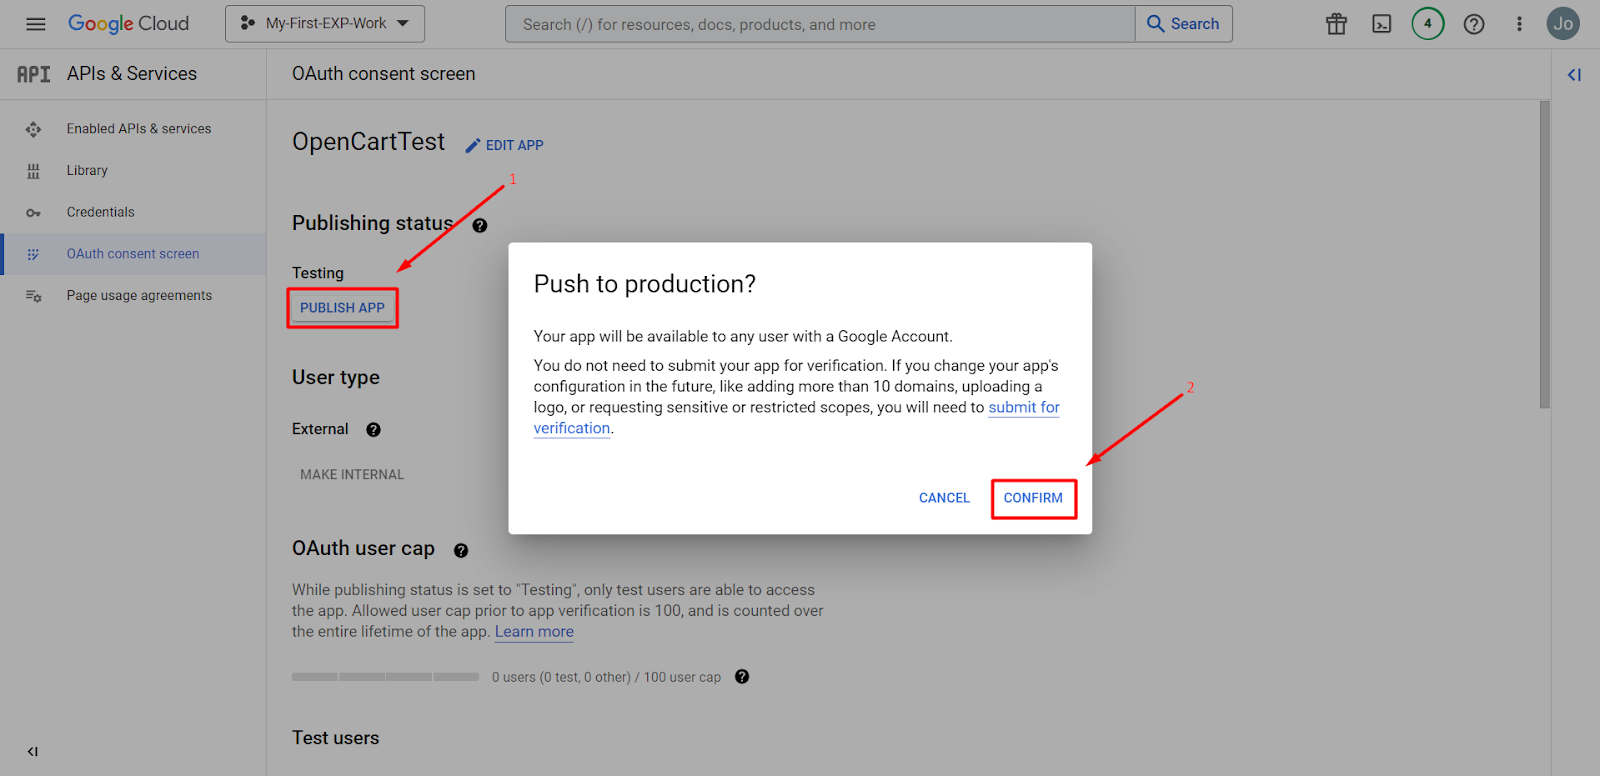
After completing the app registration form, select PUBLISH APP (1) to change the publishing status. Next, click the CONFIRM button (2).
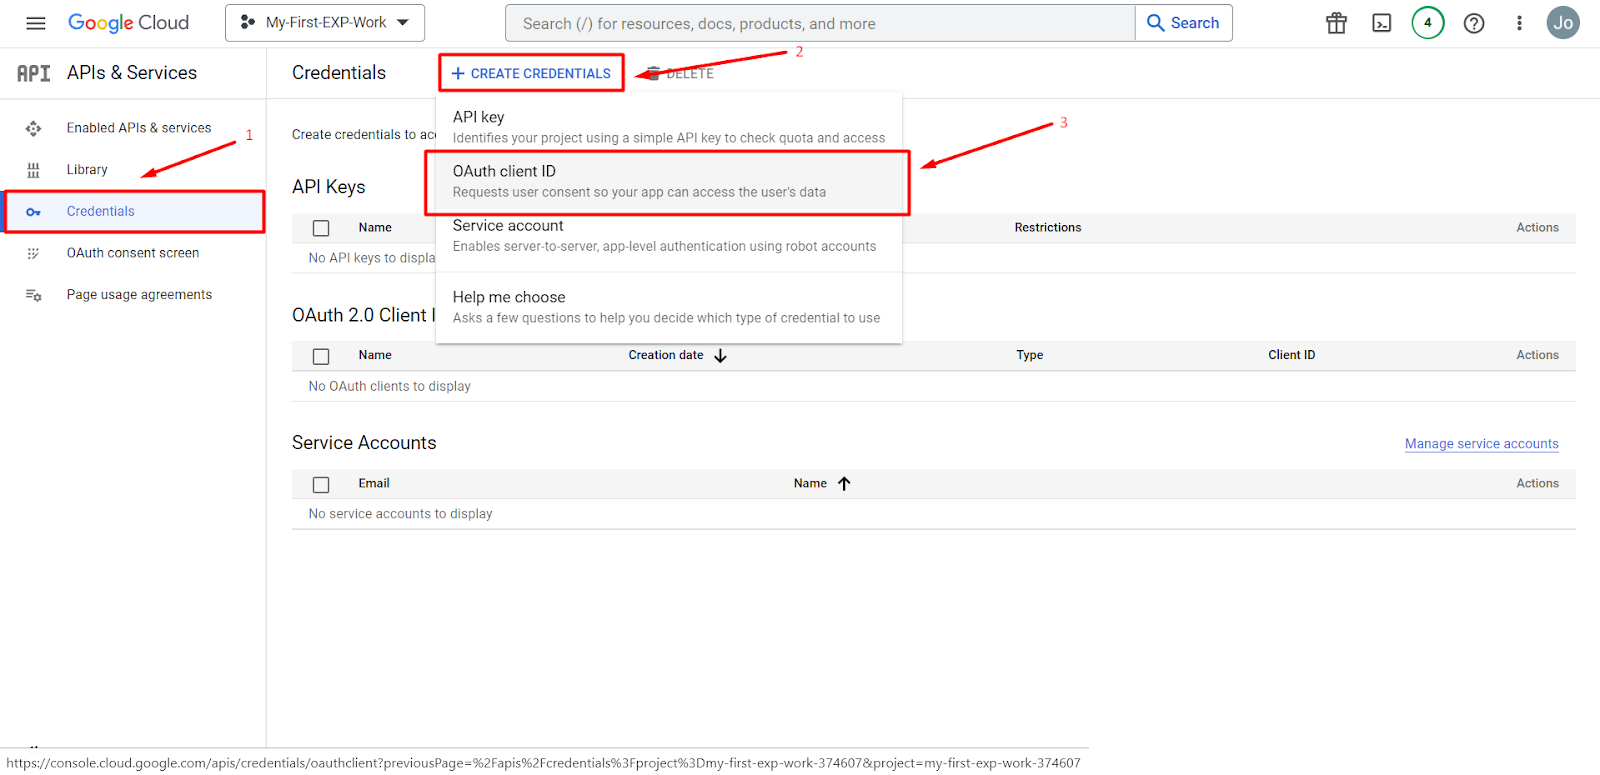
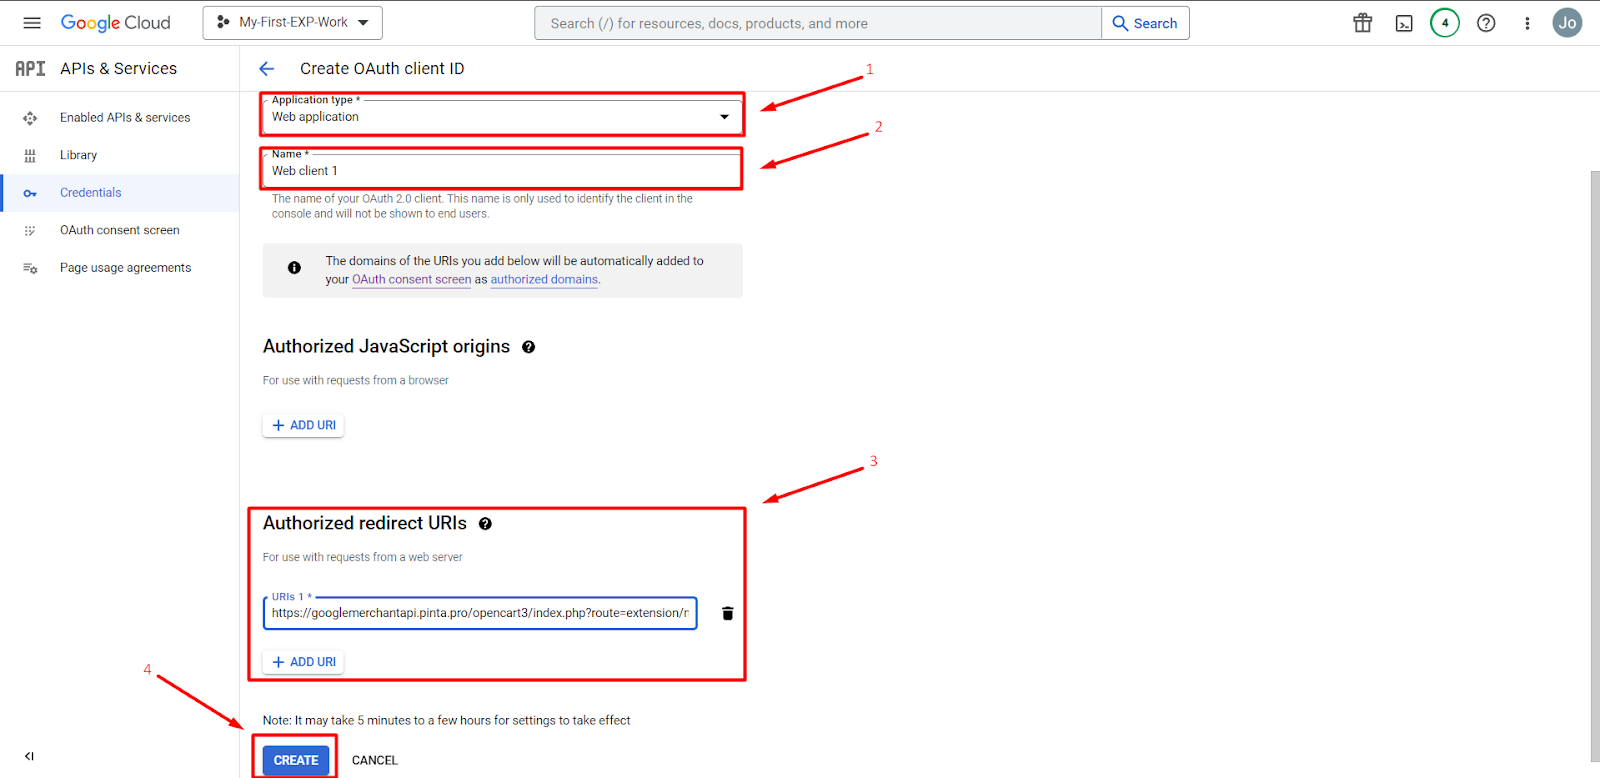
Go to the Credentials menu (1) and select CREATE CREDENTIALS (2) > OAuth client ID (3).
4. Select the Web application option (1) in the Application type field.
5. Enter the client name, for example, Web client 1 (2).
6. Add your redirect URL in the Authorized redirect URIs block (3):
To display the field for entering the redirect URL, click the ADD URI button.
Copy the redirect URL on the plugin page by clicking the button for copying of Your redirect url (5).
Paste to the URIs 1 field (3) the redirect URL copied from your website's admin panel.
7. Click the CREATE button (4).
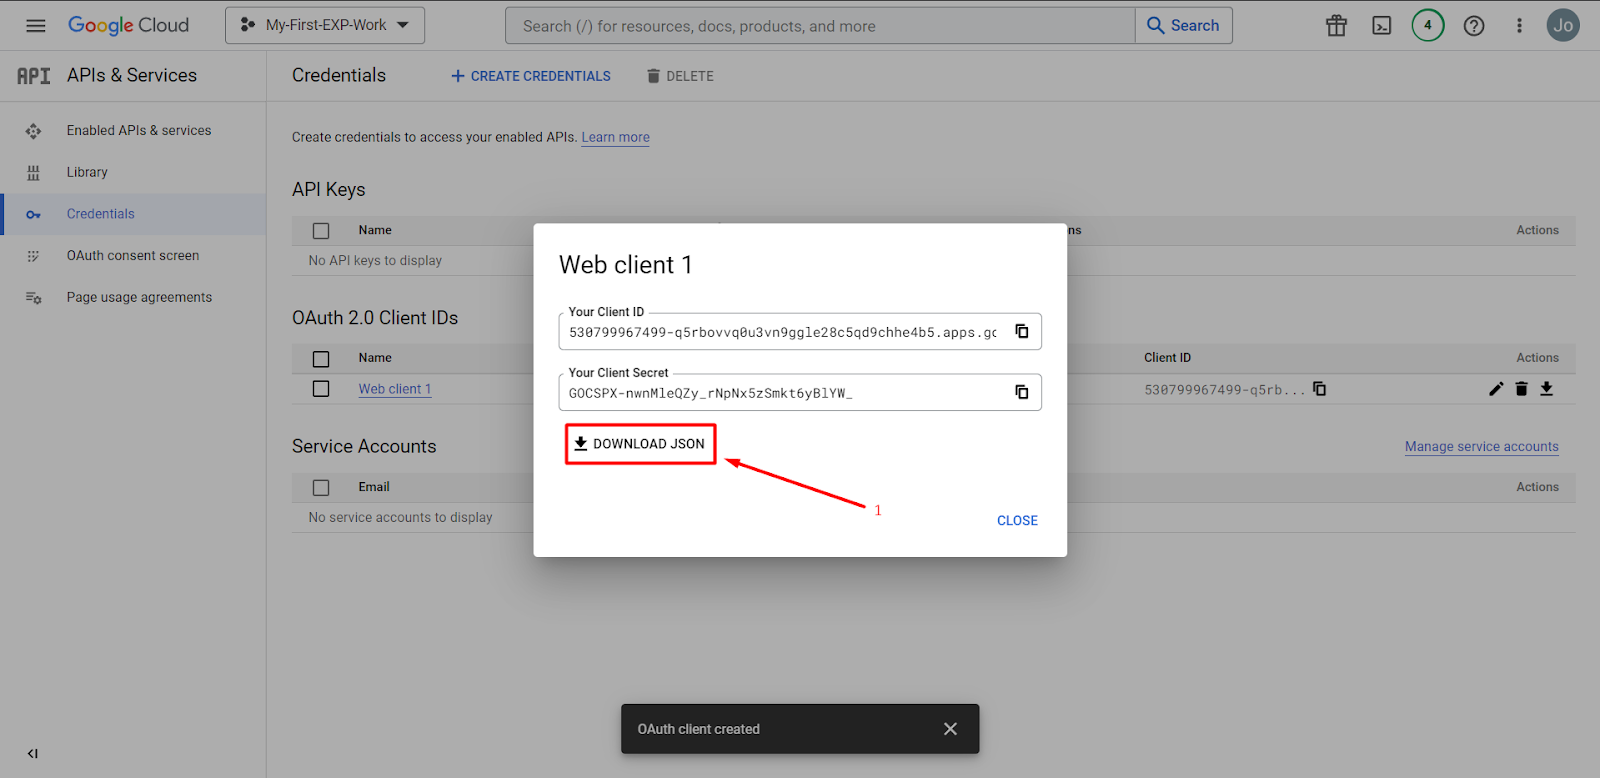
8. To download a json file, click the DOWNLOAD JSON button (1).
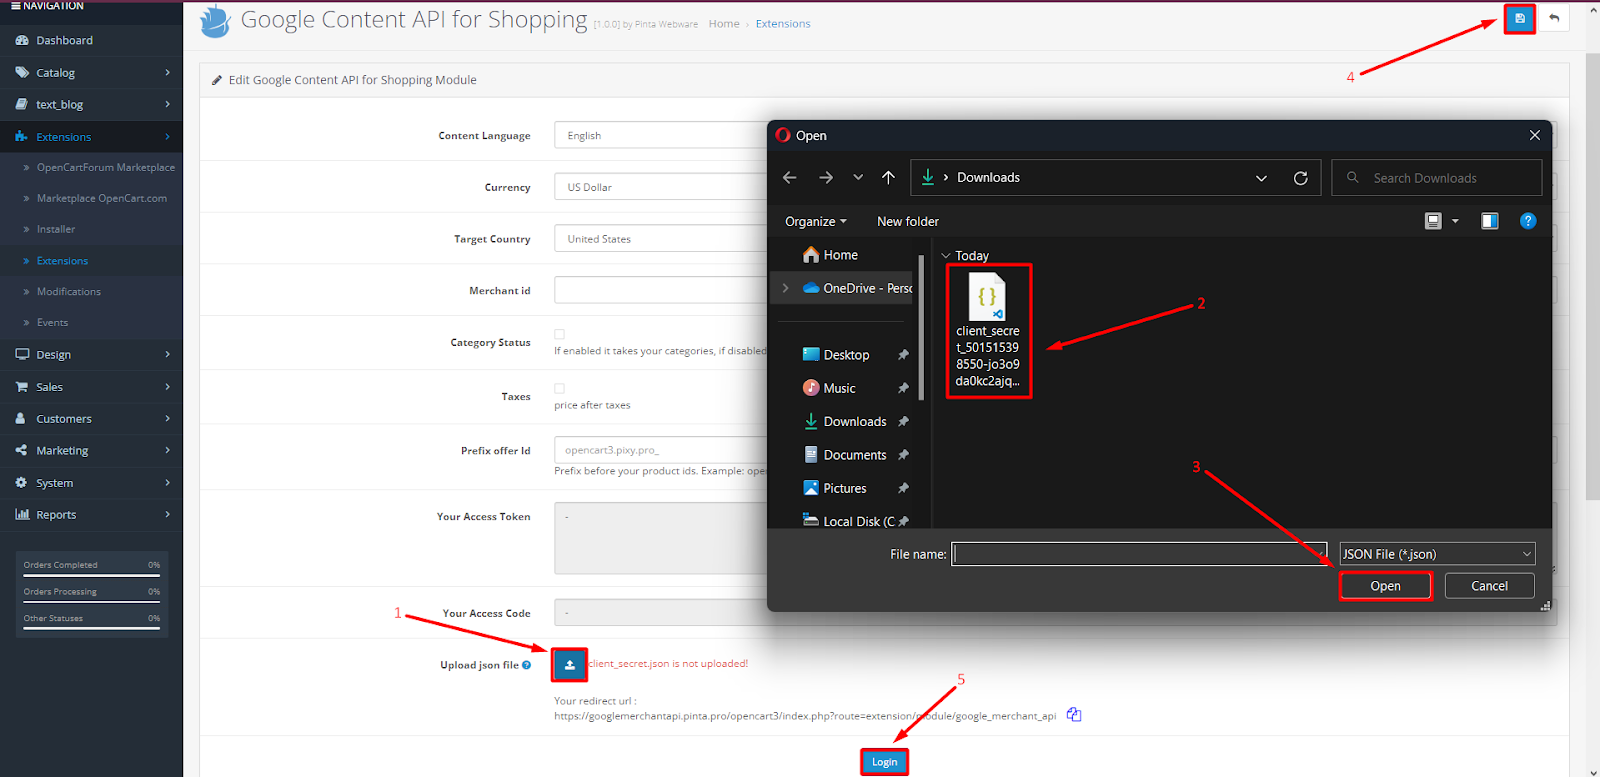
To authorize data on the plugin page, upload a json file.
To do it, click the Upload json file button (1) and select the previously downloaded json file (2, 3).
Next, click the Save button (4) to save the current data.
And click the Login button (5).
After successful authorization, the Your Access Token and Your Access Code fields are automatically filled.

Upload your products to your Google Merchant Center account.
To load products, click the Load Products button (on the plugin page) and go to your Google Merchant Center account (menu Products (1) > All products (2)).
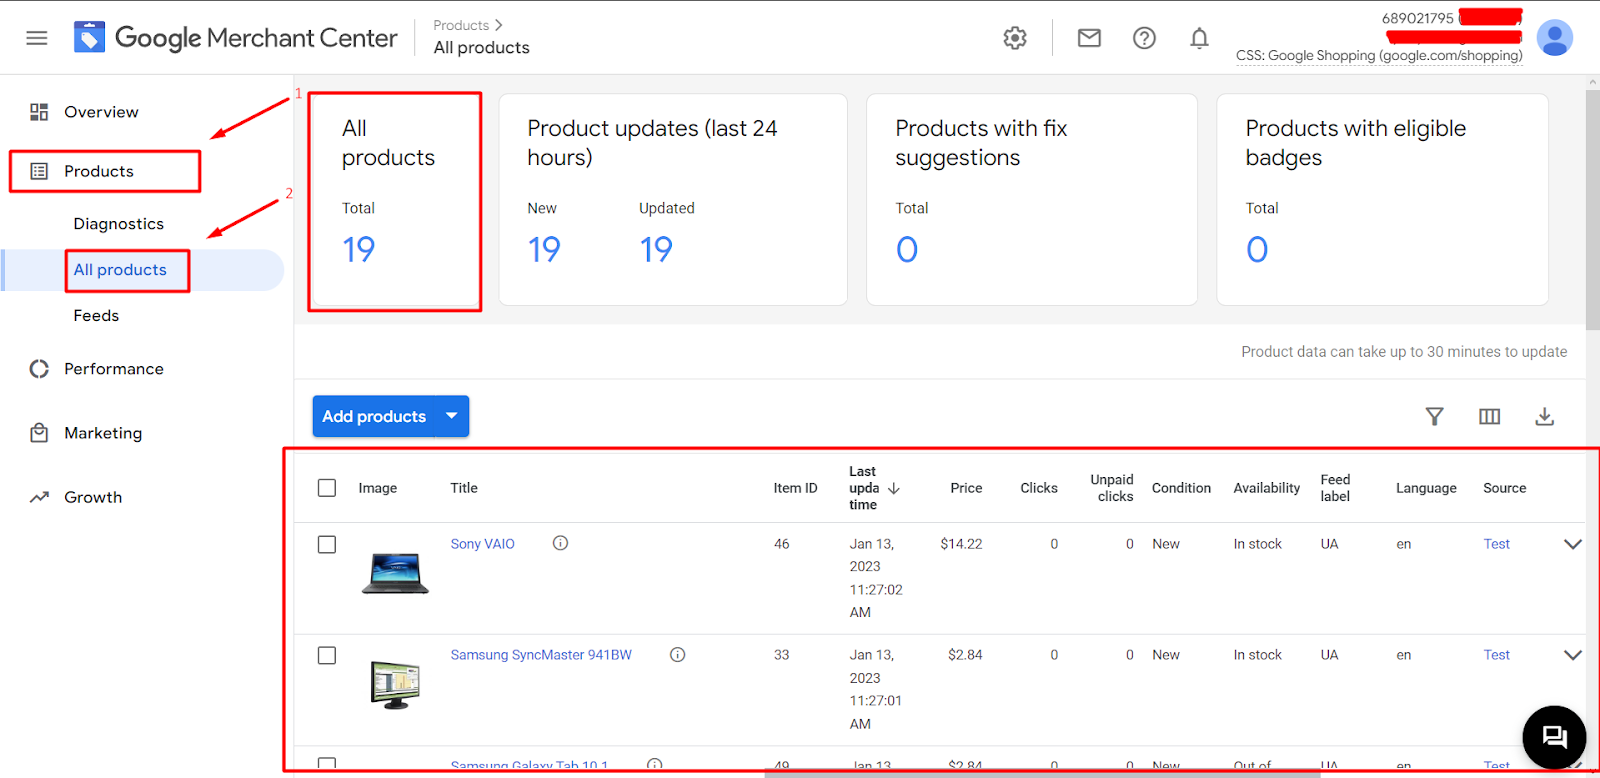
Now you can quickly upload all the products of your website to your Google Merchant Center account.
VIDEO INSTRUCTION