Instruction for Google Dynamic Remarketing in Prestashop
INSTRUCTION GOOGLE DYNAMIC REMARKETING FOR PRESTASHOP 1.7
Download and install
Download the plugin archive in the Shop Pinta store and save it on your computer.
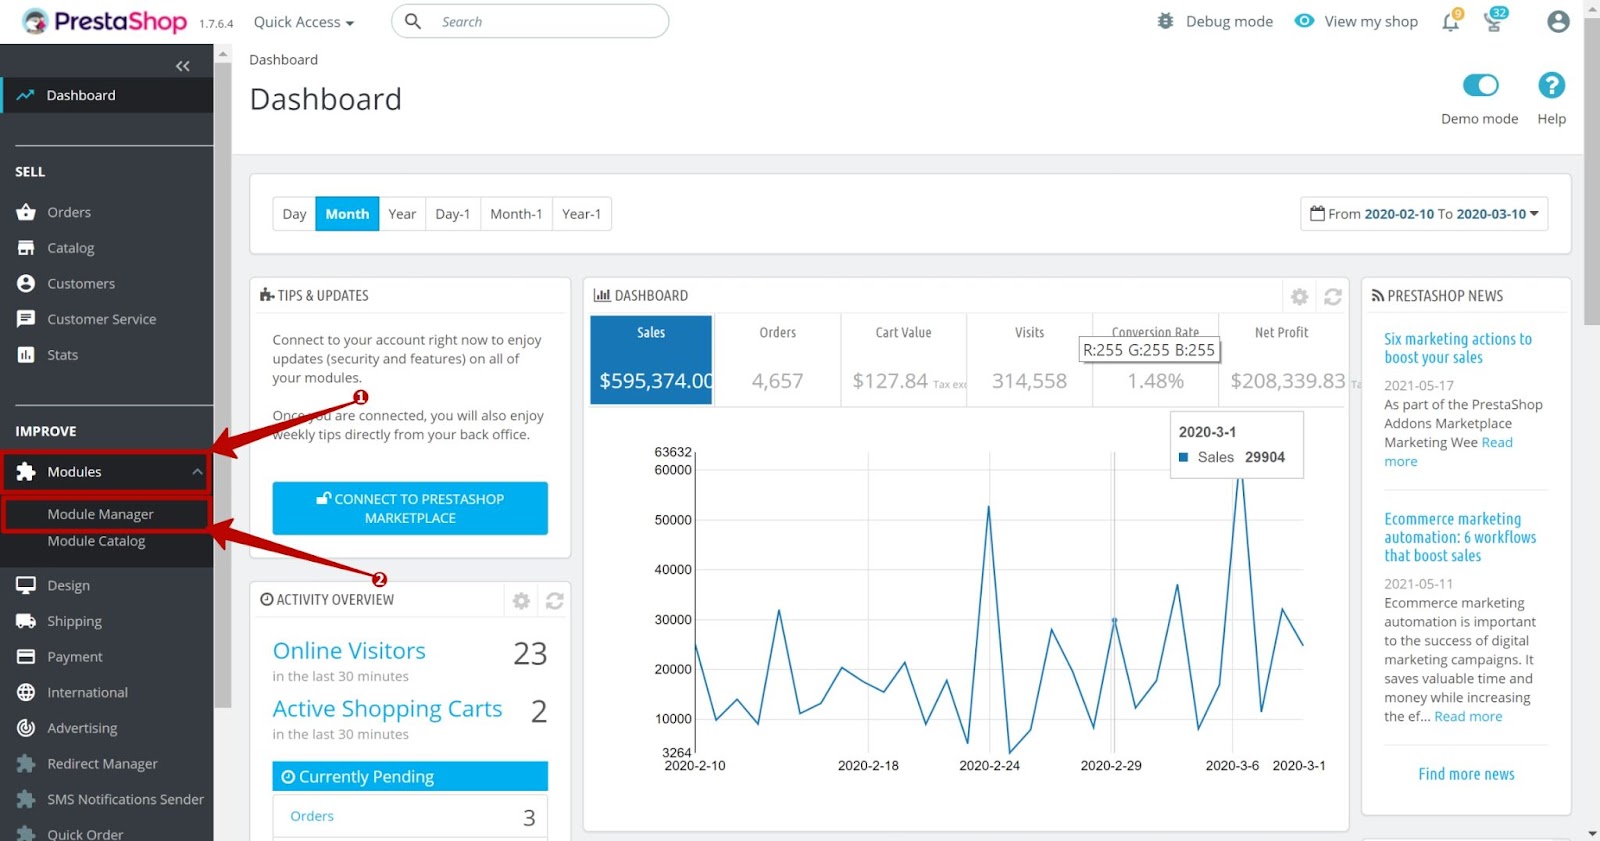
In the admin panel of your website, select Modules (1) > Module Manager (2).
Download the plugin archive in the Shop Pinta store and save it on your computer.
In the admin panel of your website, select Modules (1) > Module Manager (2).
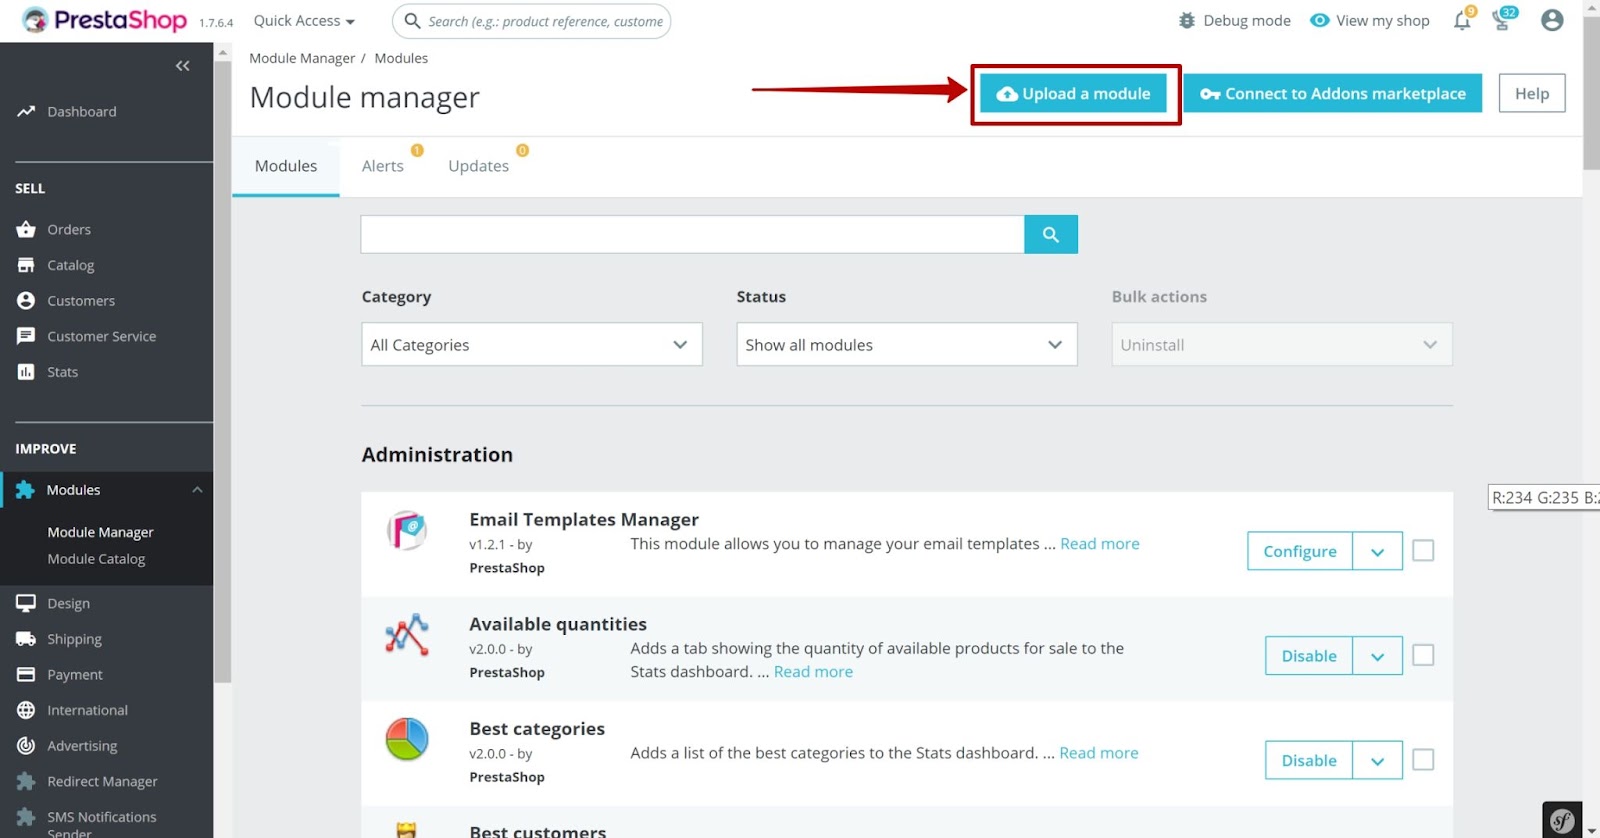
Click the Upload a module button.
4. In the opened window, click on select file.
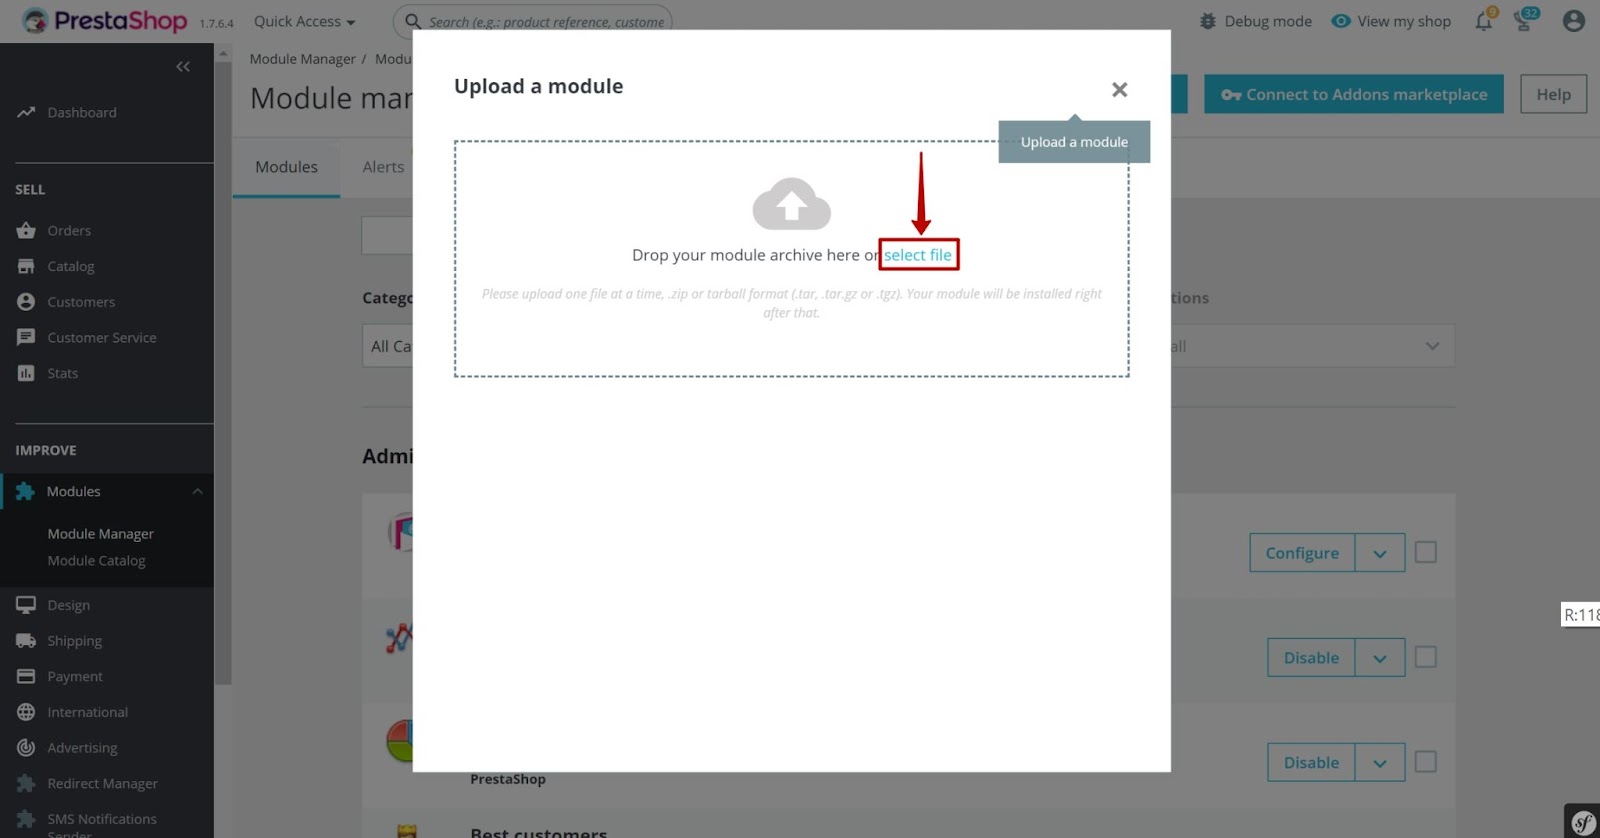
5. Select the plugin archive (1) and click the Open button (2).

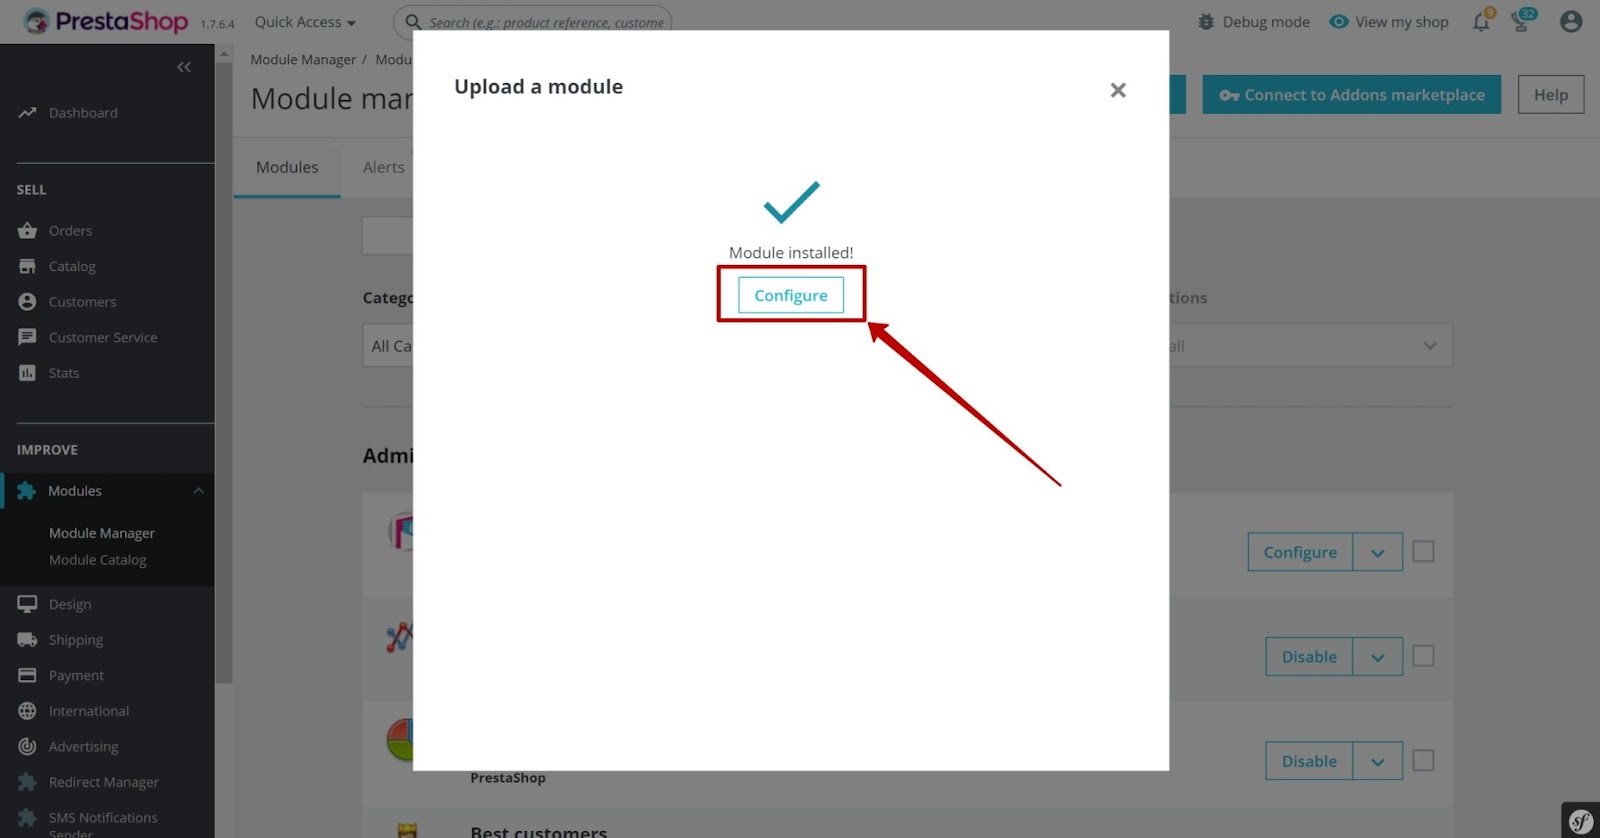
6. To configure the plugin, click the Configure button.
Plugin page
The plugin page consists of a block for changing the URL channel parameters manually (1) and the fields for setting the feed file (2).
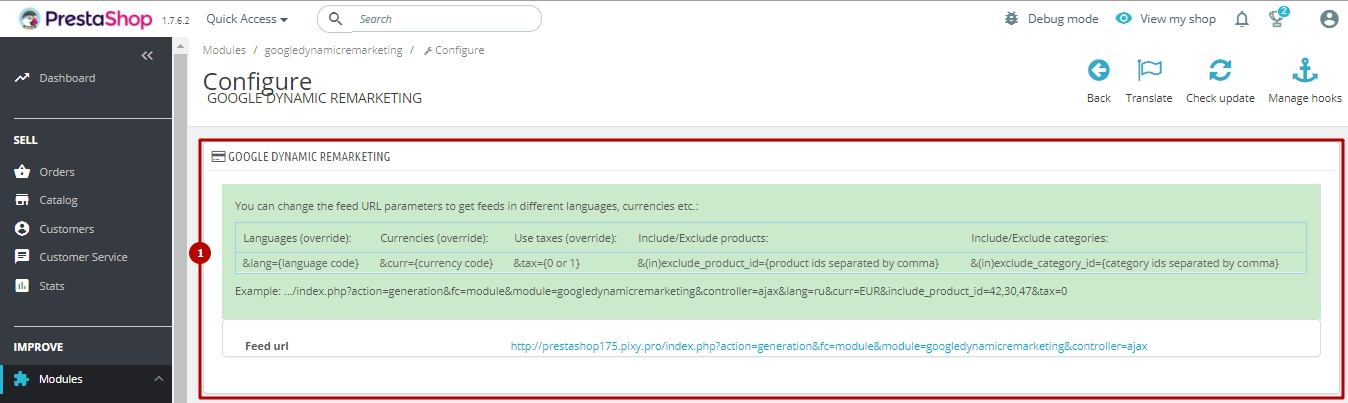
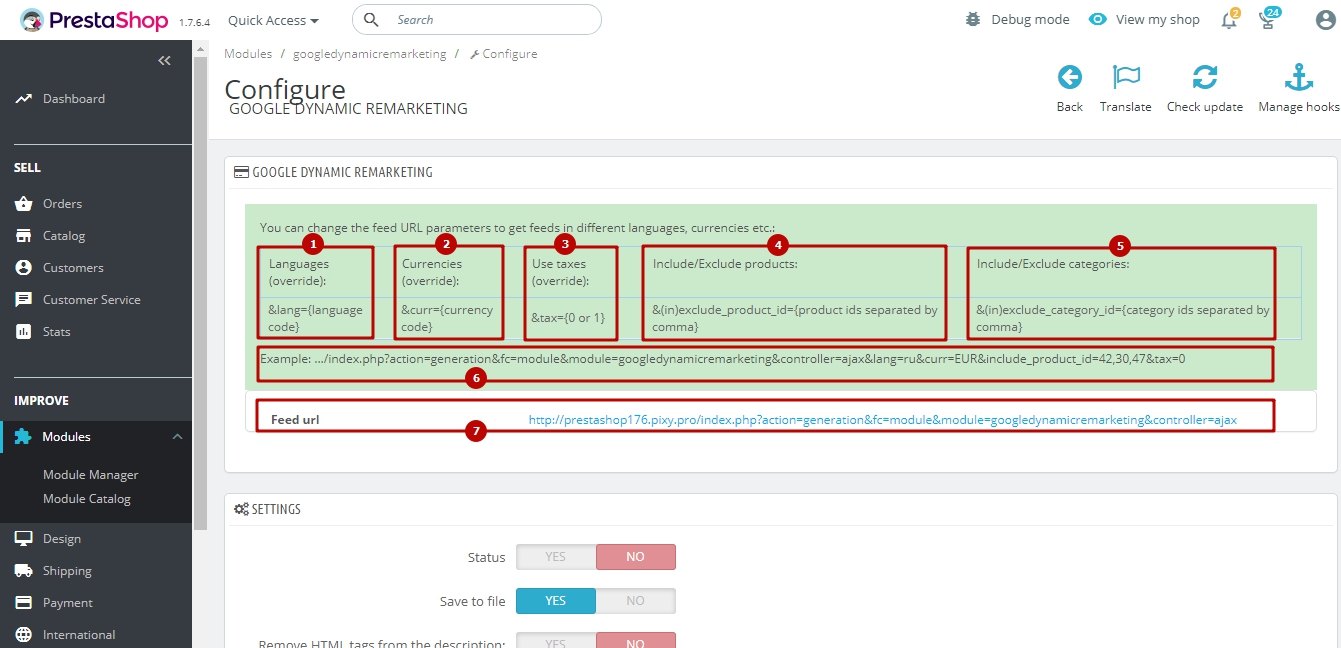
The block for changing the URL channel parameters manually contains instructions for creating a feed manually:
The Languages (override) block (1) shows how to enter the language that will be used in the feed.
The Currencies (override) block (2) shows how to enter the currency that will be displayed in the feed.
The Use taxes (override) block (3) shows how to enable / disable displaying discounts in the feed.
In the Include/Exclude products block (4) you can select the products that will be displayed / not displayed in the feed.
In the Include/Exclude categories block (5) you can select the categories that will be displayed / not displayed in the feed.
The Example field (6) shows an example of a link for your created feed.
The Feed URL field (7) contains a link to your created feed.
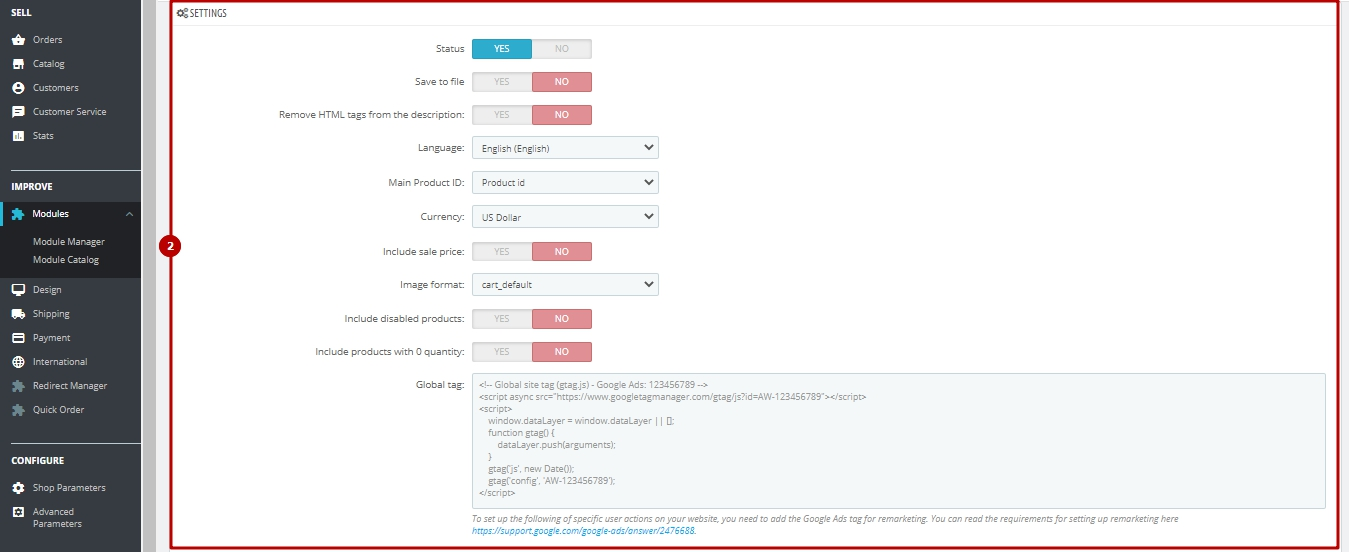
Fields for setting the feed file:
The Status field (1) - to enable / disable the creation of the feed.
The Save to file field (2) - to enable / disable saving the feed to your computer.
The Remove HTML tags from the description field (3) - to enable / disable HTML tags in the title and description.
The Language field (4) - to select the language that will be used in the feed.
In the Main Product ID field (5), you can choose what will be displayed in the feed: product ID or product name.
The Currency field (6) - to select the currency that will be displayed in the feed.
In the Include taxes in the price field (7) - to enable / disable the display of the price including the discount.
The Image format field (8) - to select the image size format.
In the Include disabled products field (9) - you can select if you want to display disabled products in your feed.
In the Include products with 0 quantity field (10) - you can select if you want to display products that are out of stock in your feed.
The Google global site tag field (11) - to add the global tag code, which will be placed in the code of each page of your website in the <head> section. This code is generated in the Google Ads account (Google Analytics account).
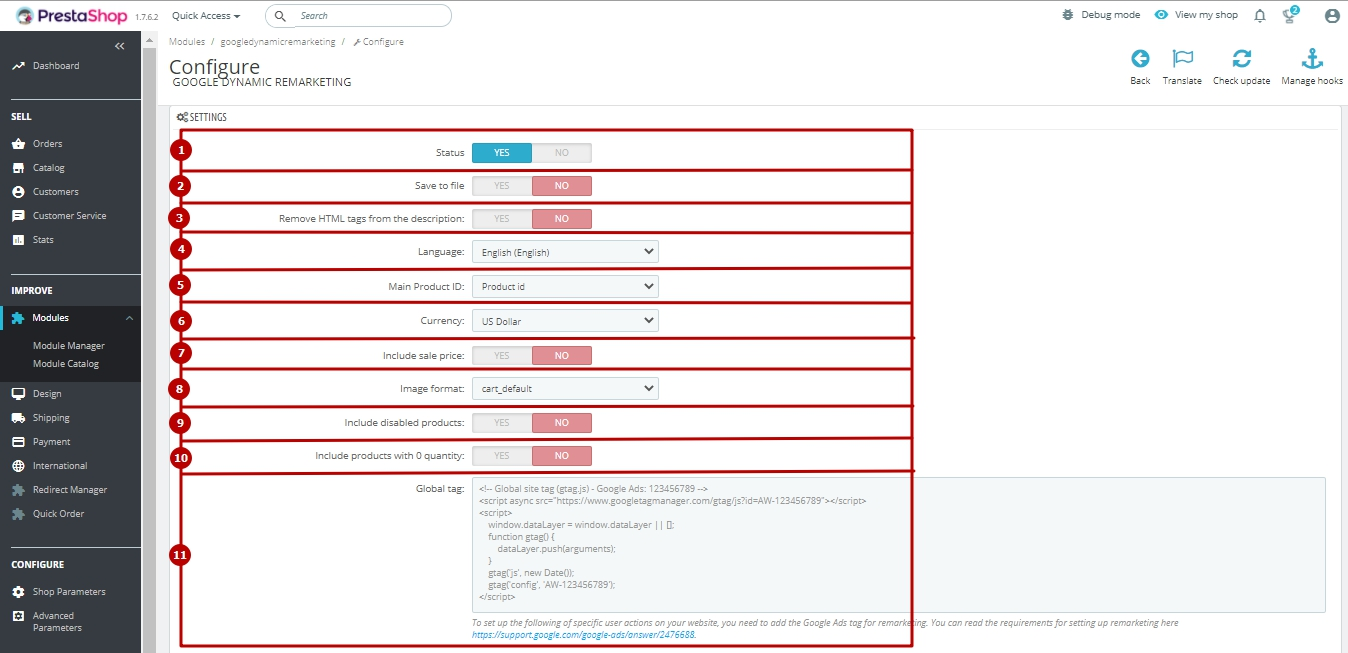
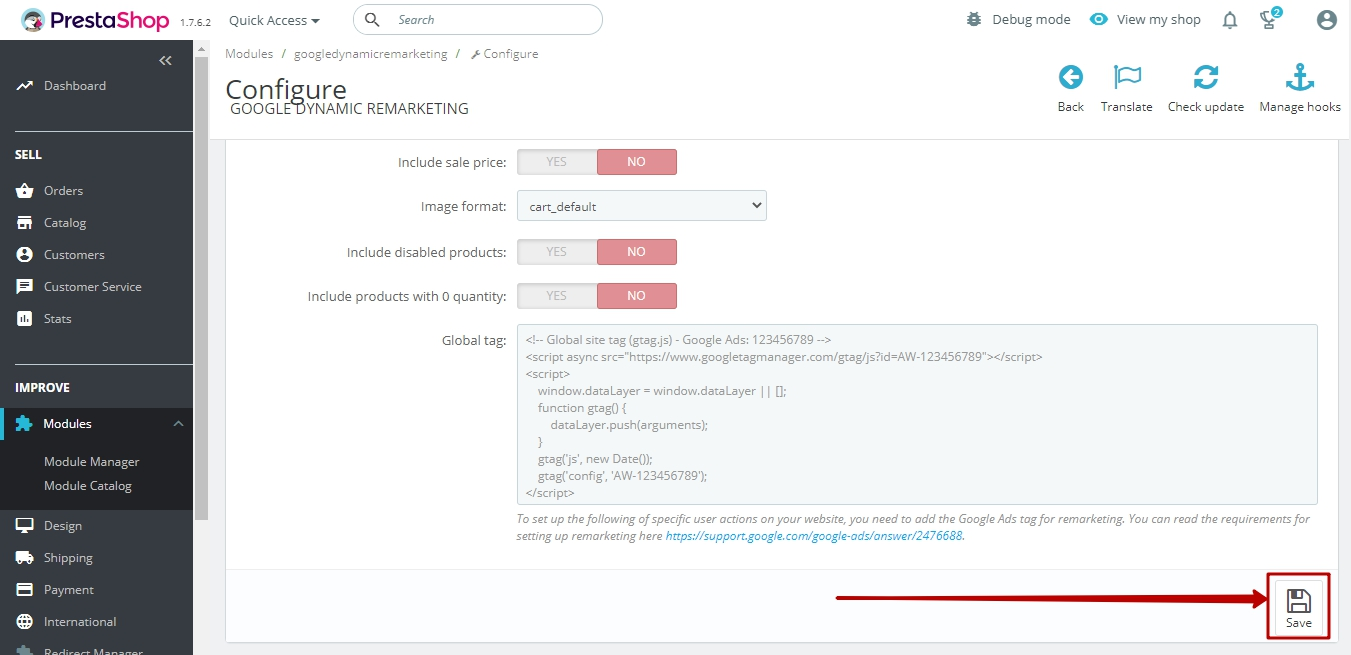
After setting up the feed, click the Save button.
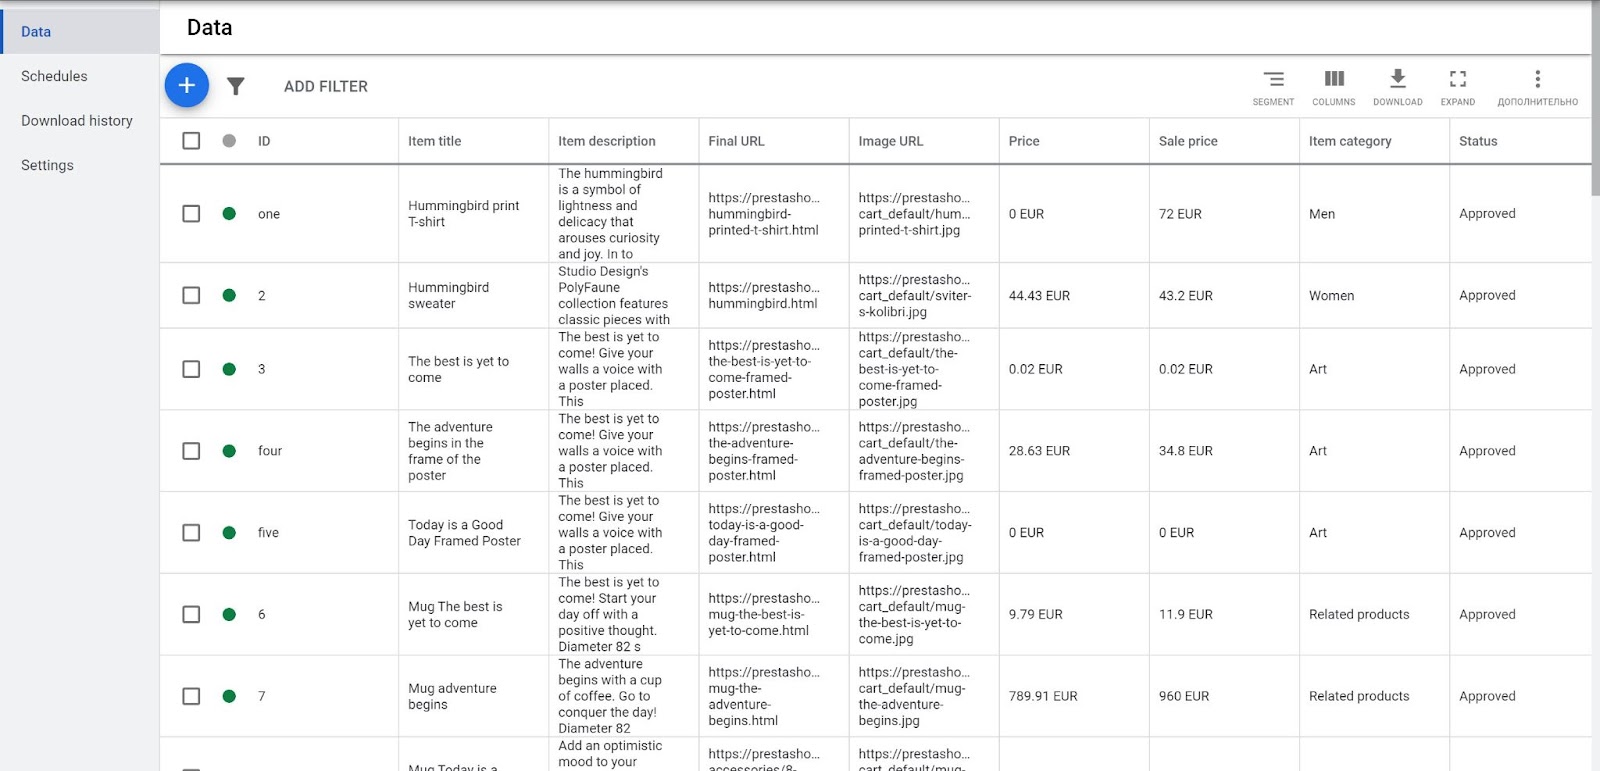
To generate a feed as a file / link, click on the Feed URL field.

Your feed formed as a link / file.
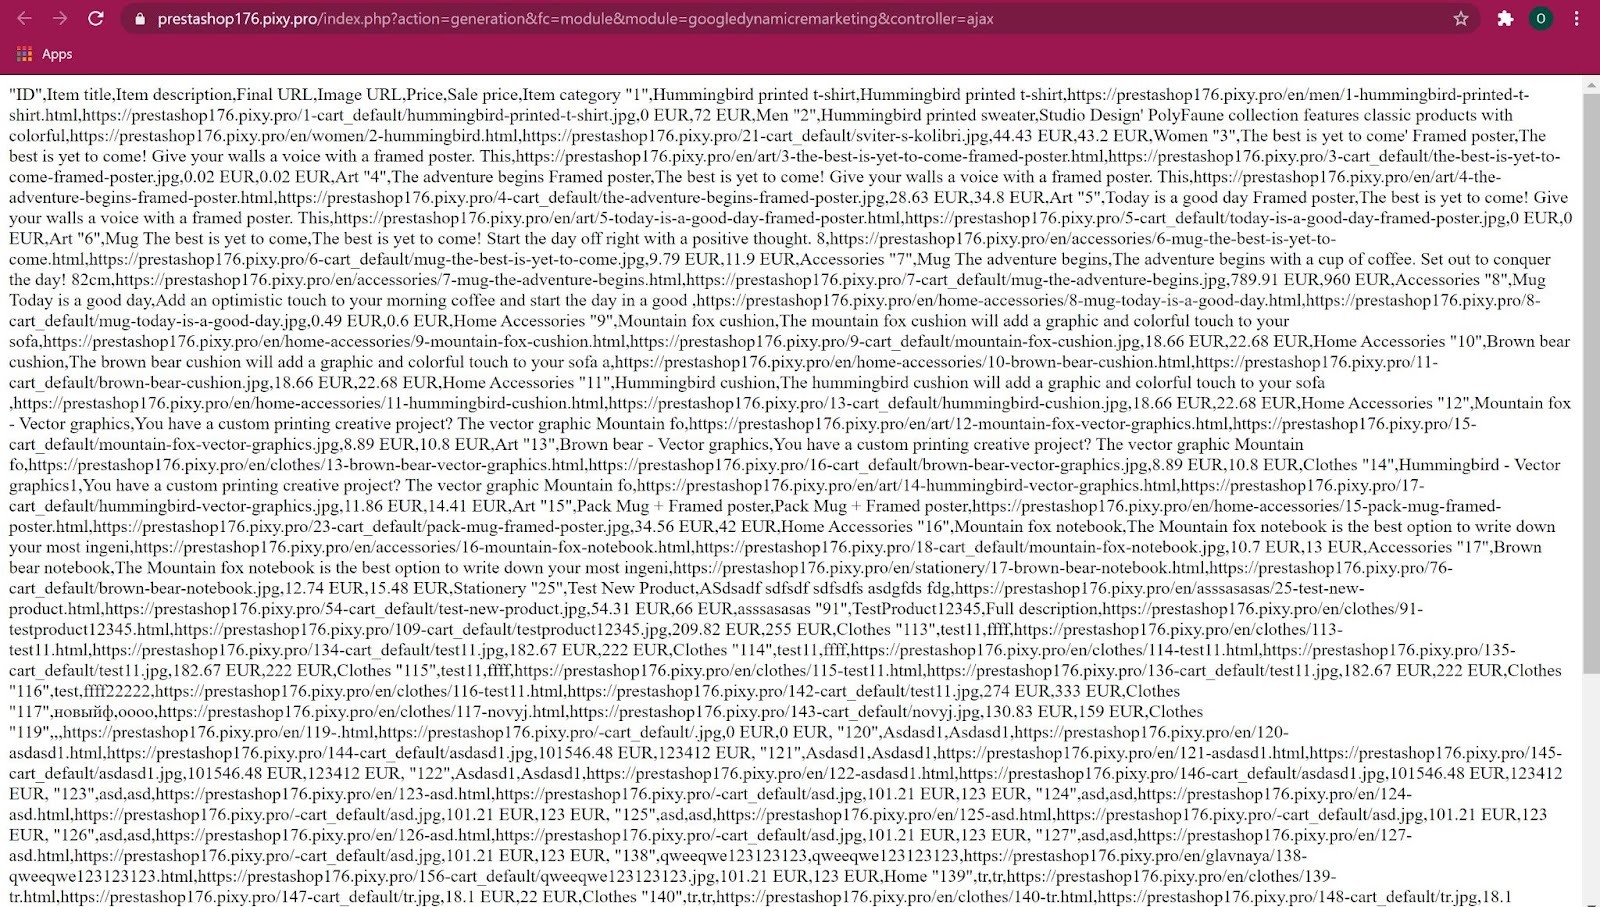
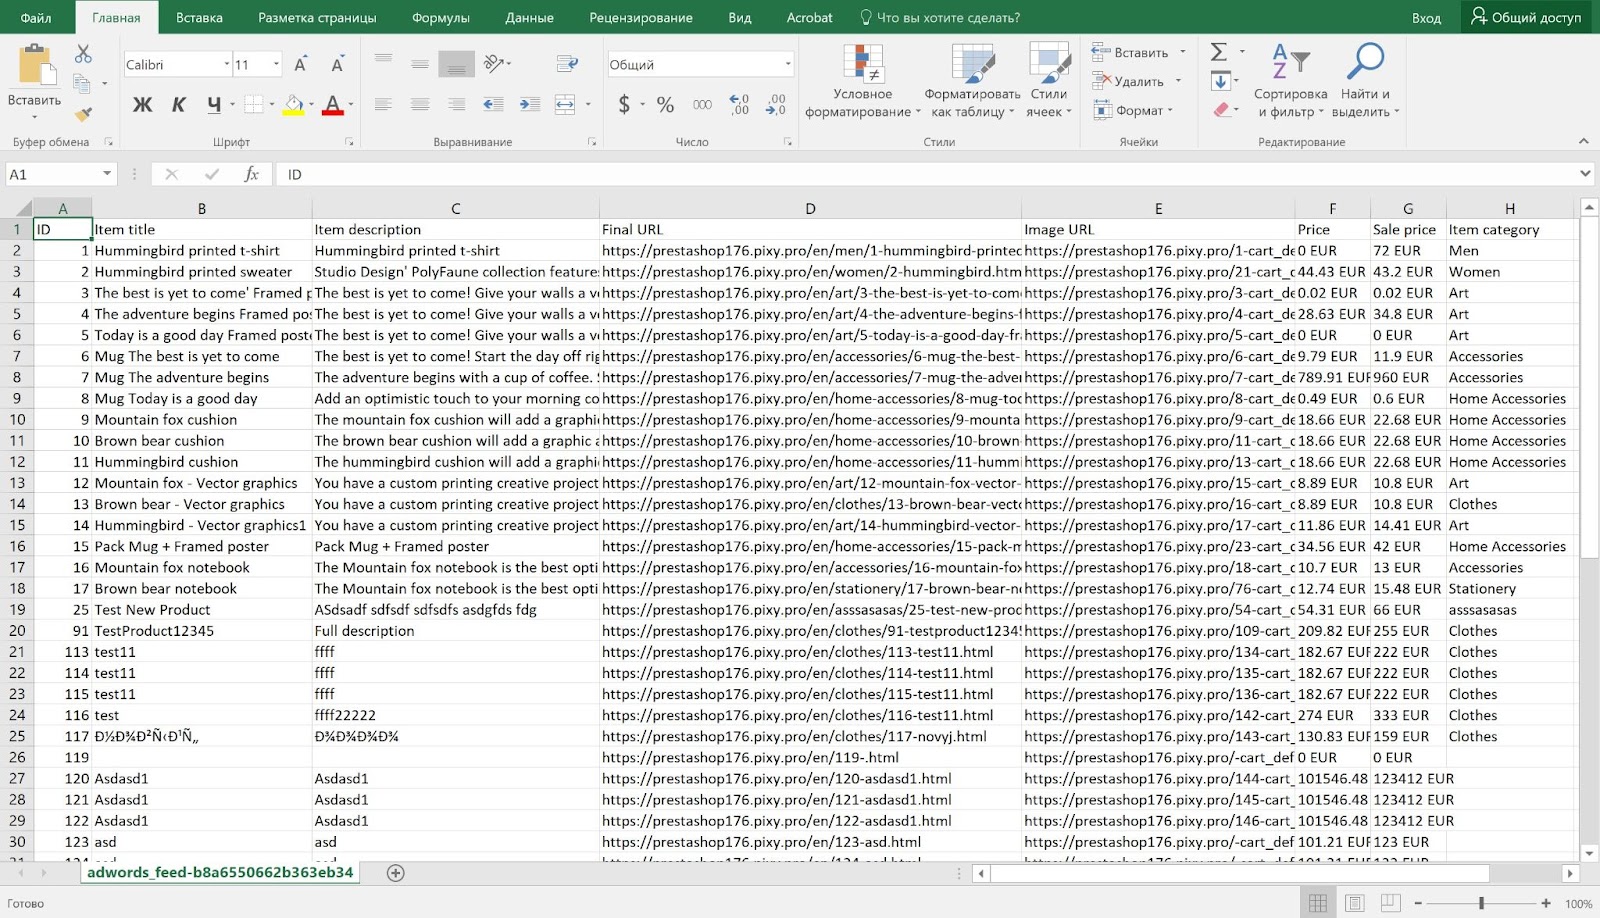
Now you can import the generated feed into your Google Ads account.