Instruction for Google Rich Snippet in Magento2.4
INSTRUCTION GOOGLE RICH SNIPPETS FOR MAGENTO 2.4
Download and install
Download the plugin archive from the Shop Pinta store and save it on your computer. Unpack the zip archive.
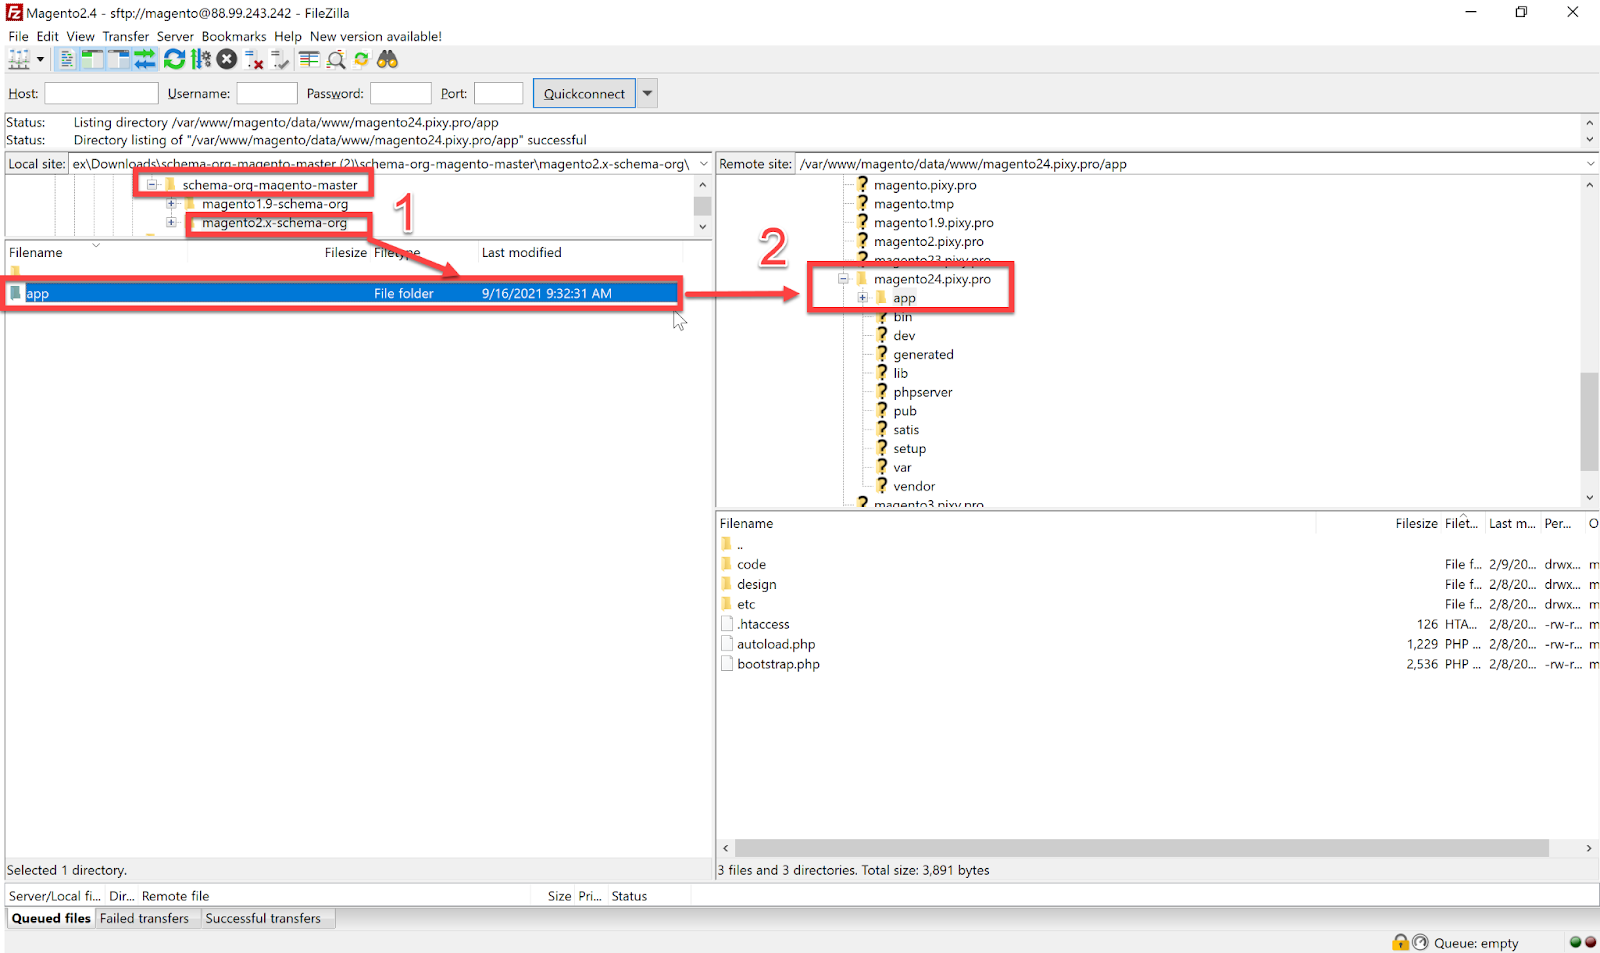
Connect via FTP to your website and copy the contents of the Pinta folder from the schema-org-magento archive (1) to the plugins storage folder 2).
Be sure to use the commands php bin/magento setup:upgrade and php bin/magento setup:di:compile in the web console to activate the plugin.
Also be sure to clear the cache after installing the plugin and update the installation. It is important! Next, you need to log into the admin panel again. The procedure is now complete.
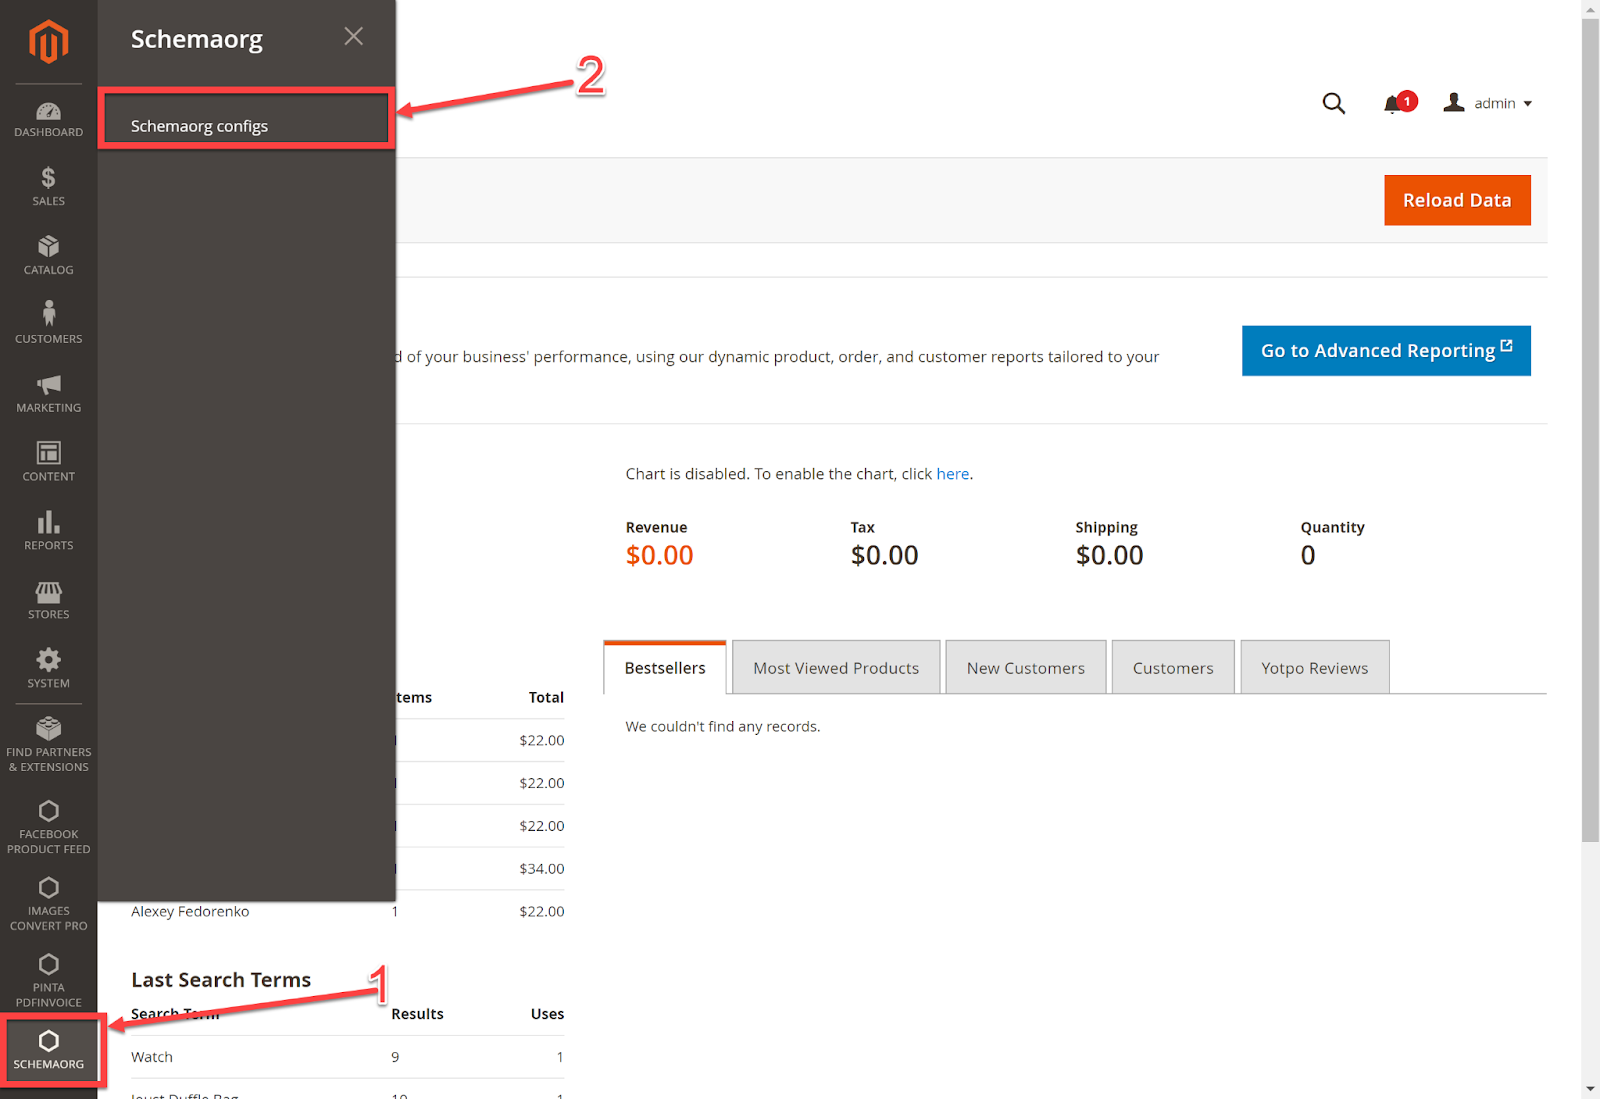
To configure the plugin, go to the main menu of the admin panel Schemaorg (1) > Schemaorg configs (2), which appears after installation.
Plugin Page
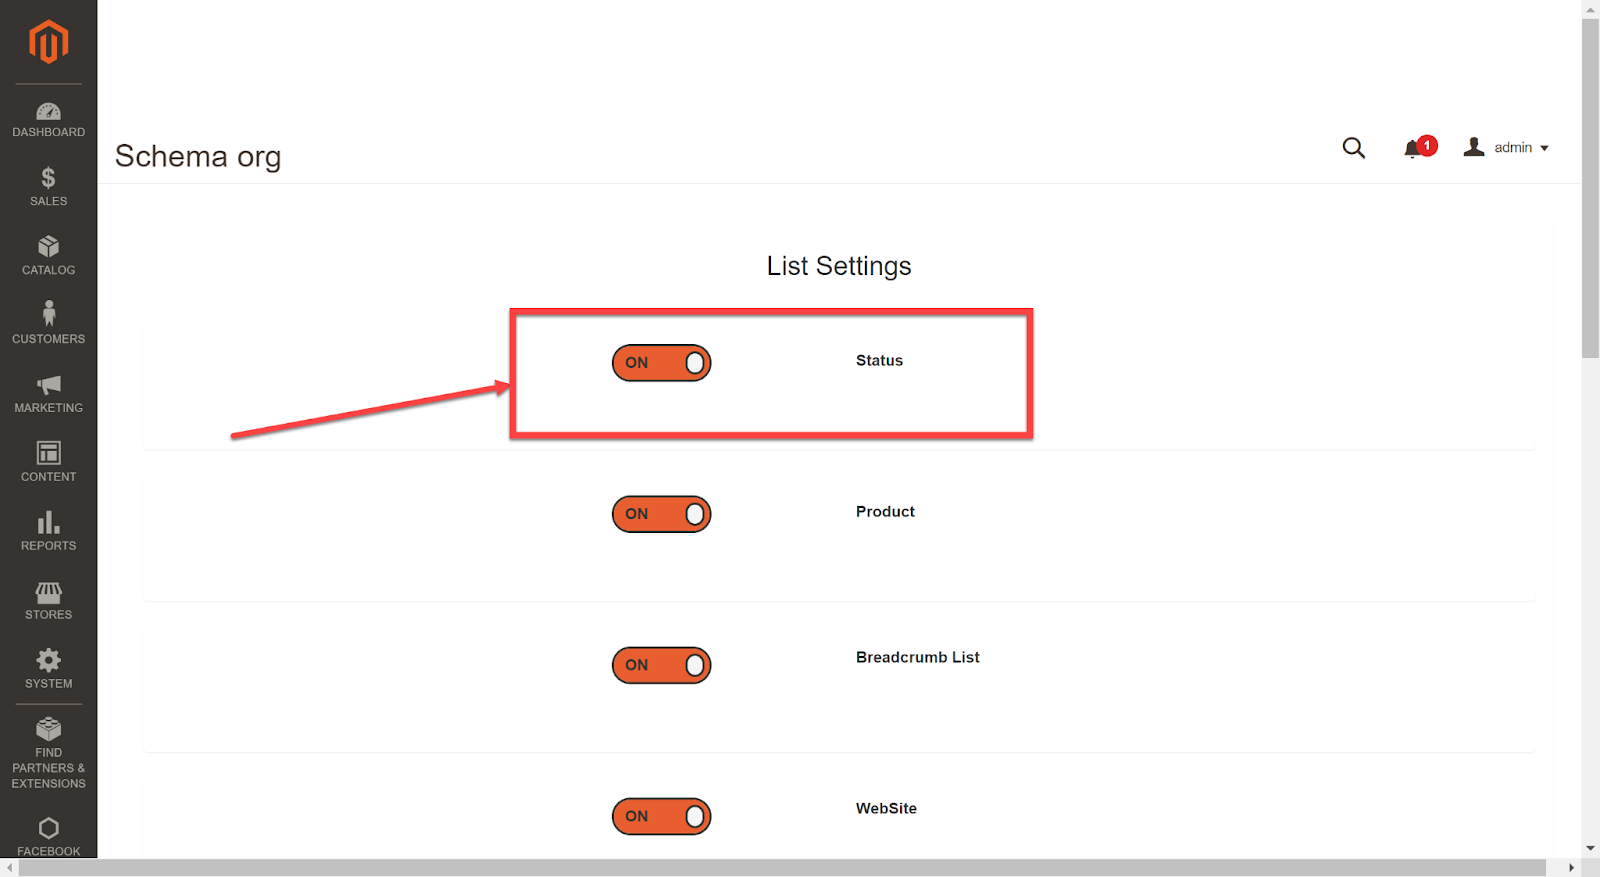
The plugin page (List Setting) consists of:
The Status checkbox - to enable / disable the plugin (position ON / OFF).
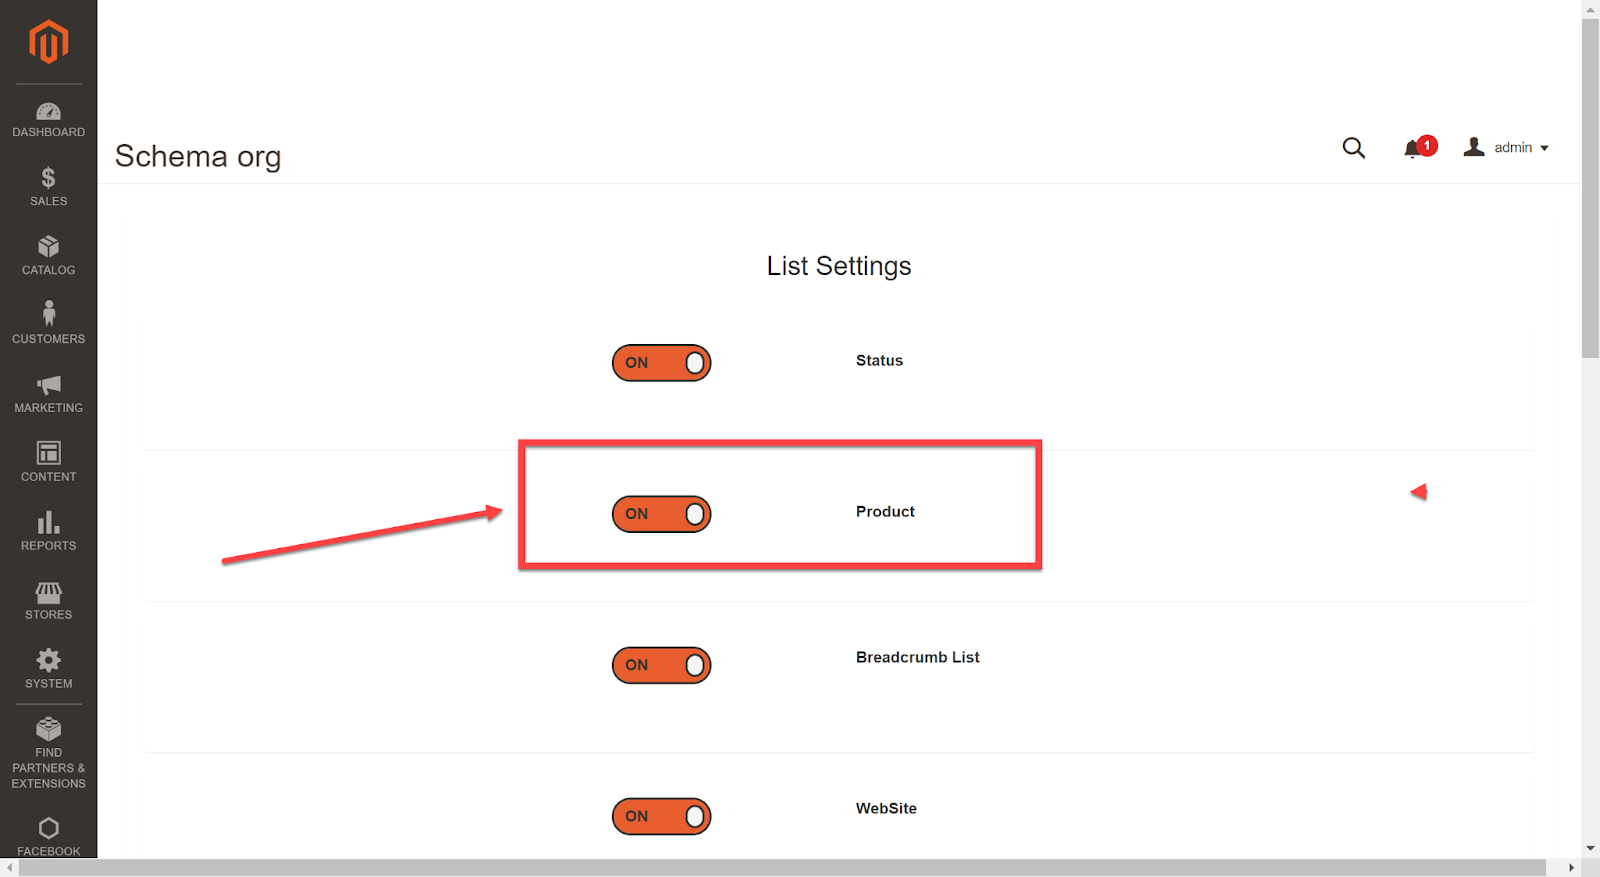
The Product checkbox - to display products in rich snippets of your website (position ON / OFF).
The Breadcrumb List checkbox - to display the navigation bar in rich snippets of your website (position ON / OFF).
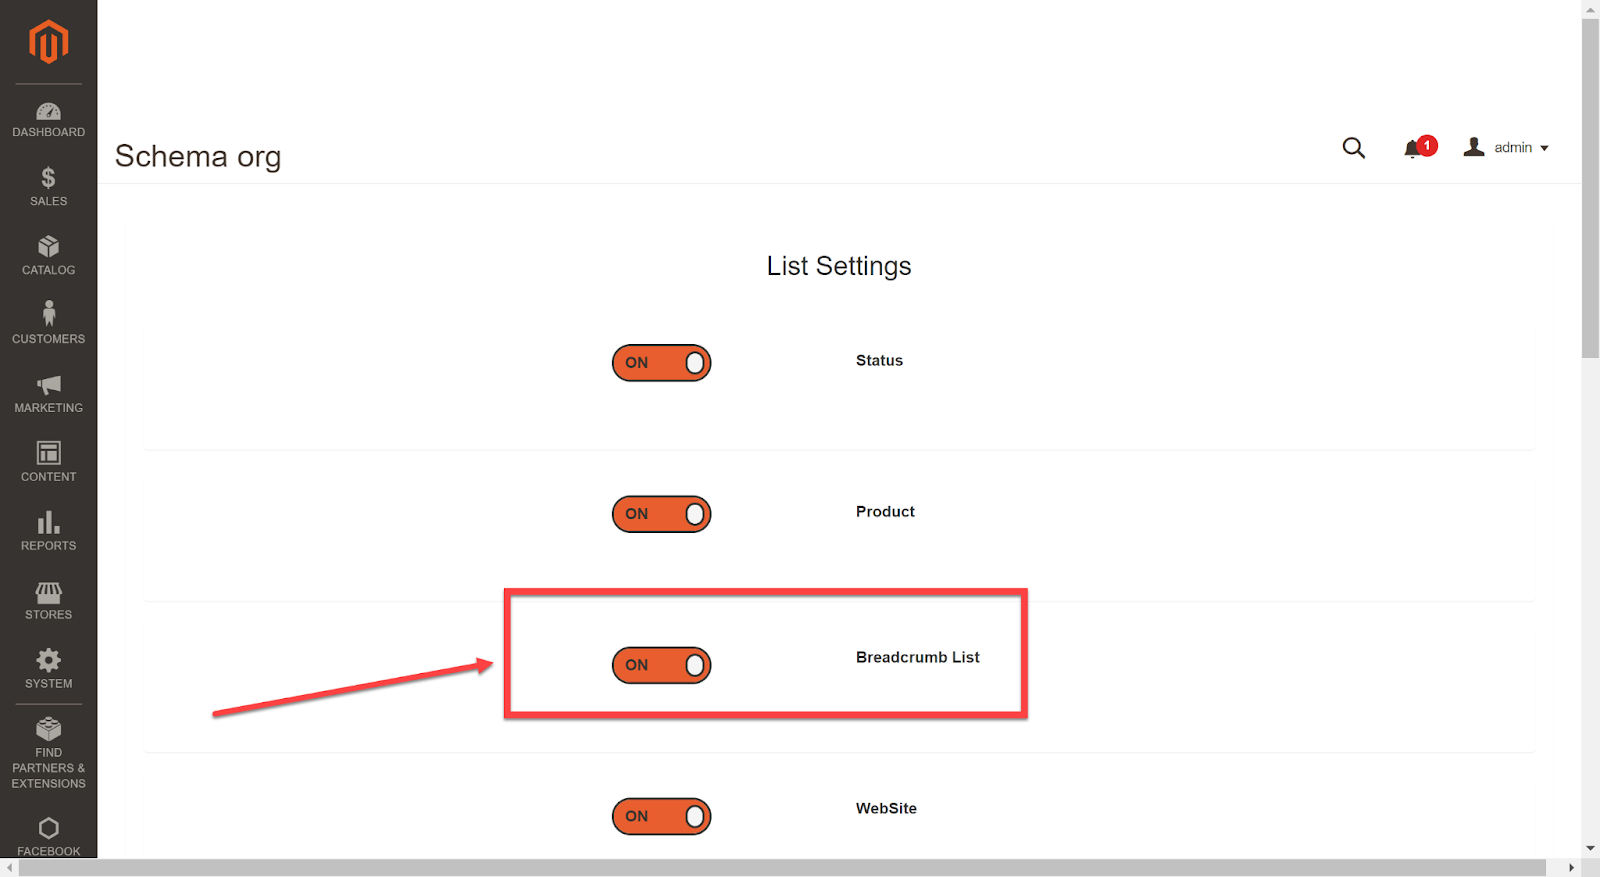
The Website checkbox - to display the search field in rich snippets of your website (position ON / OFF).
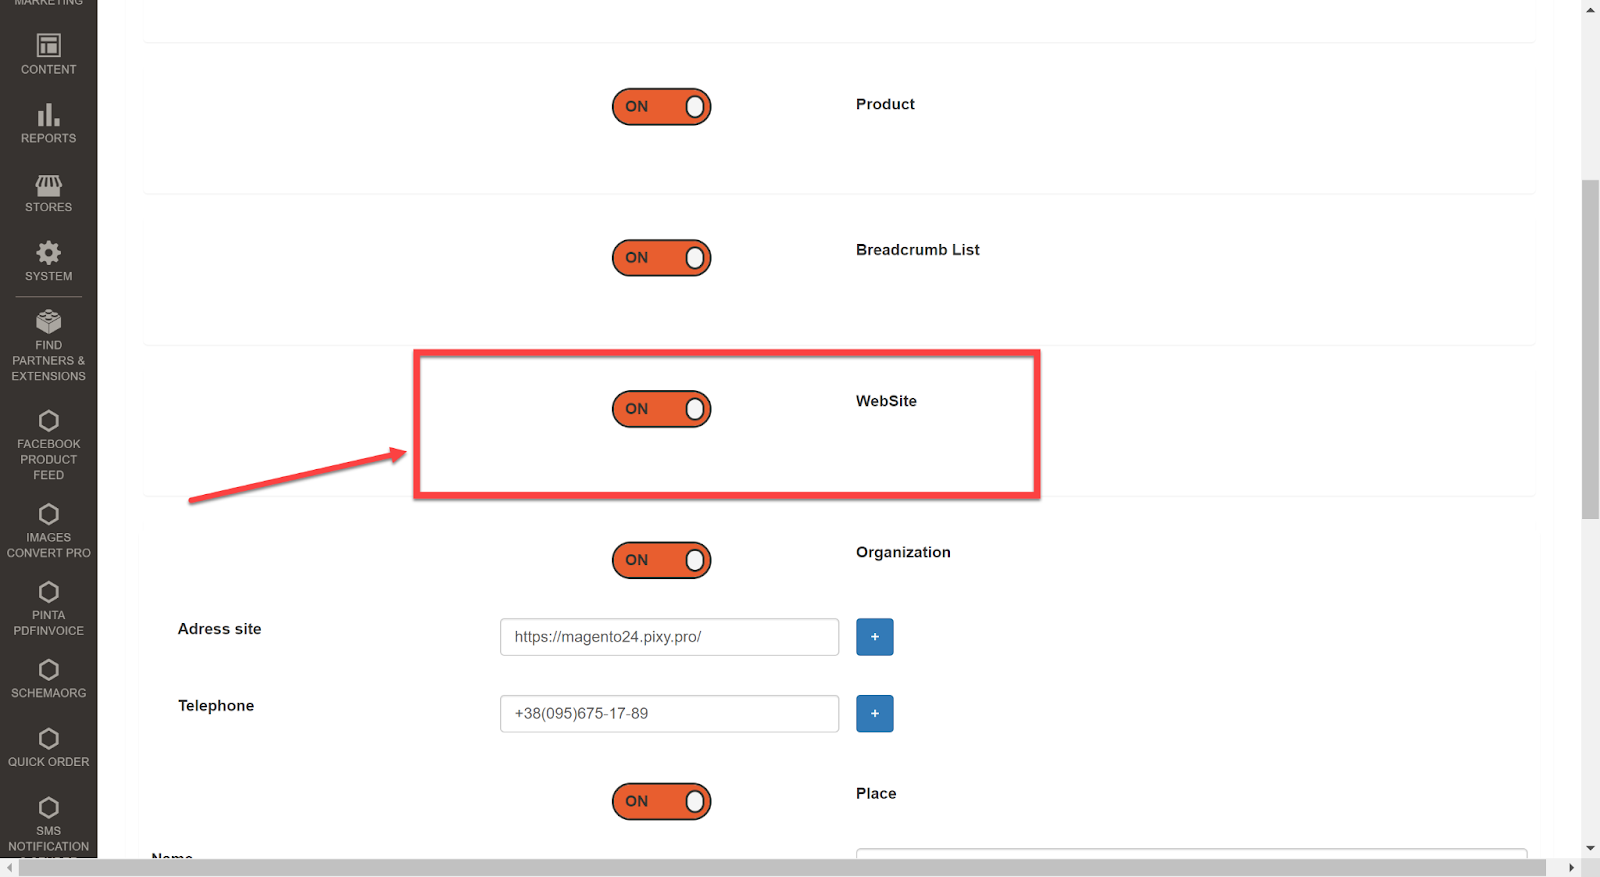
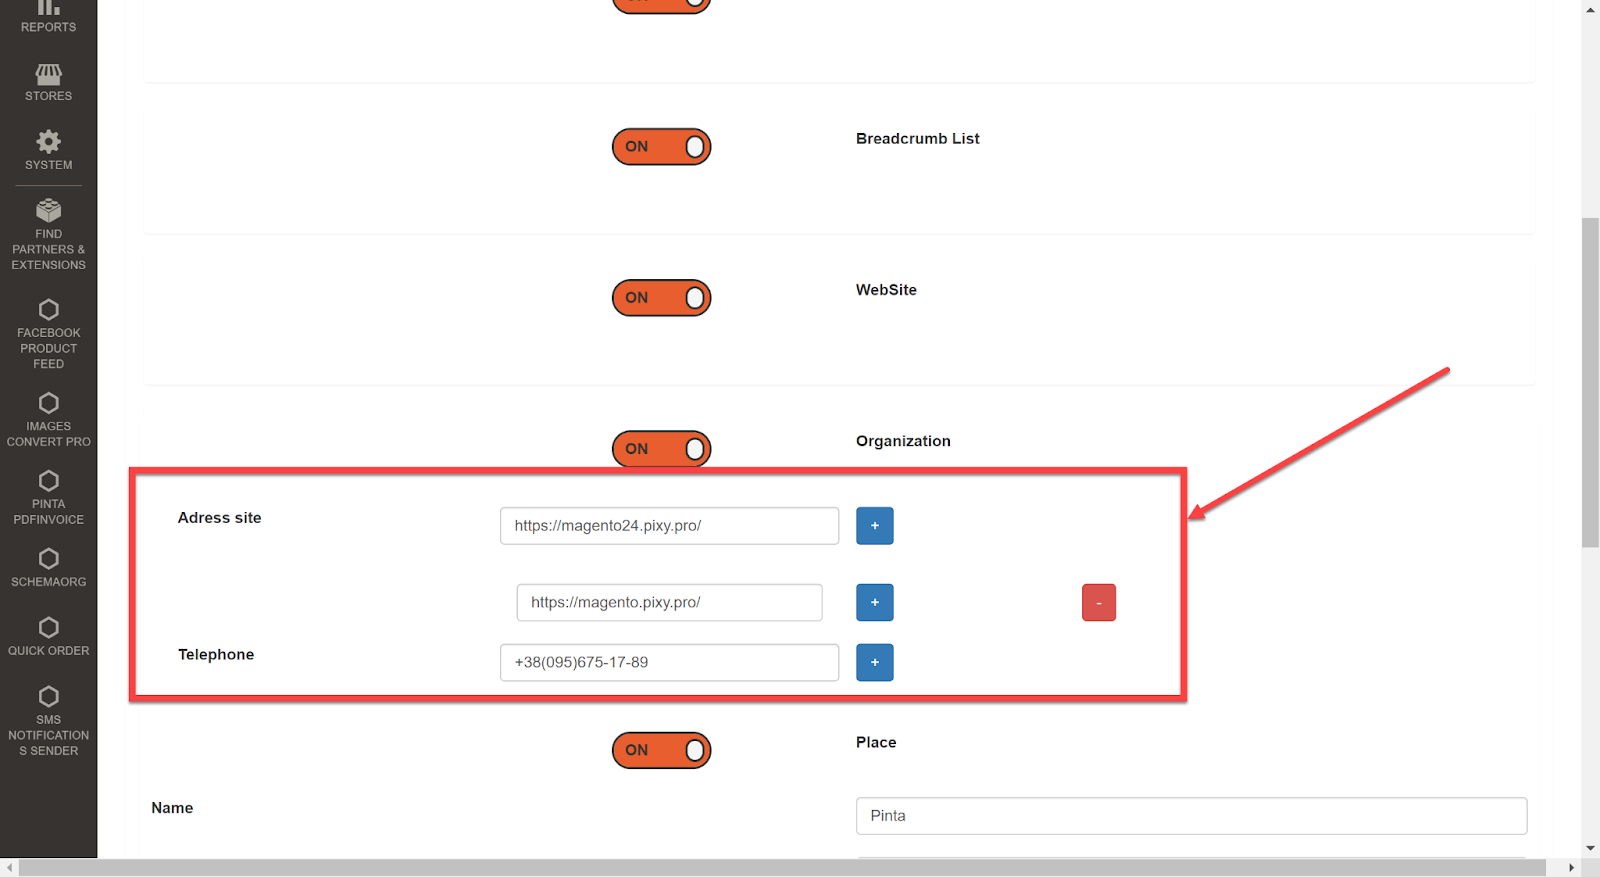
The Organization checkbox - to display your website URL and contact phone in rich snippets of your website (position ON / OFF).
To do this, move the slider to the ON position and add data to the Address site and Telephone fields.
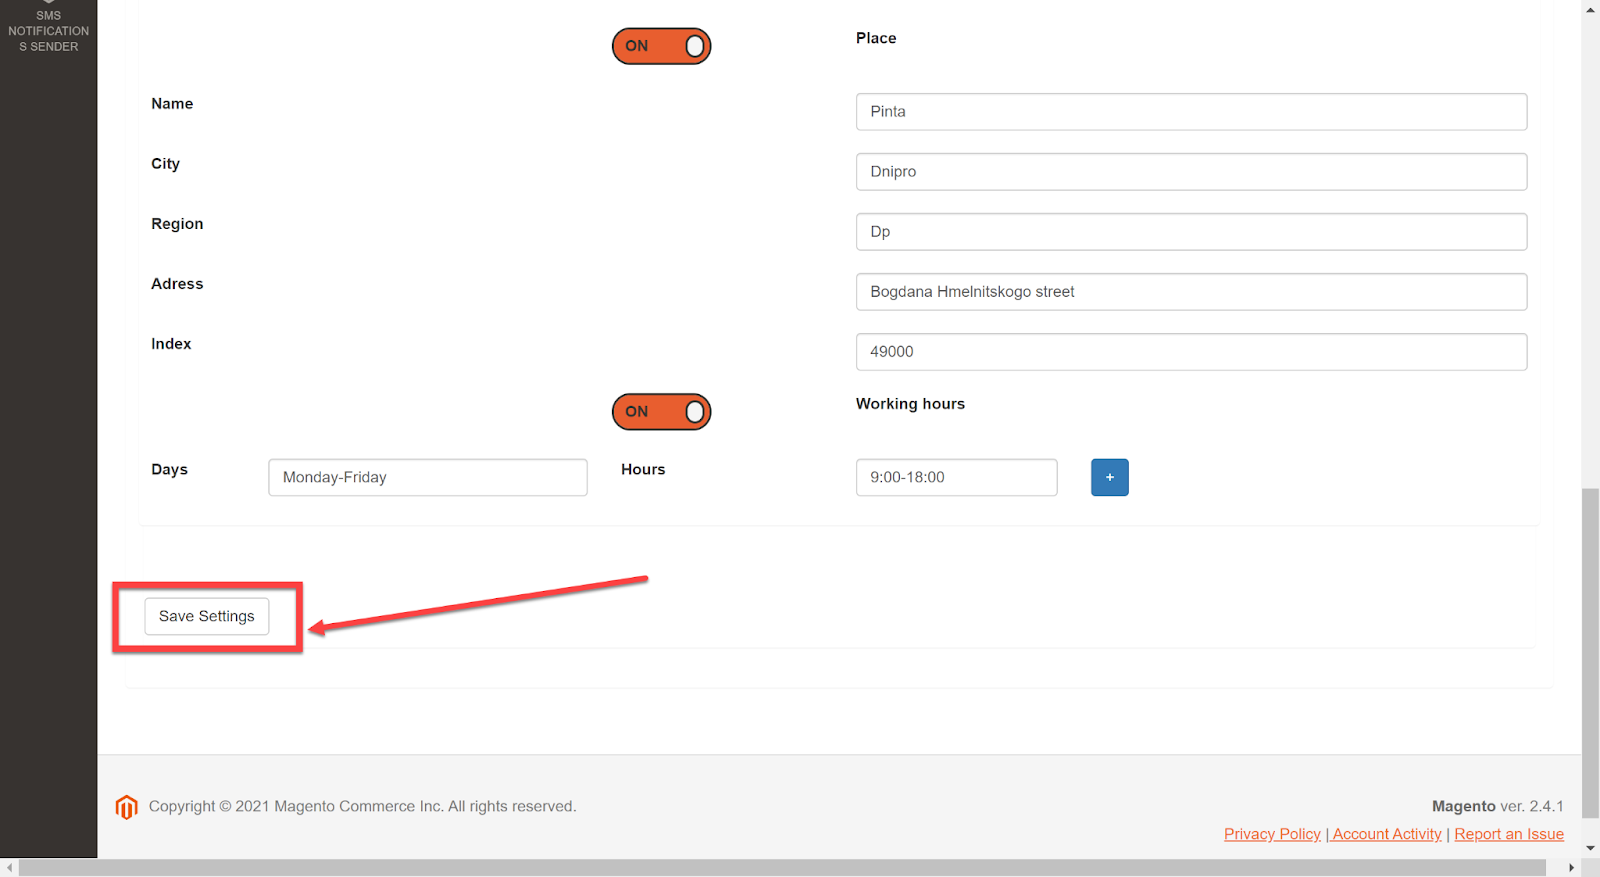
The Place checkbox (1) - to display information about your company in rich snippets of your website.
To add the name and address of your company, select the ON position for the Place checkbox.
Next, add data to the fields:
Name - to enter the name of your company.
City, Region, Adress, Index - to enter data on the location of your company.
To add information about the work schedule of your company, select the ON position for the Working hours checkbox (2).
Next, add data to the fields:
Days - to add working days for your company.
Hours - to add the working hours of your company.
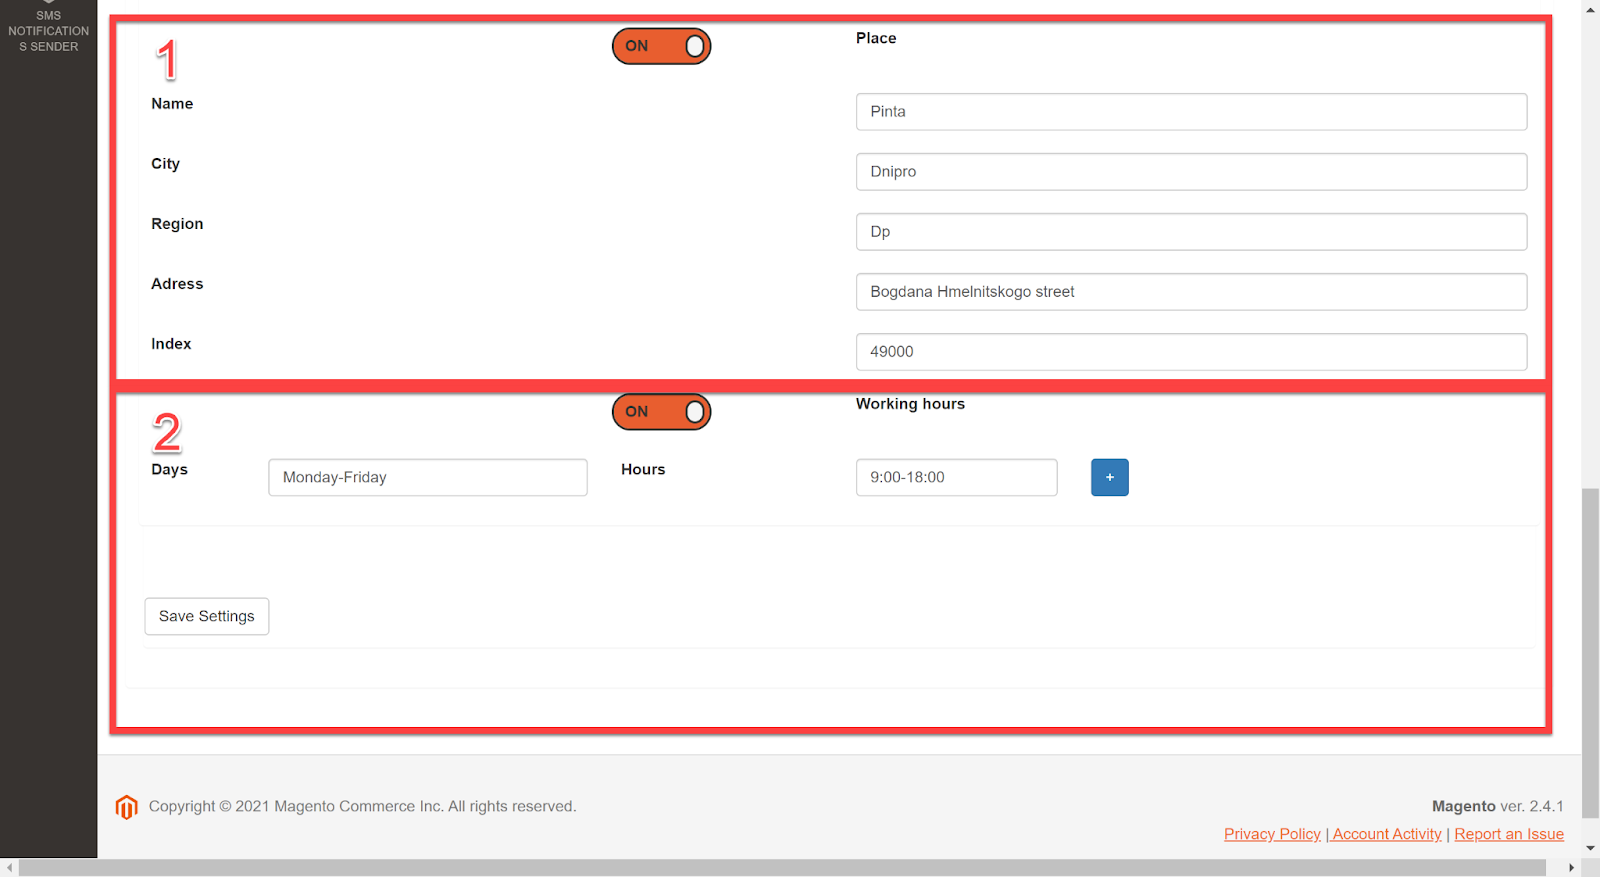
After completing the plugin configuration, click the Save button.
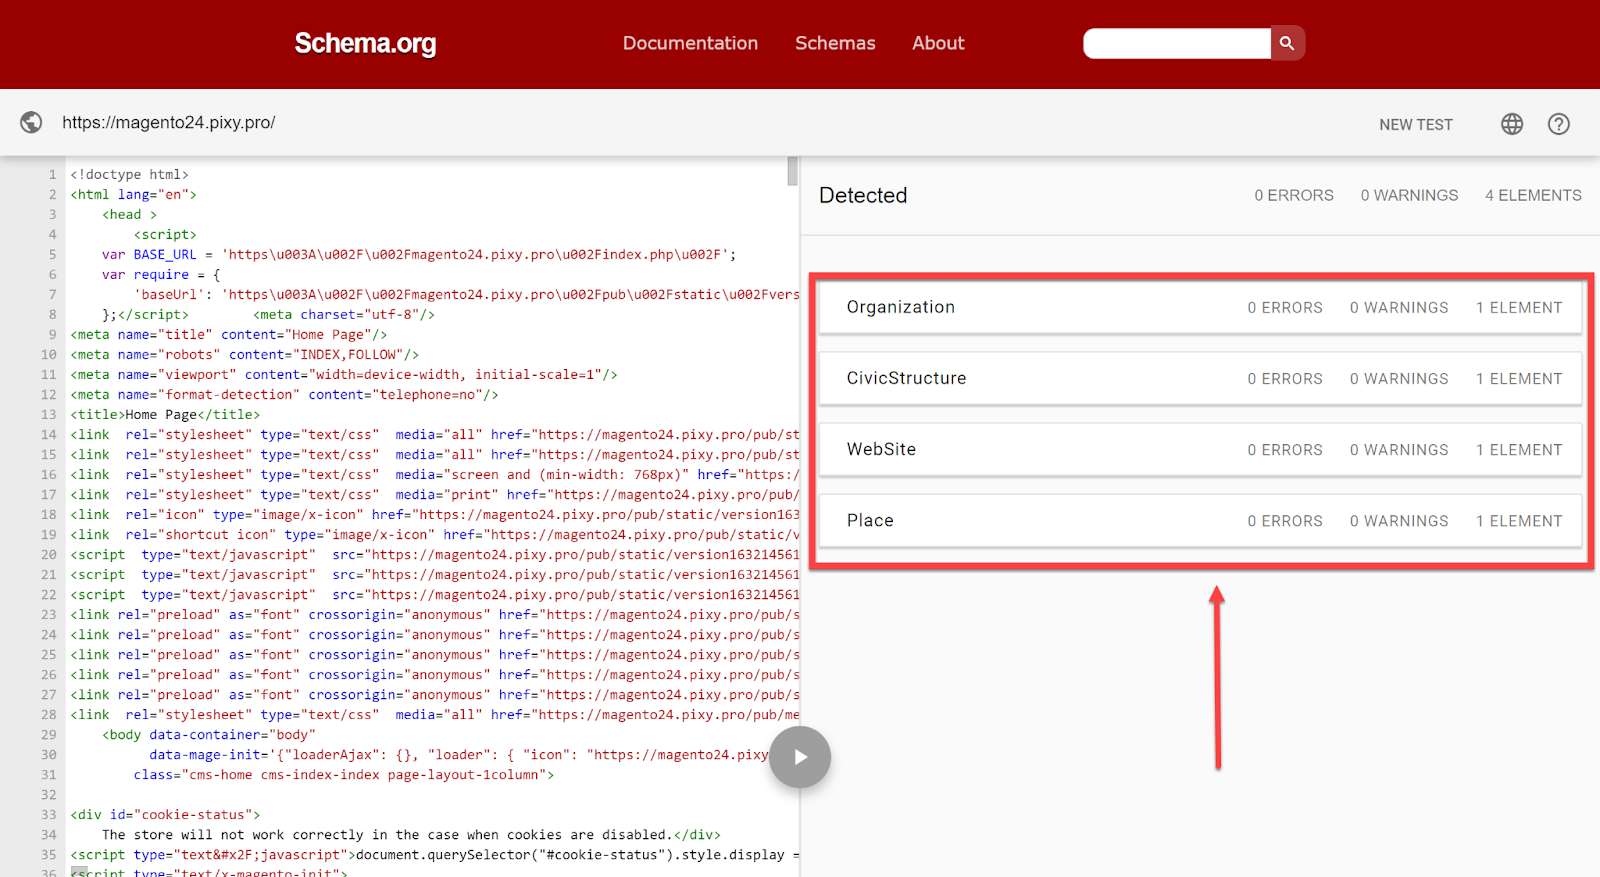
After installing and configuring the plugin, you can check your website layout with a simple tool - Schema Org Validator.
Go to the https://validator.schema.org/.
Paste your website URL into the GET THE URL tab (1) and click the VERIFY button (2).

As a result of testing, you will see the structured data of your website that users will see in search results.
VIDEO INSTRUCTION