Google Rich Snippet Instruction for Prestashop1.7
Download and install
Download the plugin archive from the Shop Pinta store and save it on your computer.
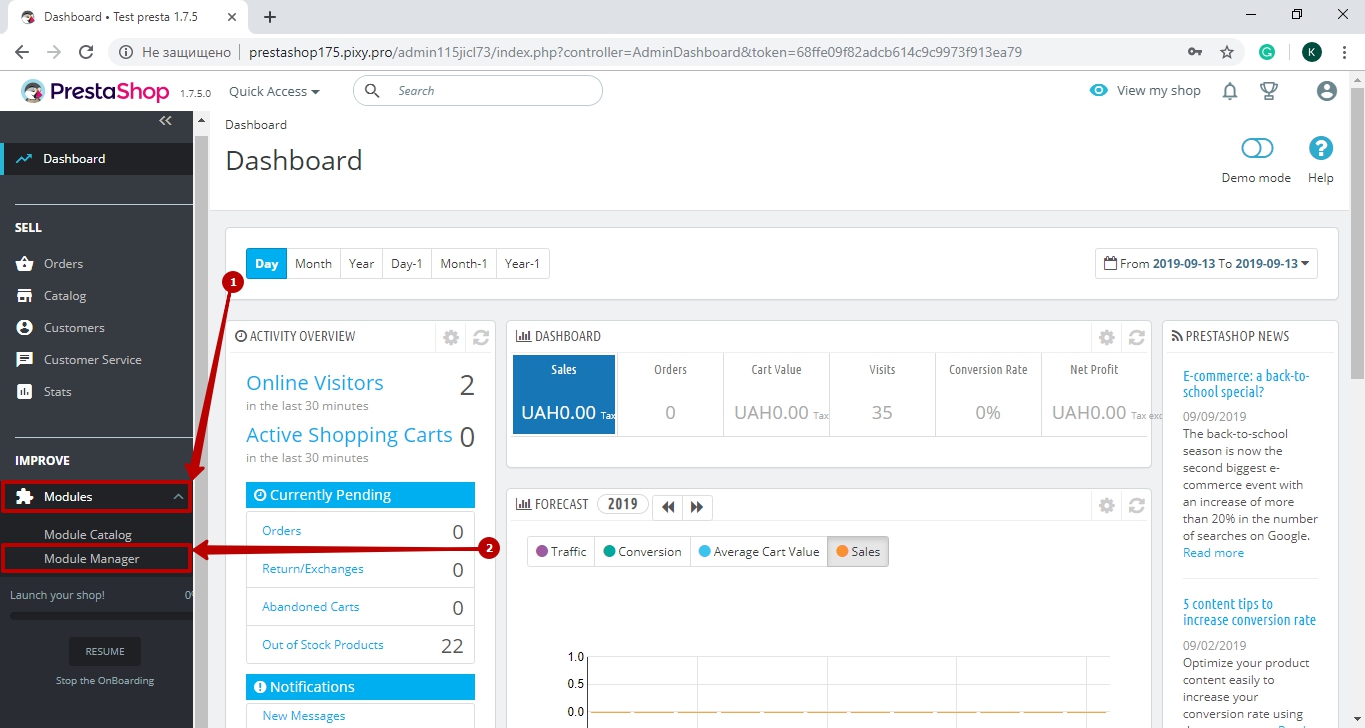
In the admin panel of your website, select Modules (1) > Modules Manager (2).
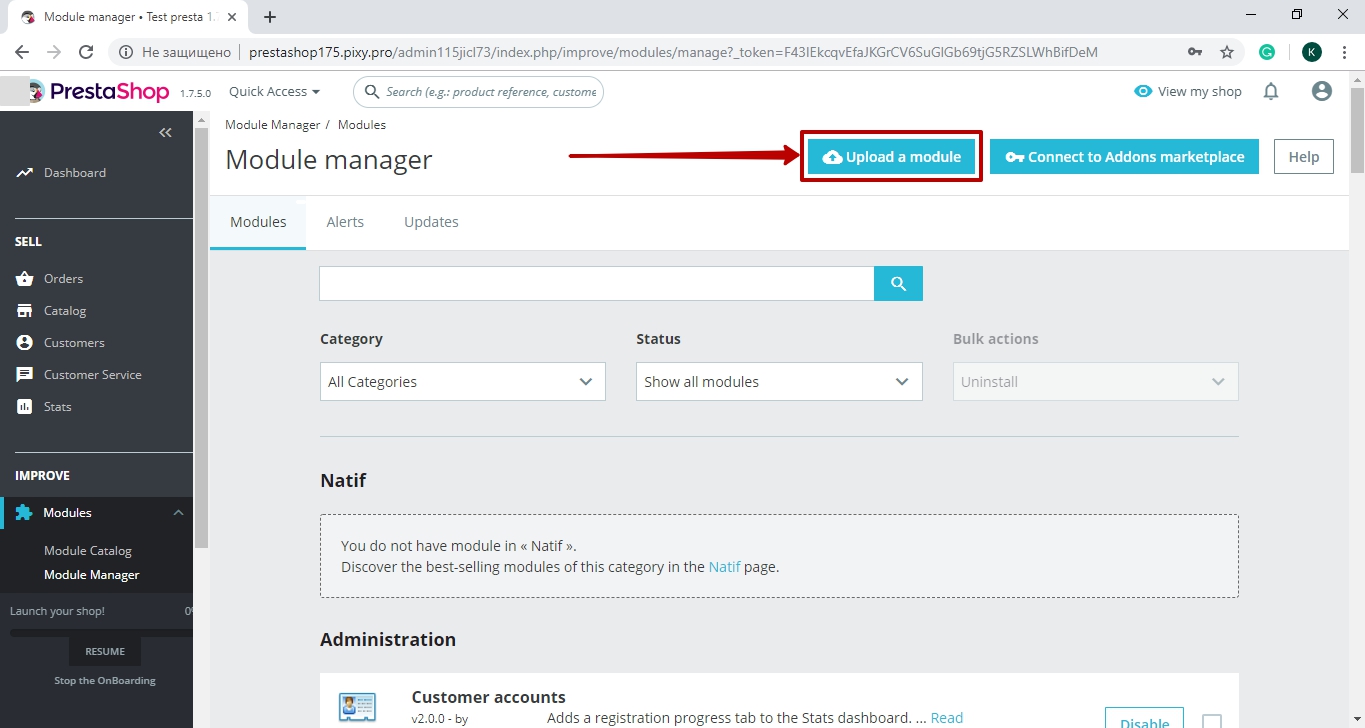
Click the Upload a module button.
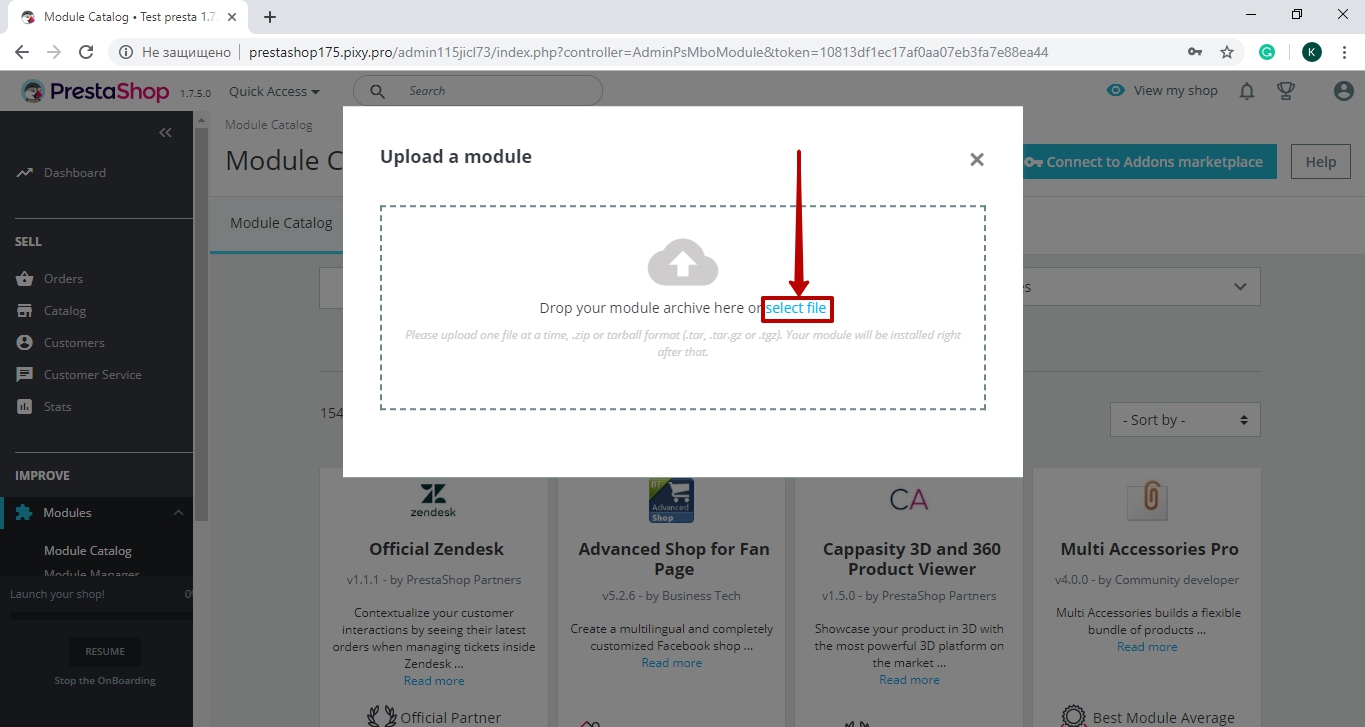
In the opened window, click the select file.
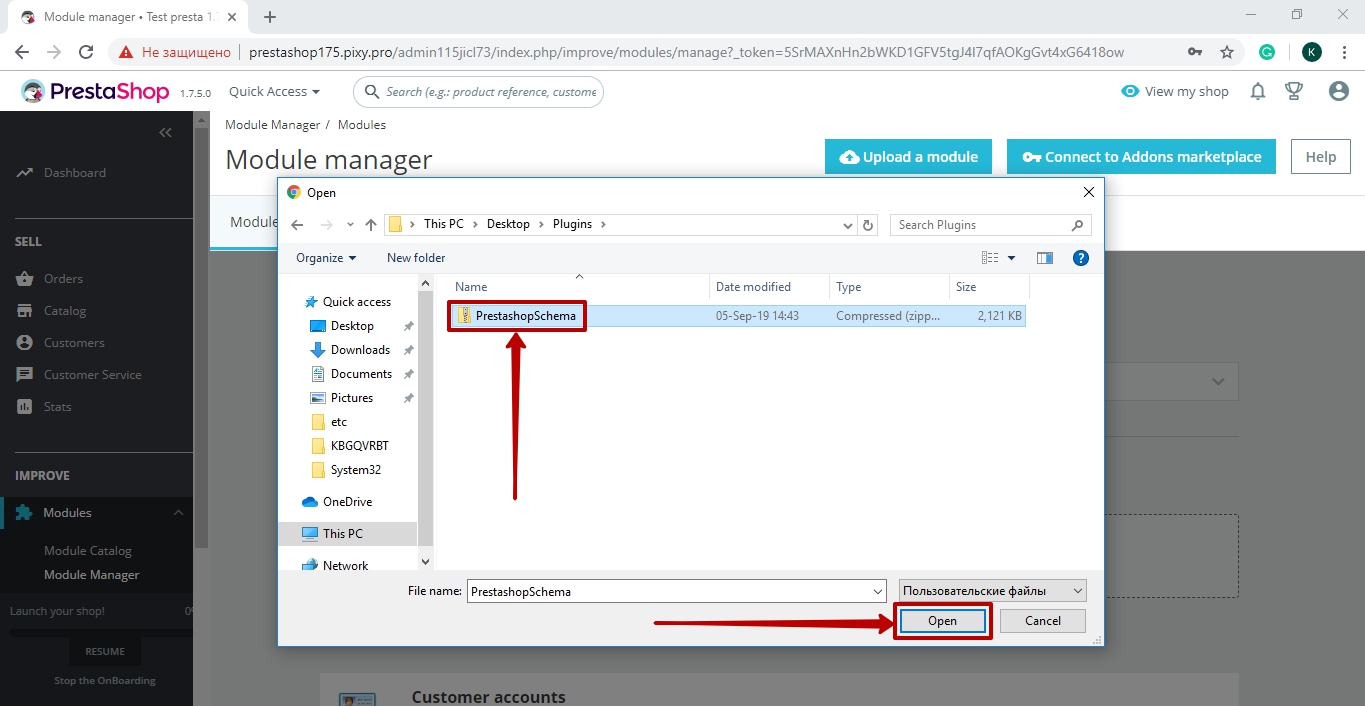
Select the plugin archive and click the Open button.
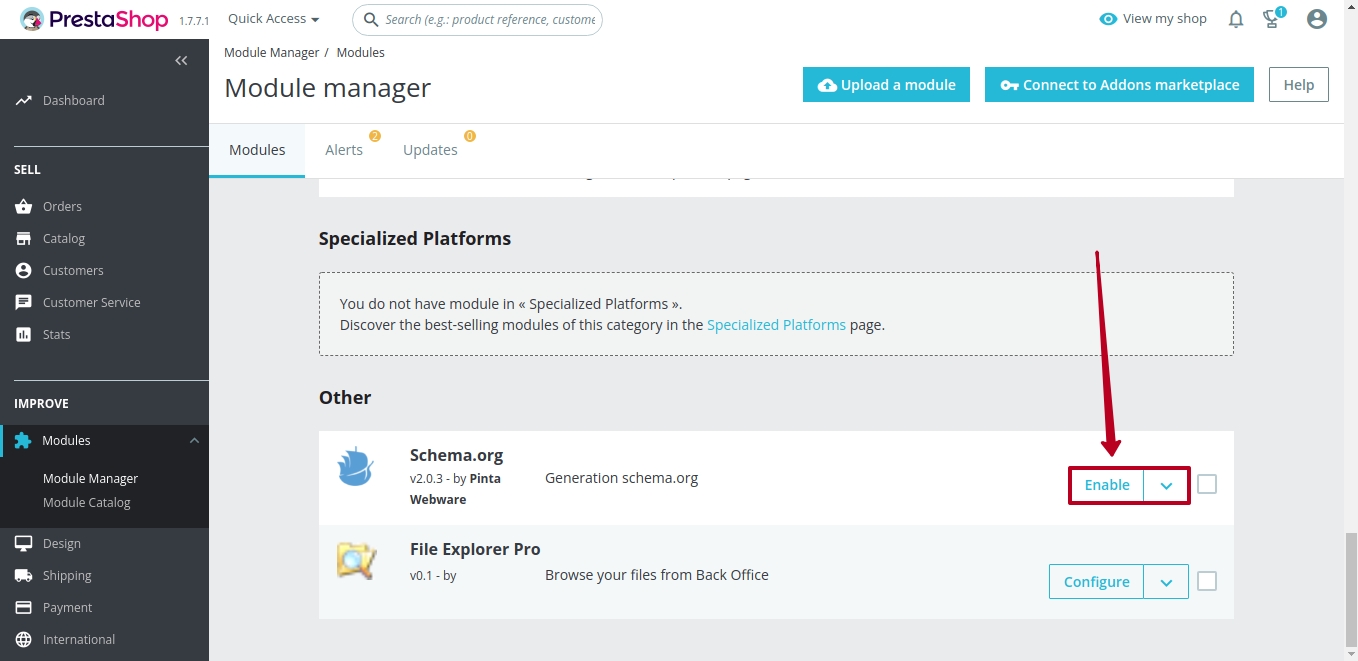
To activate the plugin, go to the main menu of the admin panel Modules > Module Manager. Next, find the Schema.org plugin and click the Enable button.
To configure the plugin, click the Configure button.

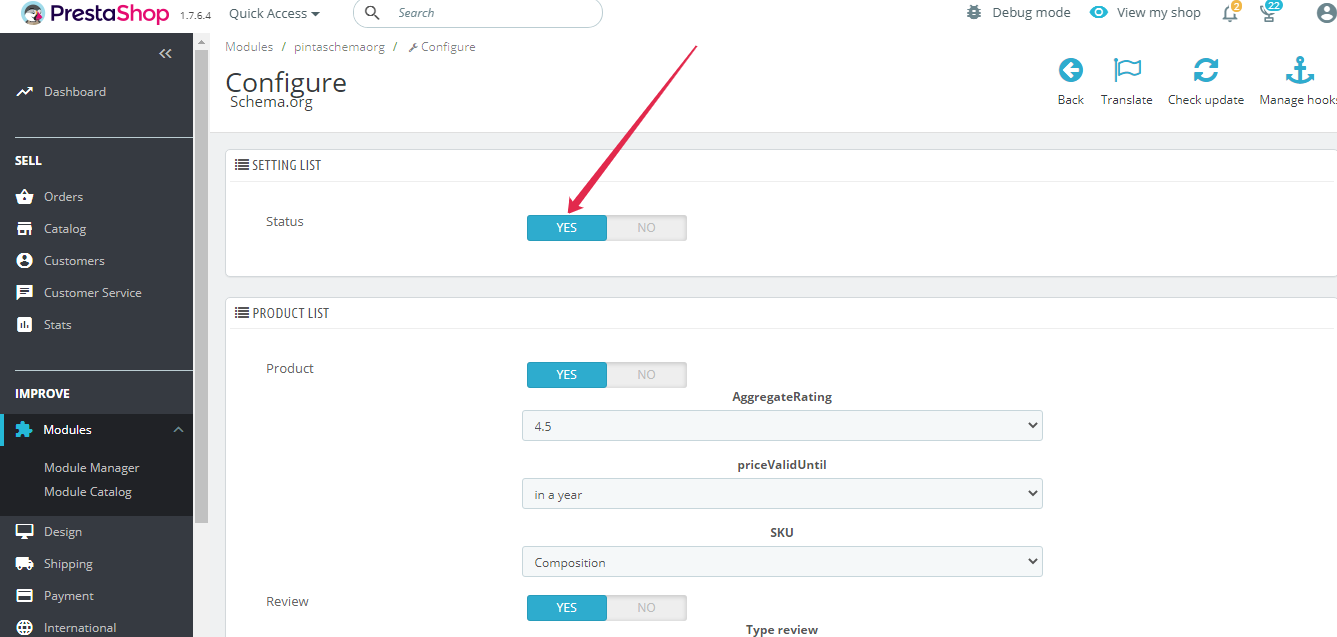
Plugin page
The plugin page consists of:
The SETTING LIST block. In the Status field, you can enable / disable the plugin (position YES / NO).
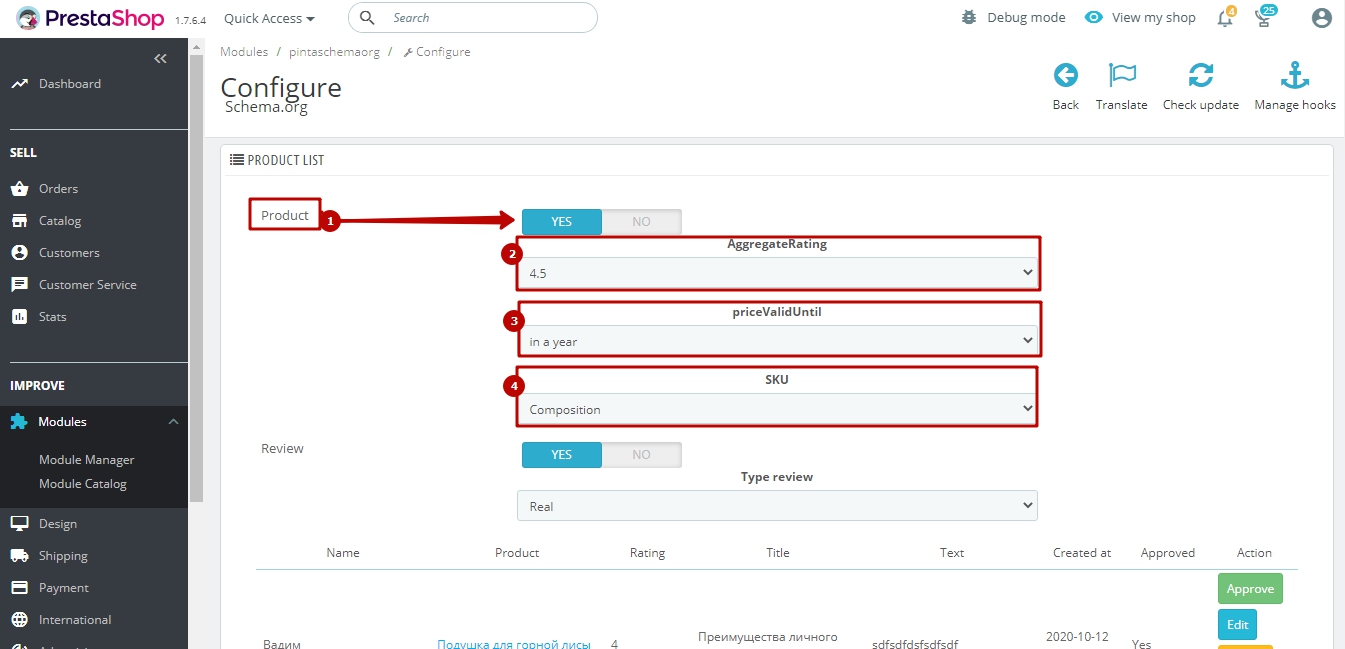
The PRODUCT LIST block allows you to display products and reviews in rich snippets of your website and contains:
The Product checkbox (1) - to enable / disable the display of products (position YES / NO).
The AggregateRating field (2) - to select the rating of products.
The priceValidUntil field (3) - to select the period during which the price will be valid.
The SKU field (4) - to select a product identifier.
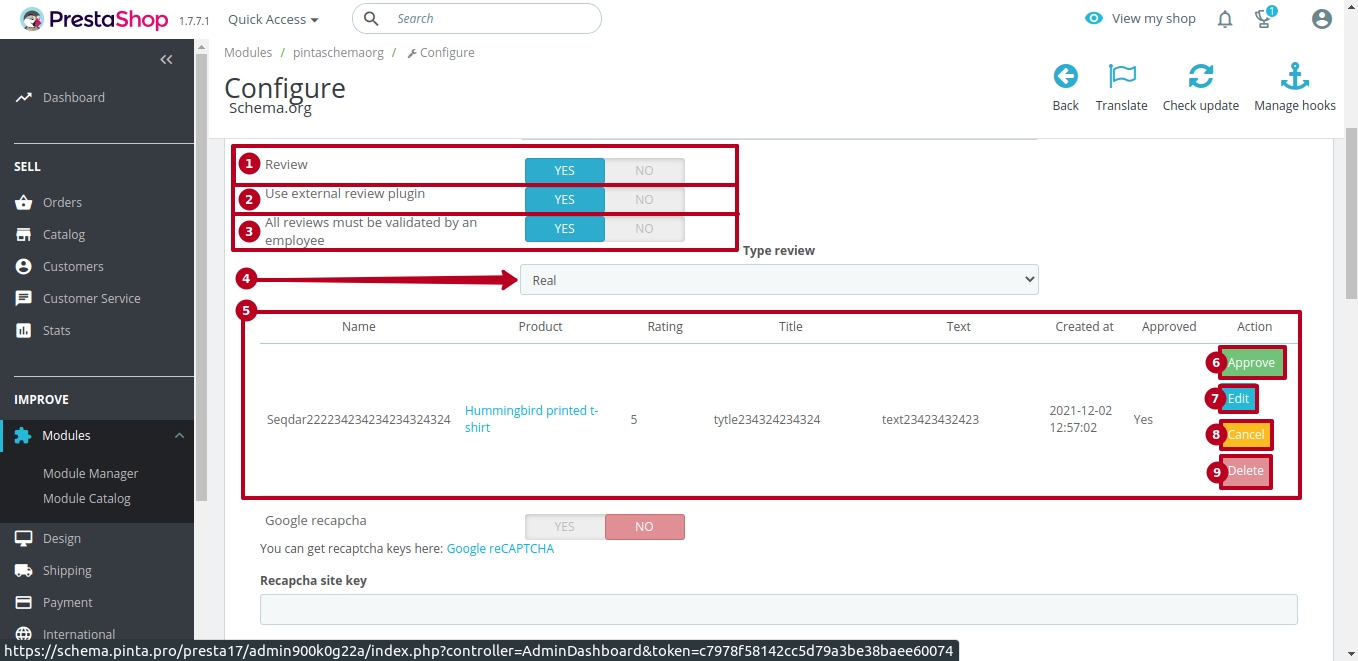
The Review checkbox (1) - to enable / disable the display of reviews (position YES / NO).
The Use external review plugin checkbox (2) - select the YES position if you don't want to use the plugin for generating reviews.
The All reviews must be validated by an employee checkbox (3) - select the YES position to confirm the review placement by the website administrator before publishing.
The Type review field (4) - to select the type of reviews.
Table (5) displays all reviews from your website.
If necessary, you can:
place a review on the website by clicking the Approve button (6),
edit the review by clicking the Edit button (7),
cancel the review confirmation by clicking the Cancel button (8),
remove the review by clicking the Delete button (9).
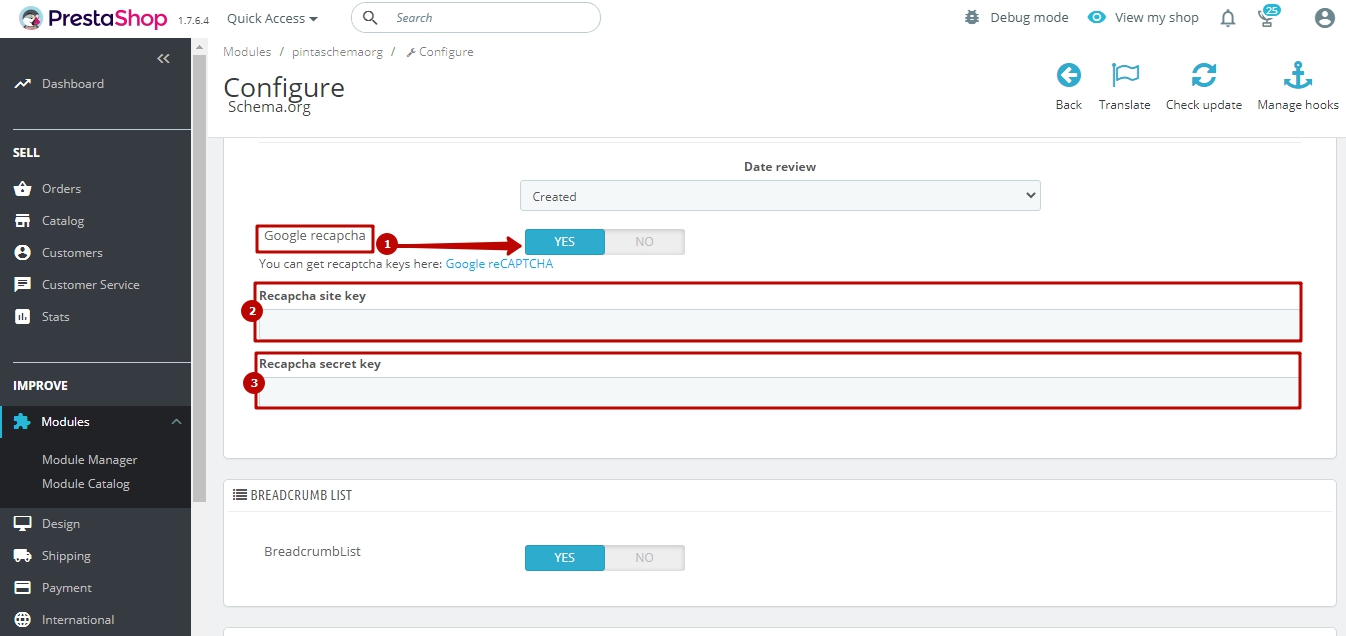
The Google recapcha checkbox (1) - to enable / disable the use of Google recapcha (position YES / NO).
Fields Recapcha site key (2), Recapcha secret key (3) - to enter the data copied from the Google reCAPTCHA website after registration.
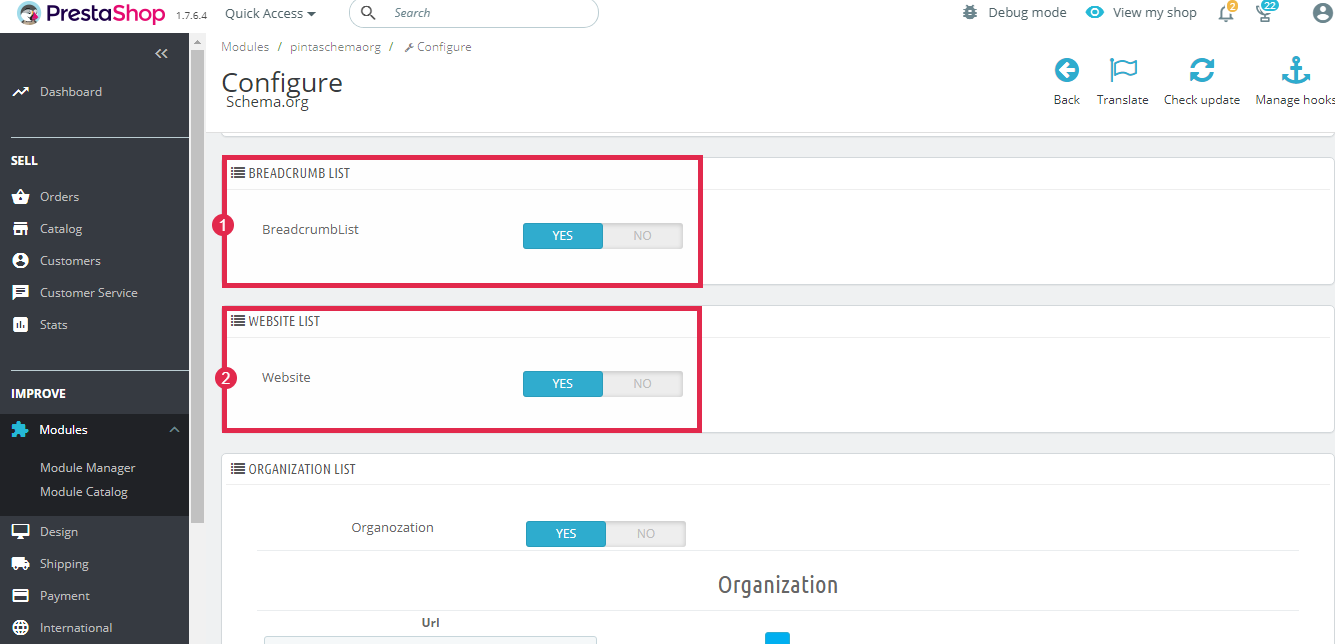
The BREADCRUMB LIST (1) allows you to display the navigation bar in rich snippets of your website and contains:
The BreadcrumbList checkbox - to enable / disable the display of the navigation bar (position YES / NO).
The WEBSITE LIST (2) allows you to display the search field in rich snippets of your website and contains:
The Website checkbox - to enable / disable the display of the search field (position YES / NO).
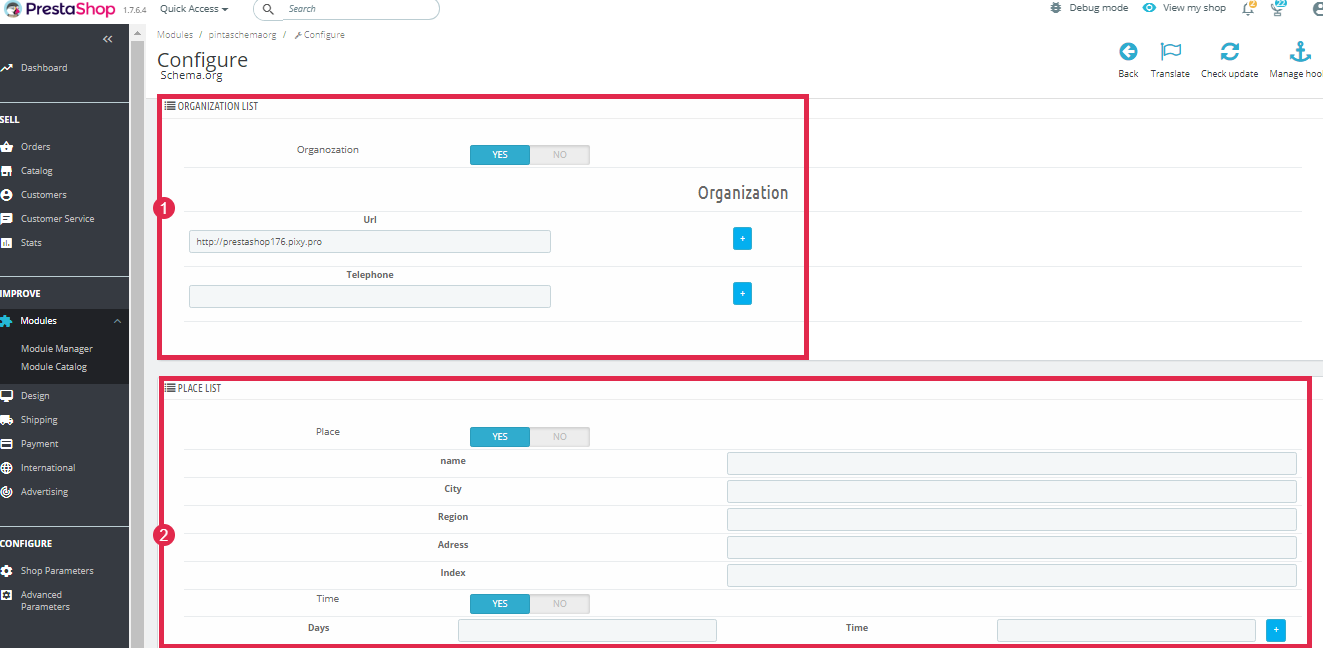
The ORGANIZATION LIST (1) allows you to display your website URL and contact phone number in rich snippets of your website and contains:
The Organization checkbox - to enable / disable the display of the website URL and contact phone number (position YES / NO).
The Organization (fields Url, Telephone) - to enter the data.
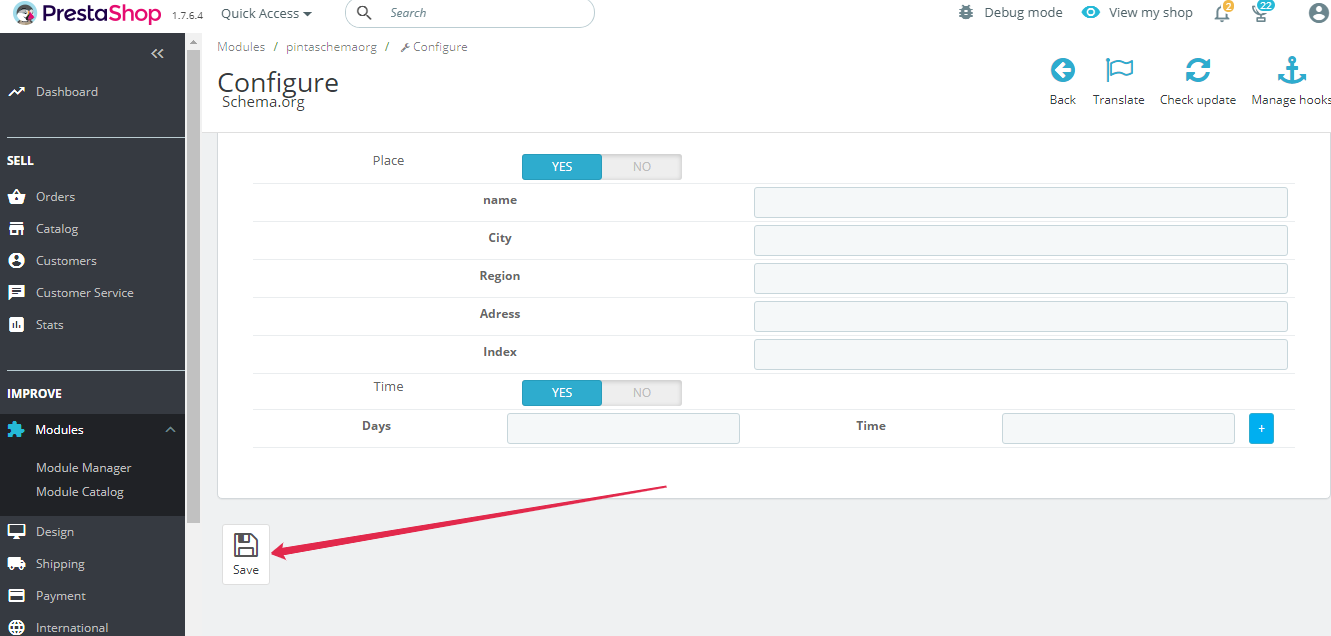
The PLACE LIST (2) allows you to display your company data in rich snippets of your website and contains:
The Place checkbox - to enable / disable the display of data about your company (position YES / NO).
The name field - to enter the name of your company.
Fields City, Region, Adress, Index - to enter data on the location of your company.
The Time checkbox - to enable / disable the display your company work schedule (position YES / NO).
The Days field - to add working days of your company.
The Time field - to add the working hours of your company.
After completing the plugin configuration, click the Save button.
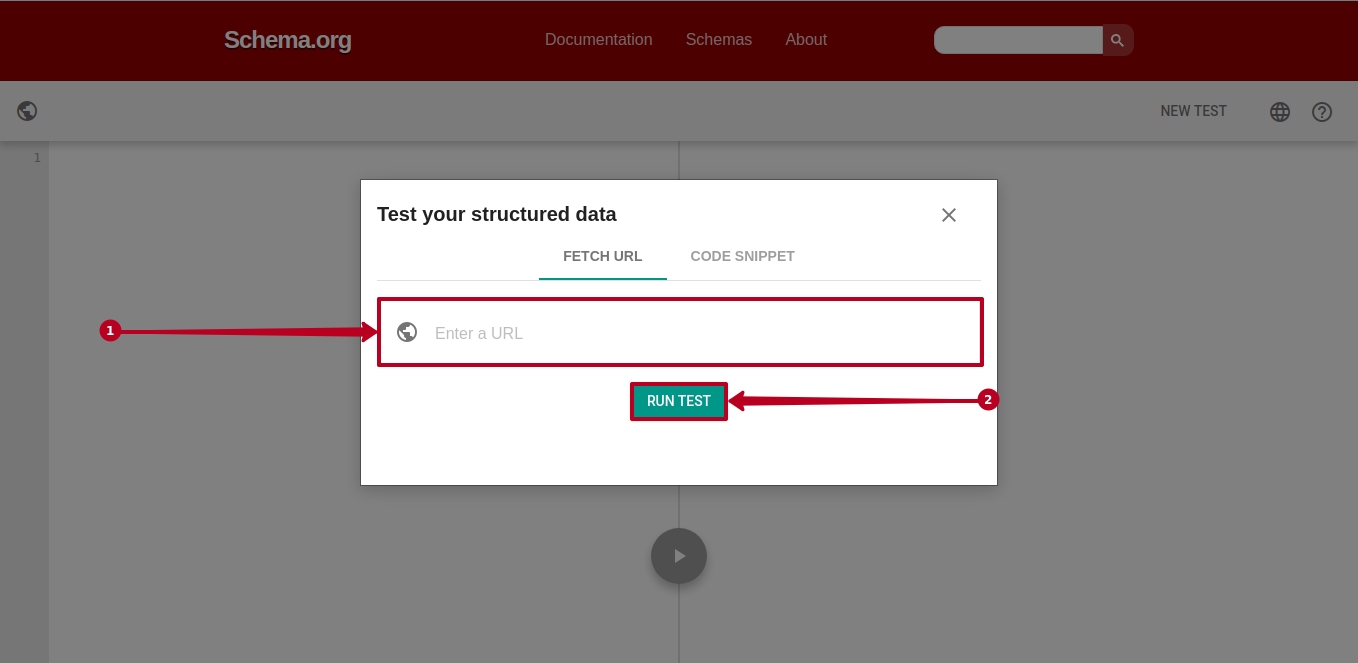
After installing and configuring the plugin, you can check your website layout with a simple tool - Schema Org Validator.
Go to the https://validator.schema.org/.
Paste your website URL into the FETCH URL tab (1) and click the RUN TEST button (2).
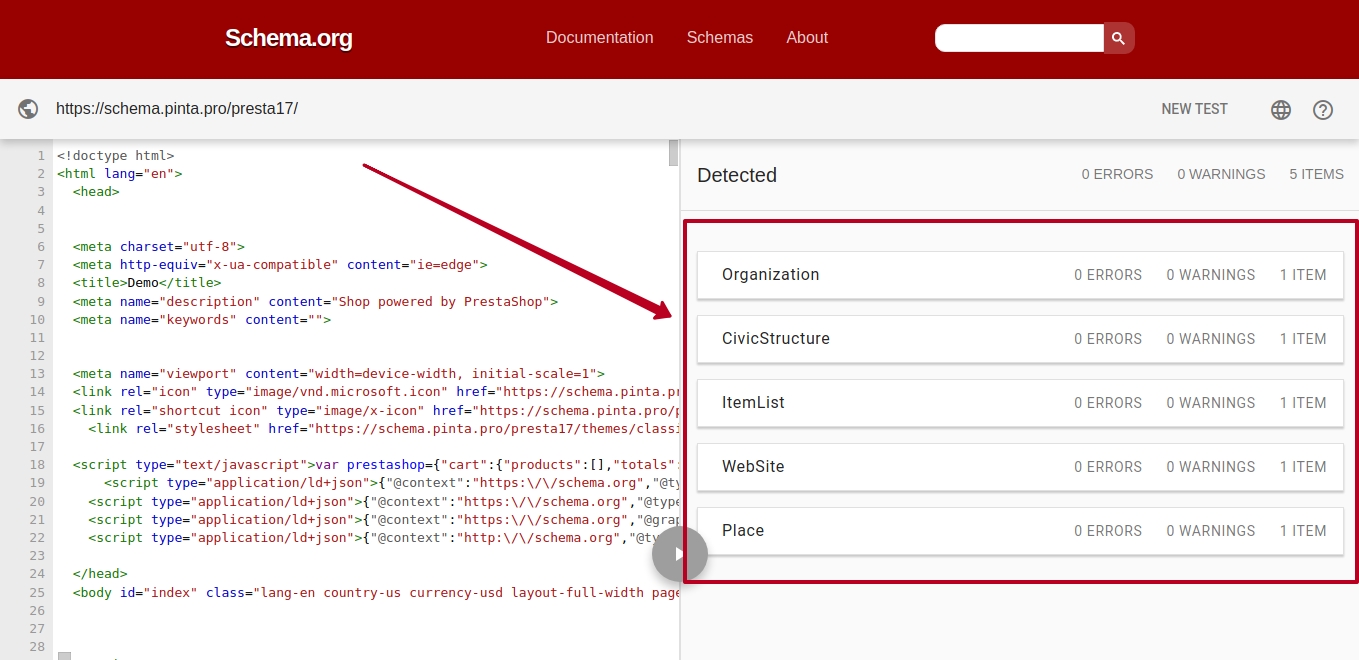
As a result, you will see the structured data of your website.
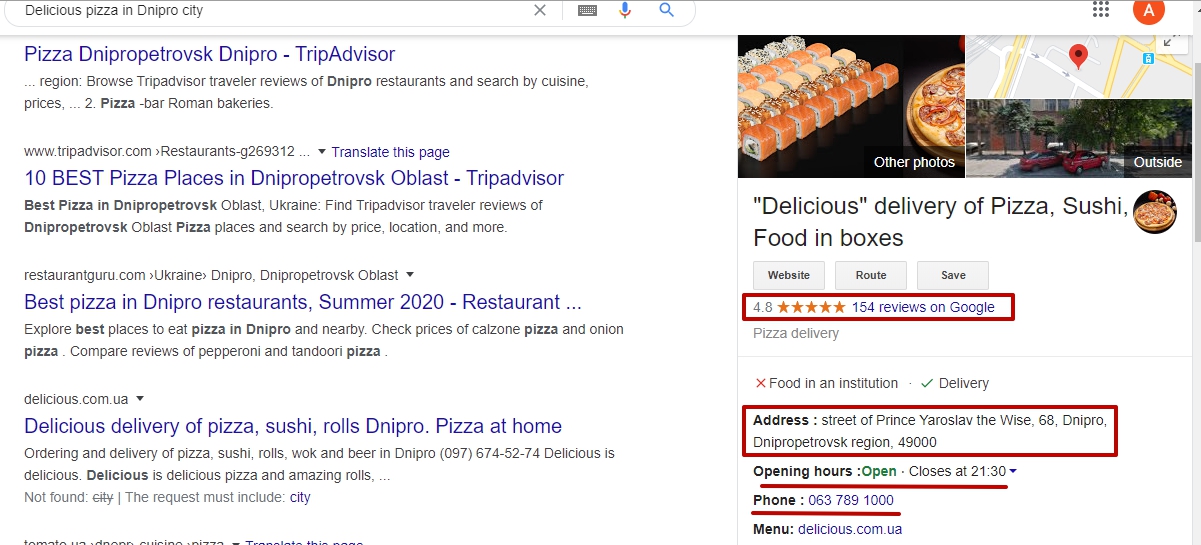
And now users see more information about your company on the Google search results page.
VIDEO INSTRUCTION