How to Compress Images with Squeezeimg in Drupal
INSTRUCTION IMAGES COMPRESS WITH SQUEEZEIMG FOR DRUPAL
Download and install
Download the plugin archive from Shop Pinta store and save it to your computer.
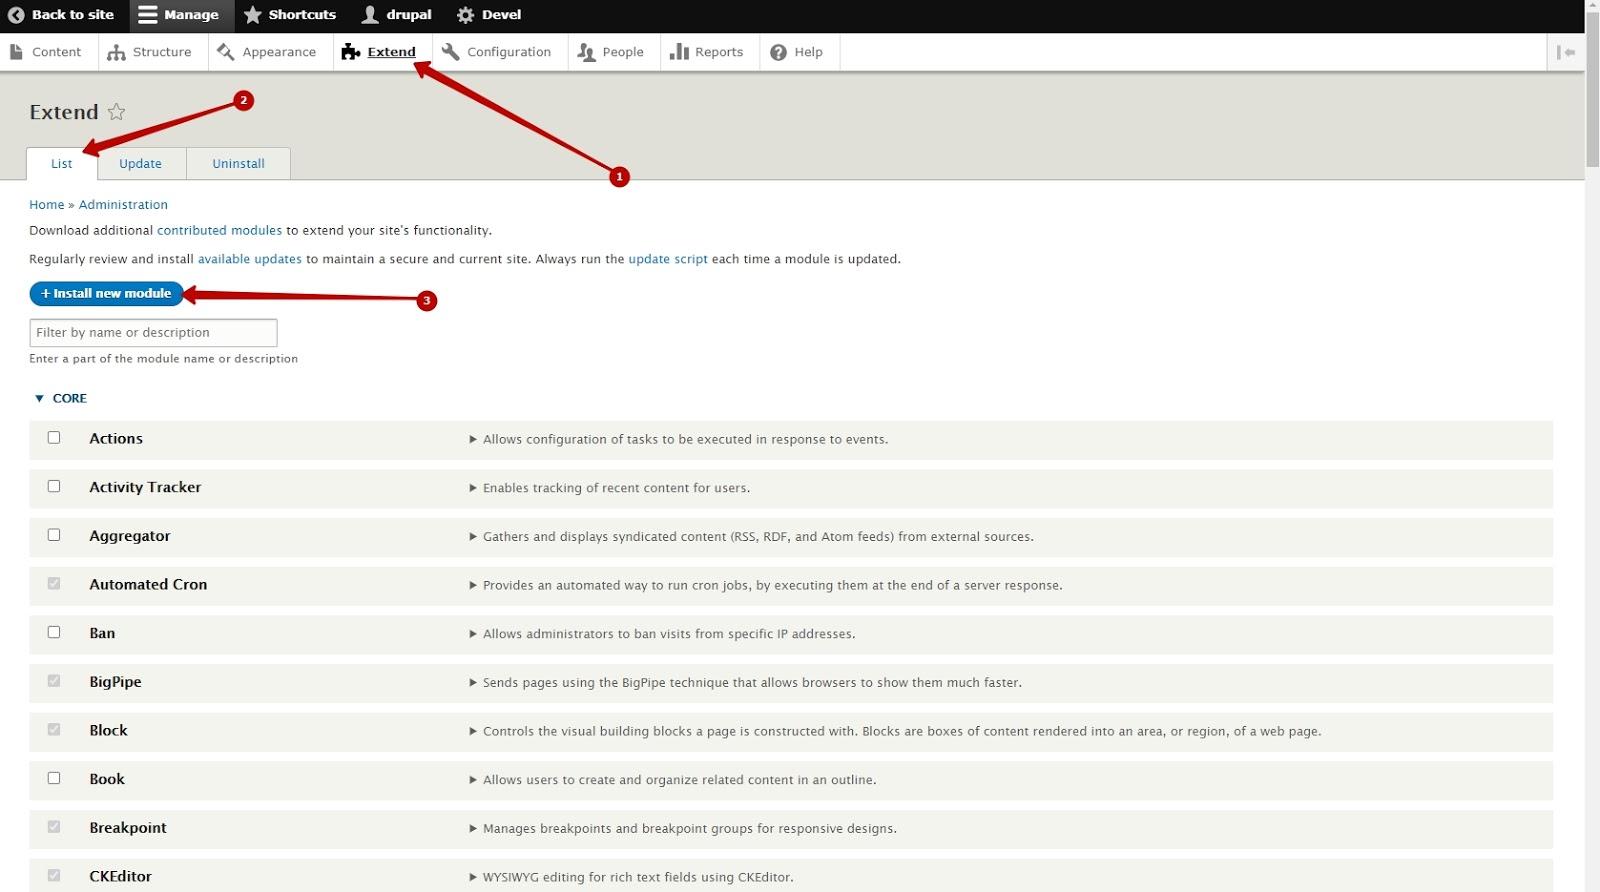
In the admin panel of your website select on the menu Extend (1) > List (2) > Install new module (3).
Download the plugin archive from Shop Pinta store and save it to your computer.
In the admin panel of your website select on the menu Extend (1) > List (2) > Install new module (3).
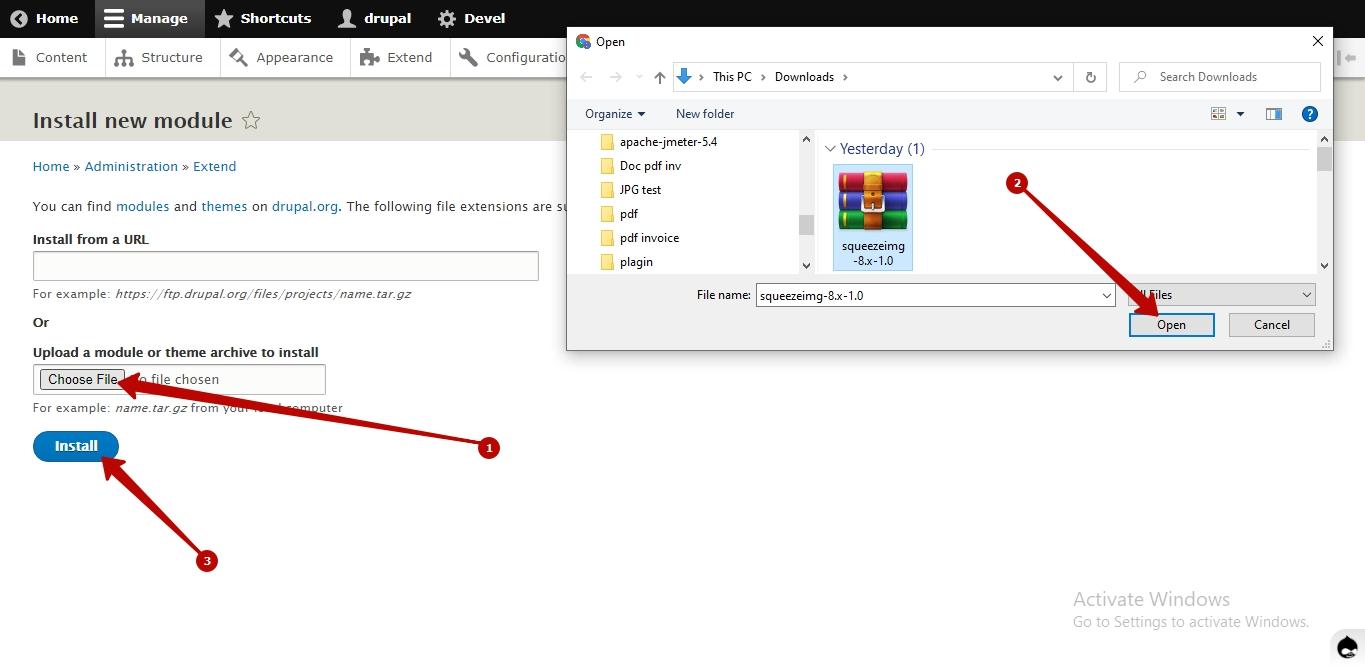
In the Install new module block, click the Choose file button (1), select the plugin archive and click the Open button (2). Then click the Install button (3).
At this point the installation is complete.
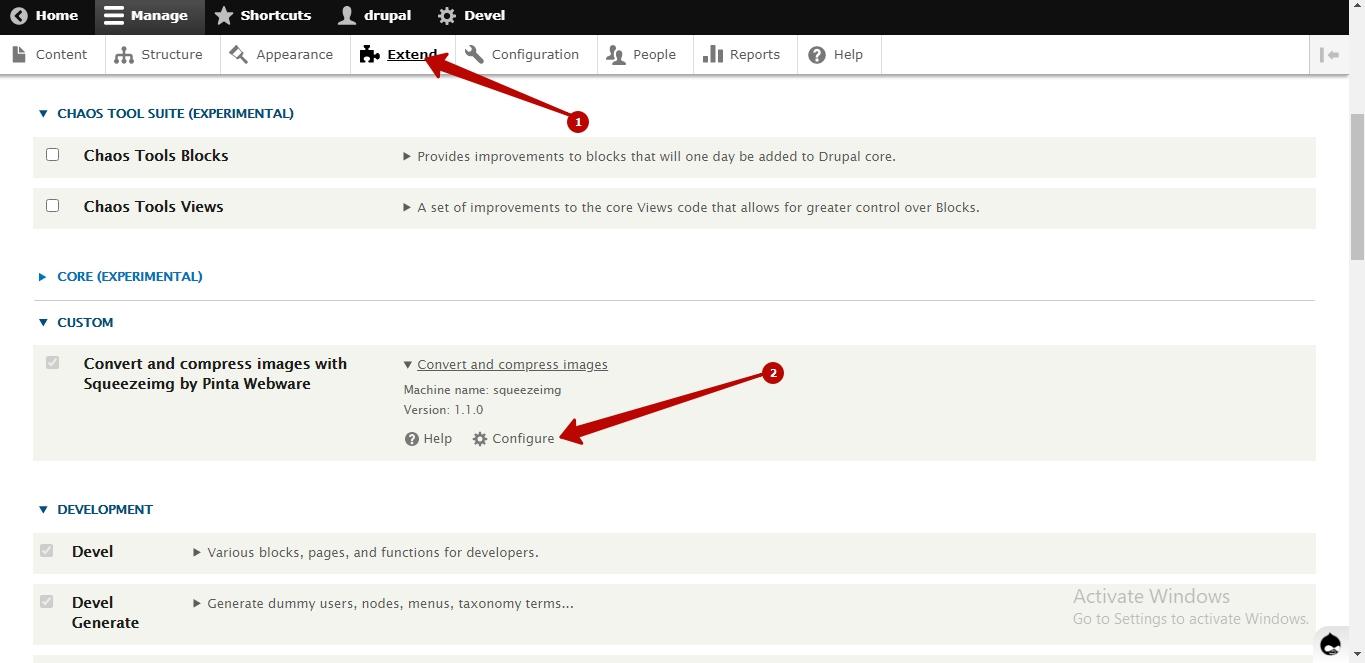
To configure the plugin in the admin panel of your website, select on the menu Extend (1). Next, in the Custom block, select Configure (2) for the Convert and compress images with Squeezeimg by Pinta Webware plugin.
Plugin page
The plugin page Configuration consists of blocks:
GENERAL SETTINGS.
SETTINGS COUNT SEND AND QUALITY.
SITEMAP AND LAZY LOAD.
A block for starting the image compression/conversion process.
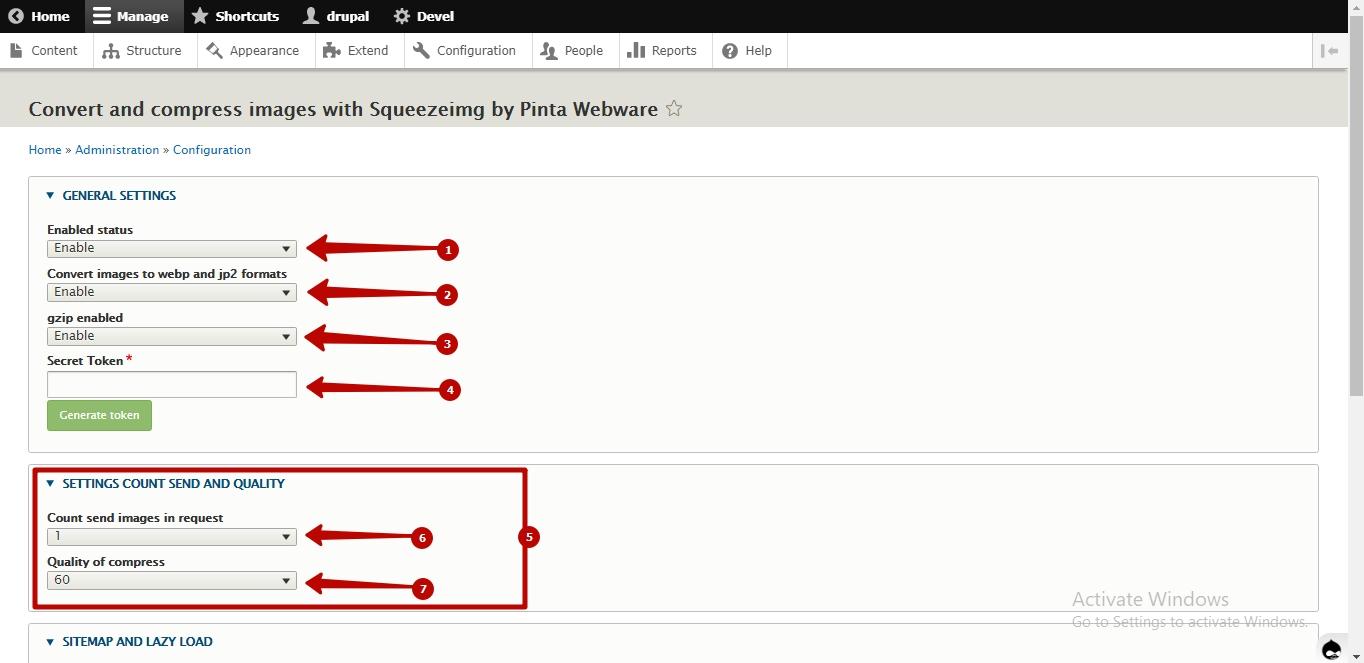
The GENERAL SETTINGS block includes:
The Enabled status field (1) - to enable / disable the plugin (position Enable / Disable).
The Convert images to webp and jp2 formats field (2) - for displaying optimized images in webp and jp2 formats on your website (position Enable). If the status is disabled (position Disable), the images will be converted and saved in the original image folder, but without replacement on the website.
The Gzip enabled field (3) - to optimize browser speed (position Enable / Disable).
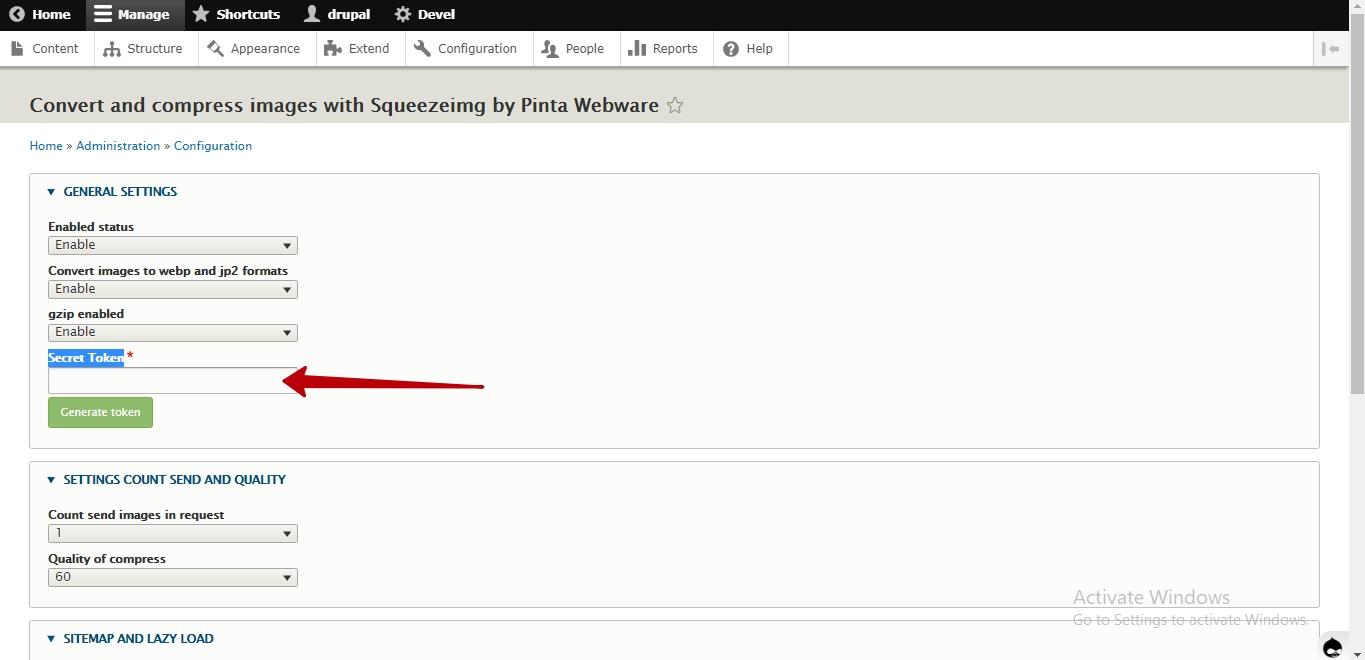
The Secret Token field (4) - to enter the API key, which you will receive after registering with the Squeezeimg service.
The Create token button - allows you to go to the Squeezeimg service window, in which the API key is generated.
The SETTINGS COUNT SEND AND QUALITY block (5) consists of fields for selecting the compression parameters:
Count send images in request (6) - to select the number of images processed in one request.
Quality of compress (7) - to select the image compression rate (%).
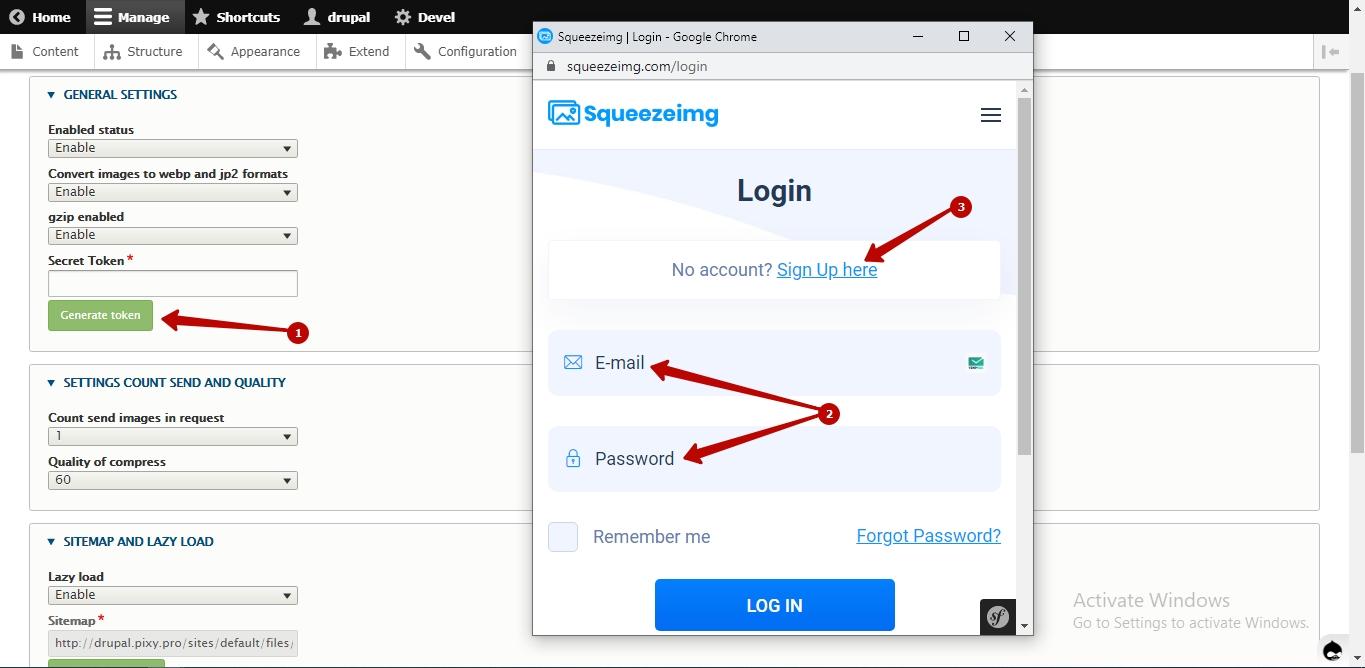
To fill in the Secret Token field, you need to receive an API key.
To do this, click on the Generate token button (1).
Next, in the Squeezeimg service window that opens, log in (2), if you are already registered with the service, or register a new account (3).
After registration, go to the My account section, open Api tab (1) and click the GENERATION NEW KEY button to generate the API key.
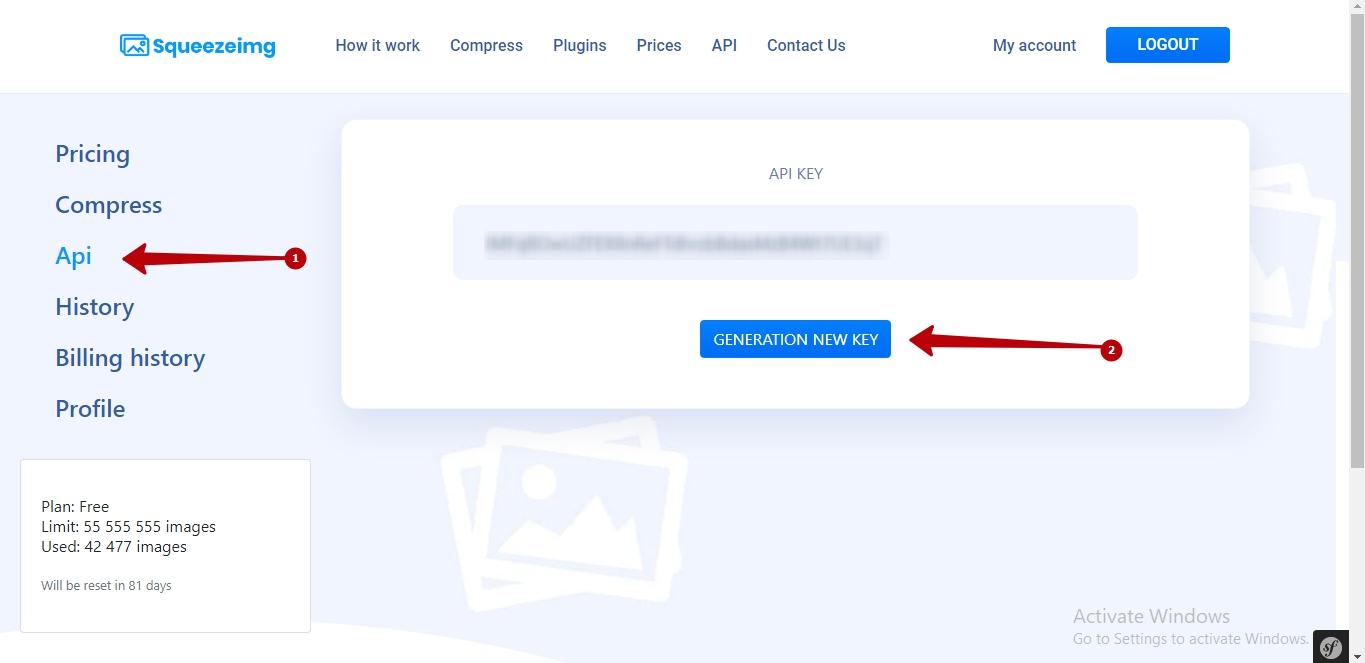
Insert the generated token from the API KEY field into the Secret Token field on the plugin page.
The SITEMAP AND LAZY LOAD block (8) includes:
The Lazy load field (9) - if you want to increase the website loading speed using lazy-load images, select the Enabled position.
The Sitemap field (10) - displays the generated xml Sitemap.
The Generate Sitemap button - allows you to generate a Sitemap.
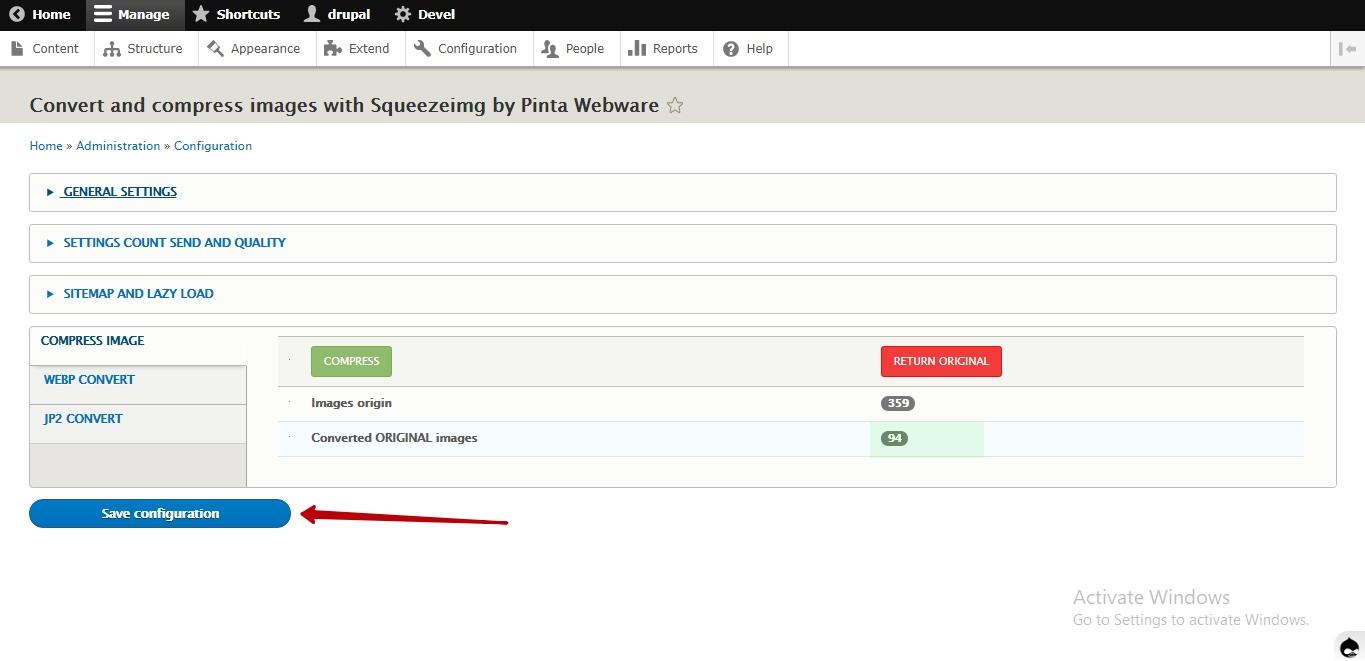
The block for starting the image compression/conversion process consists of the COMPRESS IMAGE, WEBP CONVERT and JP2 CONVERT tabs.
Using these tabs, depending on the format that you need, you can compress images without changing the format, or compress them with conversion to WebP or jp2 formats.
The COMPRESS IMAGE, WEBP CONVERT, JP2 CONVERT tabs include:
The COMPRESS / COMPRESS & CONVERT button (15) - for processing your images.
The RETURN ORIGINAL button (16) - to return images to their original state.
The Images origin counter (17) - displays the total number of images on your website.
The Converted ORIGINAL / WEBP / JP2 images counter (18) - displays the number of compressed images.

After completion to edit the settings, click the Save Configuration button.