Image Convert Plugin Instruction
INSTRUCTION IMAGE CONVERT FOR CS-CART
Загрузка и установка
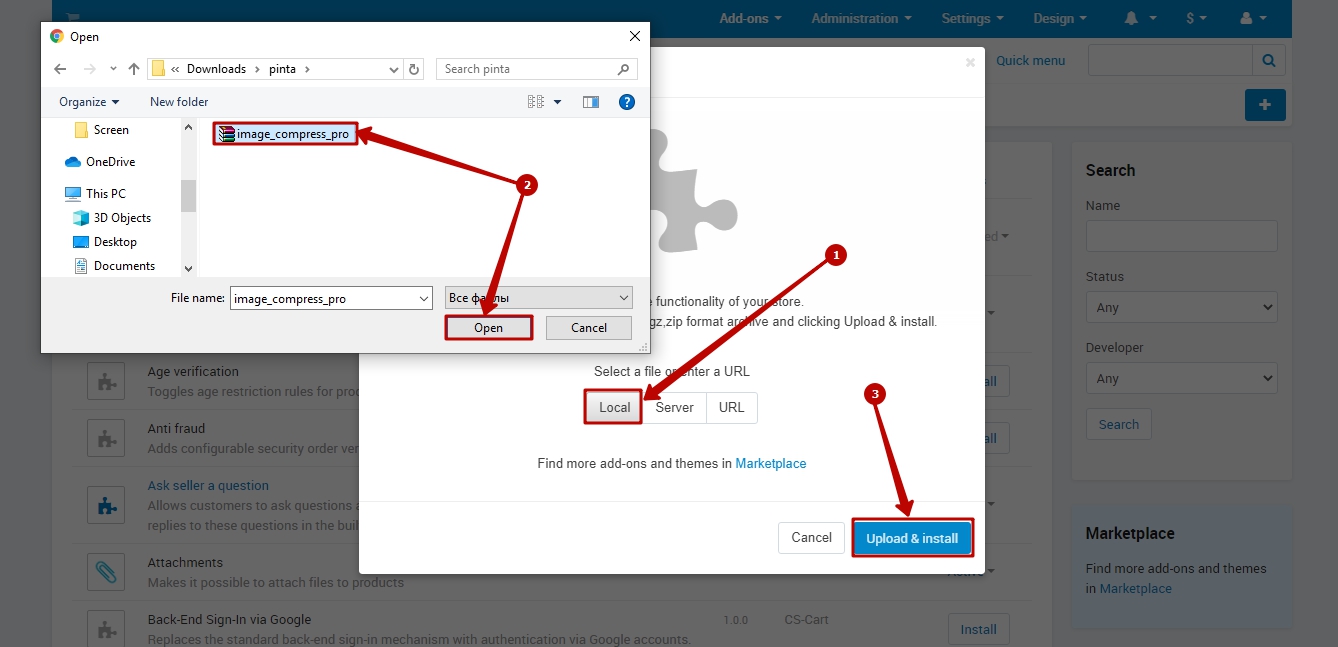
Download the plugin archive in the Shop Pinta store and save it on your computer.
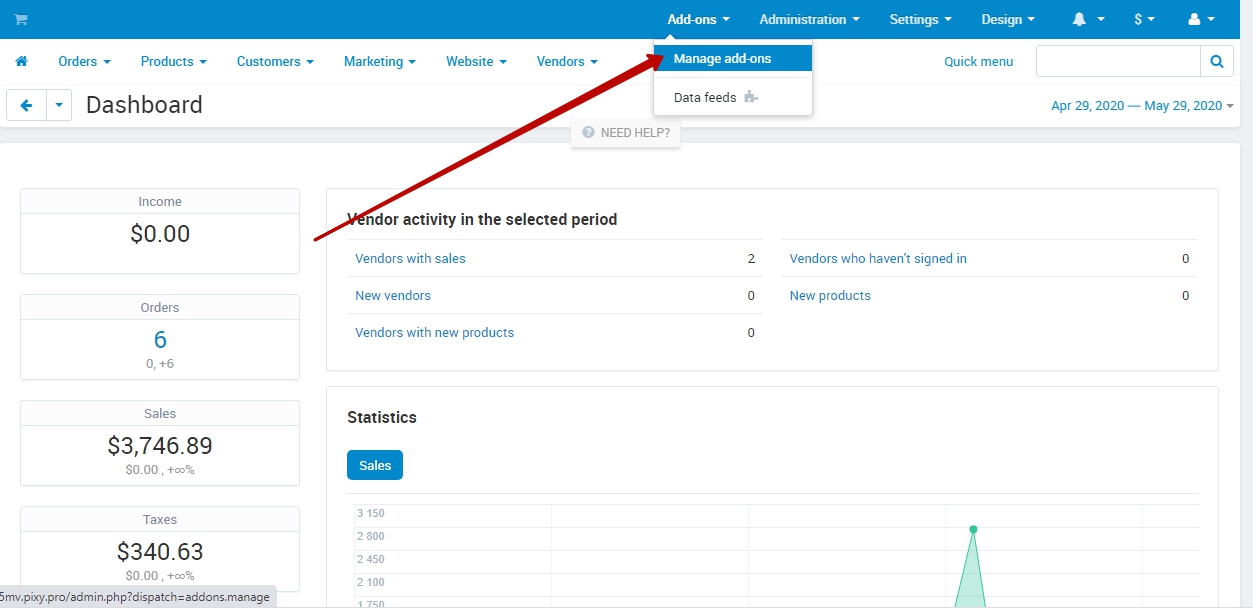
In the admin panel of your website, select Add-ons > Manage add-ons.
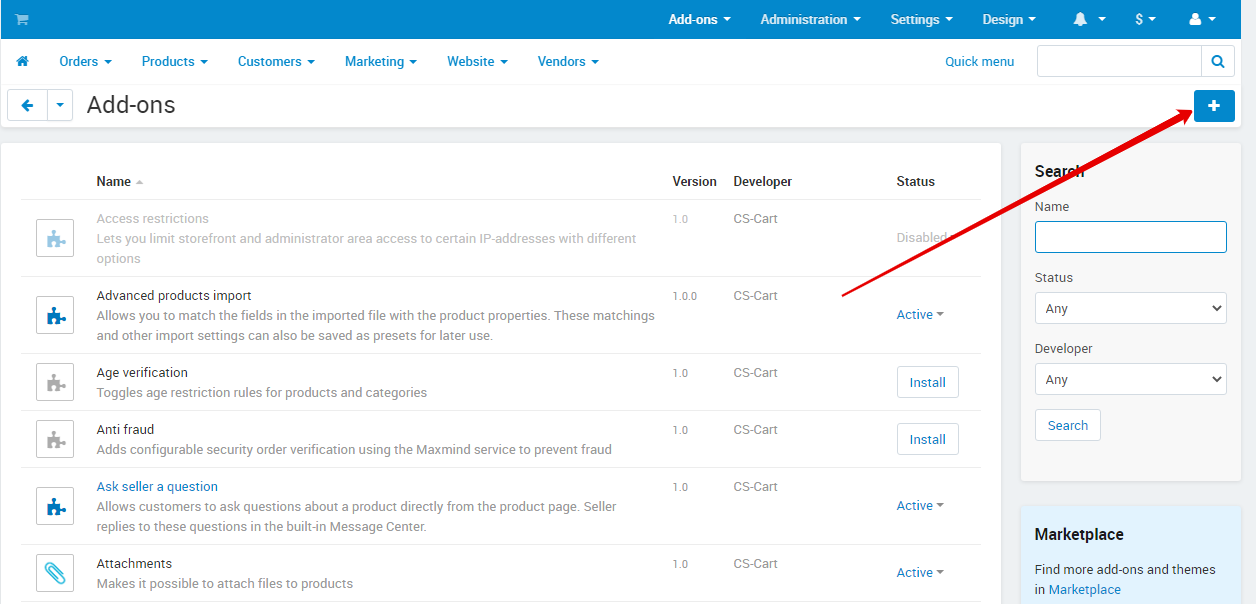
Click the Upload & install add-on button.
Download the plugin archive from your computer (1, 2) and click the Upload & install button (3).
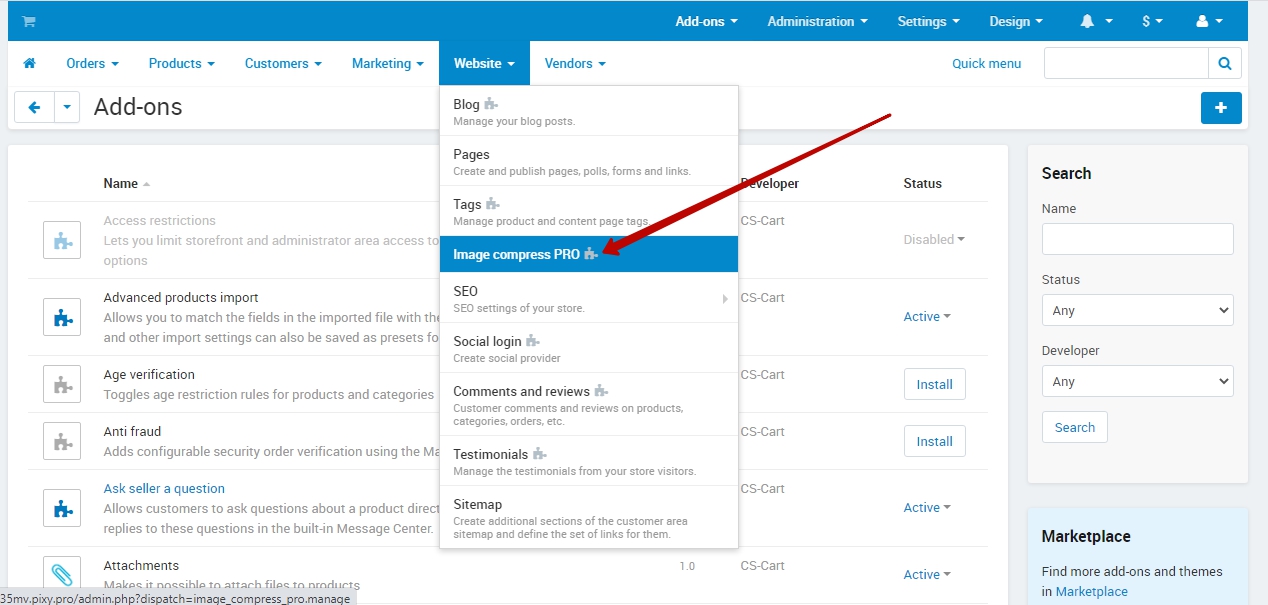
To configure the plugin, select the menu Website > Image compress PRO, which appears in the admin panel after installation.
Plugin page
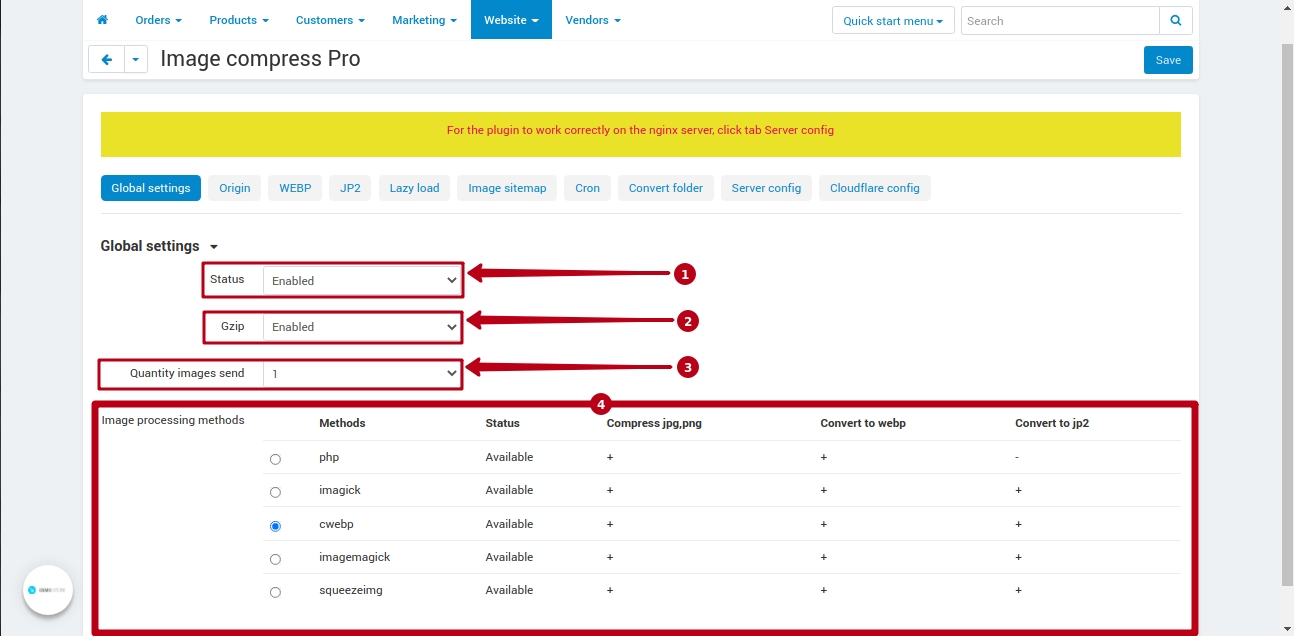
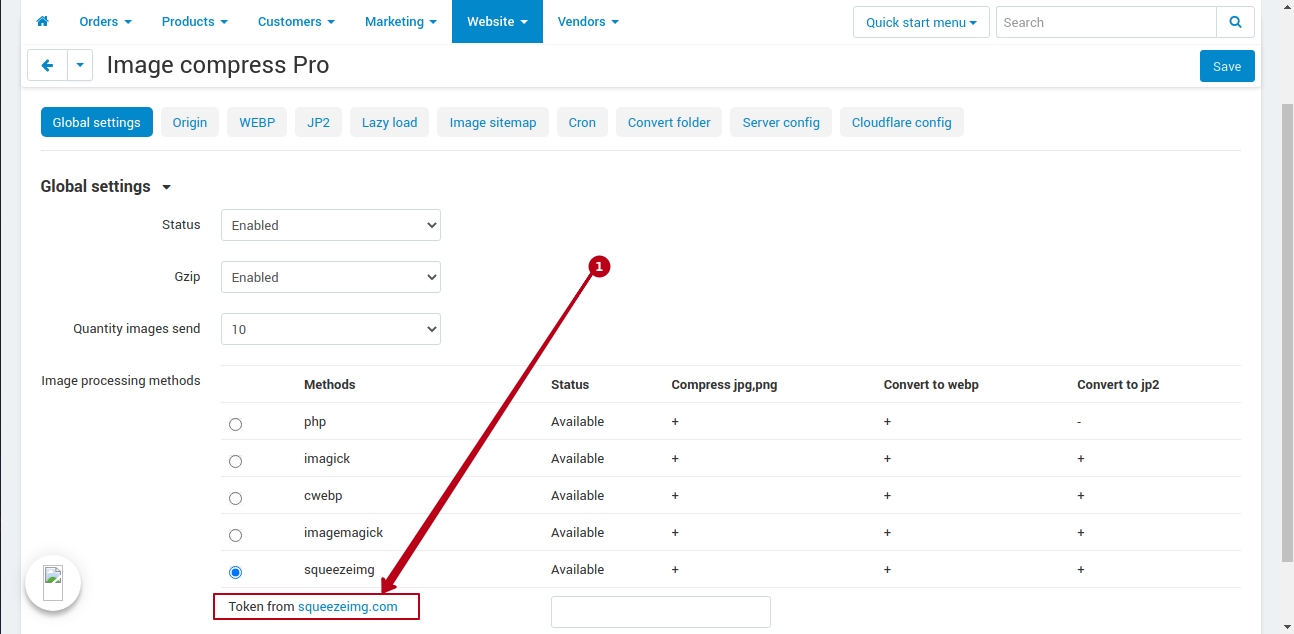
The plugin page consists of tabs - Global settings, Origin, WEBP, JP2, Lazy load, Image sitemap, Cron, Convert folder, Server config.
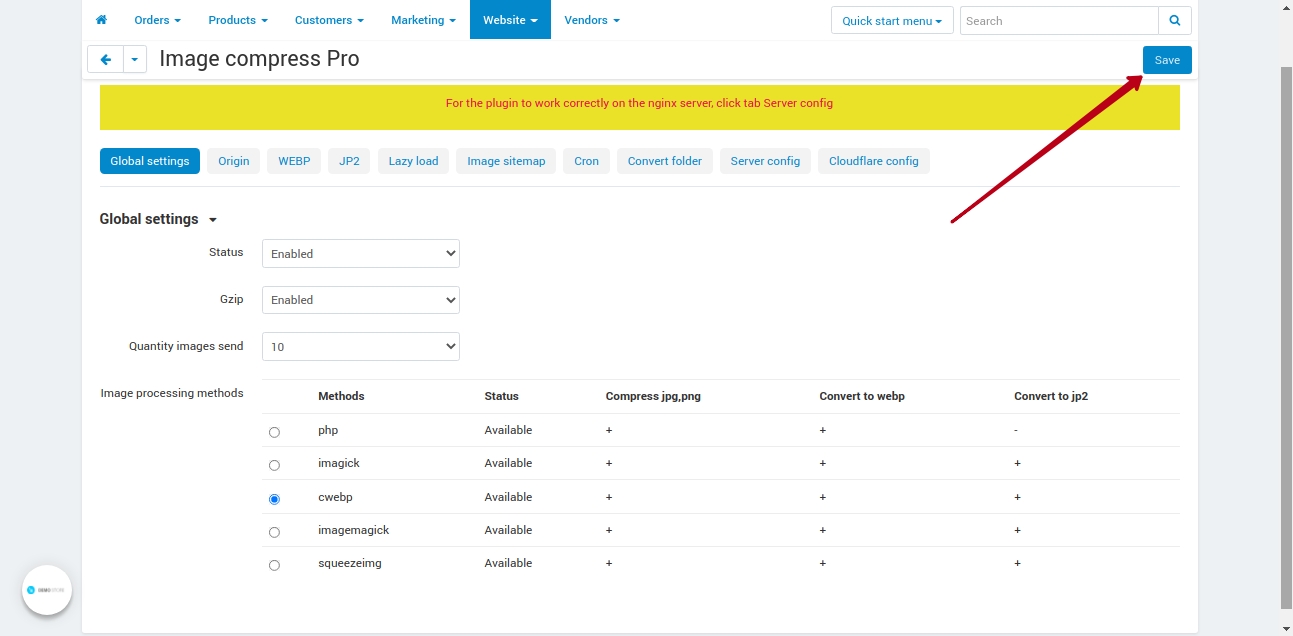
The Global settings tab includes:
The Status field (1) - to enable / disable the plugin (Enabled / Disabled position).
The Gzip field (2) - select the Enabled position, if you want to enable gzip compression for your website.
The Quantity images send field (3) - select how many images will be sent for processing at one time.
The Image processing methods block (4) - to select the type of the compression / conversion:
Php - to compress images (.jpg, .jpeg, .png) and convert it to webP format.
Imagick - to compress images (.jpg, .jpeg, .png) and convert it to webP and jp2 format.
To use this method, you need to install the Imagick extension for PHP.
Cwebp - to compress images (.jpg, .jpeg, .png) and convert it to webP and jp2 format.
To use this method, you need to install the Cwebp library on the server.
Imagemagick - to compress images (.jpg, .jpeg, .png) and convert it to webP and jp2 format.
To use this method, you need to install the ImageMagick library on the server.
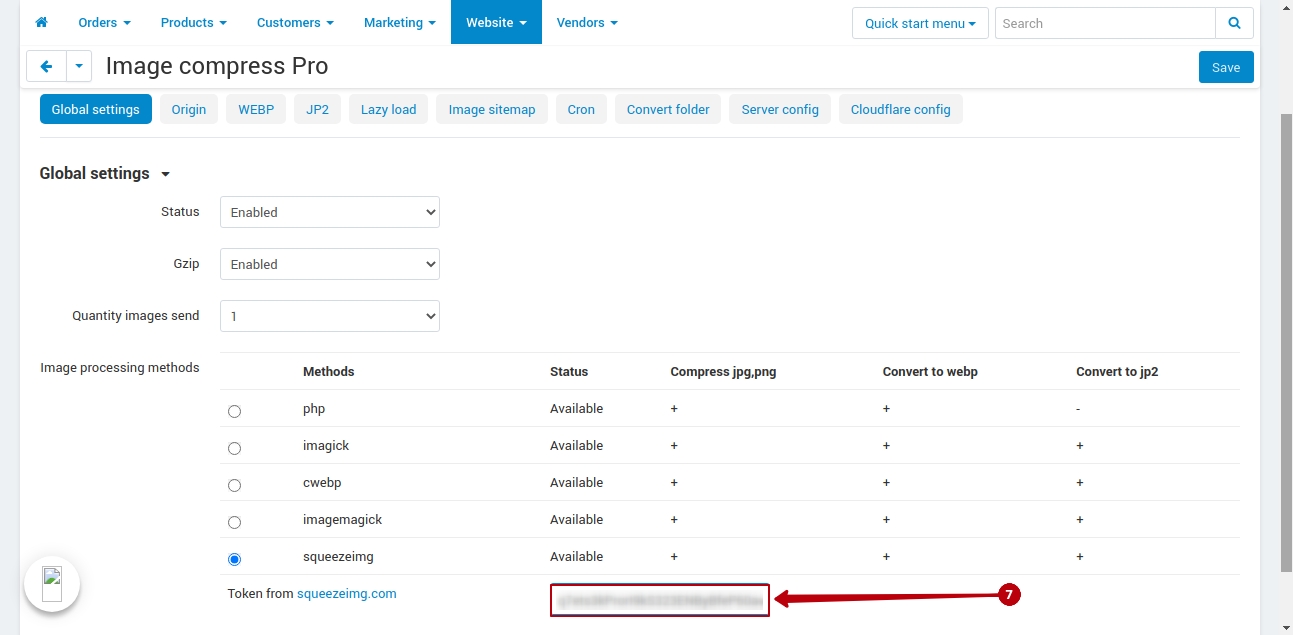
Squeezeimg - to compress images (.jpg, .jpeg, .png, .gif, .svg, .bmp, .tiff) and convert it to webP and jp2 format.
To use this method, you need to enter the token generated after registration of a Squeezeimg account.
To fill the Token from squeezeimg.com field, you need to get an API key.
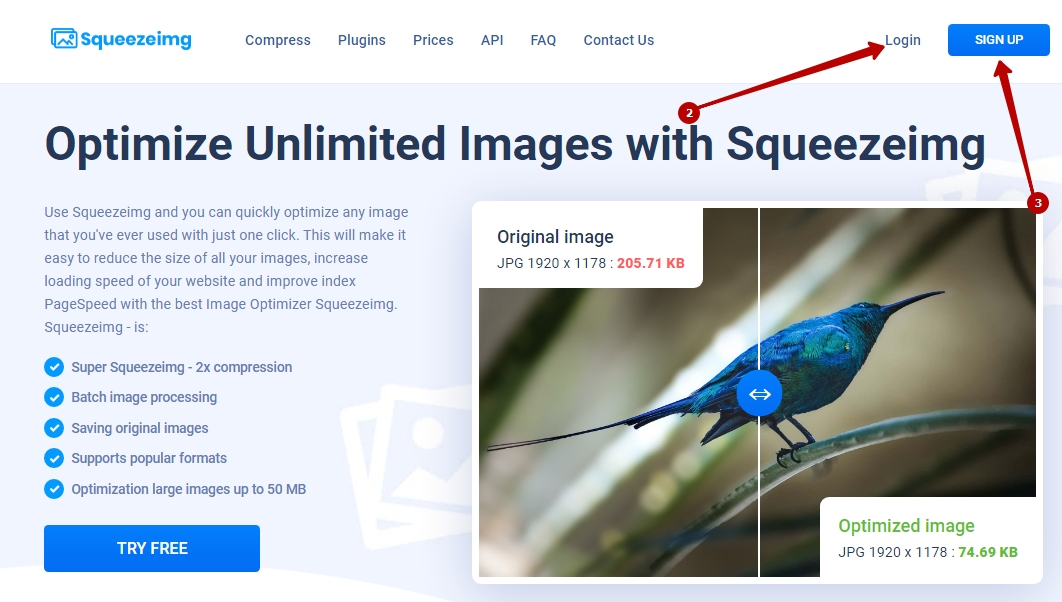
To do this, click on the link (1) from Token from squeezeimg.com field.
Next, in the Squeezeimg service window that opens, Login (2), if you are already registered with the service, or register a new account - SIGN UP (3).
After registration, go to the My account section, open the API tab (4) and click the GENERATION A NEW KEY button (5) to generate the API KEY (6).
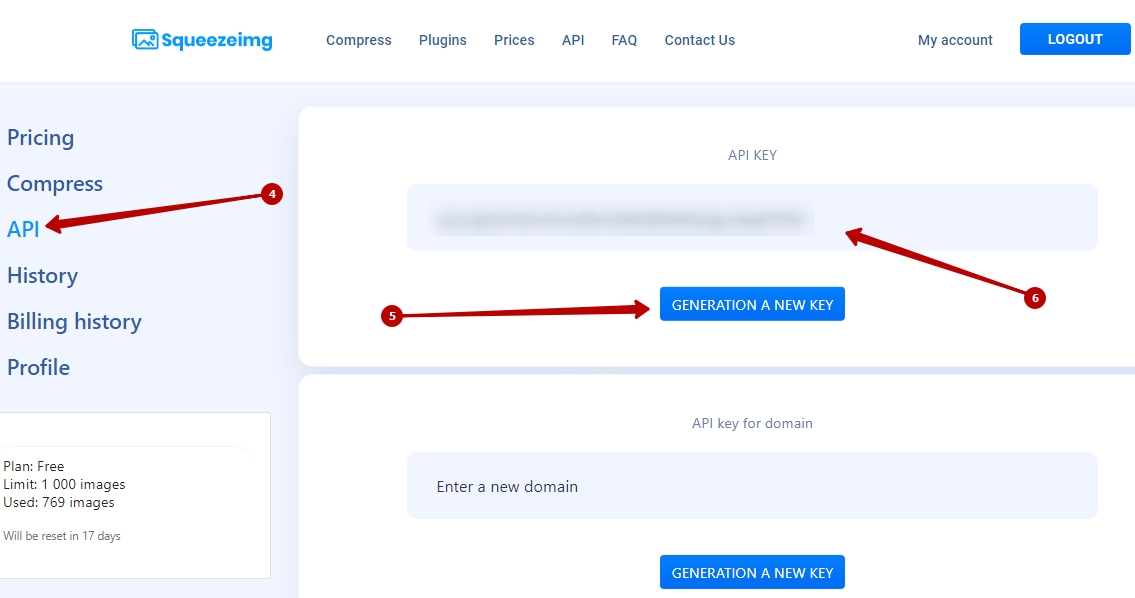
Insert the generated token from the API KEY field into the Token from squeezeimg.com field (7) on the plugin page.
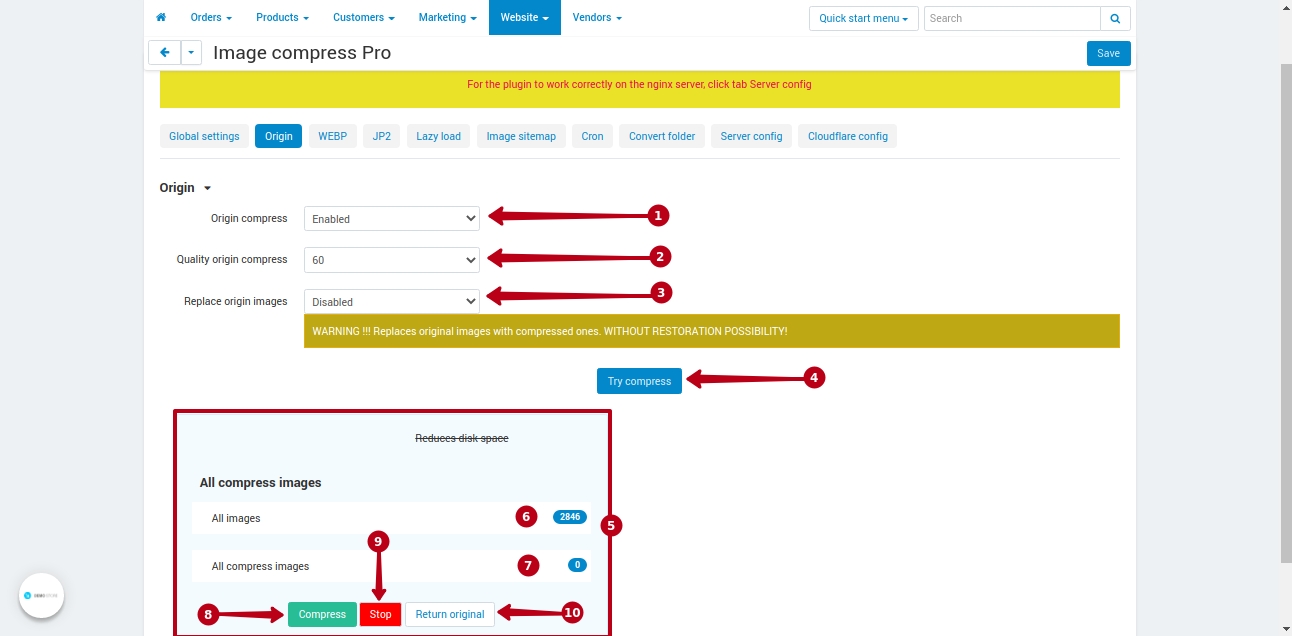
The Origin tab includes:
The Origin compress field (1) - to enable / disable the compression of images in jpg format for your website (position Enabled / Disabled).
The Quality origin compress field (2) - select a value for the compression quality.
The Replace origin images field (3) - select the Enabled position, if you want to replace the original files with converted images.
The Try compress button (4) - for the visual display of the random image in the original and processed state.
The All compress images block (5) consists of:
The All images counter (6) - displays the total number of images on your website.
The All compress images counter (7) - displays the number of compressed images.
The Compress button (8) - to start the compression of your images.
The Stop button (9) - to stop the compression of images.
The Return original button (10) - to return the images to the original state.
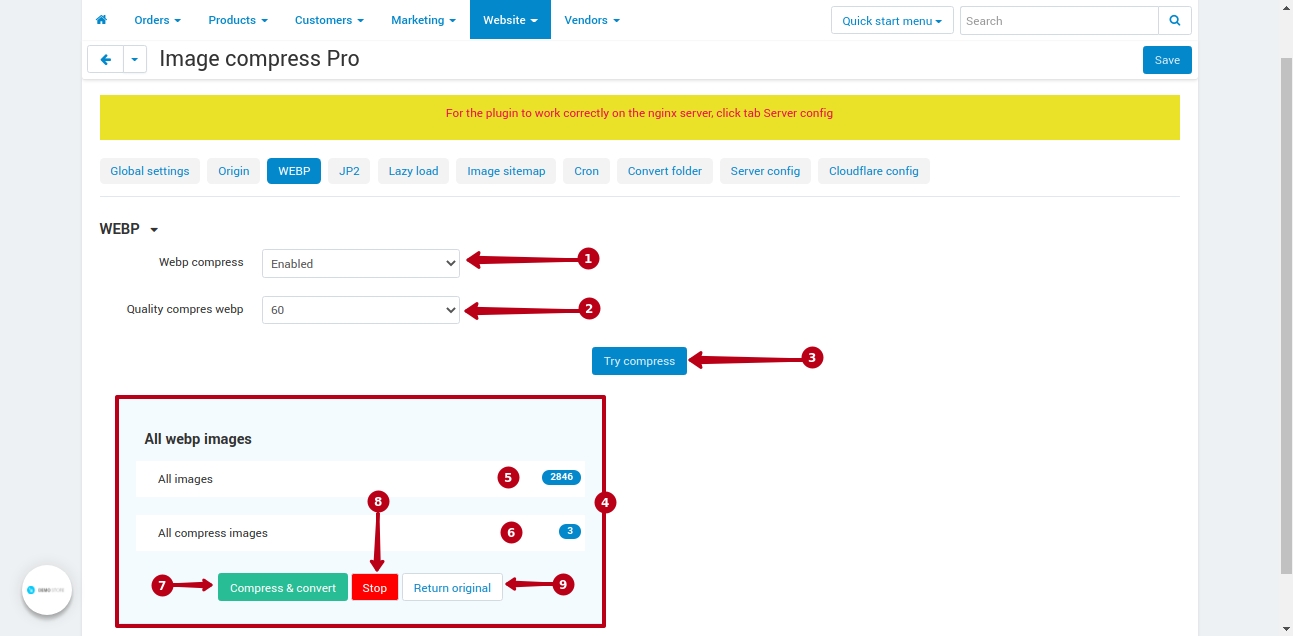
The WEBP tab includes:
The Webp compress field (1) - to enable / disable the conversion of images to webp format on your website (position Enabled / Disabled).
The Quality compres webp field (2) - select a value for the compression quality.
The Try compress button (3) - for the visual display of the random image in the original and processed state.
The All Webp images block (4) consists of:
The All images counter (5) - displays the total number of images on your website.
The All compress images counter (6) - displays the number of compressed images.
The Compress & convert button (7) - to start the conversion of your images.
The Stop button (8) - to stop the conversion of images.
The Return original button (9) - to return the images to the original state.
The JP2 tab includes:
The Jp2 status field (1) - to enable / disable the conversion of images to Jp2 format on your website (position Enabled / Disabled).
The Quality jp2 field (2) - select a value for the compression quality.
The Try compress button (3) - for the visual display of the random image in the original and processed state.
The All Jp2 images block (4) consists of:
The All images counter (5) - displays the total number of images on your website.
The All compress images counter (6) - displays the number of compressed images.
The Compress & convert button (7) - to start the conversion of your images.
The Stop button (8) - to stop the conversion of images.
The Return original button (9) - to return the images to the original state.

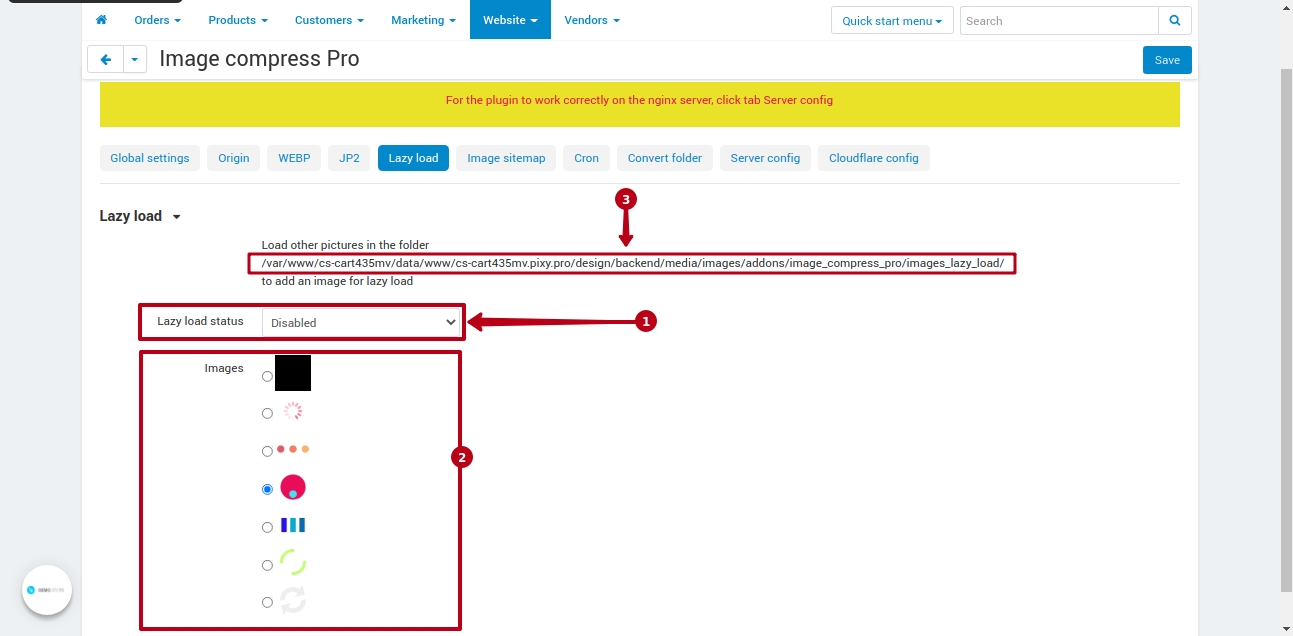
The Lazy load tab includes:
The Lazy load status field (1) - select the Enabled position, if you want to increase the website loading speed using lazy-load images.
The Images block (2) - allows you to select the option to display the loading images on your website.
You can also use an image that differs from the standard ones. To do this, add it to the specified folder (3).
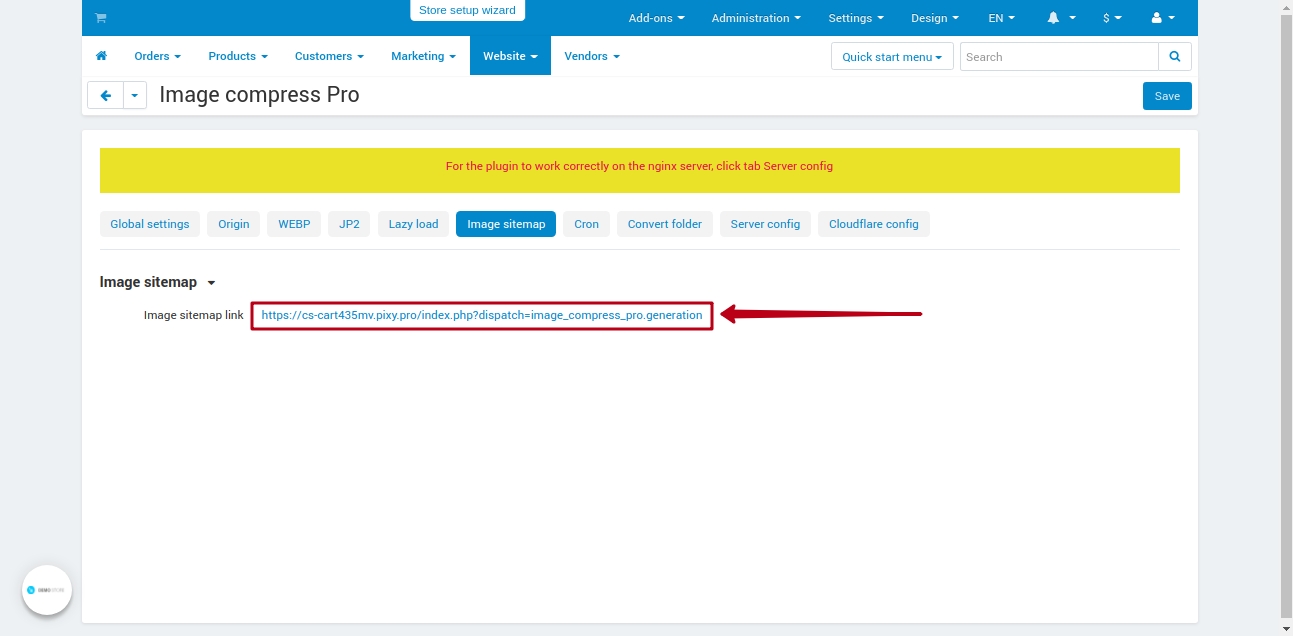
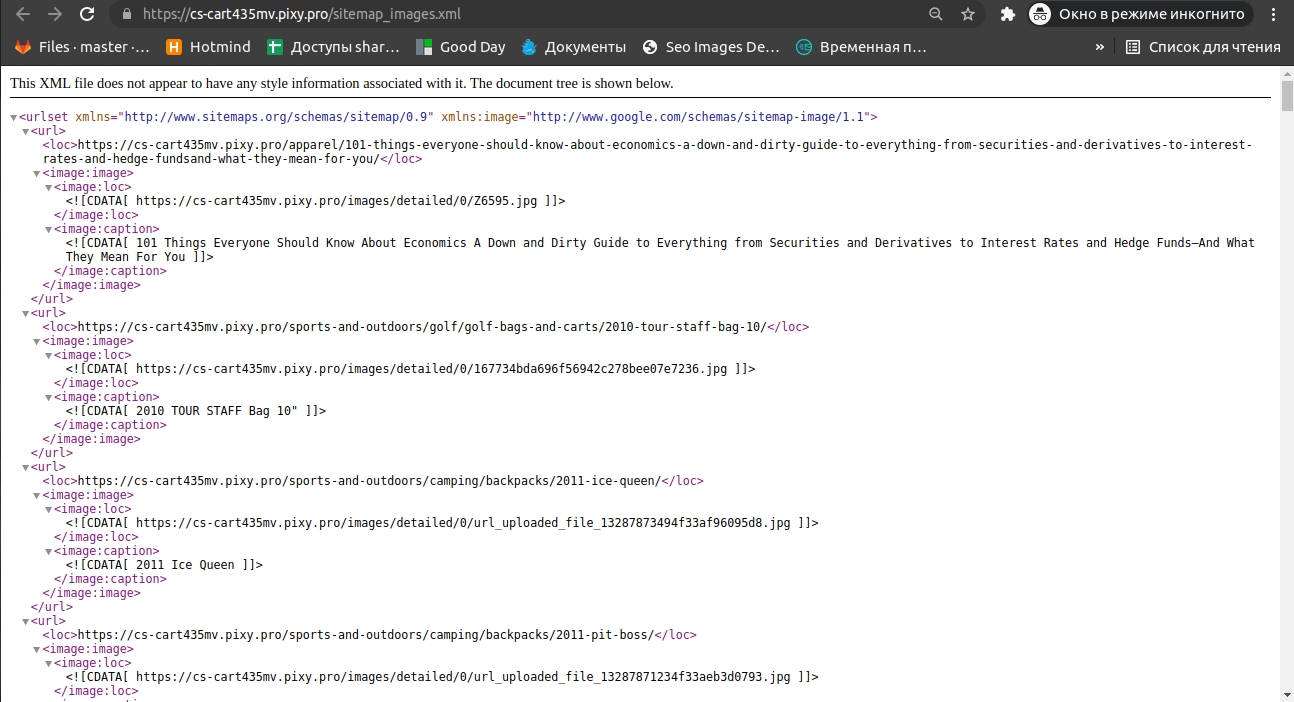
In the Image sitemap tab, a link to a feed with a complete map of your website's images is generated. Use this link for Google Search Console and Yandex.Webmaster services.
To view the generated xml file, open the Image sitemap link in a new browser window.
Your website's image map is dynamically updated to help search engines find and index the actual images of your website faster.
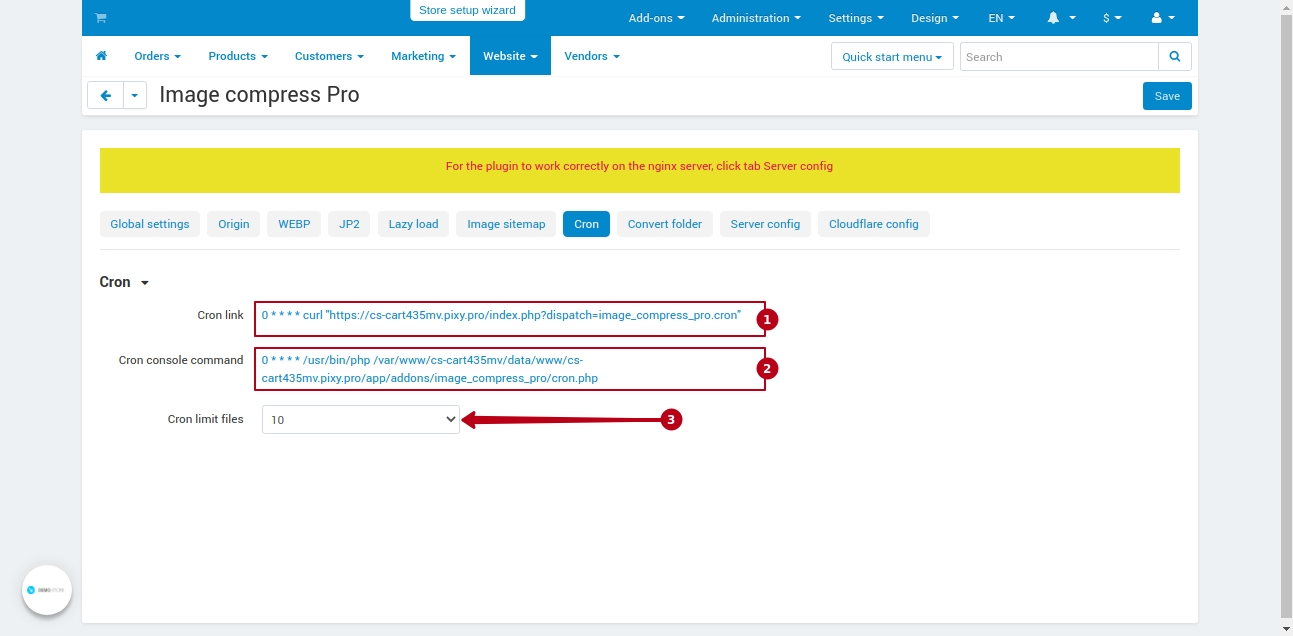
The Cron tab is designed to create a Cron task and automate the process of compressing images of your website.
This tab consists of fields:
Cron link (1) - the link for the Cron task is displayed.
Cron console command (2) - the command for Cron is displayed and used in the developer console.
Cron limit files (3) - to select how many images will be sent for processing at one time.
To check how the Cron task works, click on the Cron link (1).
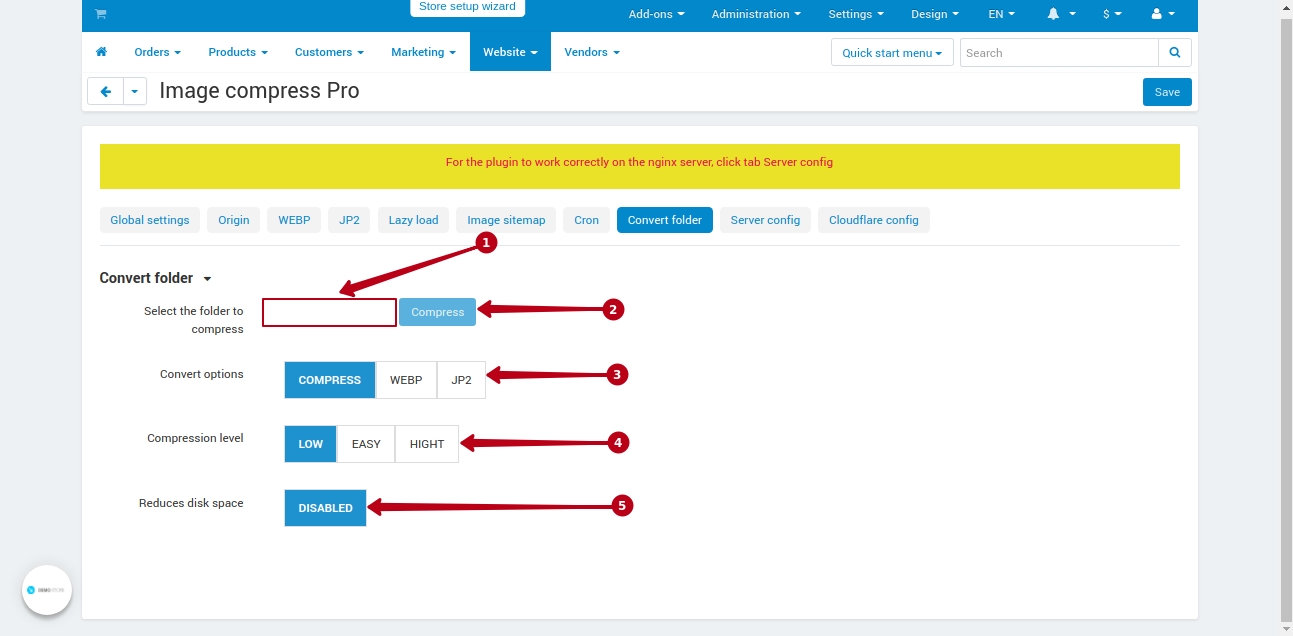
The Convert folder tab is designed to process the images of your website, which are located in a specific folder, and consists of:
The Select the folder to compress field (1) - to select a folder, images from which you want to process.
The Compress button (2) - to start the compression / conversion of your images.
The Convert options field (3) - allows you to select the type of image processing:
COMPRESS - images are compressed without changing the format.
WEBP - images are compressed with conversion to WebP format.
JP2 - images are compressed with conversion to jp2 format.
The Compression level field (4) - to select the image compression rate (LOW, EASY, HIGHT).
The Reduces disk space field (5) - displays the status of replacement of original images (Enabled - original images will be replaced, Disabled - processed images will be created in the original folder). To change the status, go to the Origin > Replace origin images.
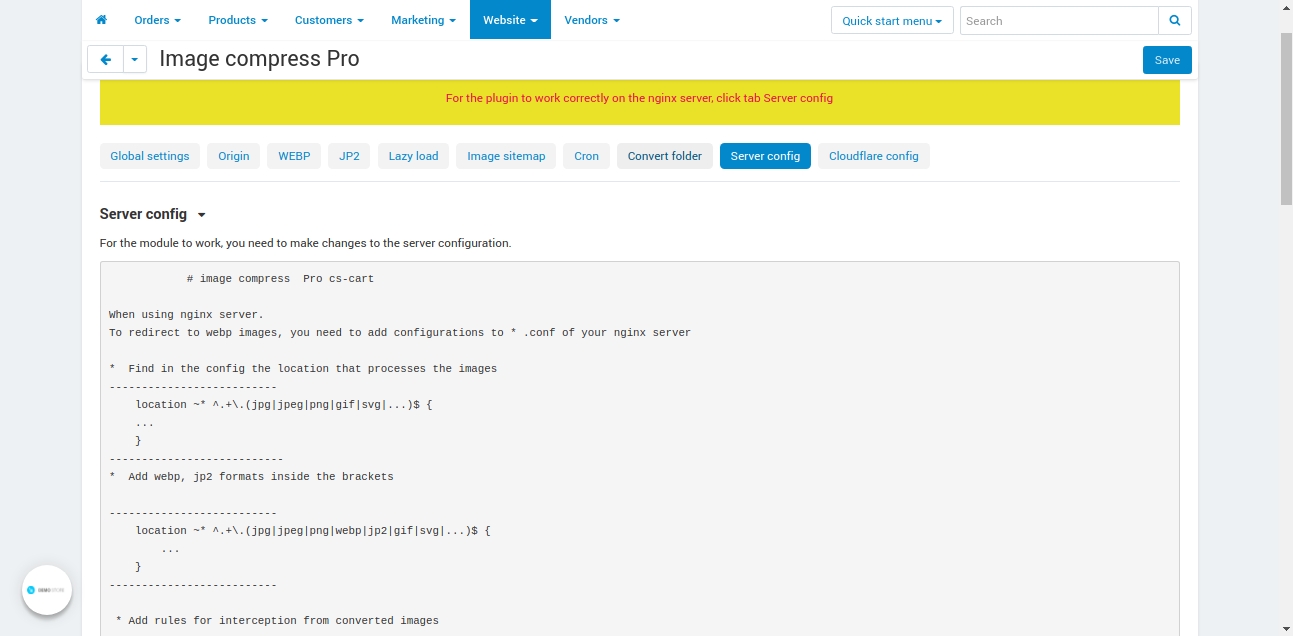
The Server config tab contains instructions for configuring the nginx server.
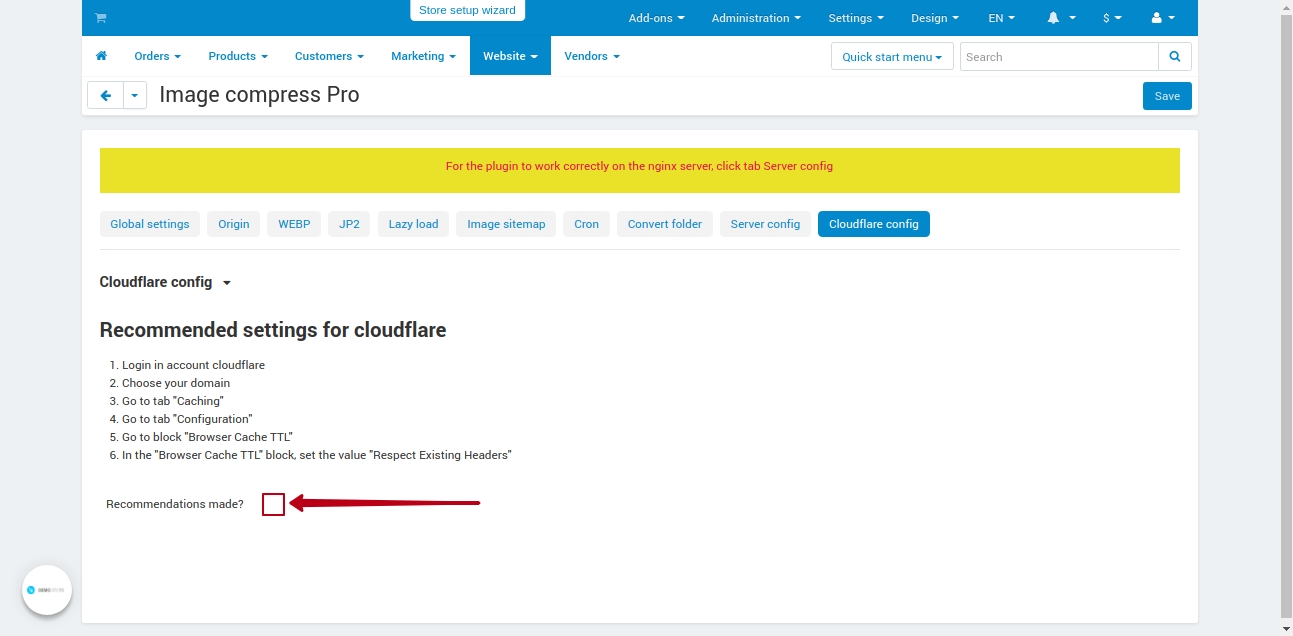
The Cloudflare config tab contains instructions for configuring the Cloudflare service.
Check the box if you don't want to receive Cloudflare notifications.
After completing the plugin configuration, click the Save button.
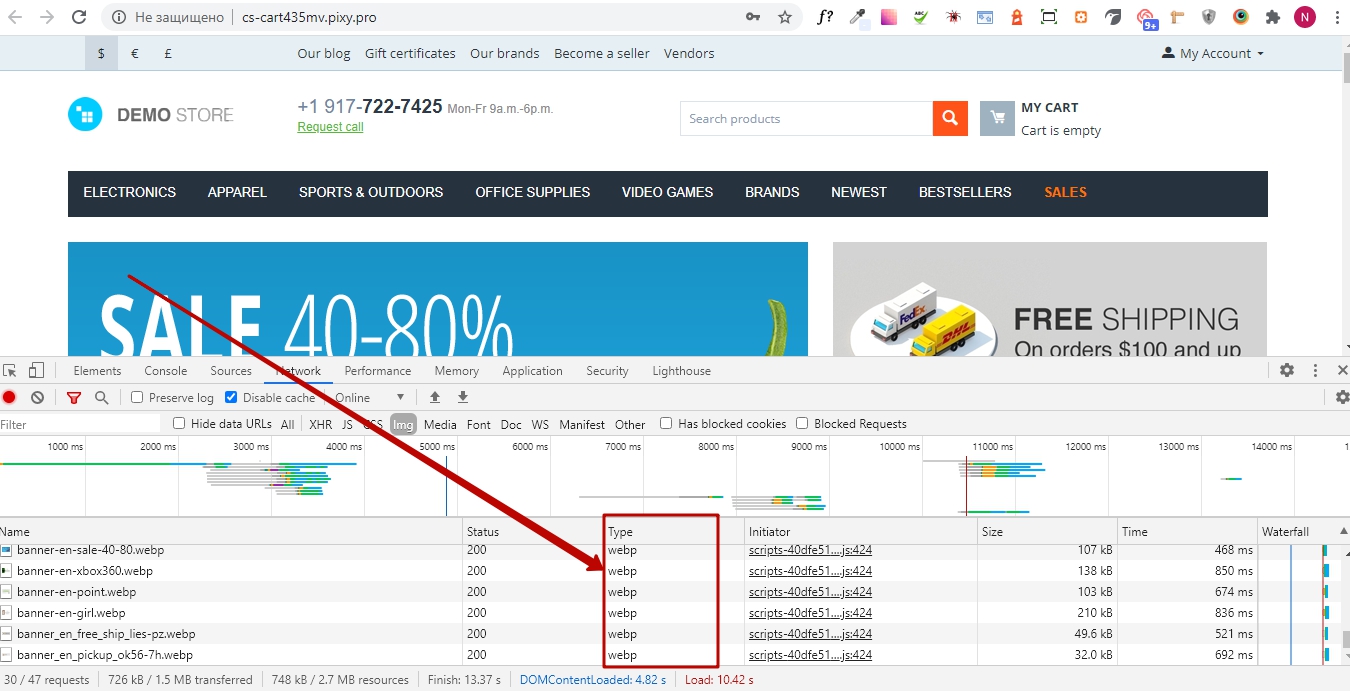
After completing the image compression / conversion process, update your website.
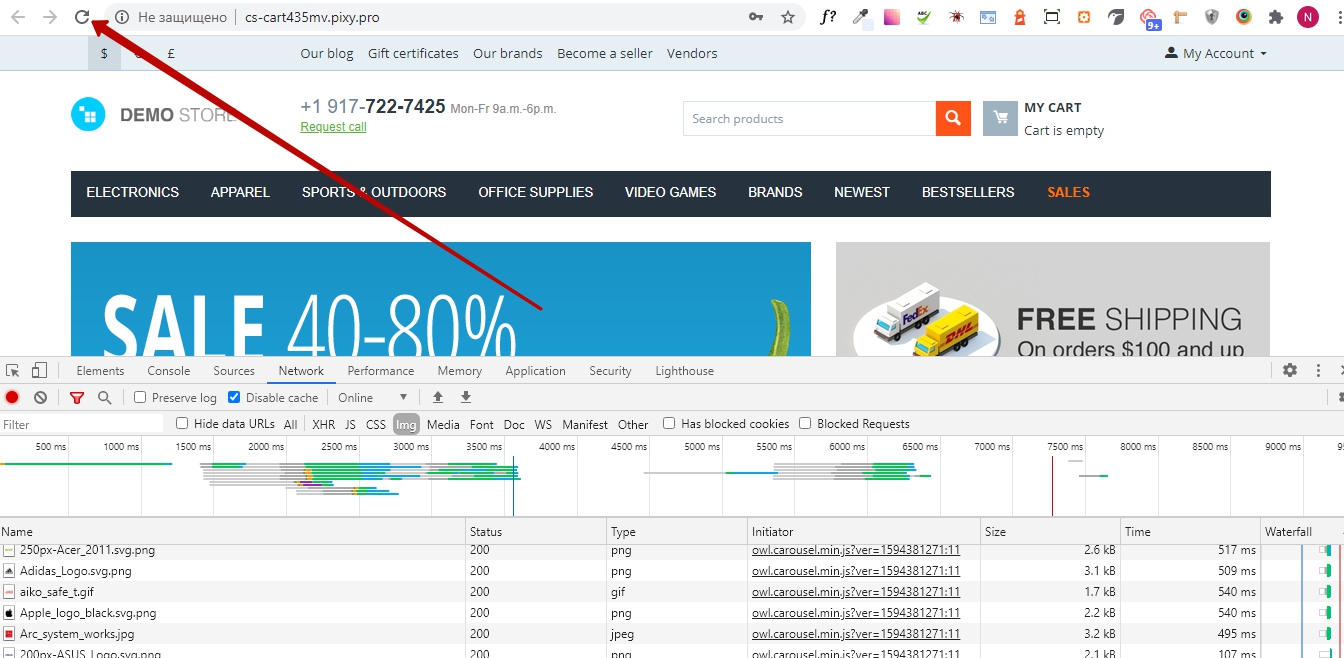
The converted images are now displayed on your website.
VIDEO INSTRUCTION