Guide to Image Convert Plugin in Magento 2.4
Download and install
Download the plugin archive from the Shop Pinta store and save it on your computer. Unpack the zip archive.
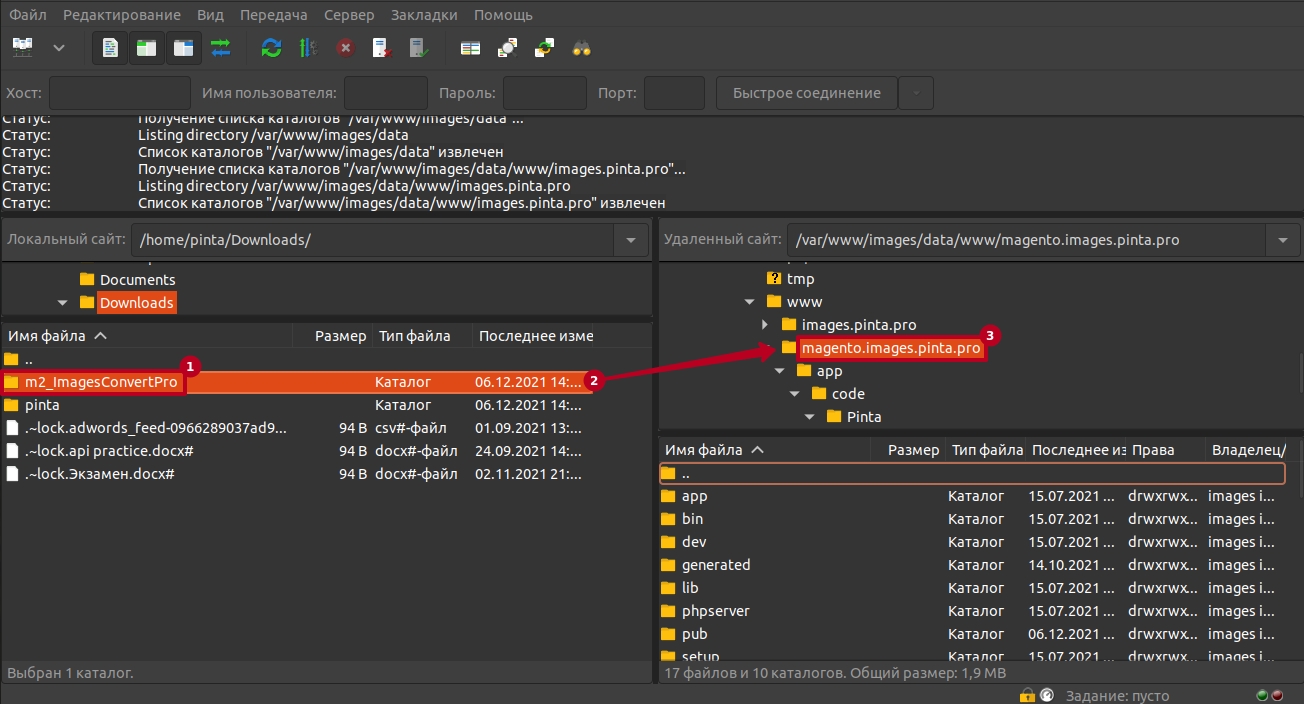
Connect via FTP to your website and copy the contents of the m2_ImagesConvertPro folder (1, 2) to the root of the website folder (3).
Be sure to use the commands php bin/magento setup:upgrade and php bin/magento setup:di:compile in the web console to activate the plugin.
Also, be sure to clear the cache after installing the plugin and update the installation. It is important! Next, you need to log into the admin panel again. The procedure is now complete.
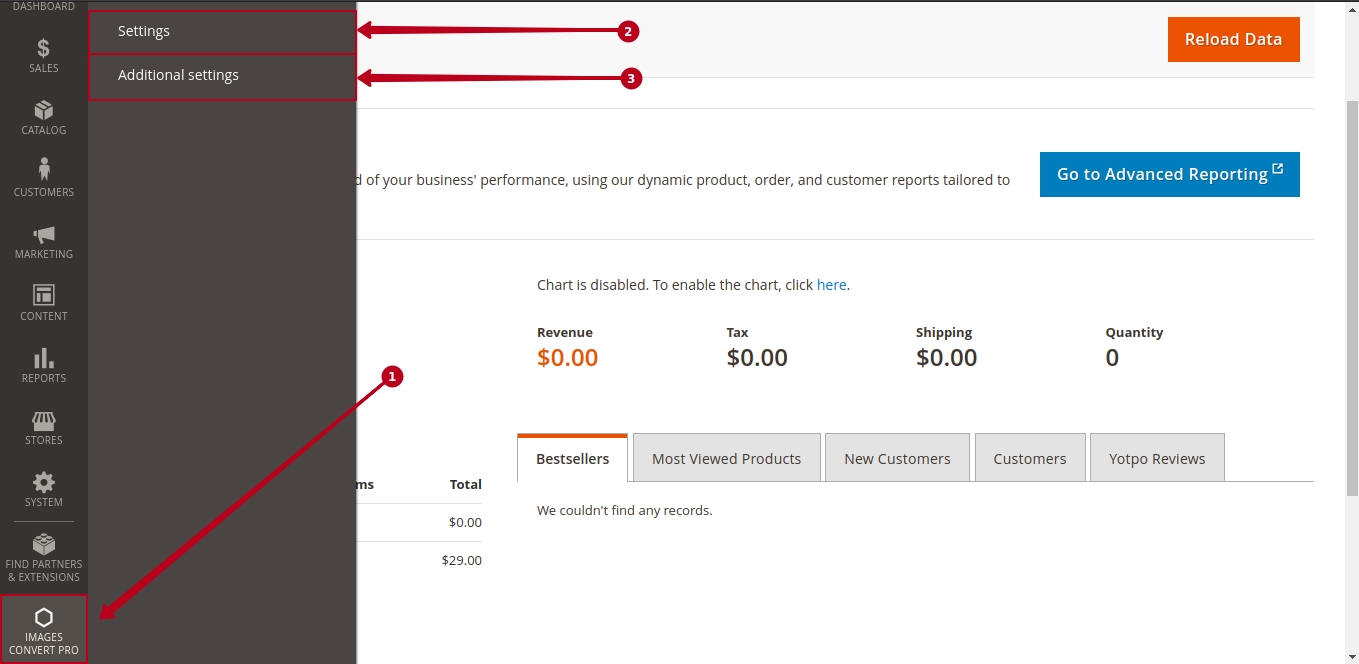
And go to the main menu of the admin panel Images Convert Pro (1), which appears after installation and contains the tabs:
Settings (2) - to configure the plugin.
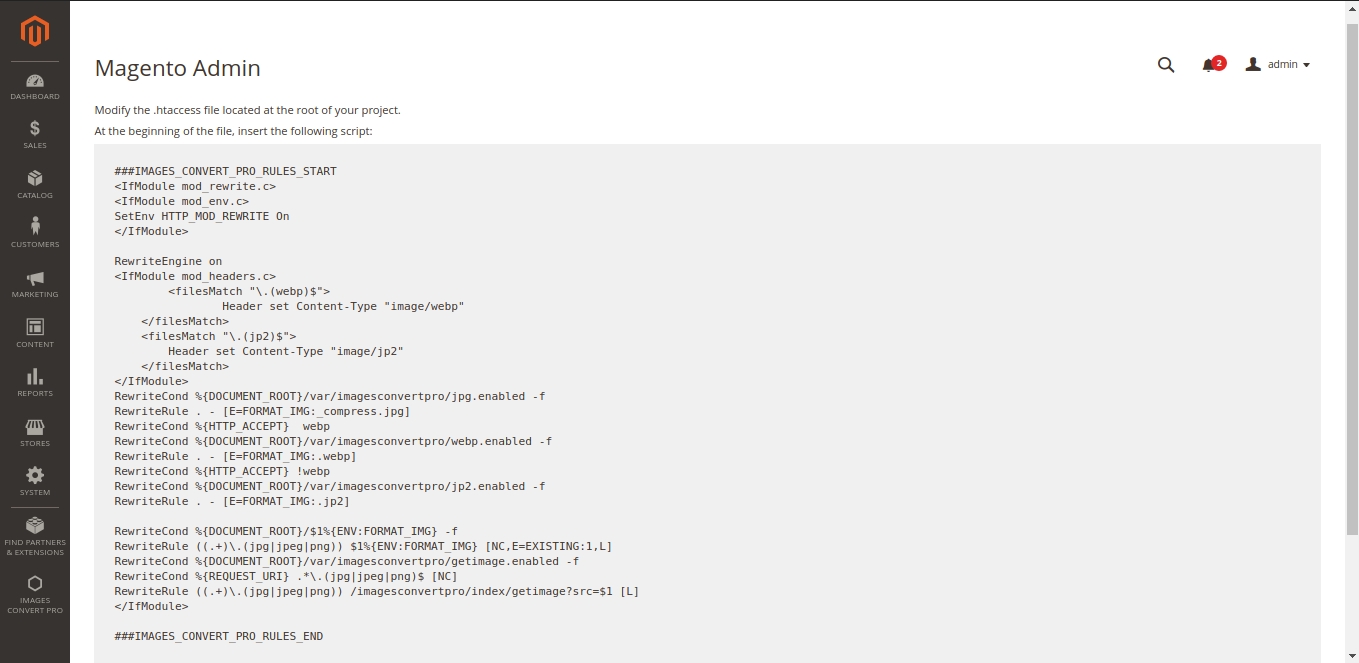
Additional settings (3) - to modify the .htacess file.
The Additional settings tab contains instructions. Using it will help you modify the .htacess file.
Plugin page
The plugin page allows you to configure the plugin and consists of:
The Status field (1) - to enable / disable the plugin (position Enabled / Disabled).
The Convert webp field (2) - to enable / disable the conversion of images to webp format (position Enabled / Disabled).
The Convert jp2 field (3) - to enable / disable the conversion of images to jp2 format (position Enabled / Disabled).
The Quality convert field (4) - select a value for the compression quality.
The Quantity images send one request field (5) - select how many images will be sent for processing at one time.
Next, click the Save setting button.
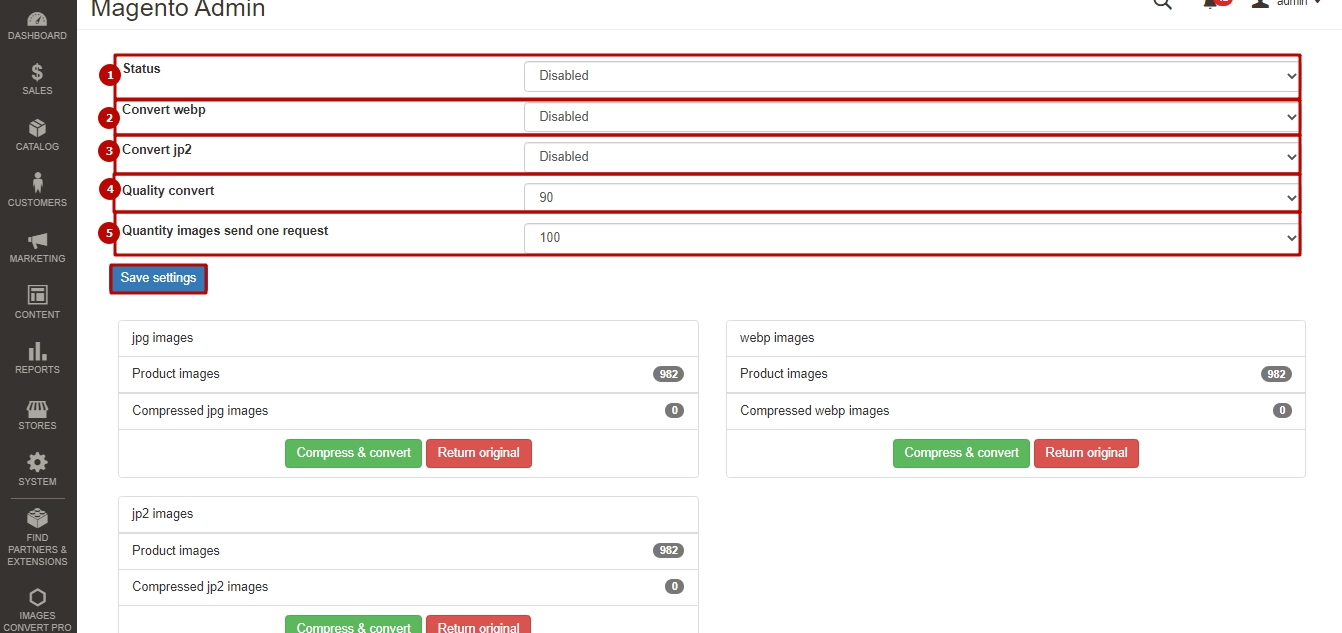
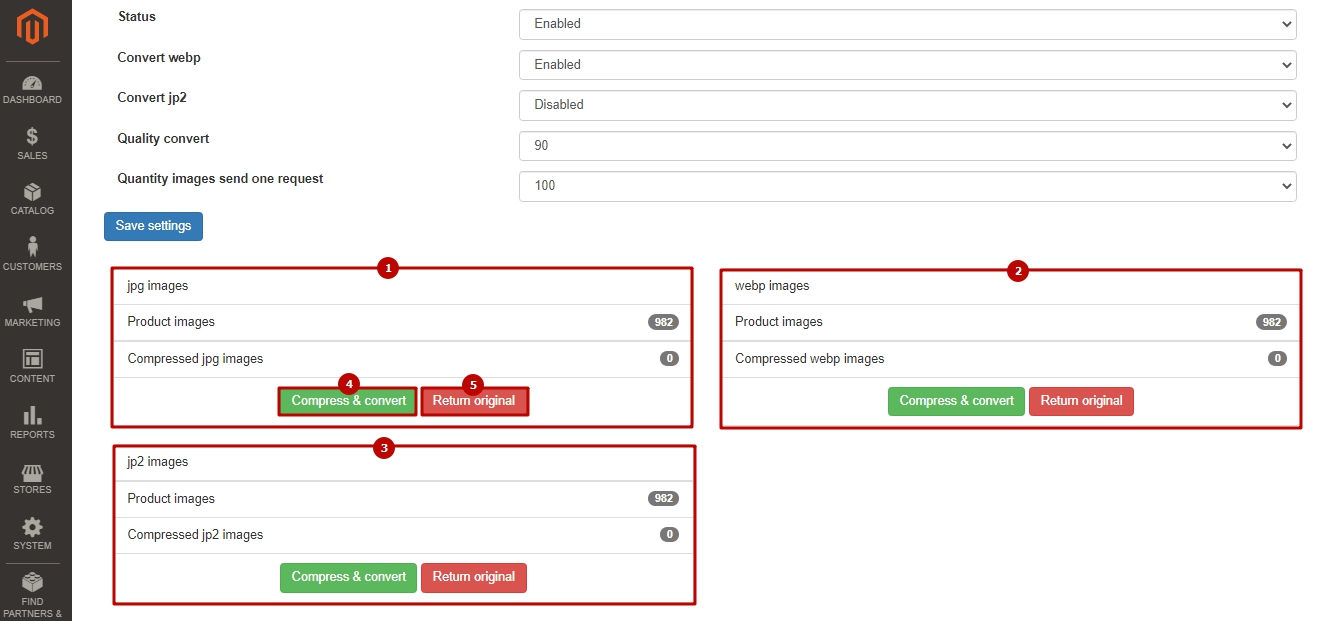
The jpg images block (1) - for compressing images.
The webp images block (2) - for converting images to webp format.
The jp2 images block (3) - for converting images to jp2 format.
Each block of images contains:
The Product images counter - displays the total number of images on your website.
The Compressed jpg images / Compressed webp images / Compressed jp2 images - displays the number of all compressed images of the appropriate format.
The Compress & convert button (4) - to start compression / conversion of your images.
The Return original button (5) - to return images to their original state.
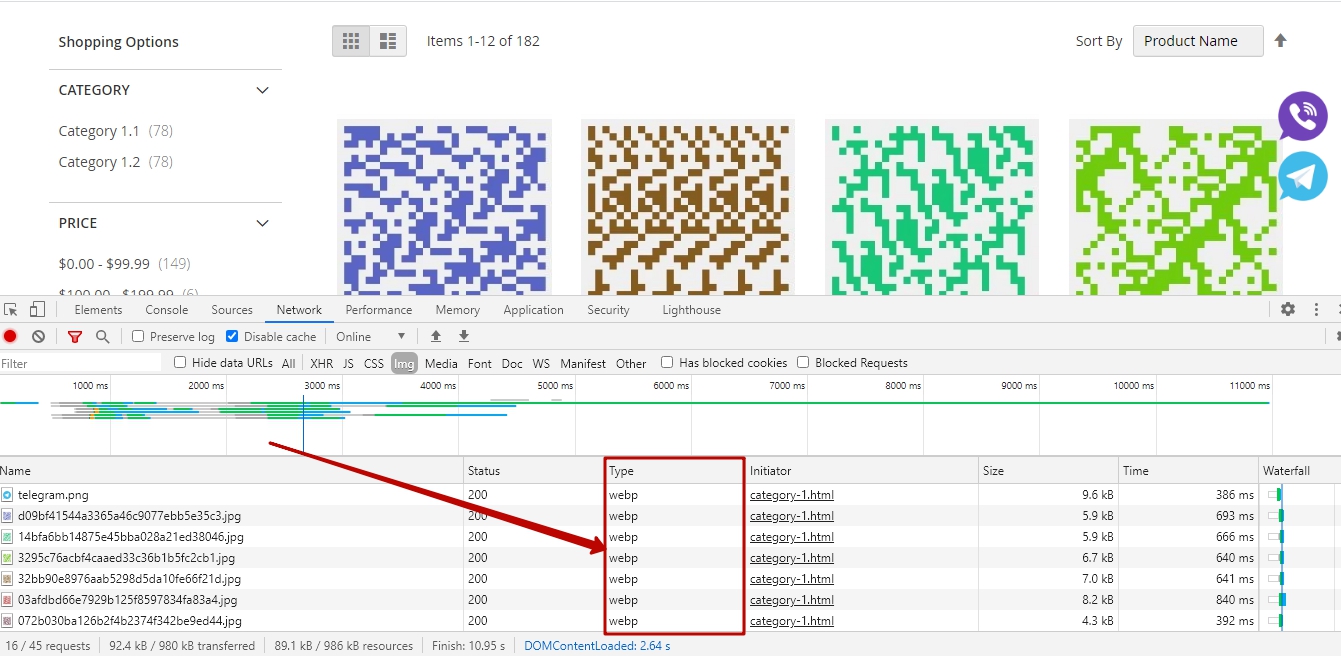
After completing the image compression / conversion process, update your website.
The converted images are displayed on your website.
VIDEO INSTRUCTION