Instruction Nova Poshta - Simple Delivery for CS-Cart
INSTRUCTION NOVA POSHTA - SIMPLE DELIVERY FOR CS-CART
Download and install
Download the plugin archive from the Shop Pinta store and save it on your computer.
In the admin panel of your website, select Add-ons > Manage add-ons.
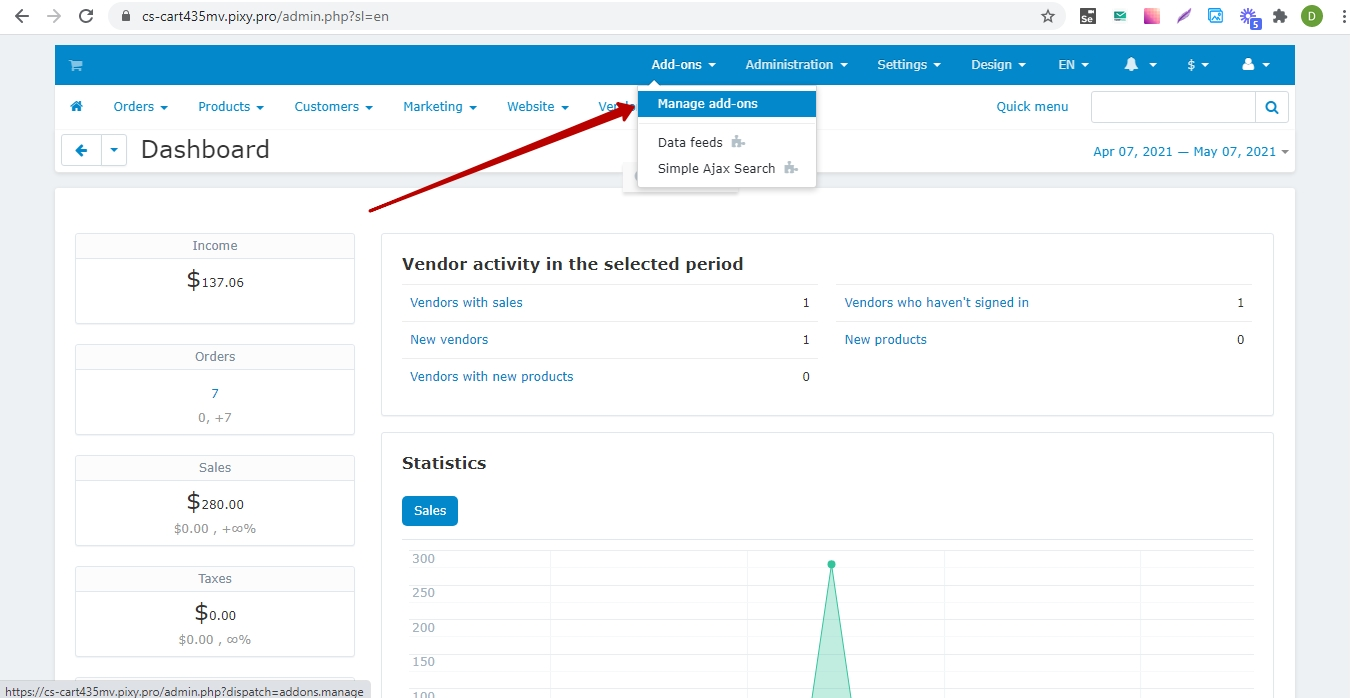
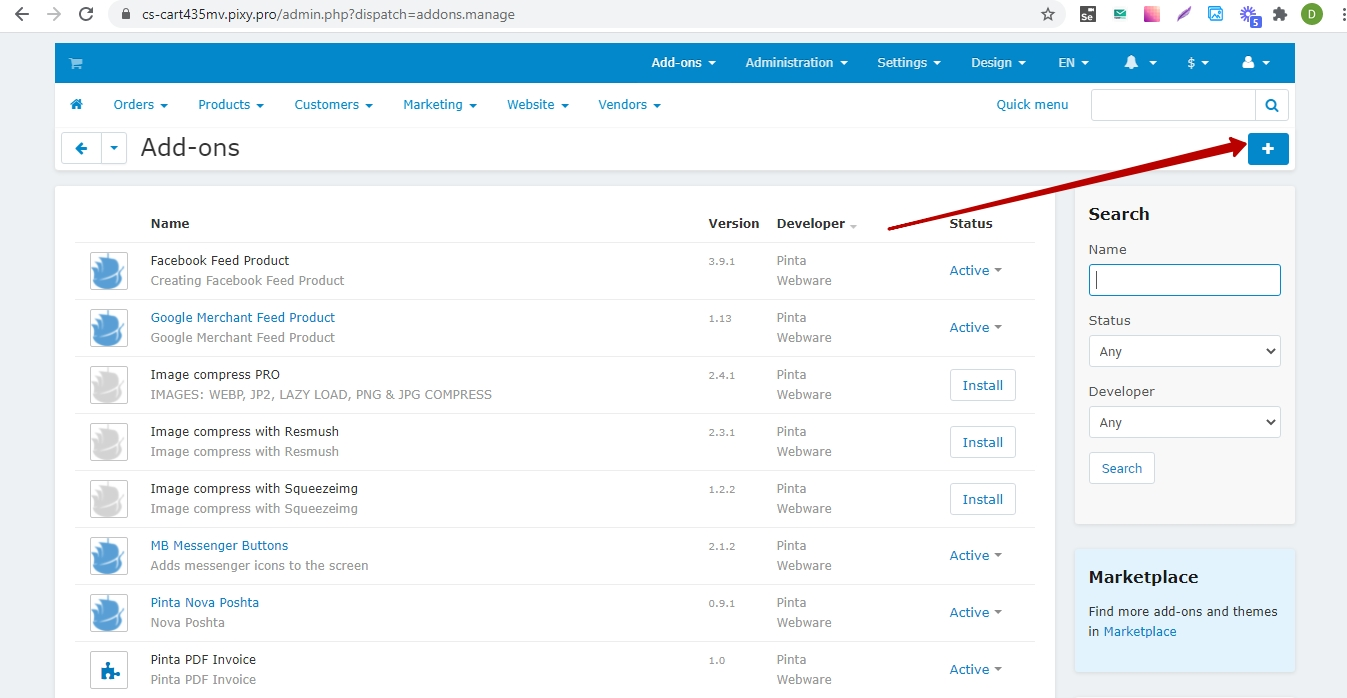
Click the Upload & install add-on button (“+”).
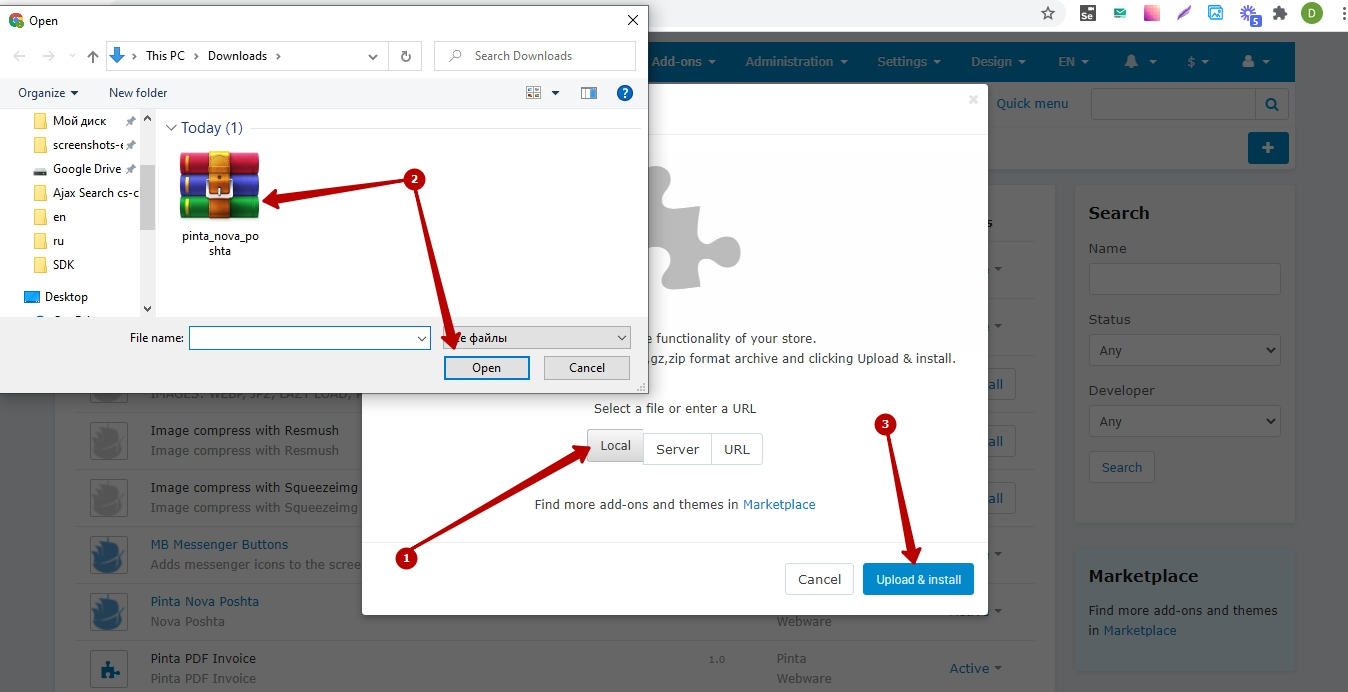
Download the plugin archive from your computer (1, 2) and click the Upload & install button (3).
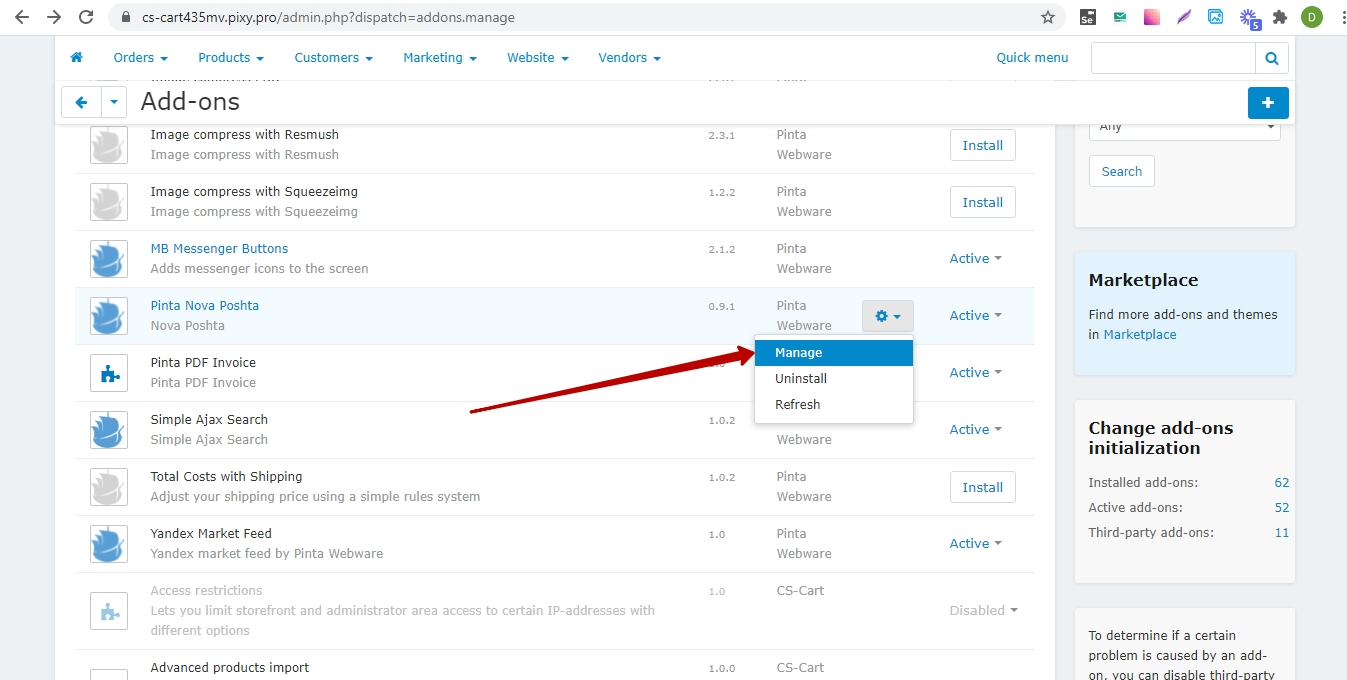
To configure the plugin, go to the main menu of the admin panel Add-ons > Manage add-ons. Next, in the list of settings for the Pinta Nova Poshta module, select Manage.
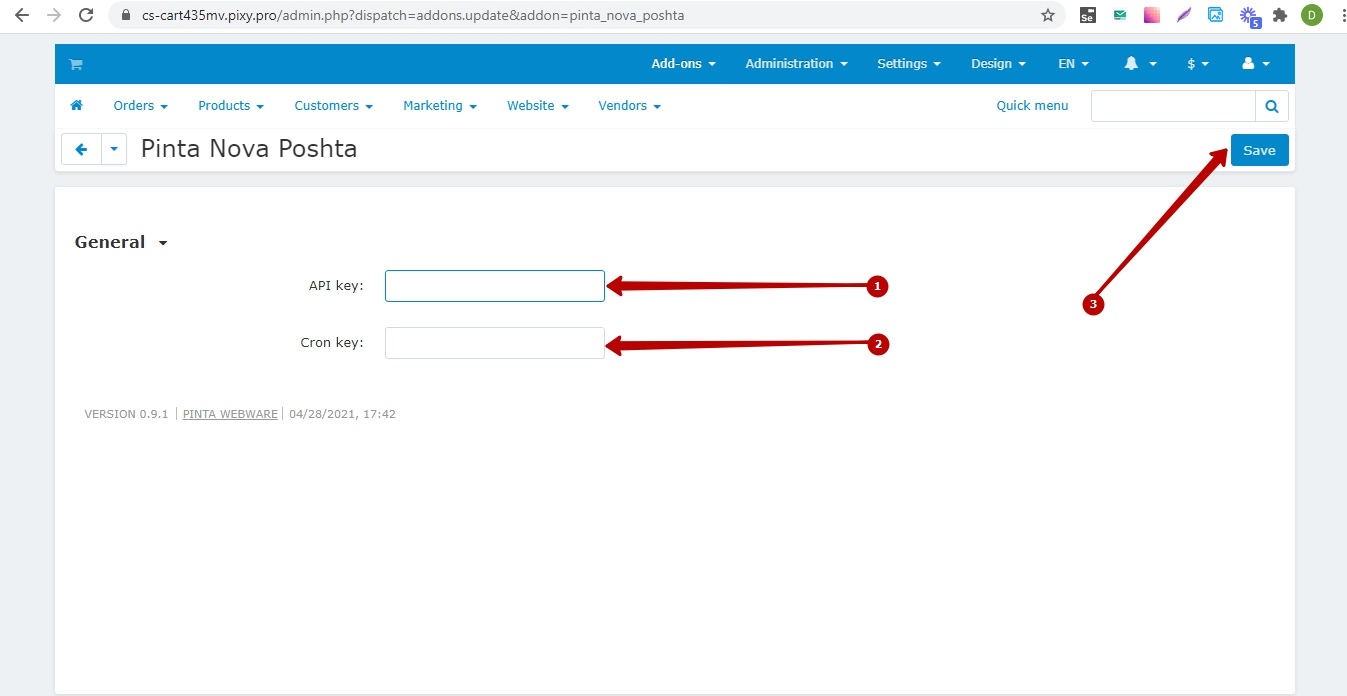
Plugin page
To activate the plugin, you need to fill in the following fields:
The API key field (1) - for entering the API key copied in the Nova Poshta’s business account after registration.
The Cron key field (2) - to copy the Cron key.
After adding your data, click the Save button (3).
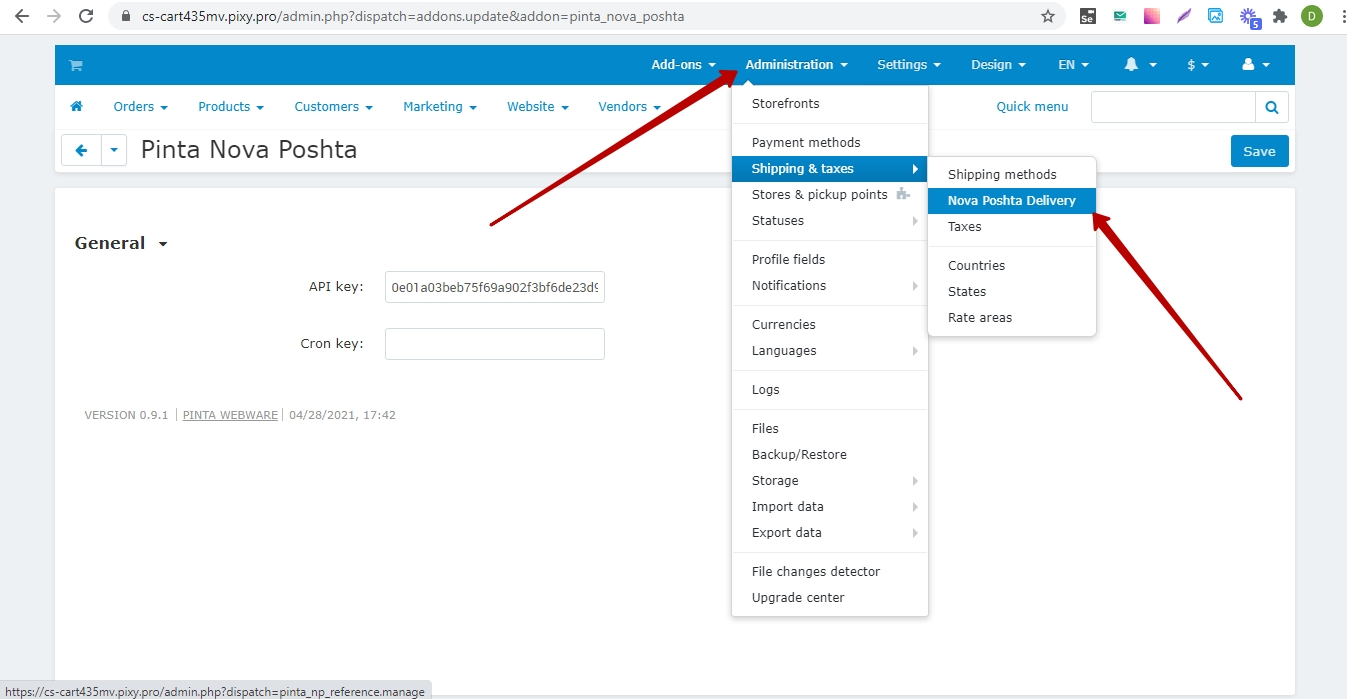
Next, update all data directories provided by the delivery service “Nova Poshta”.
Such an update is necessary to display up-to-date information (contractors and directories) when filling in the data for delivery.
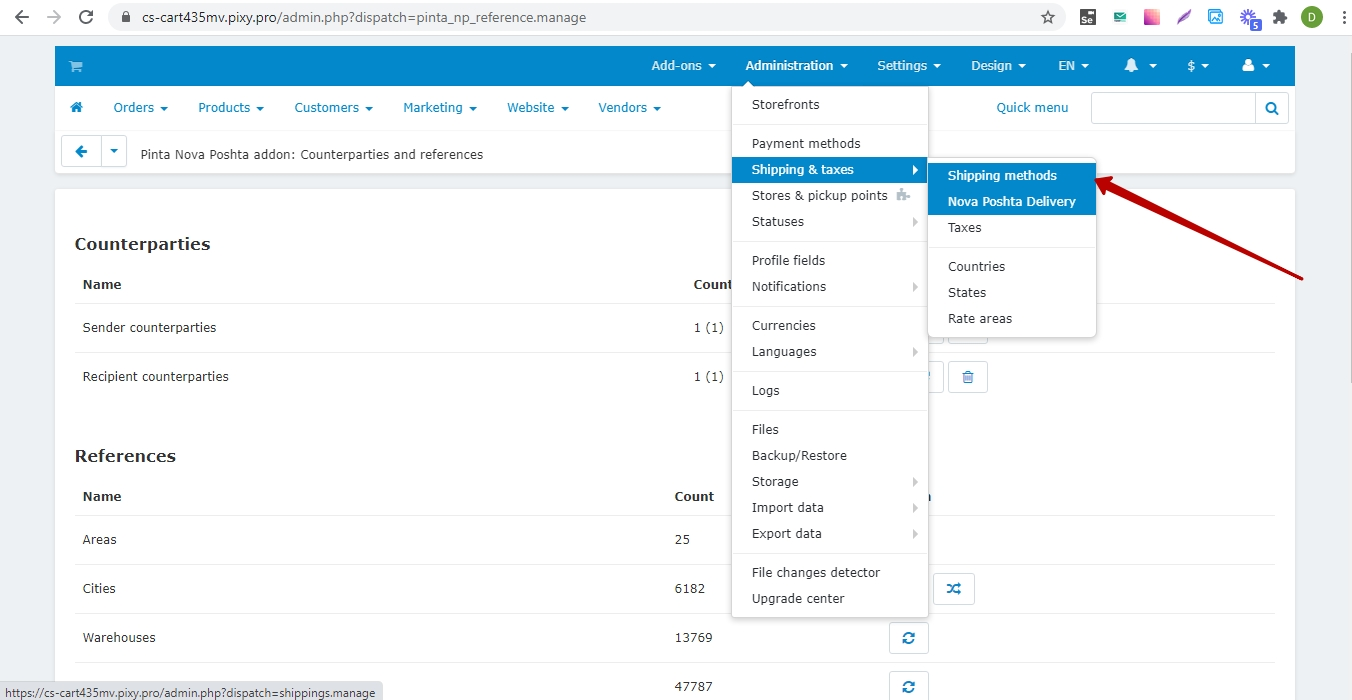
To do this, go to the main menu of the admin panel Administration > Shipping & taxes > Nova Poshta Delivery.
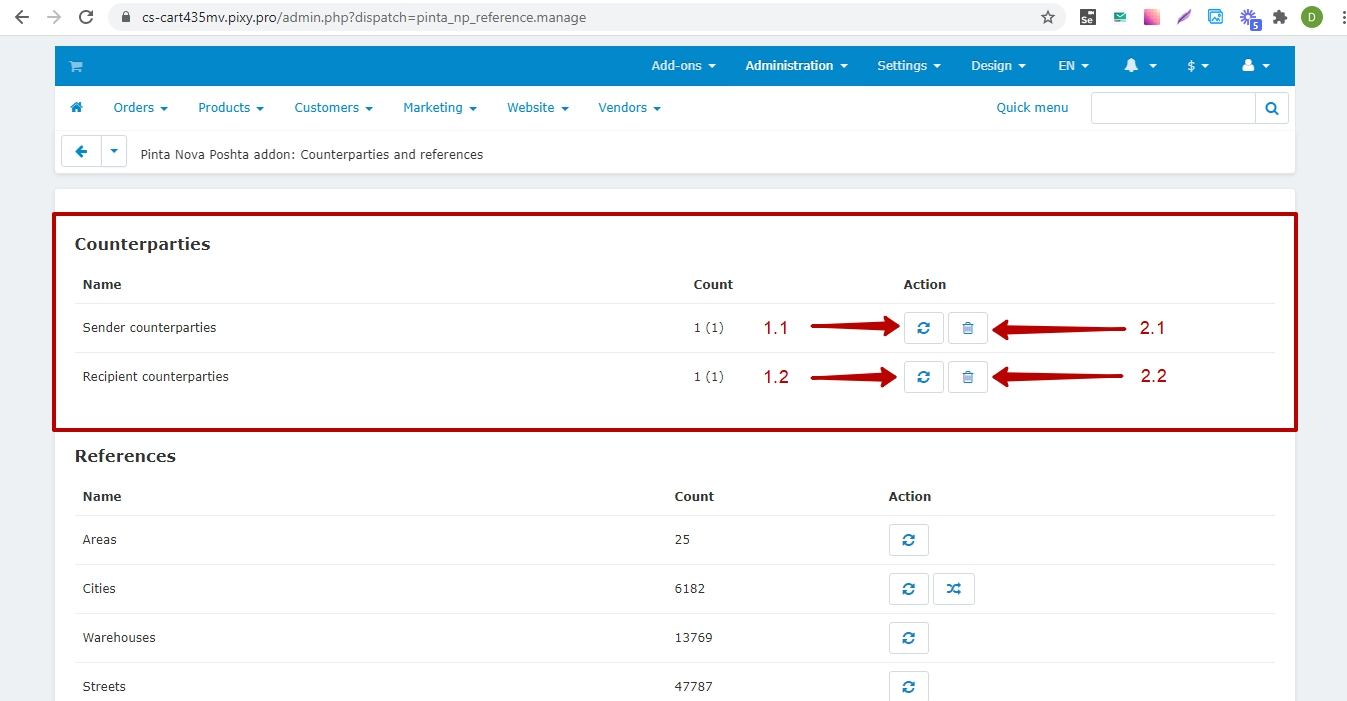
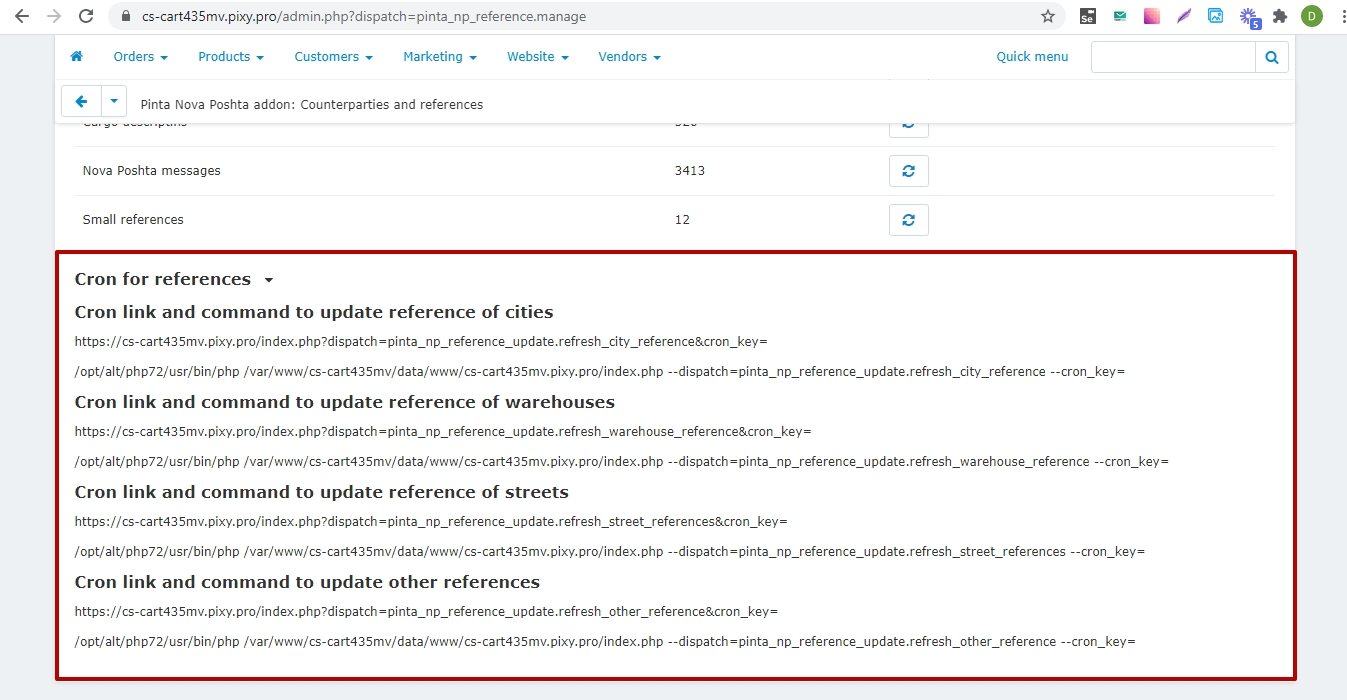
The Counterparties and references tab allows you to update data and consists of blocks:
Counterparties - to update information about sender-counterparties and recipient counterparties.
In this block you can update (1.1, 1.2) or delete (2.1, 2.2) information about counterparties.
References - to update all information of delivery addresses (regions, cities, filial branches, streets), and descriptions of cargo, notifications of the “Nova Poshta” service, etc.
Updating the list of streets can take a long time, since the amount of updated information is significant.
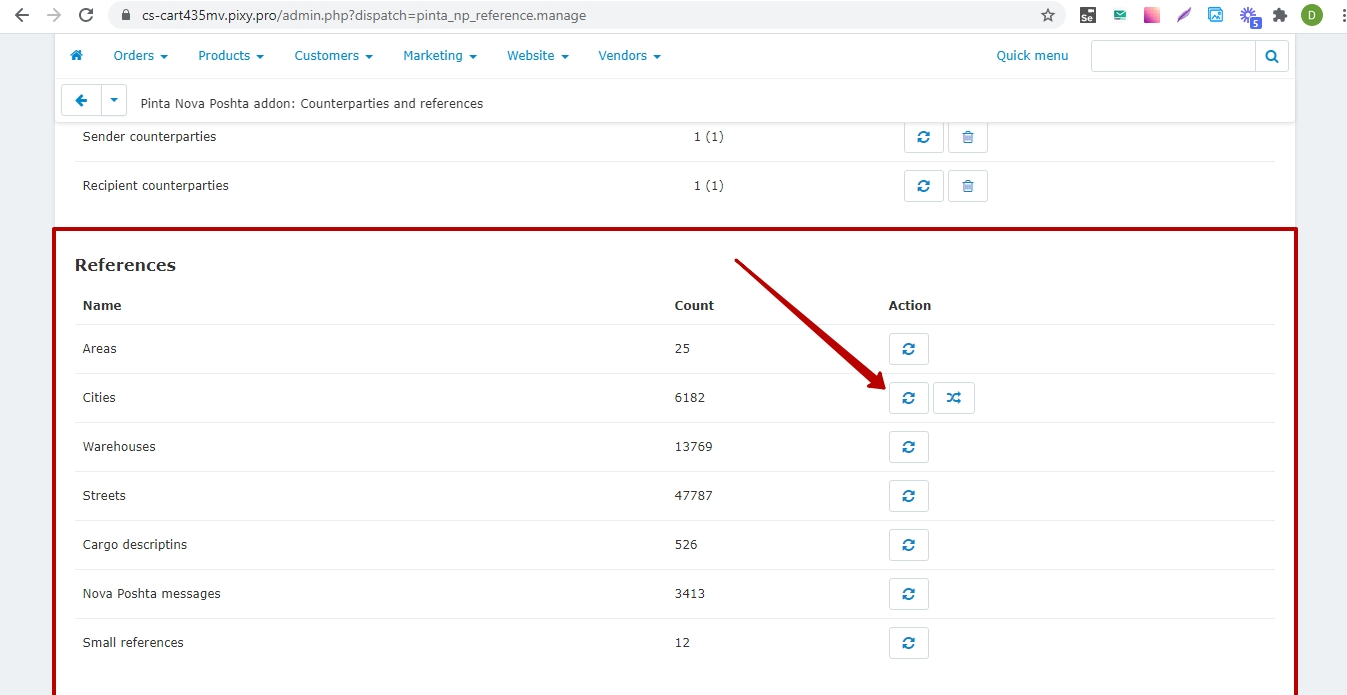
Cron for references - this block contains cron links for creating a Cron task and automating the process of updating references.
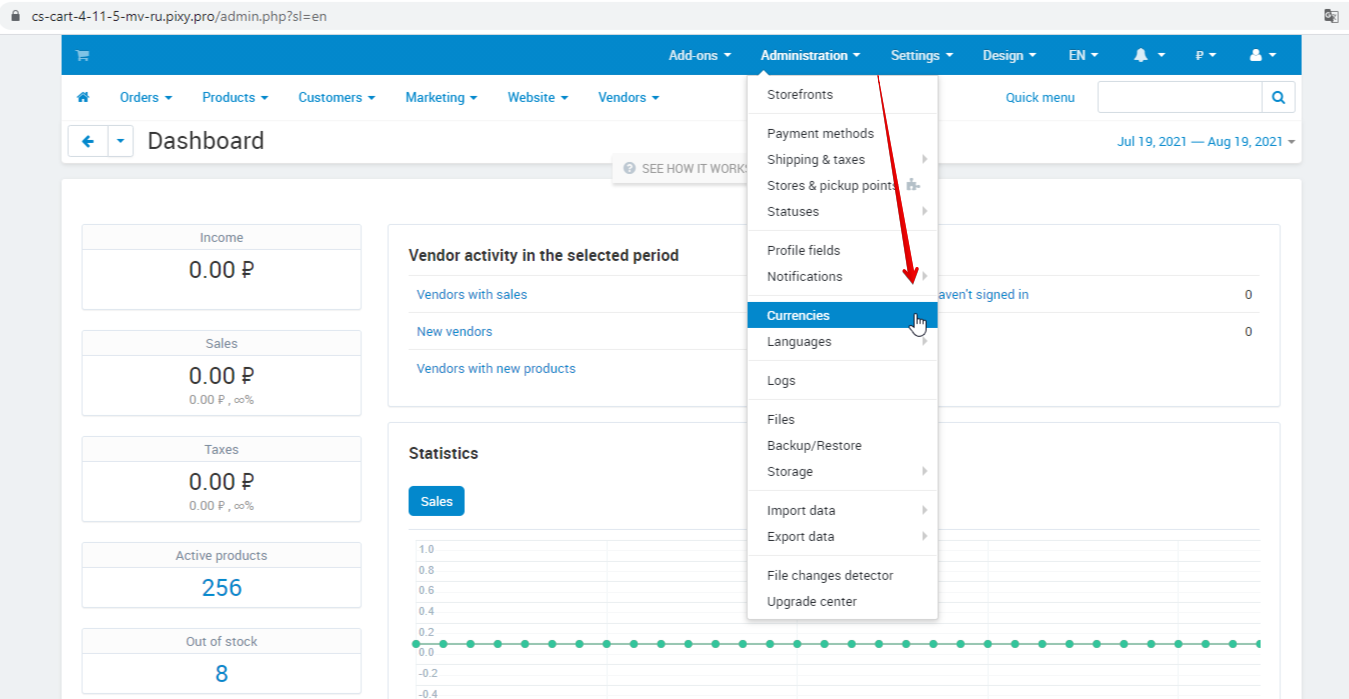
To the shipping method using the "Nova Poshta" service to be displayed correctly on your website, activate the Hryvnia currency in the list of currencies.
To do this, go to the main menu of the admin panel Administration > Currencies.
https://monosnap.com/file/pu4JazP2HY4nCTlk7JDHNq98FcQN3Y
Next, on the Currencies page, select the Active status.
If necessary, you can edit the currency settings or add a currency (if this hasn’t been done in advance).
https://monosnap.com/file/T8wqMgKf98mq1ySb4q4LEEEJcJZOJN
Next, add the “Nova Poshta” service to the list of carriers (shipping methods).
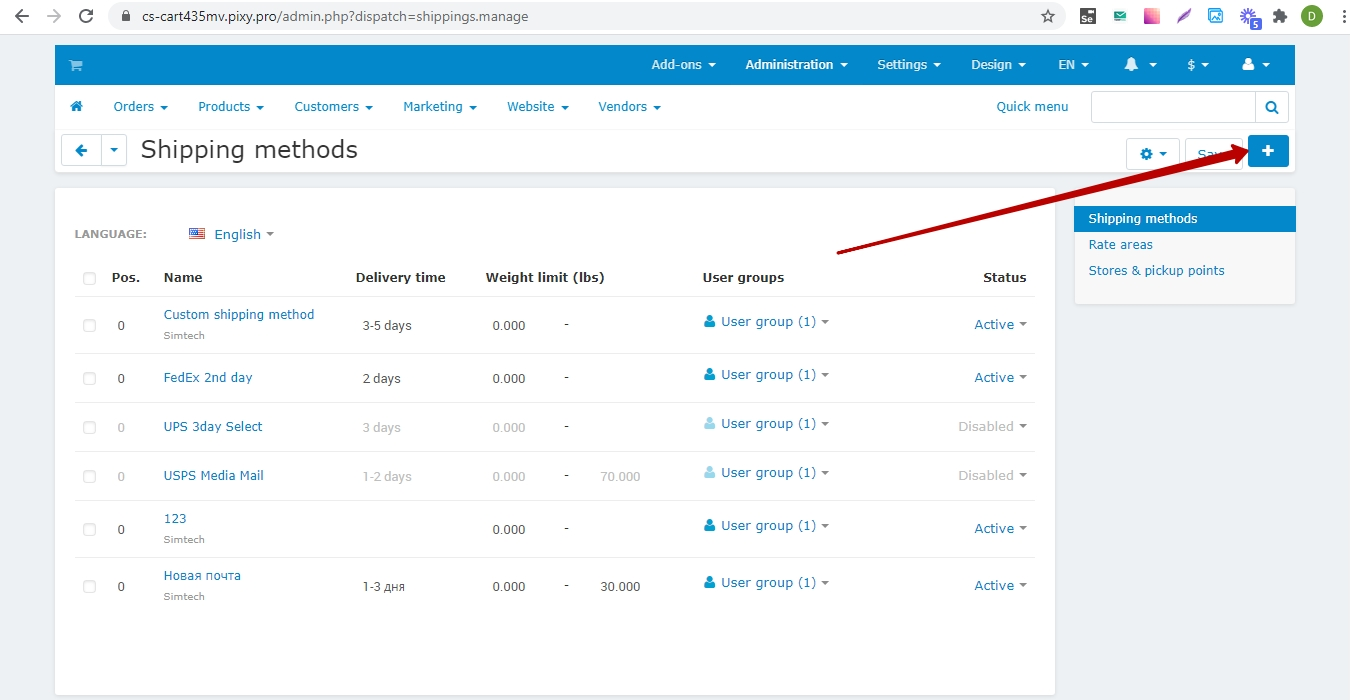
To do this, go to the main menu of the admin panel Administration > Shipping & taxes > Shipping methods.
On the Shipping methods page, click the Add shipping method (“+”) button.
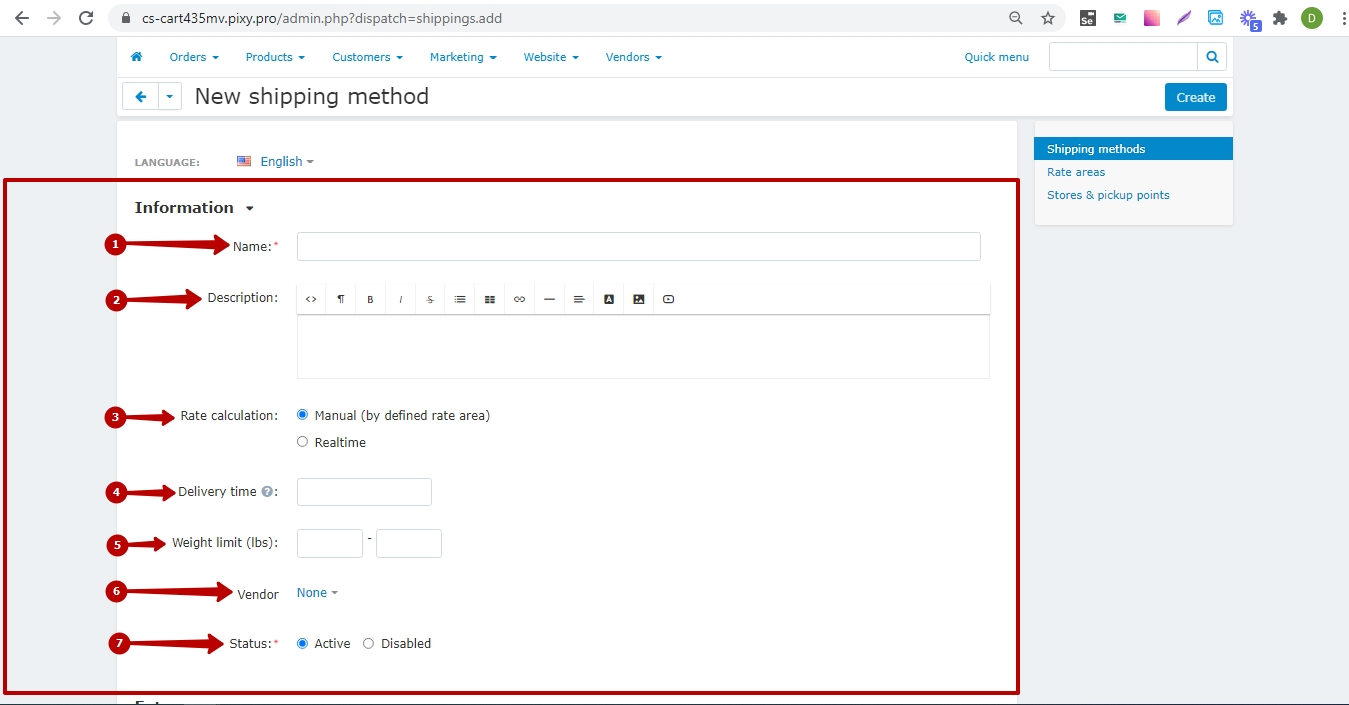
Next, on the New shipping method page you need to fill the general information for the shipping method. This page contains such blocks:
Information - consists of fields:
Name (1) - to enter the carrier name (displayed when placing an order on your website). This field is required.
Description (2) - to specify the conditions of the shipping method that are important to the client (displayed when placing an order on your website).
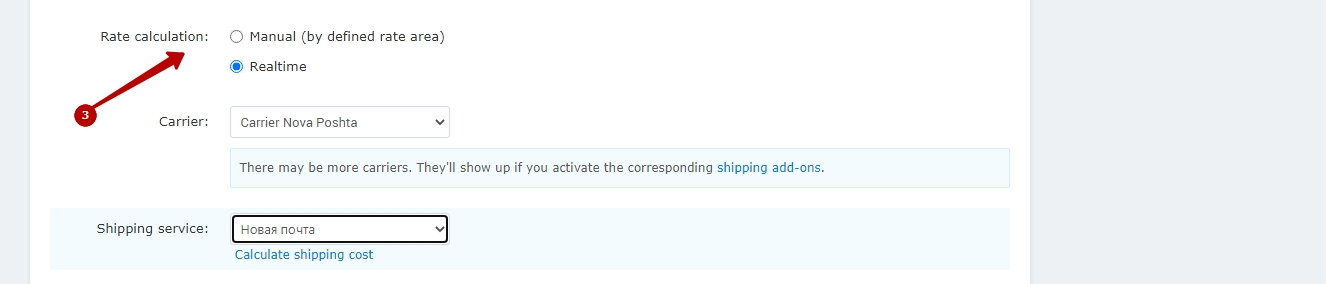
Rate calculation (3) - to select a calculation method for shipping cost (checkbox Manual / Realtime).
For using up-to-date information, it is recommended to select the Realtime checkbox.
Next, in the Carrier field, select the Carrier Nova Poshta option and in the Shipping service field, select the Nova Poshta option.
Delivery time (4) - to indicate the approximate delivery time by Nova Poshta.
Weight limit (lbs) (5) - to select weight limit (if necessary).
Vendor (6) - to select a seller whose goods can be delivered using the “Nova Poshta” service.
Status (7) - to enable / disable the shipping method. This field is required.
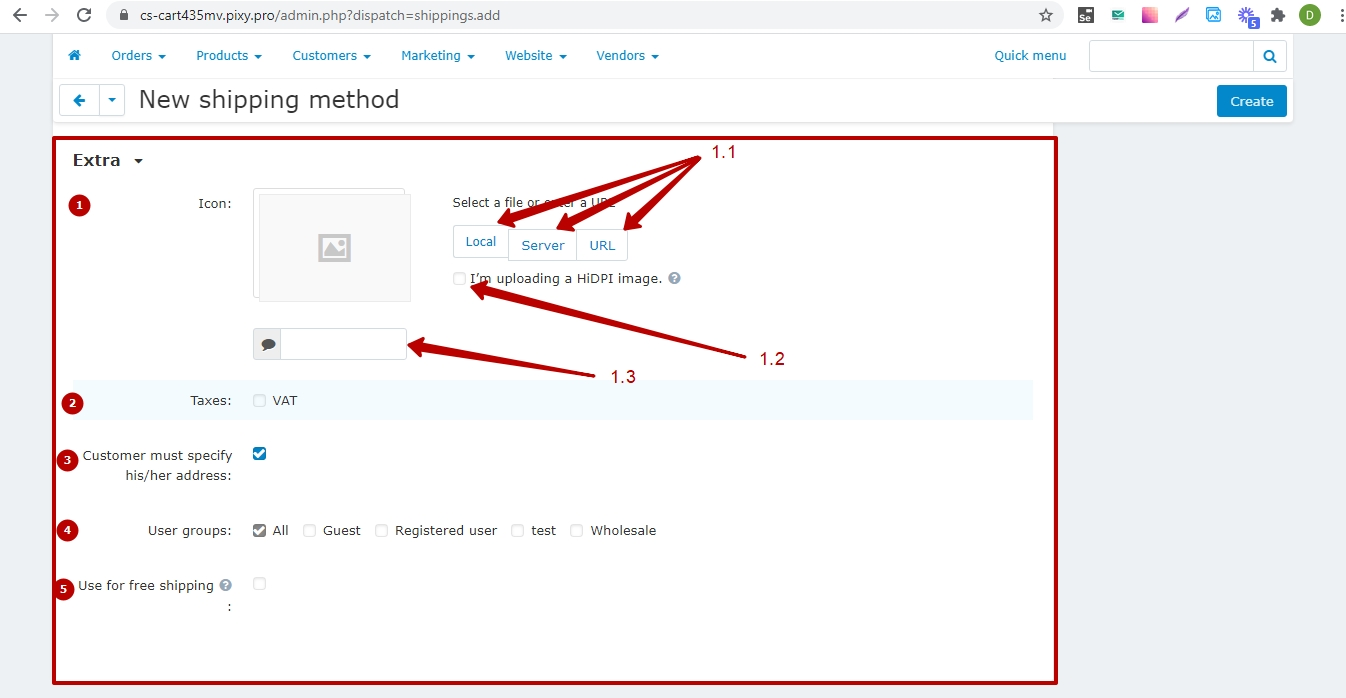
Extra - consists of fields:
Icon (1) - to select an image (1.1) as a logo for the shipping method (download from a computer / select on the server / add a URL).
It is necessary to check the box I’m uploading a HiDPI image (1.2), if you want to reduce the original image size.
You can also add text to field 1.3, which will be displayed when you hover the cursor over the image.
Taxes (2) - to select the required type of tax, which will be taken into account when calculation of cost delivery.
Сustomer must specify his/her address (3) - check the box, if you want the user to be sure to indicate his address when placing an order.
User groups (4) - check the boxes for user groups that can use this shipping method.
Use for free shipping (5) - check the box, if you want to use this shipping method for goods with free shipping.
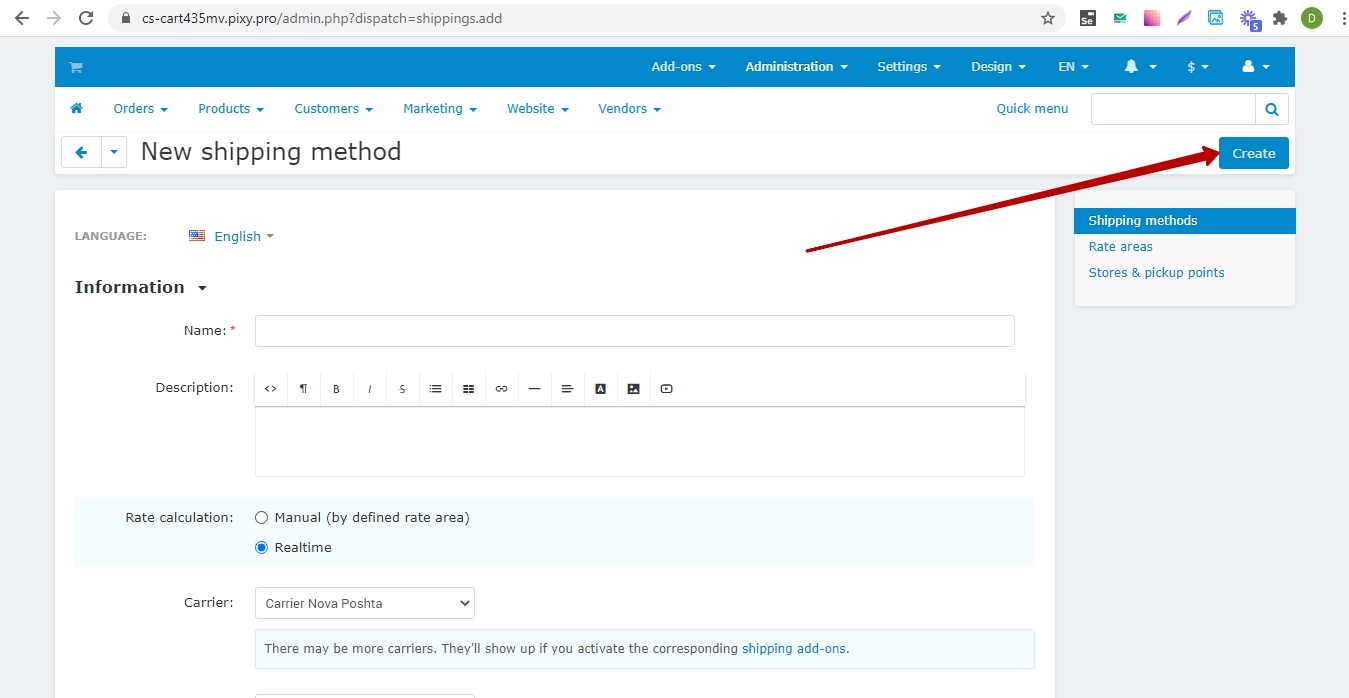
After filling in all the settings, click the Create button.
After creating the “Nova Poshta” shipping method, the tabs with additional settings will be available - Configure, Shipping charges.
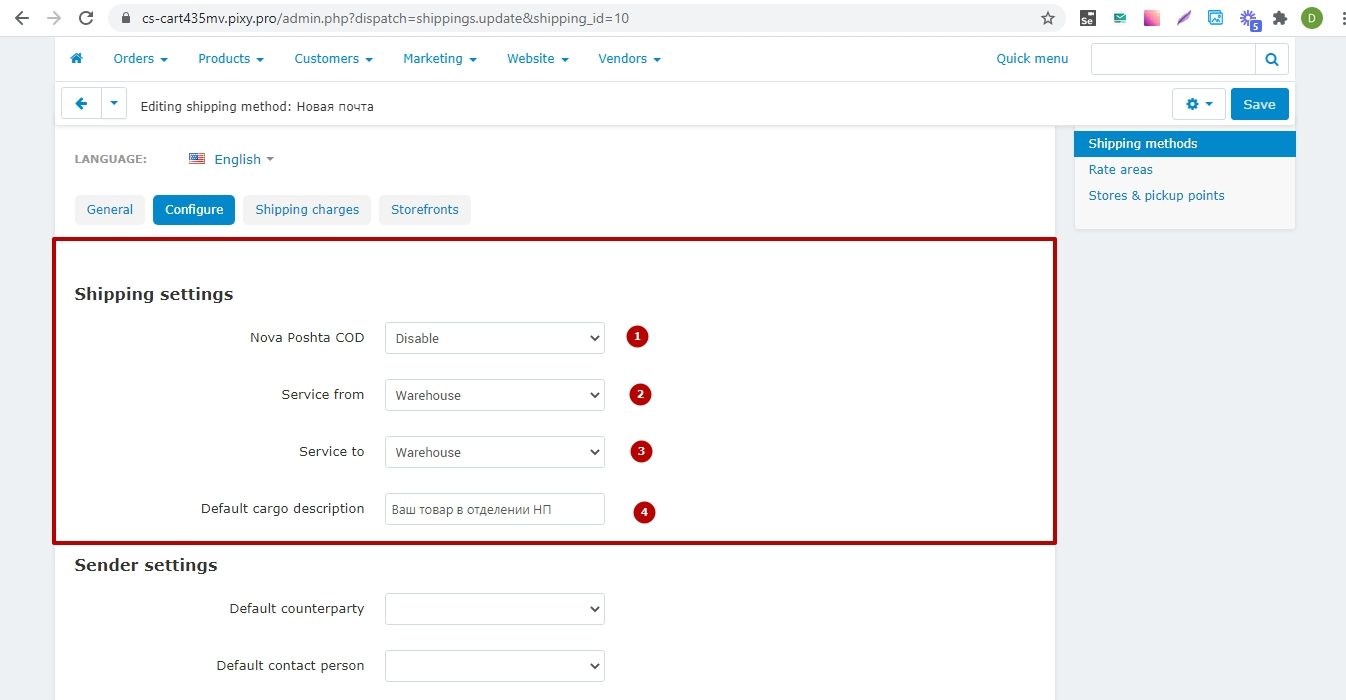
The Configure tab allows you to select general shipping conditions and contains blocks:
Shipping settings - consists of fields:
Nova Poshta COD (1) - to select, if you want to use C.O.D.
Service from (2) - to select where the goods will be sent from.
Service to (3) - to select where the goods will be sent to.
Default cargo description (4) - to add a description that will be displayed for all products by default.
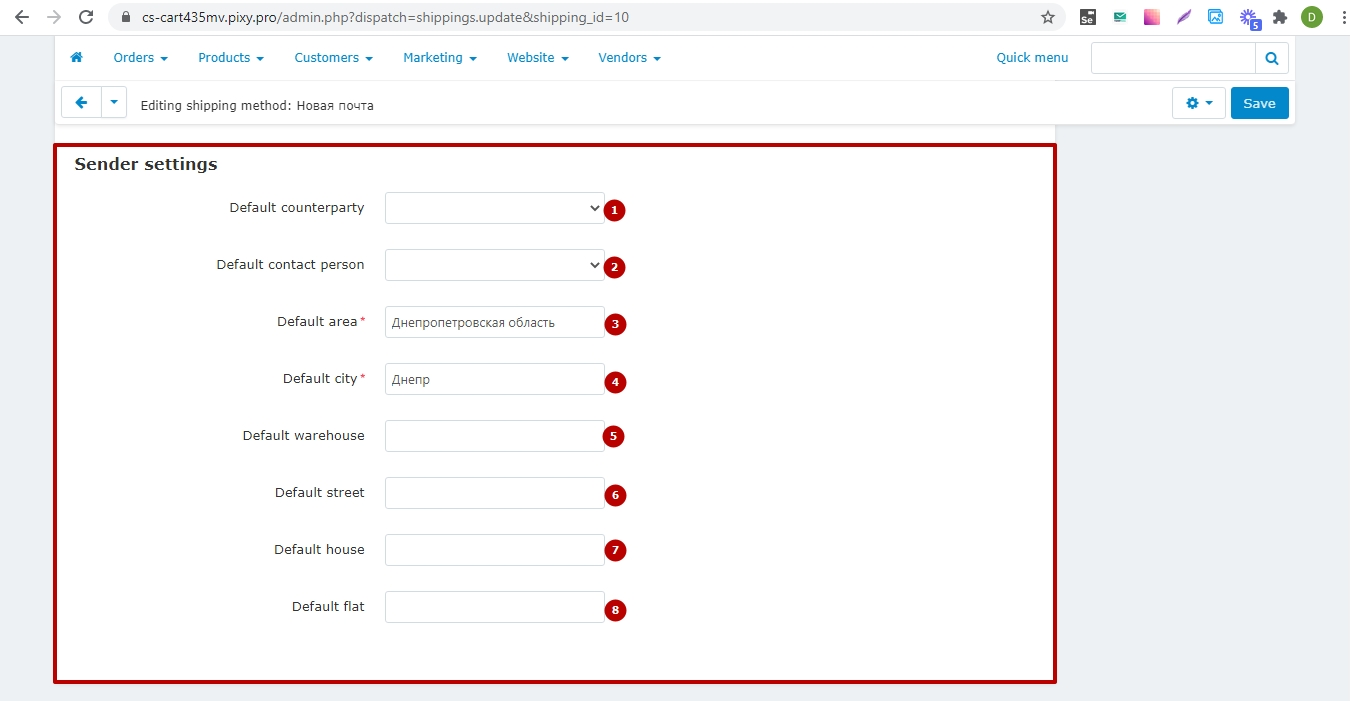
Sender settings - consists of fields:
Default counterparty (1) - to select a sender that will be displayed, by default, in the Nova Poshta’s invoice.
Default contact person (2) - to select a contact person that will be displayed, by default, in the Nova Poshta’s invoice.
Default area (3) - to select the region where the goods will be sent from, by default. This field is required.
Default city (4) - to select the city where the goods will be sent from, by default. This field is required.
Default warehouse (5) - to select the address of the Nova Poshta’s warehouse where the goods will be sent from, by default.
Default street (6) - to select the street where the goods will be sent from, by default.
Default house (7) - to select the house where the goods will be sent from, by default.
Default flat (8) - to select the apartment where the goods will be sent from, by default.
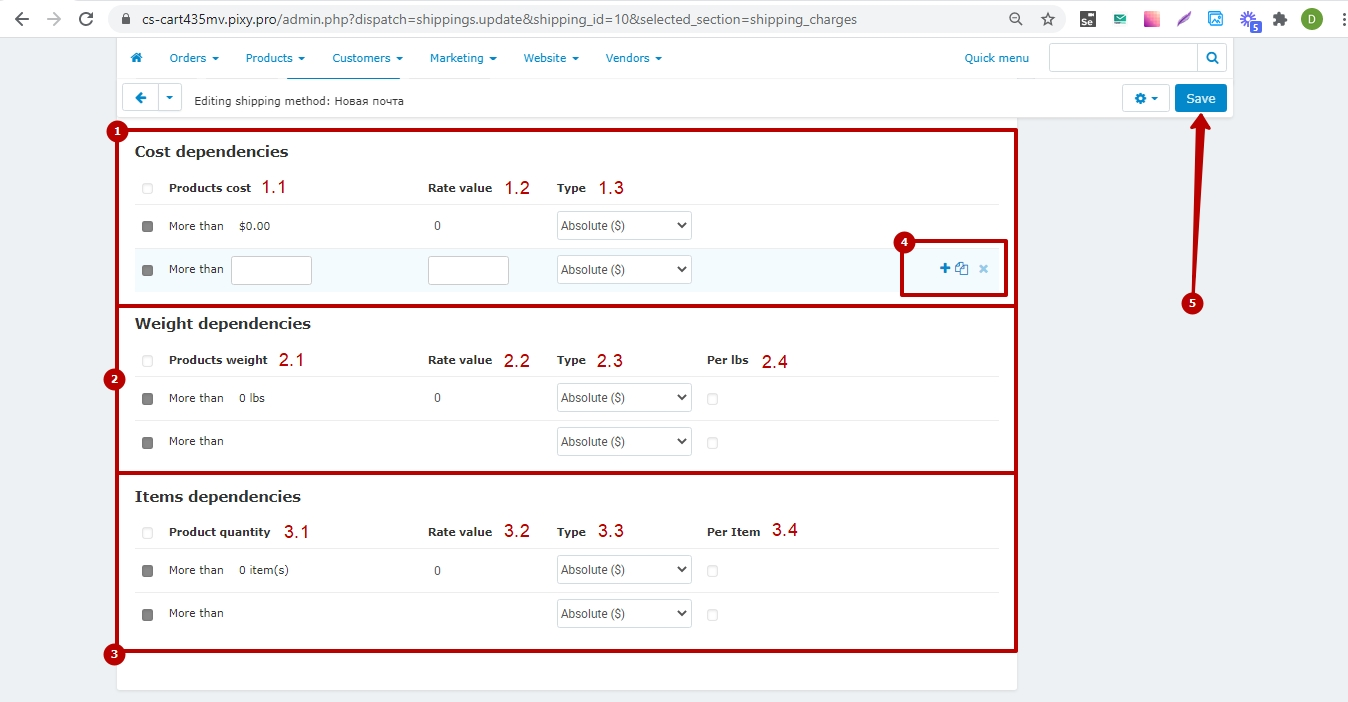
The Shipping charges tab allows you to create and edit conditions for calculation shipping costs.
This tab contains blocks:
Cost dependencies (1) - allows you to select the shipping cost depending on the price of the product and consists of the fields:
Products cost (1.1) - to select the cost of the products for which you want to apply this condition when calculation shipping cost.
Rate value (1.2) - to enter the value of shipping cost depending on the products cost.
Type (1.3) - to select units of shipping cost - a fixed (Absolute) or relative (Percent).
Weight dependencies (2) - allows you to select the shipping cost depending on the weight of the product and consists of the fields:
Products weight (2.1) - to select the weight of the products for which you want to apply this condition when calculation shipping cost.
Rate value (2.2) - to enter the value of shipping cost depending on the products weight.
Type (2.3) - to select units of shipping cost - a fixed (Absolute) or relative (Percent).
Per lbs (2.4) - check the checkbox if you need to calculate shipping cost for each product separately.
Items dependencies (3) - allows you to select the shipping cost depending on the quantity of product and consists of the fields:
Product quantity (3.1) - to select the number of products units for which you want to apply this condition when calculation shipping cost.
Rate value (3.2) - to enter the value of shipping cost depending on the products quantity.
Type (3.3) - to select units of shipping cost - a fixed (Absolute) or relative (Percent).
Per Item (3.4) - check the checkbox if you need to calculate shipping cost for each product separately.
In each of the blocks, you can add, duplicate or delete a shipping cost condition using the buttons (4) opposite the conditions (on the right).
After adding all the necessary conditions when calculation shipping cost, click the Save button (5).
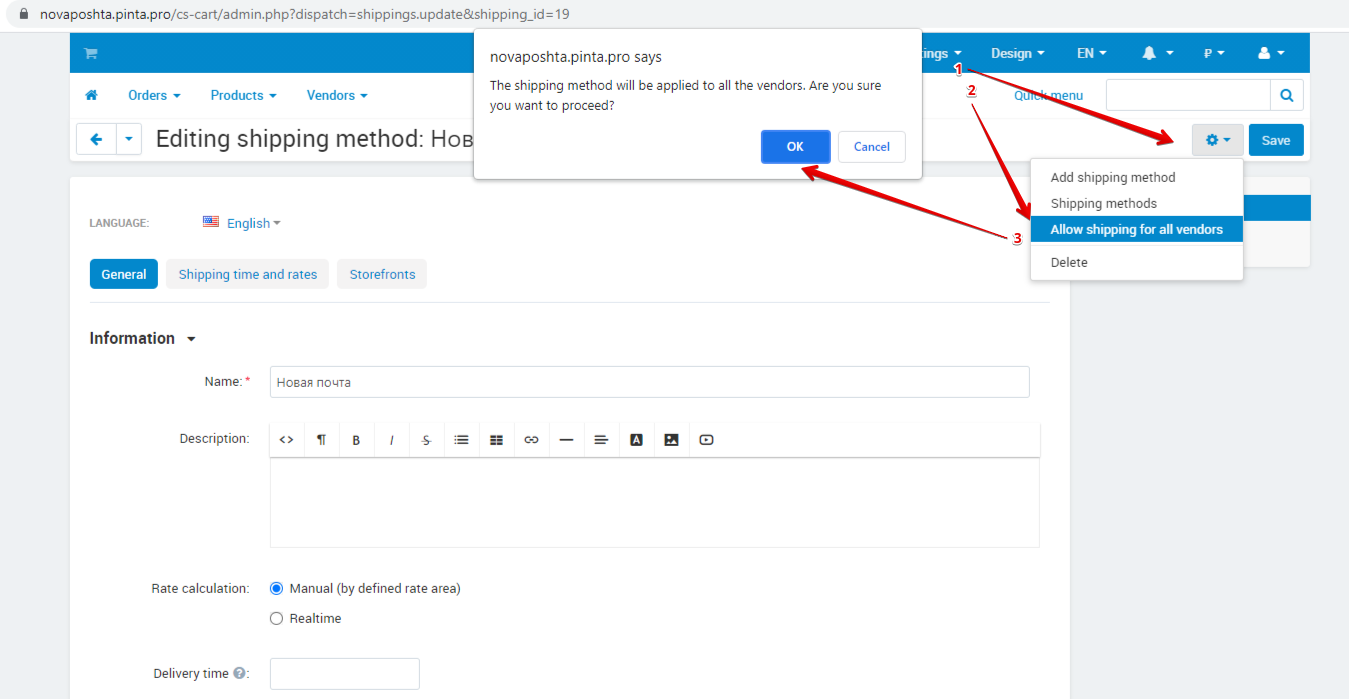
You also need to activate the “Nova Poshta” shipping method for the sellers of your online store.
For to do this you need:
Confirm the using of the “Nova Poshta” shipping method for all sellers.
To confirm in the list of options (1), select Allow shipping for all vendors (2). Next, in the opened modal window, click the OK button (3).
https://monosnap.com/file/Za3FxFOW84C9sMvVKIO6ofWvM1fPya
Add the API key copied in the Nova Poshta’s business account for sellers.
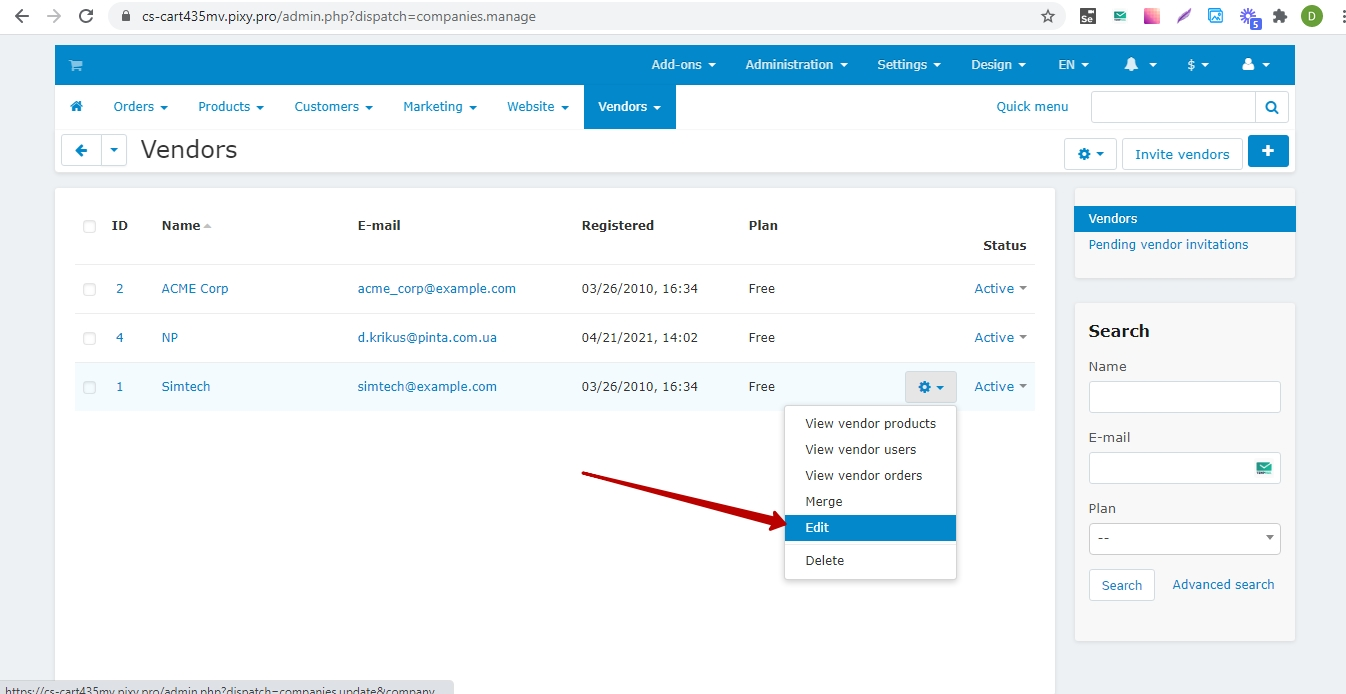
To do this, go to the main menu of the admin panel Vendors > Vendors.
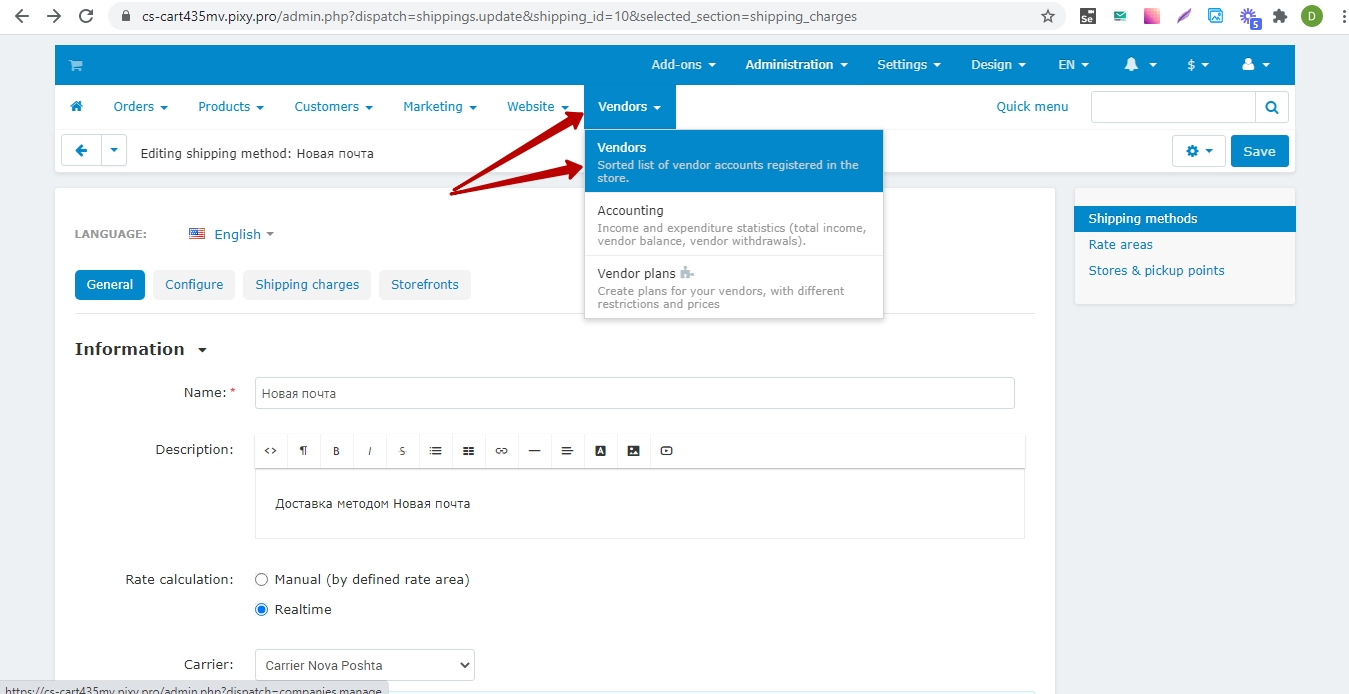
Next, to add the “Nova Poshta” shipping method, opposite the required seller in the list of options, select Edit.
On the seller edit page, go to the Add-ons tab (1) and add the API key copied in the Nova Poshta’s business account to the Company api key field (2). Next, click the Save button (3).
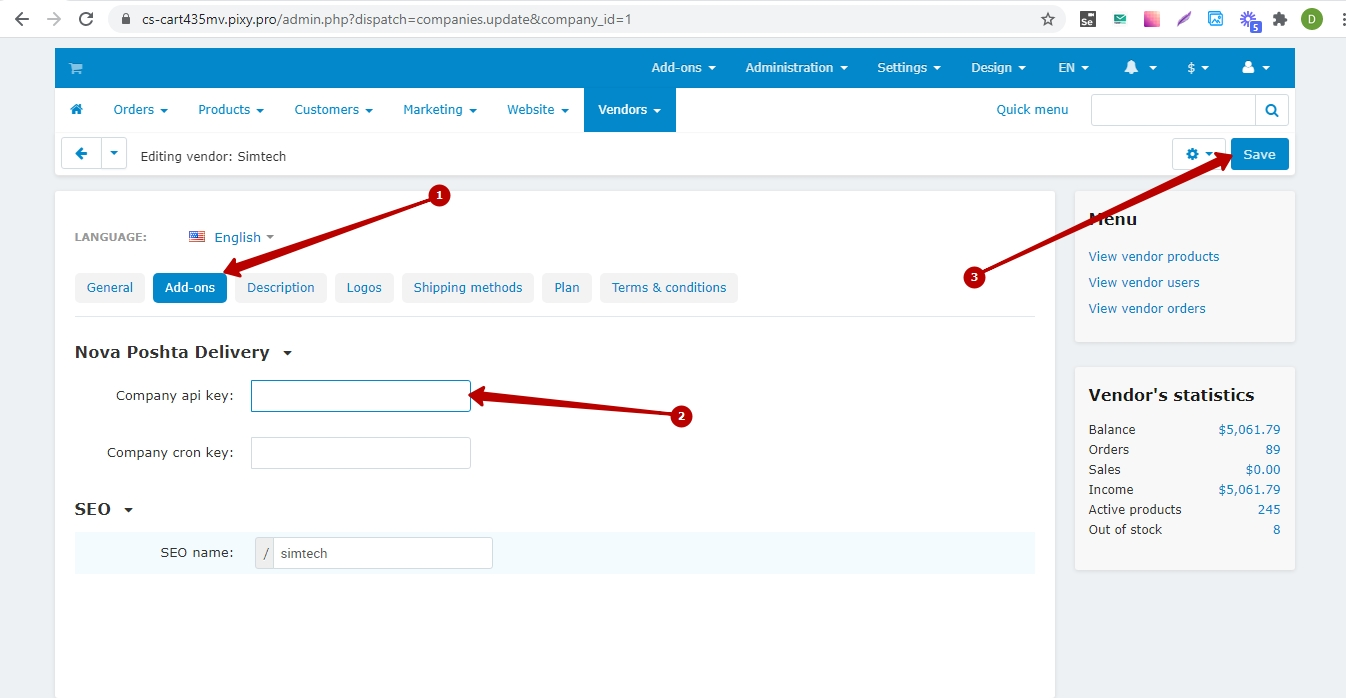
Similarly, you need to add an API key for each of your sellers whose goods can be delivered using the “Nova Poshta” delivery service.
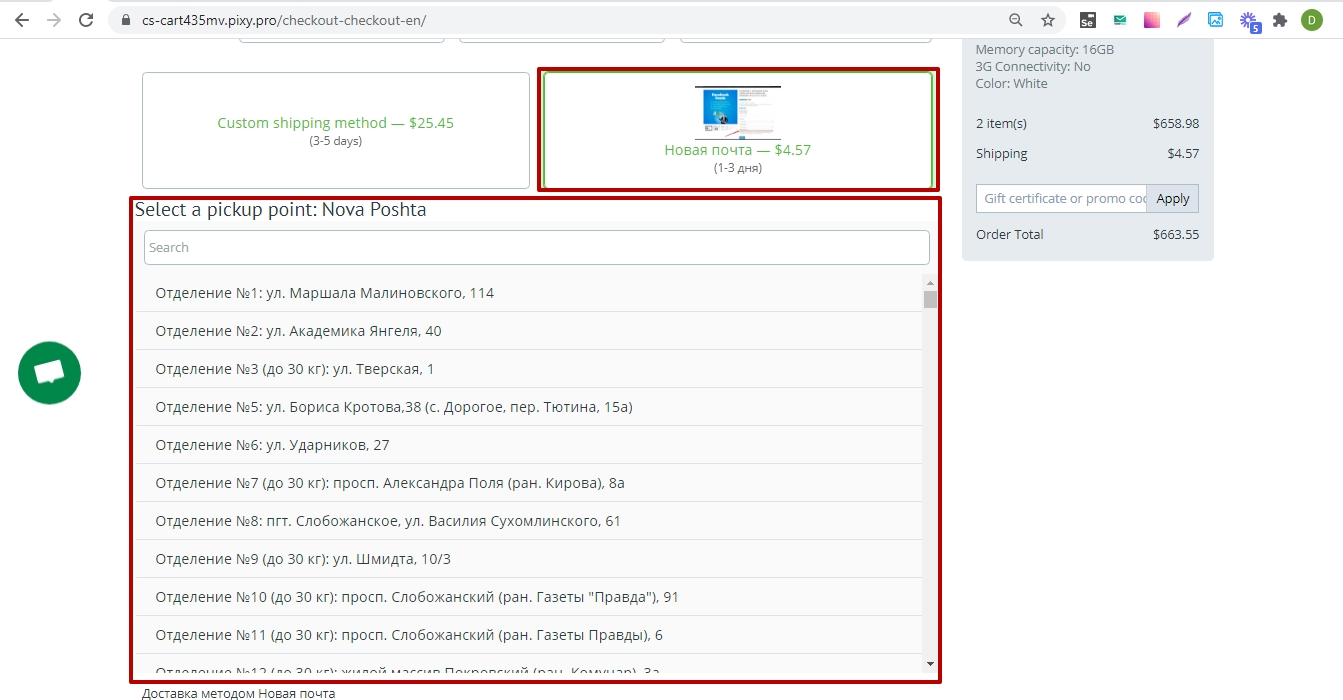
Save the settings and now your customers can order the product, arrange the delivery through the "Nova poshta" delivery service.
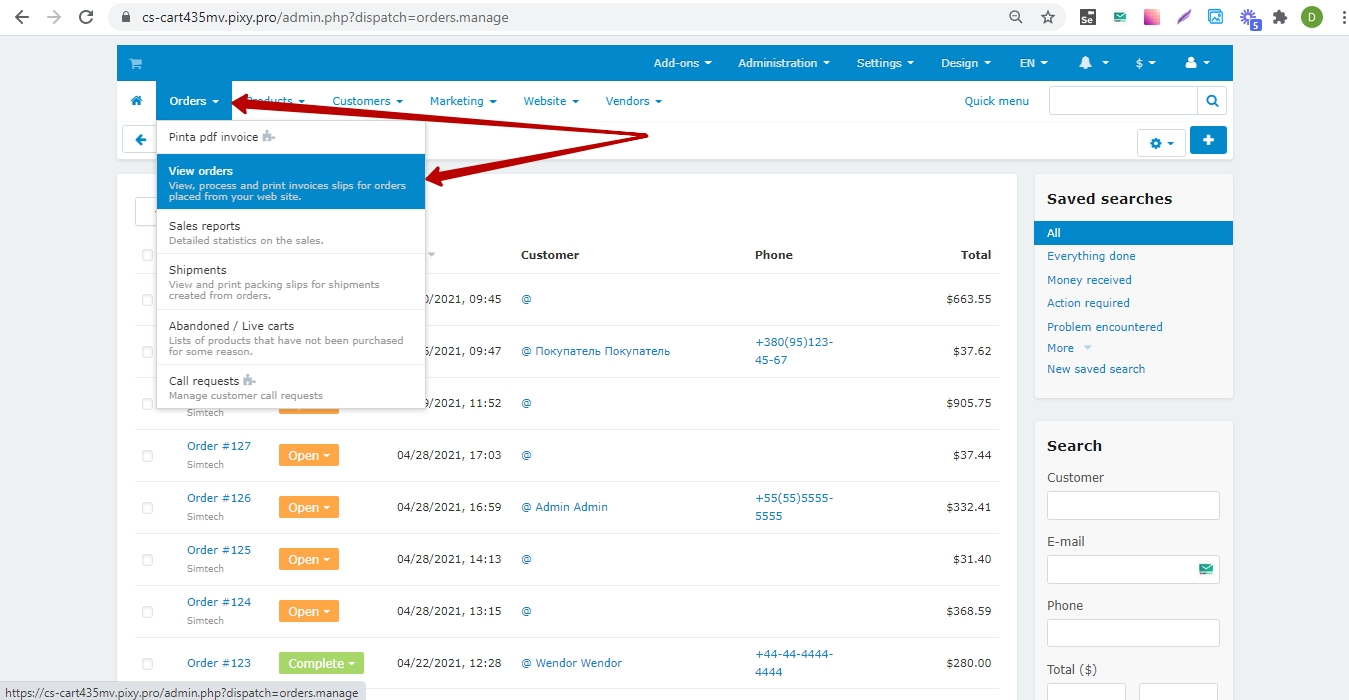
After your client has placed an order on your website and indicated the delivery address by service "Nova poshta", you can create a Nova poshta's invoice for this order in the admin panel of your website. To do this, go to the main menu of admin panel Orders > View orders.
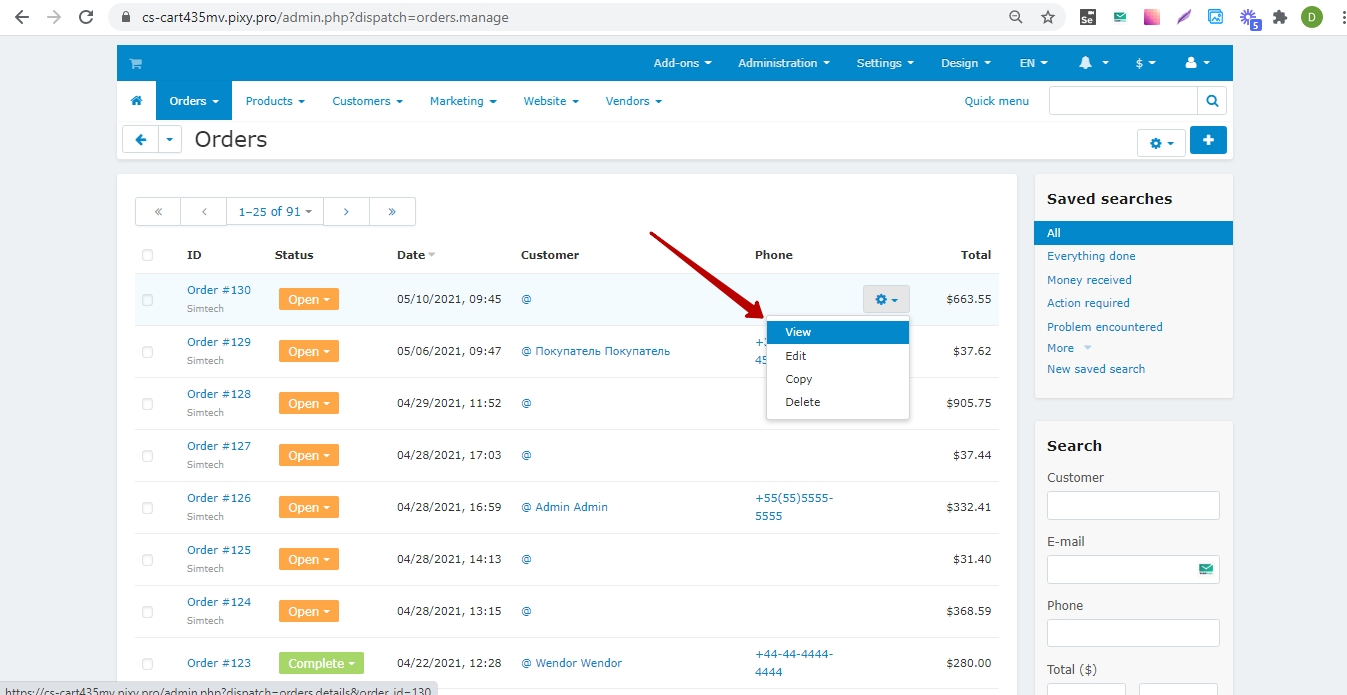
On the Orders page, opposite the required order in the list of options, select View (3).
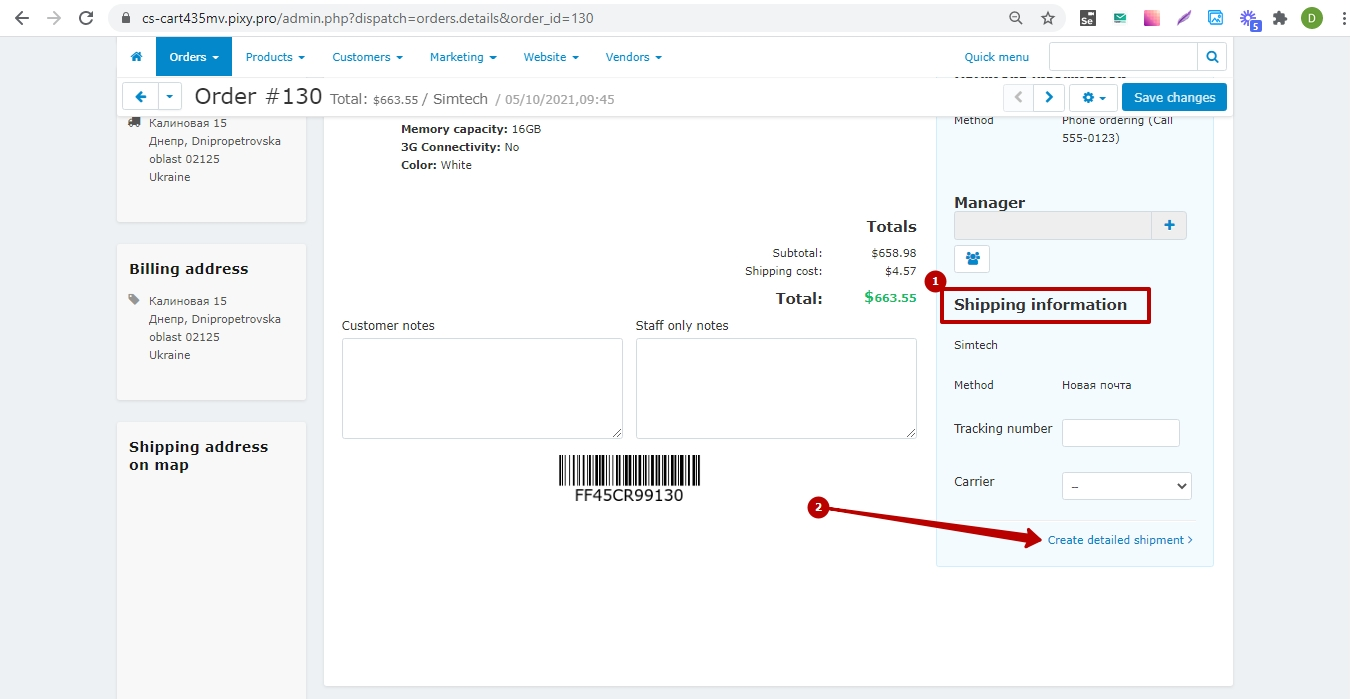
Next, on the order page, in the Shipping information block (1), select Create detailed shipment (2).
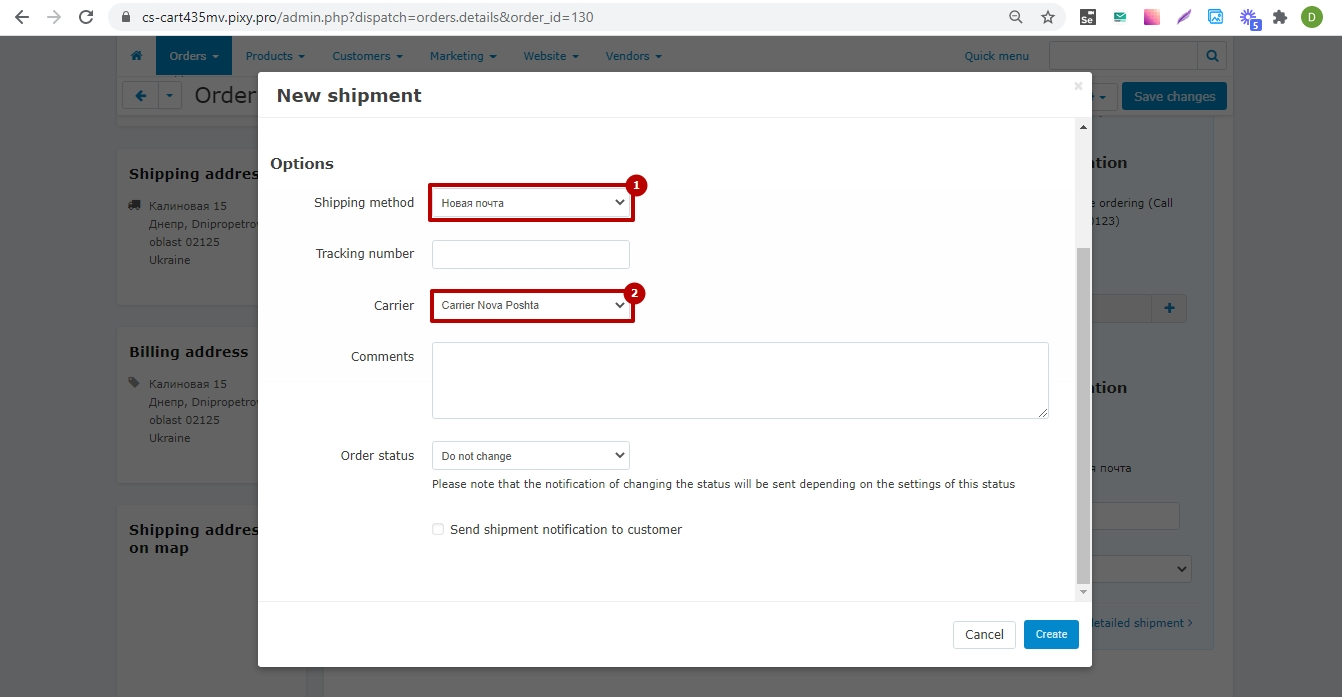
On the New shipment window, in the Options block, select the values that correspond to the "Nova poshta" shipping method:
in the Shipping method field - select Nova poshta (1).
in the Carrier field - select Carrier Nova poshta (2).
You can also specify other information - Comments, Order status, confirm sending a notification to the client.
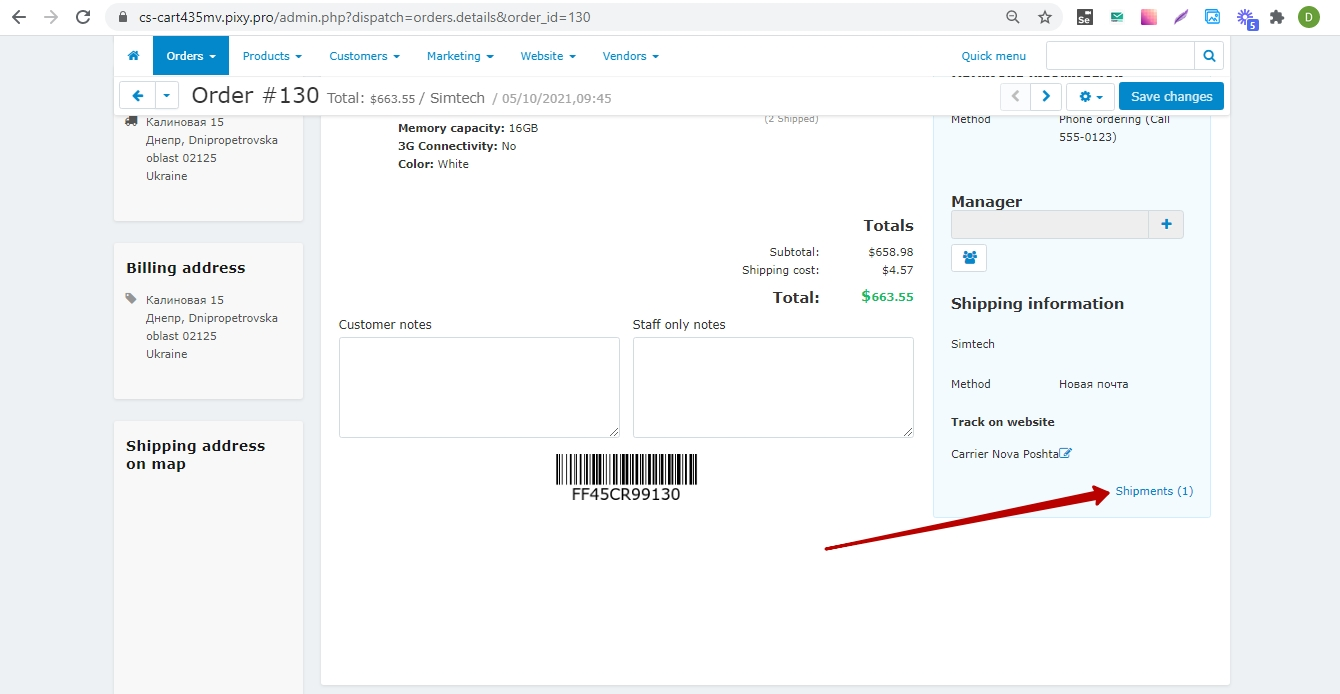
After creating a shipment on the Order page, click Shipments.
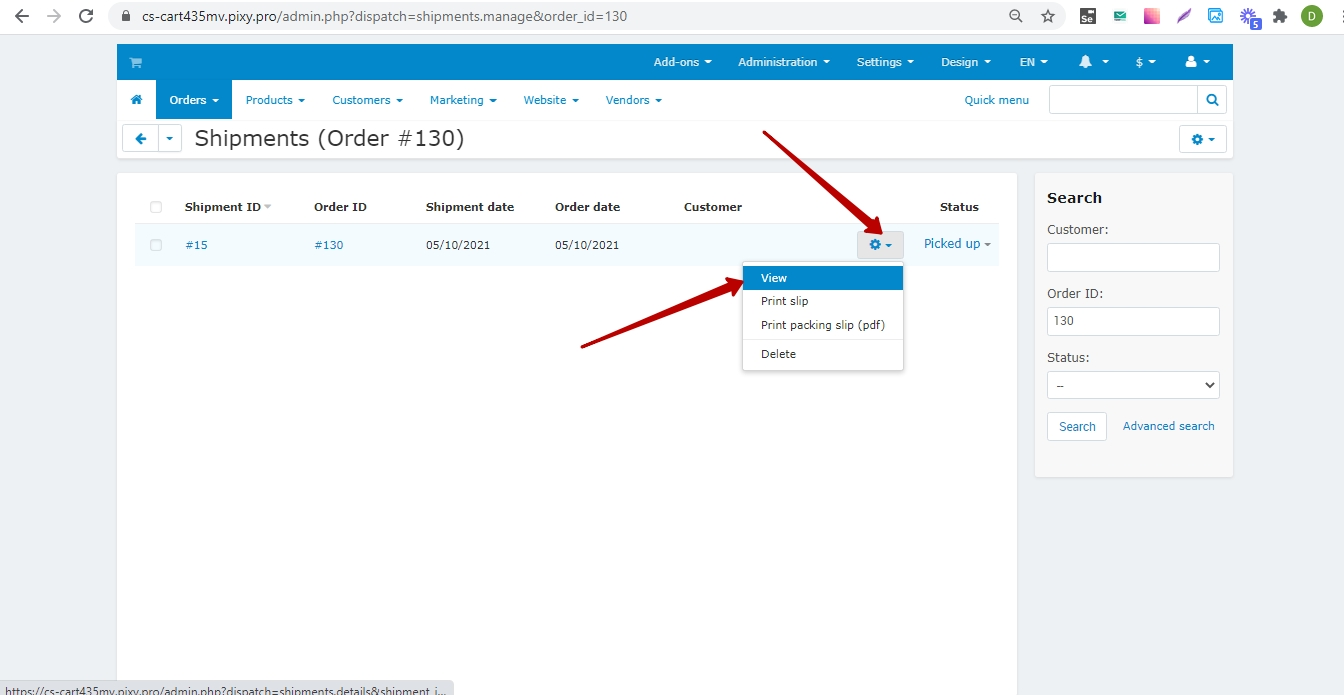
On the Shipment page in the list of options, select View.
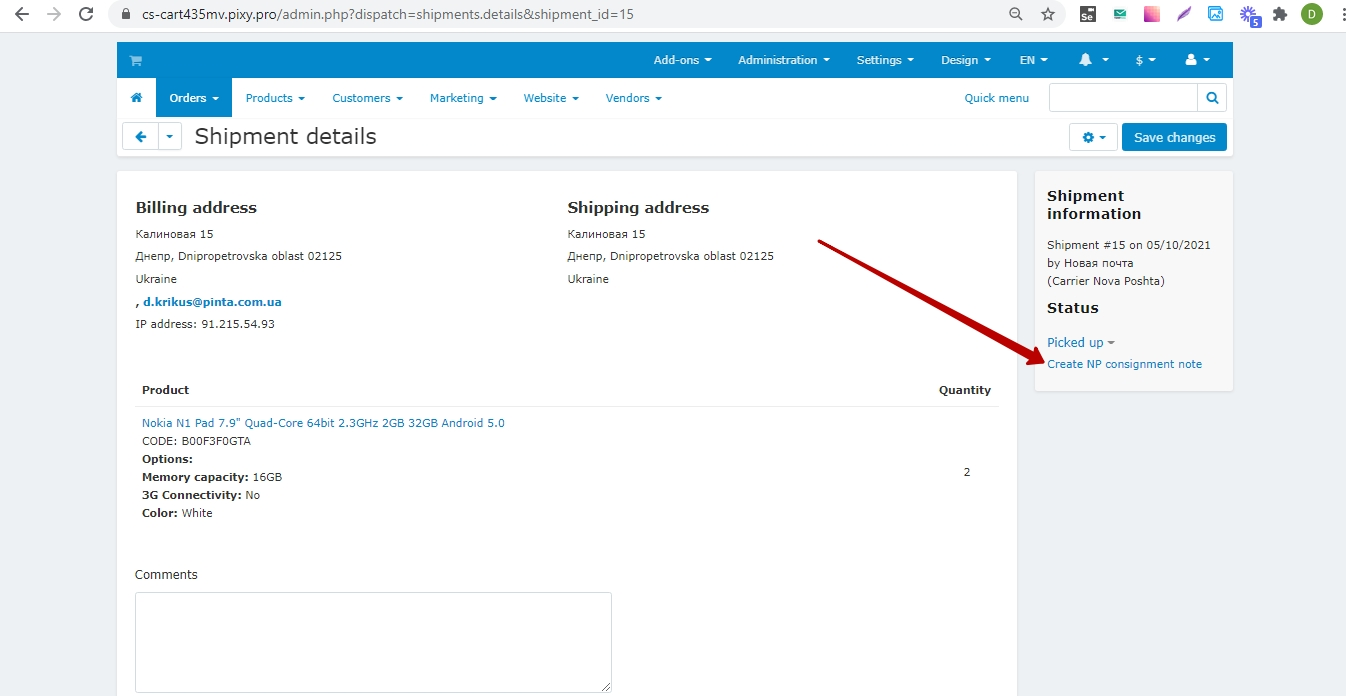
Next, to create an invoice on the Shipment details page, click Create NP consignment note in the Shipment information block (right part of the page).
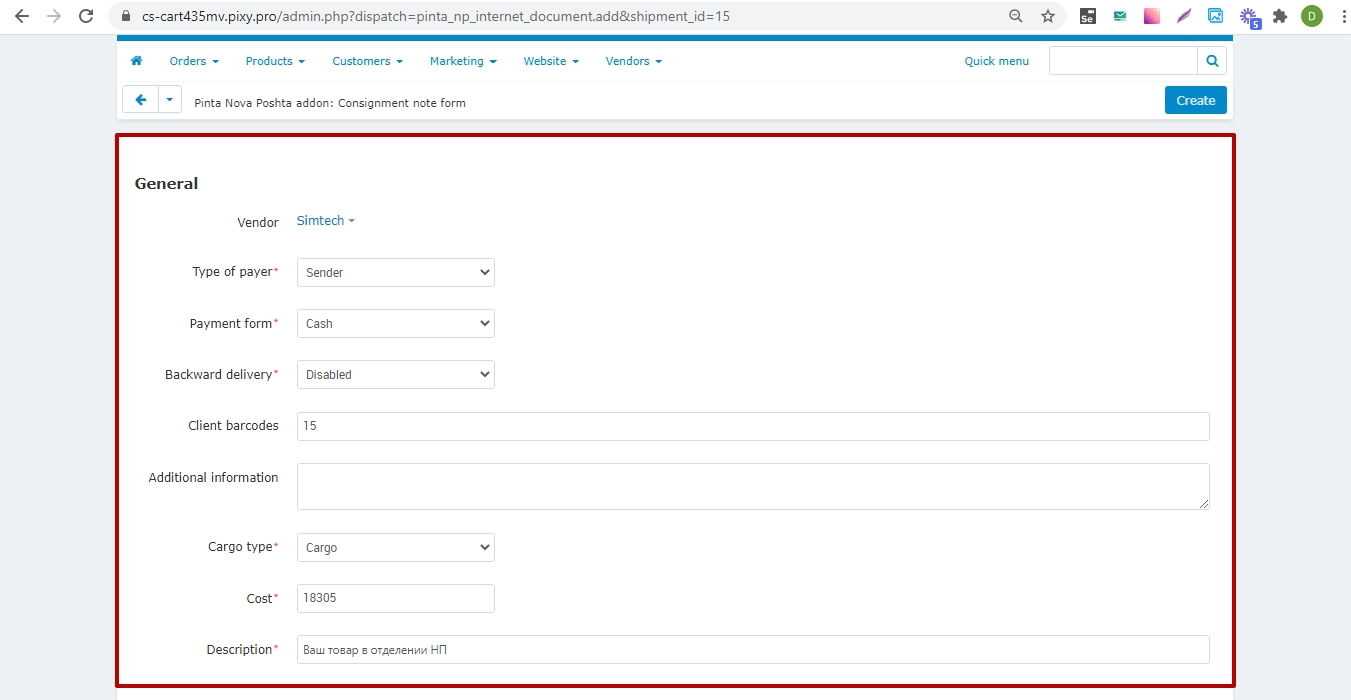
The page for creating a Nova poshta’s invoice consists of blocks:
General.
The General block displays general information about shipping conditions, type of cargo, and its cost.
The fields can be edited.
The required fields are marked with an asterisk.
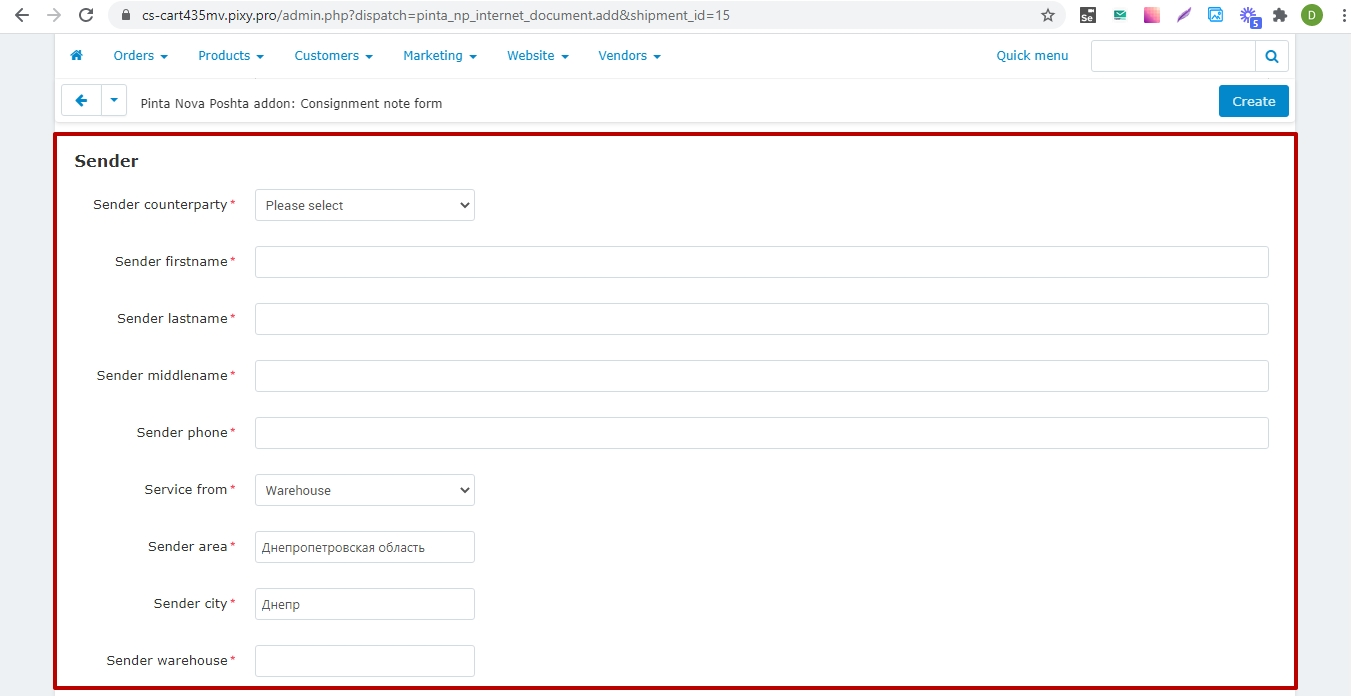
Sender.
The Sender block displays the data of the sender of the goods.
The fields can be edited.
The required fields are marked with an asterisk.
Recipient.
The Recipient block displays the data of the recipient of the goods.
The fields can be edited.
The required fields are marked with an asterisk.

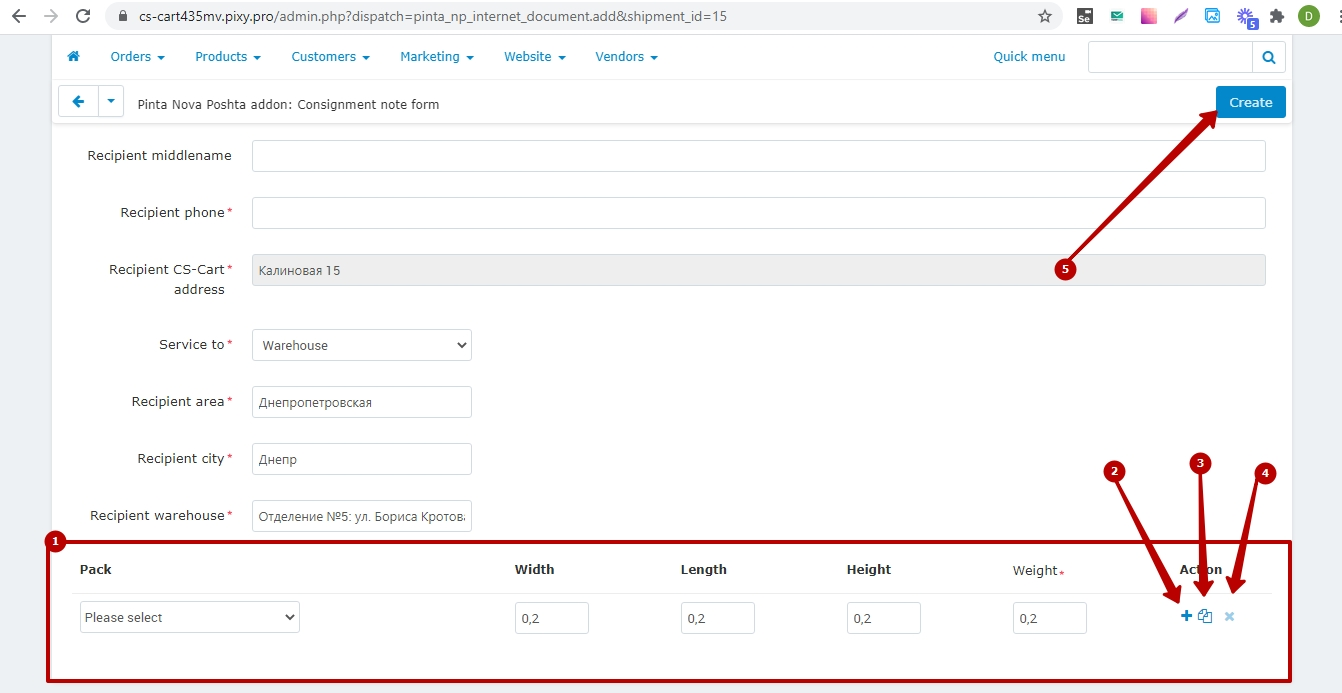
Pack.
In the Pack block, you can add / duplicate / remove a place for a cargo with an indication of its weight and dimensions.
To add a place for a cargo, click on the "+" button (2), for duplication - the button (3), to delete - the "x" button (4).
After filling in all the data, click the Create button (5).
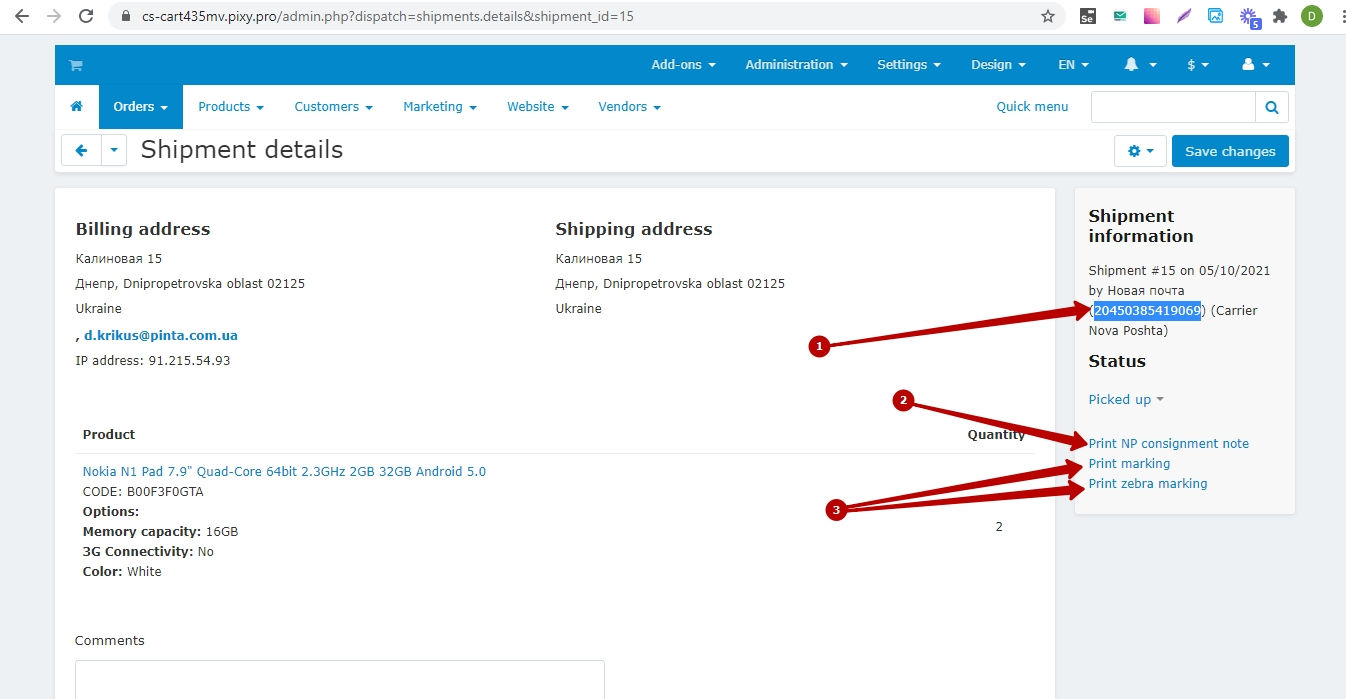
After creating the invoice, the invoice number (1) is displayed on the Shipment details page.
If you want to view or print the created invoice, select the Print NP consignment note (2).
You can also view or print the markings by selecting Print marking or Print zebra marking (3).
The Nova poshta’s invoice which you created is displayed.
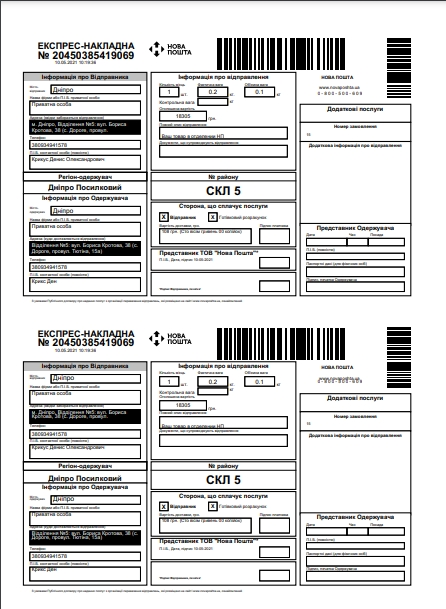
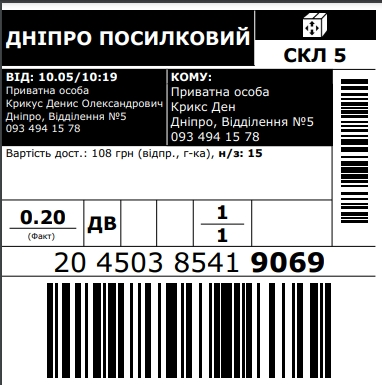
The Nova poshta’s marking is displayed.
Now you can send goods to your customers using the delivery service "Nova poshta" and create invoices directly in the admin panel of your online store.
VIDEO INSTRUCTION