Instruction Nova Poshta - Simple Delivery for PrestaShop
INSTRUCTION NOVA POSHTA - SIMPLE DELIVERY FOR PRESTASHOP 1.7
Download and install
Download the plugin archive from the Shop Pinta store and save it on your computer.
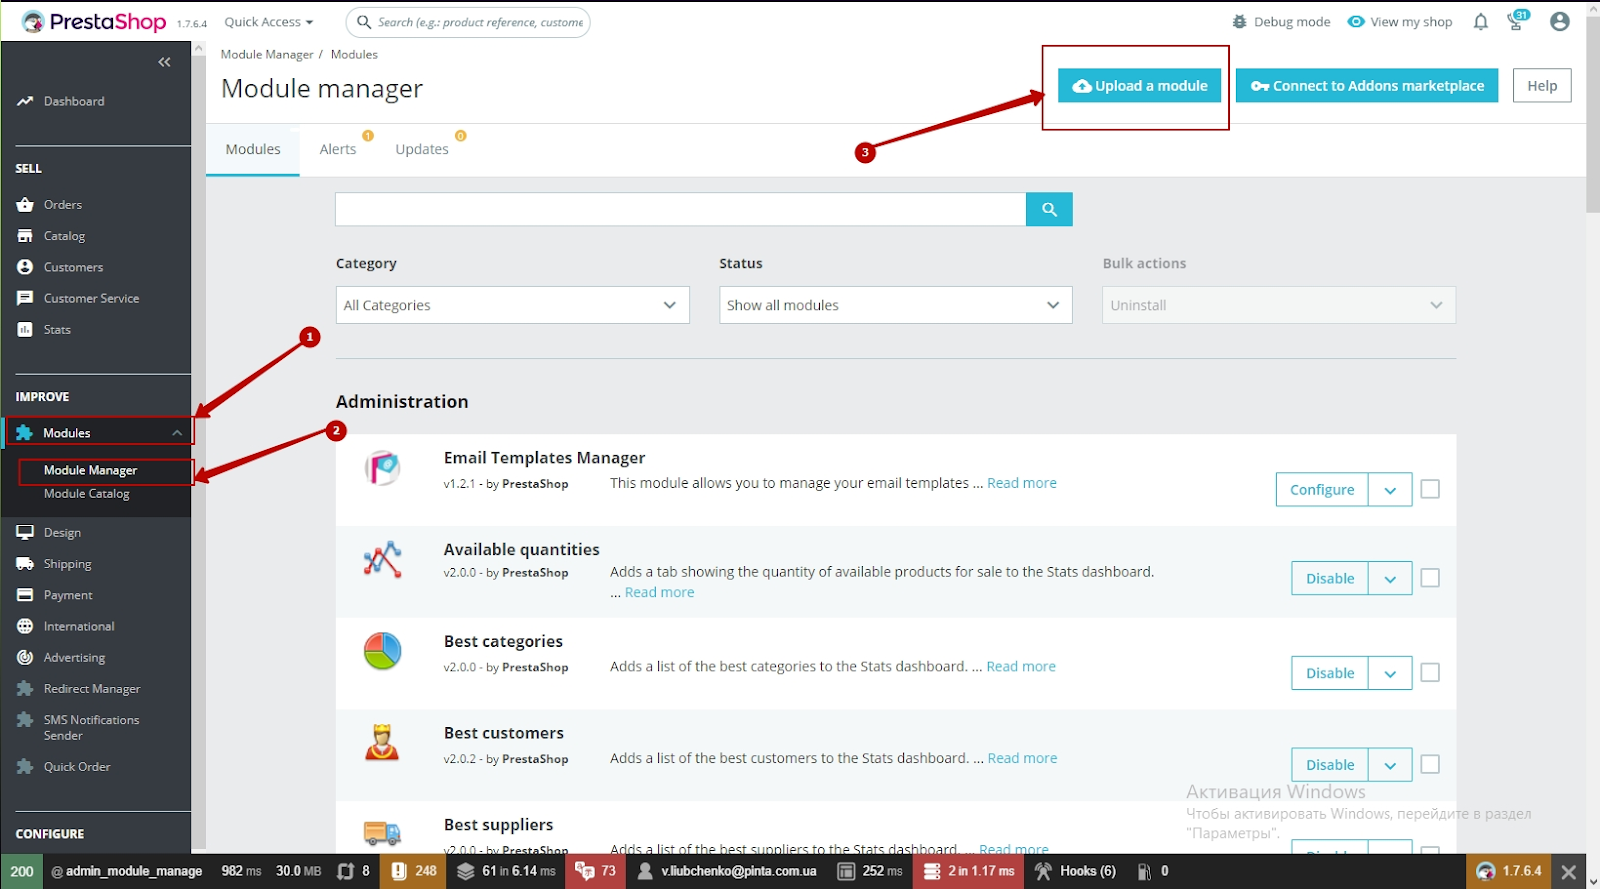
In the admin panel of your website, select Modules (1) > Module Manager (2).
In the Module Manager block, click the Upload a module button (3).
Download the plugin archive from the Shop Pinta store and save it on your computer.
In the admin panel of your website, select Modules (1) > Module Manager (2).
In the Module Manager block, click the Upload a module button (3).
In the opened window, click on select file (1).
Next, select the plugin archive (2) and click the Open button (3).

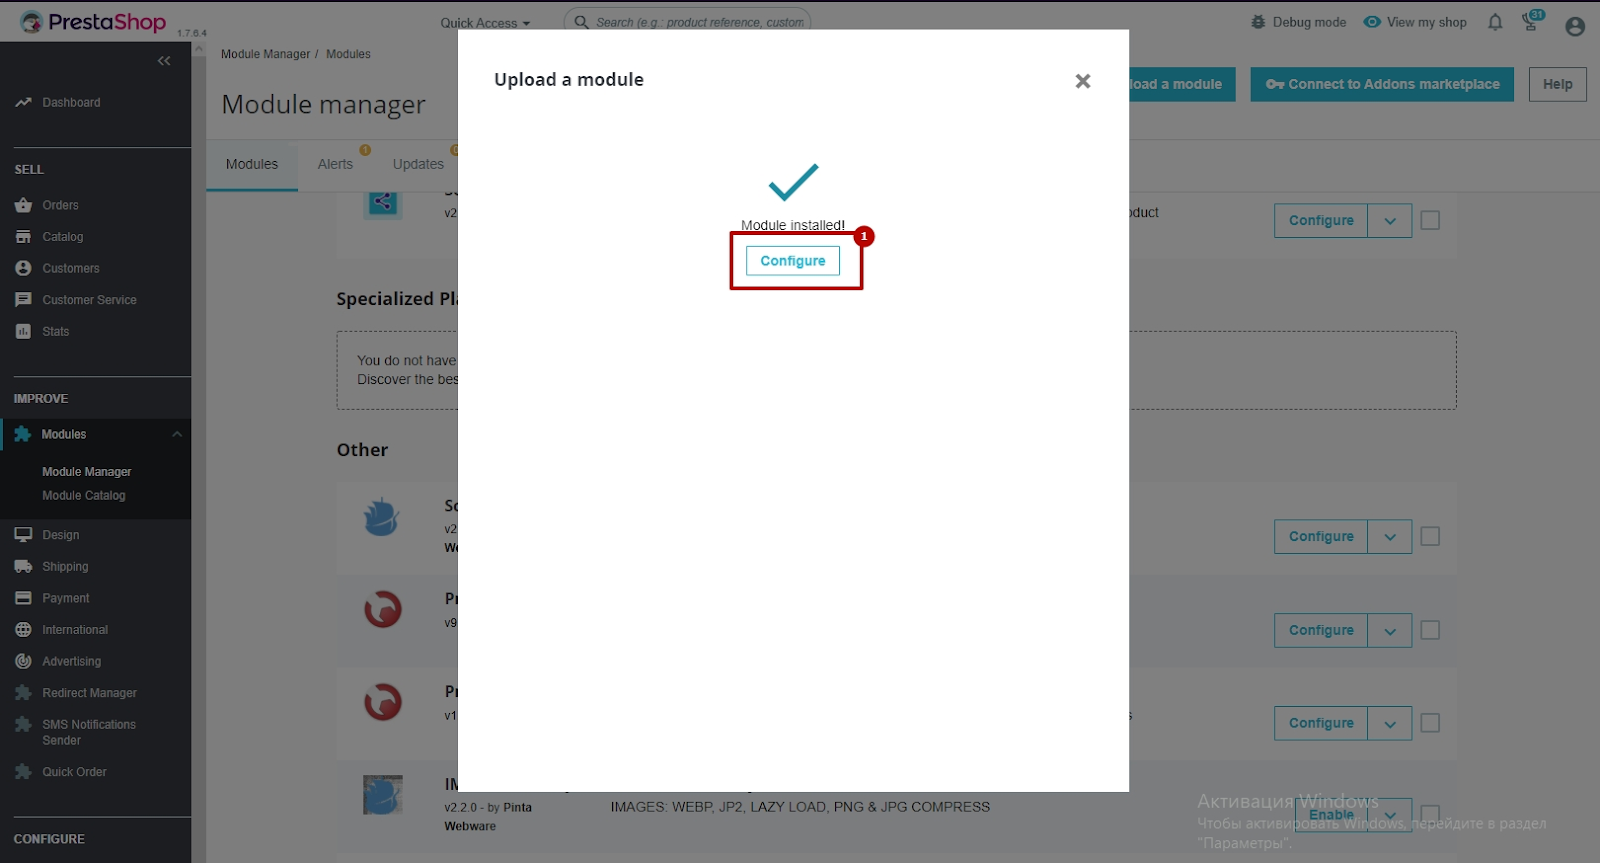
To configure the plugin, click the Configure button (1).
Plugin page
The plugin page consists of four blocks:
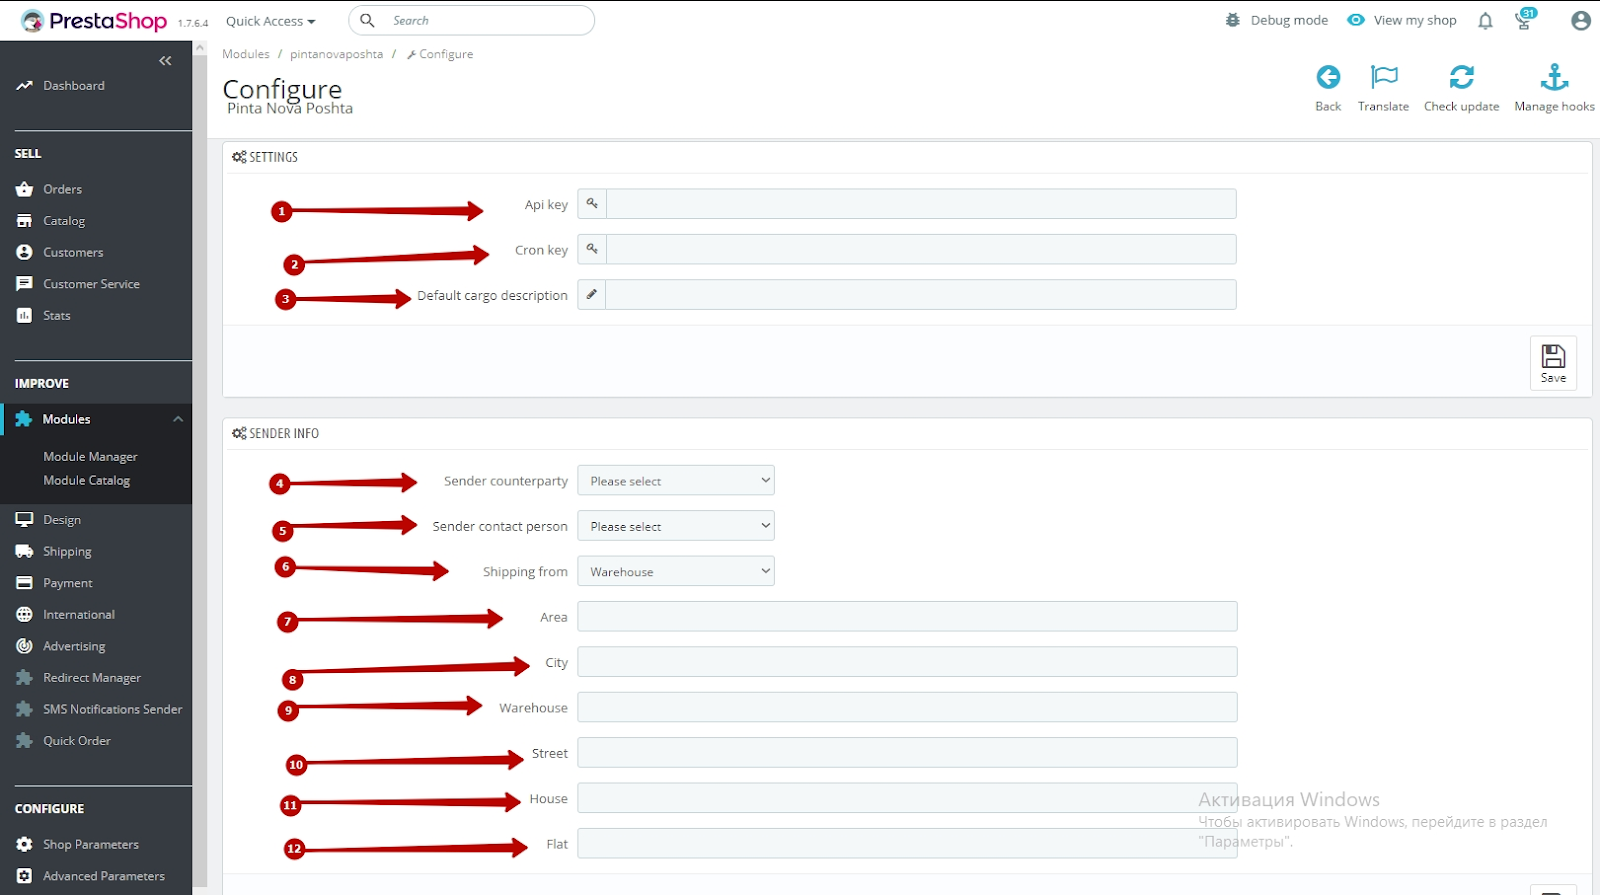
The SETTINGS block consists of fields:
API key (1) - for entering the API key copied on the Nova Poshta's business account after registration.
Cron key (2) - to copy the Cron key.
Default cargo description (3) - to add a description of the cargo, by default.
The SENDER INFO block is filled after updating the databases (the REFERENCES block, the COUNTERPARTIES block).
This block consists of fields:
Sender counterparty (4) - to select the sender that will be displayed, by default, in the Nova poshta's invoice.
Sender contact person (5) - to select a contact person that will be displayed, by default, in the Nova poshta's invoice.
Shipping from (6) - to select where the goods will be sent from, by default.
Area (7) - to select the region where the goods will be sent from, by default.
City (8) - to select the city where the goods will be sent from, by default.
Warehouse (9) - to select the address of the Nova poshta's warehouse where the goods will be sent from, by default.
Street (10) - to select the street where the goods will be sent from, by default. This field is optional.
House (11) - to select the house where the goods will be sent from, by default. This field is optional.
Flat (12) - to select the apartment from where the goods will be sent from, by default. This field is optional.
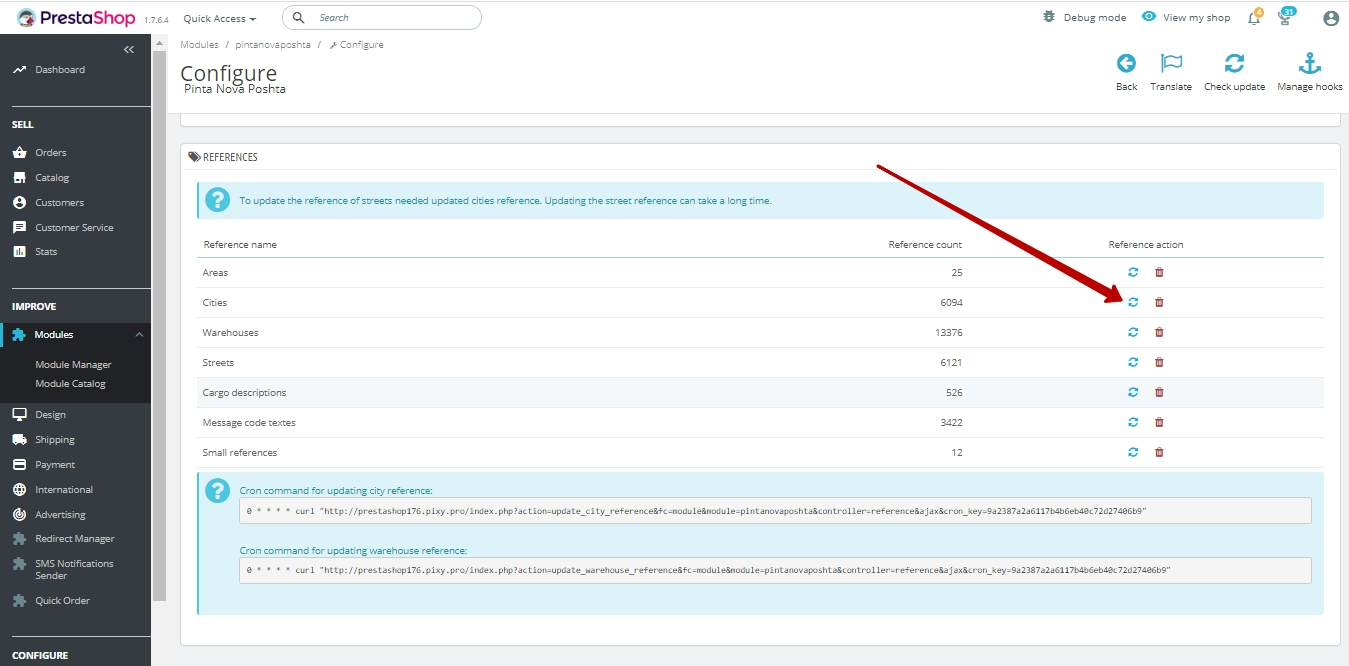
The REFERENCES block.
The REFERENCES block displays a table for updating various Nova poshta's databases.
The COUNTERPARTIES block.
In the COUNTERPARTIES block, a table is displayed to update the list of counterparties, which is necessary to check the correctness of the API key.
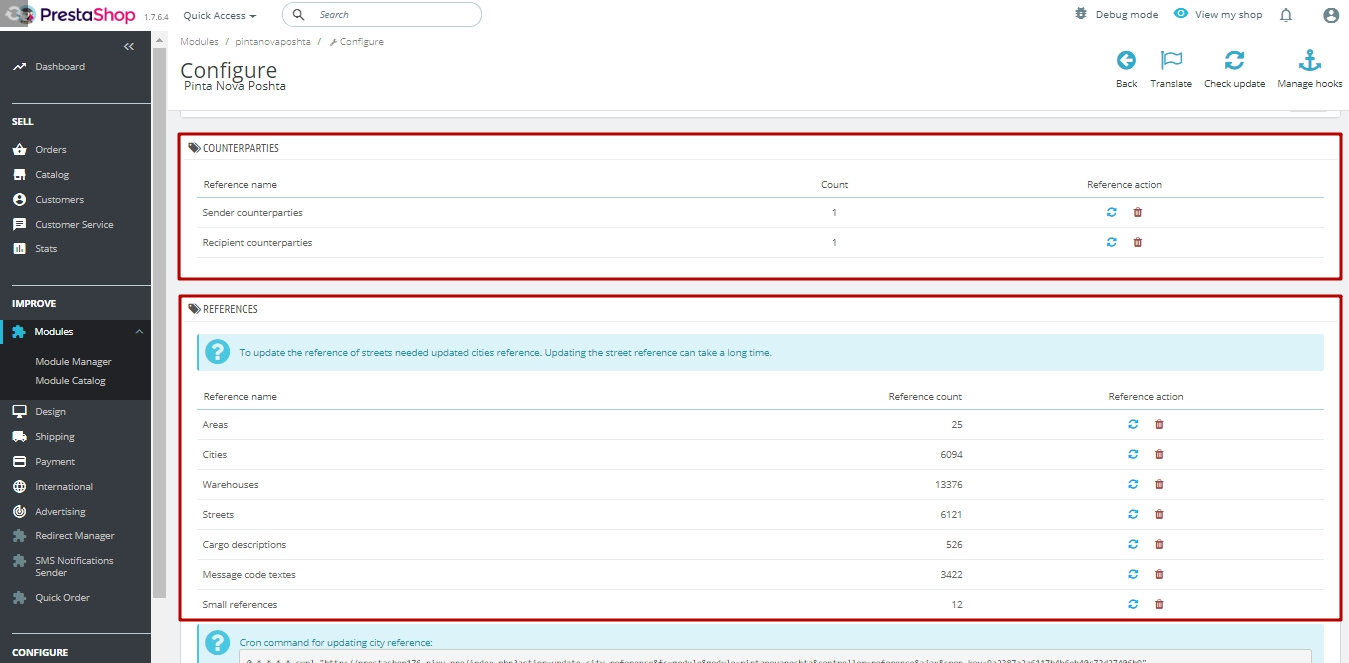
To update the selected database, click the Update button.
In addition, you can use cron-commands and set up a Cron task for automation the process of updating directories.
Save the settings and now your customers can order the product, arrange the delivery through the delivery service "Nova poshta".

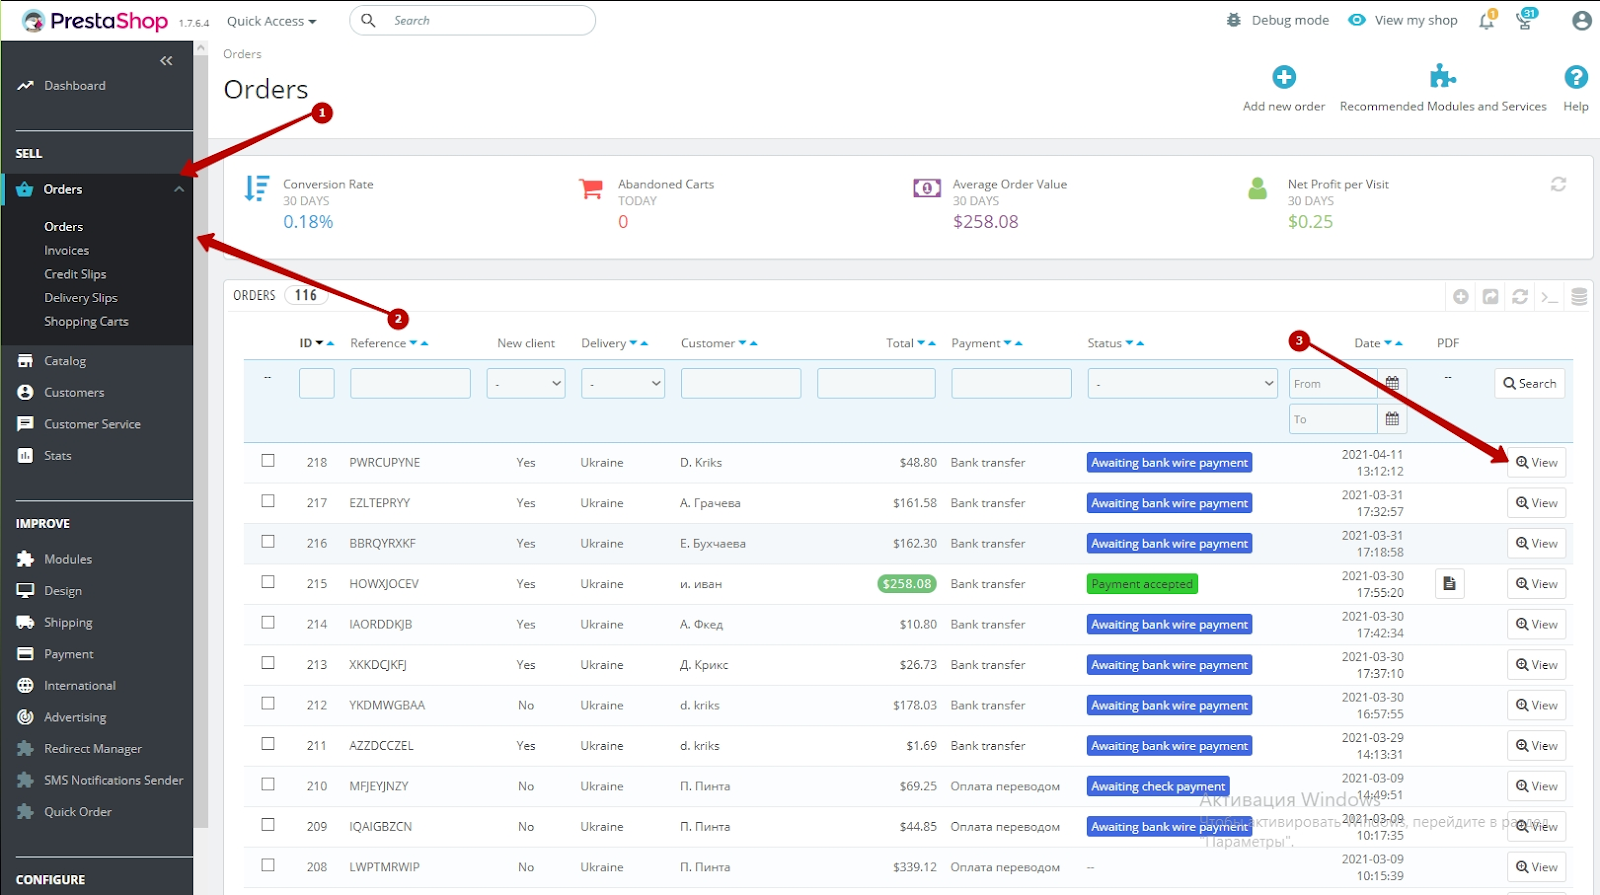
After your client has placed an order on your website and indicated the delivery address by service "Nova poshta", you can create a Nova poshta's invoice for this order in the admin panel of your website. To do this, go to the main menu of admin panel Orders (1) > Orders (2) and click the View button (3) opposite the required order.
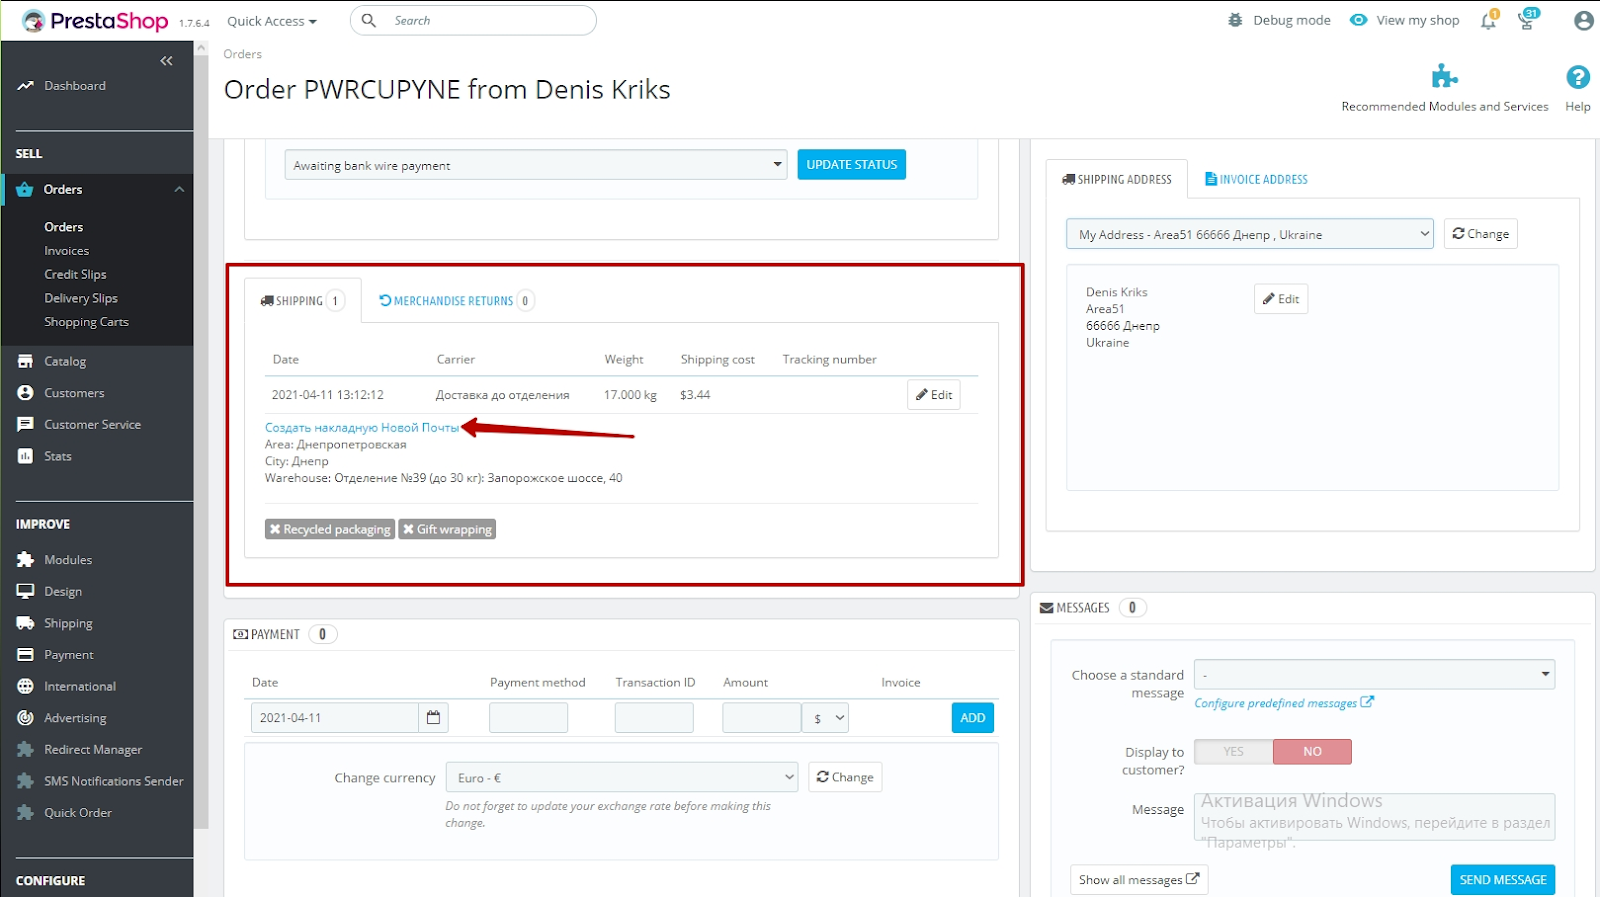
In the order form, click the Create Nova poshta's invoice button.
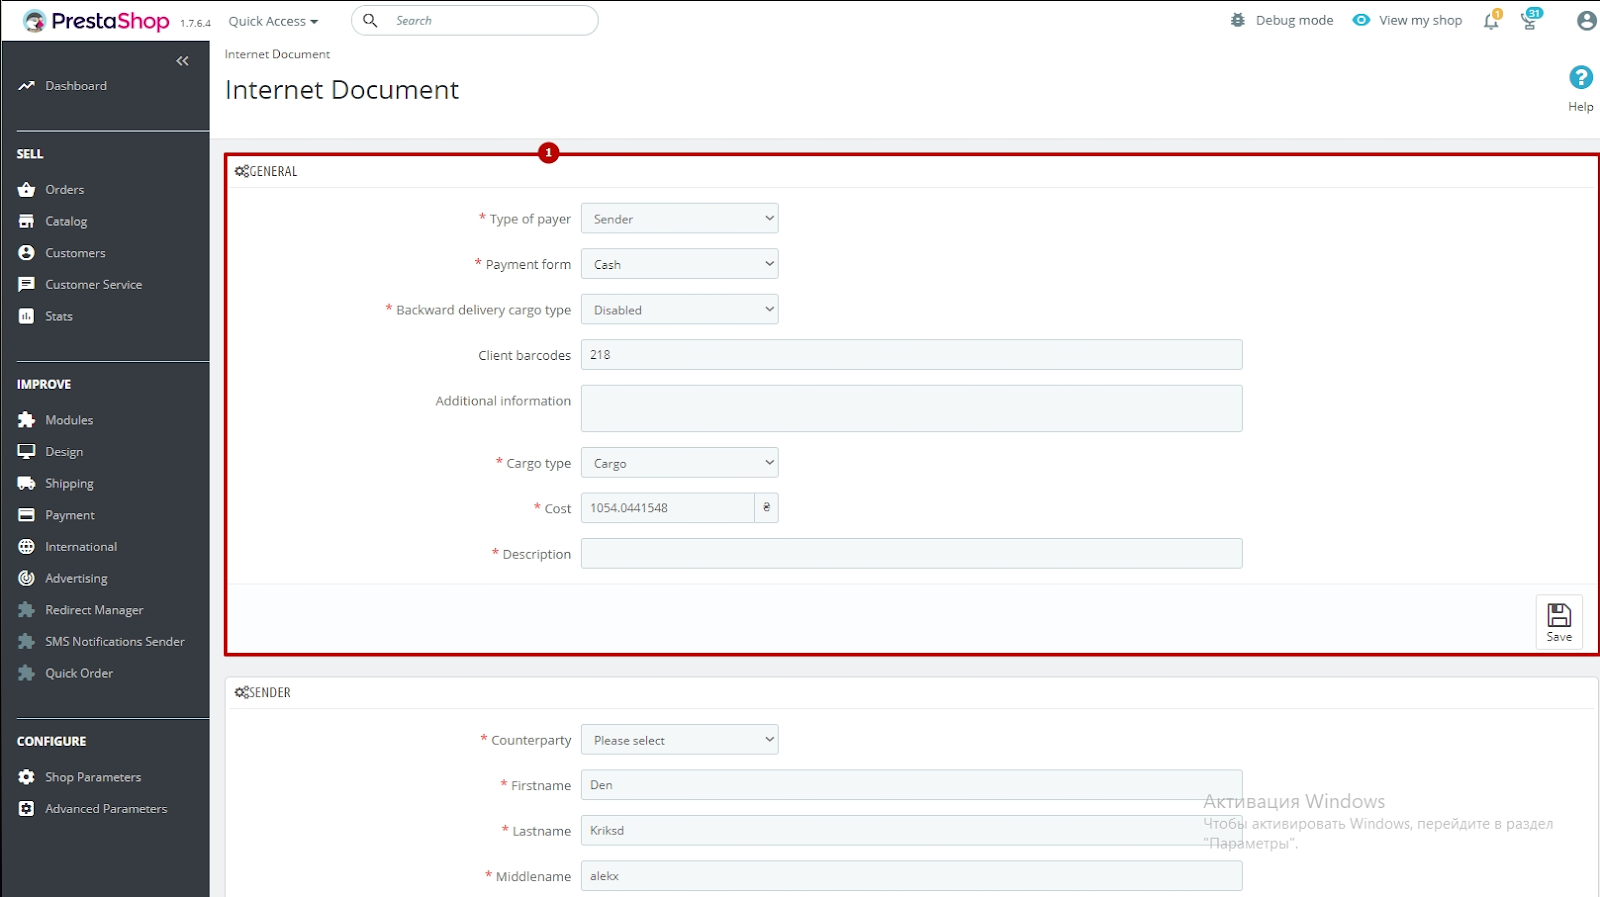
The following blocks are displayed on the page for creation Nova poshta's invoice:
The GENERAL block (1).
The GENERAL block displays a general information about the delivery conditions, type of cargo, and its cost.
The fields can be edited.
The required fields are marked with an asterisk.
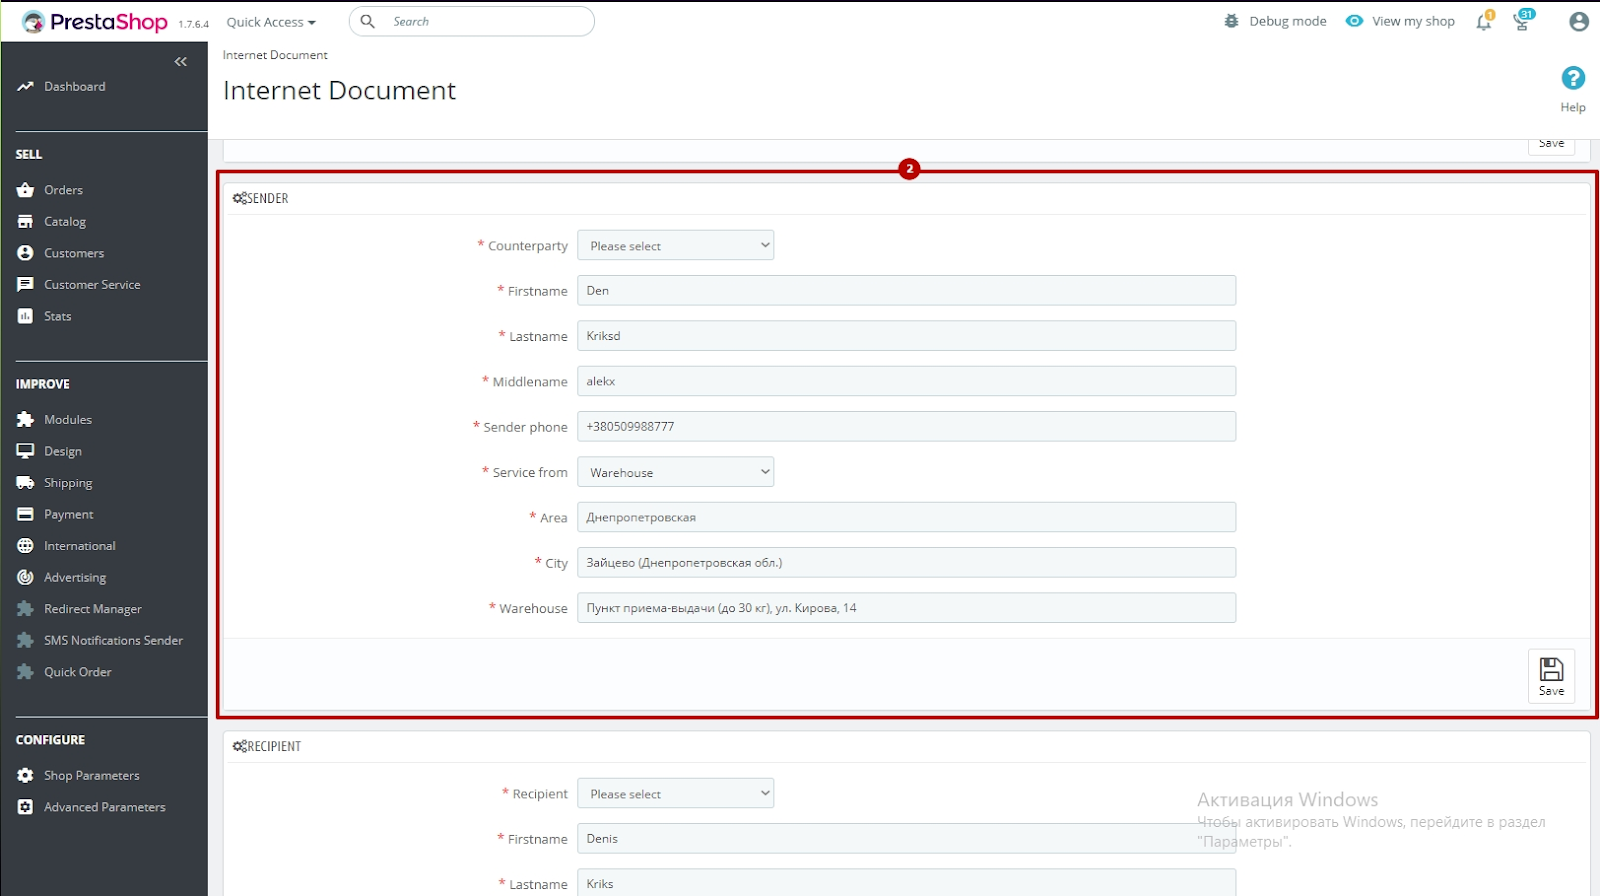
The SENDER block (2).
The SENDER block displays the data of the sender of the goods.
The fields can be edited.
The required fields are marked with an asterisk.
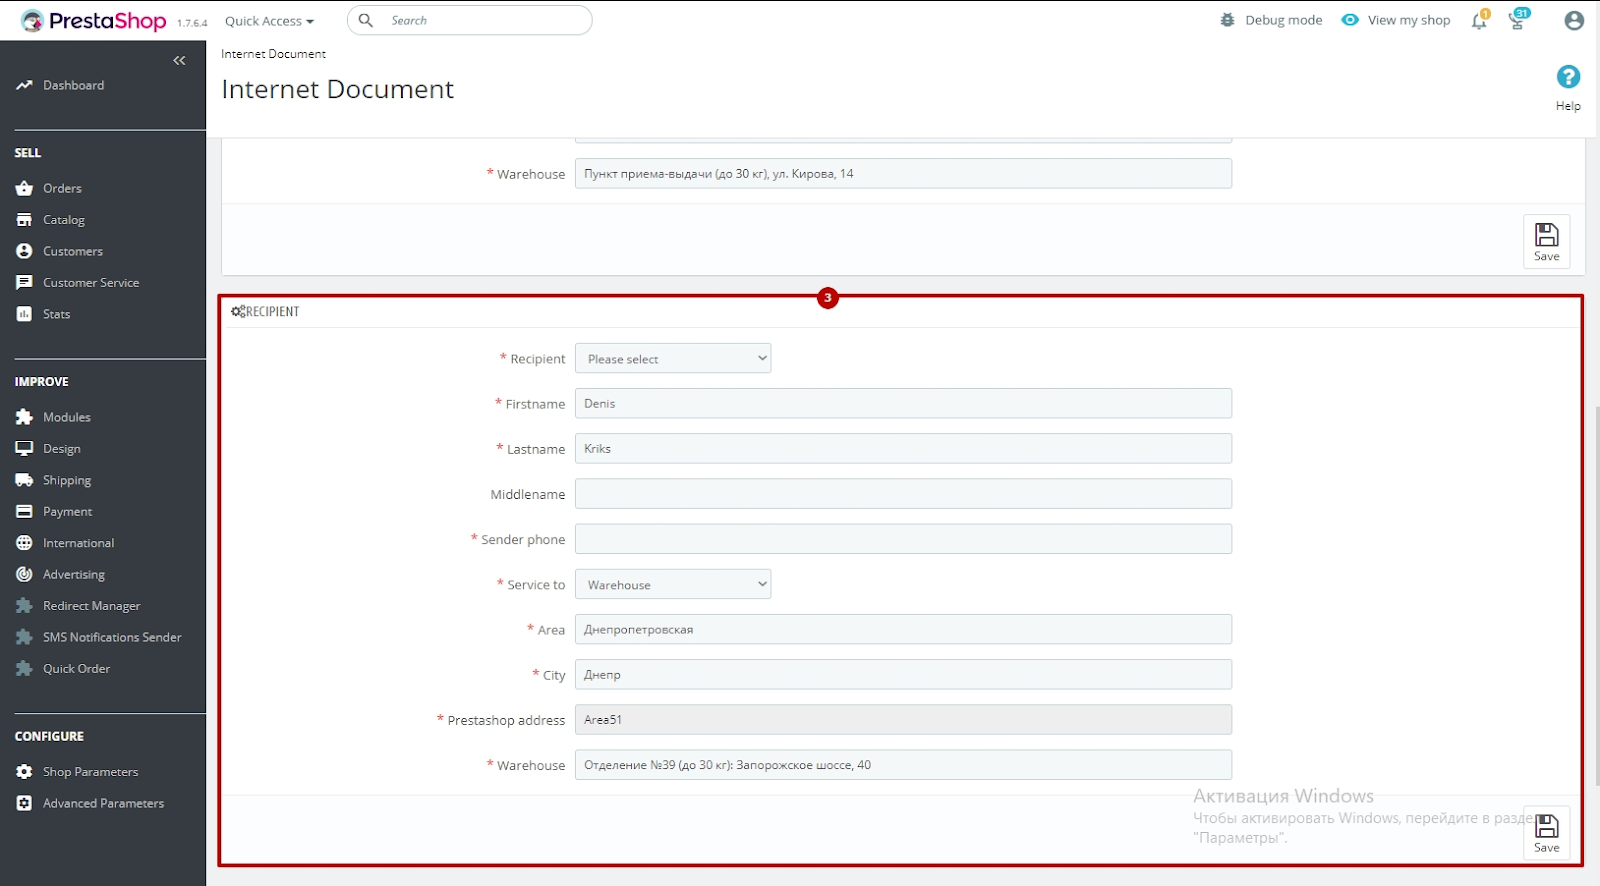
The RECIPIENT block (3).
The RECIPIENT block displays the data of the recipient of the goods.
The fields can be edited.
The required fields are marked with an asterisk.
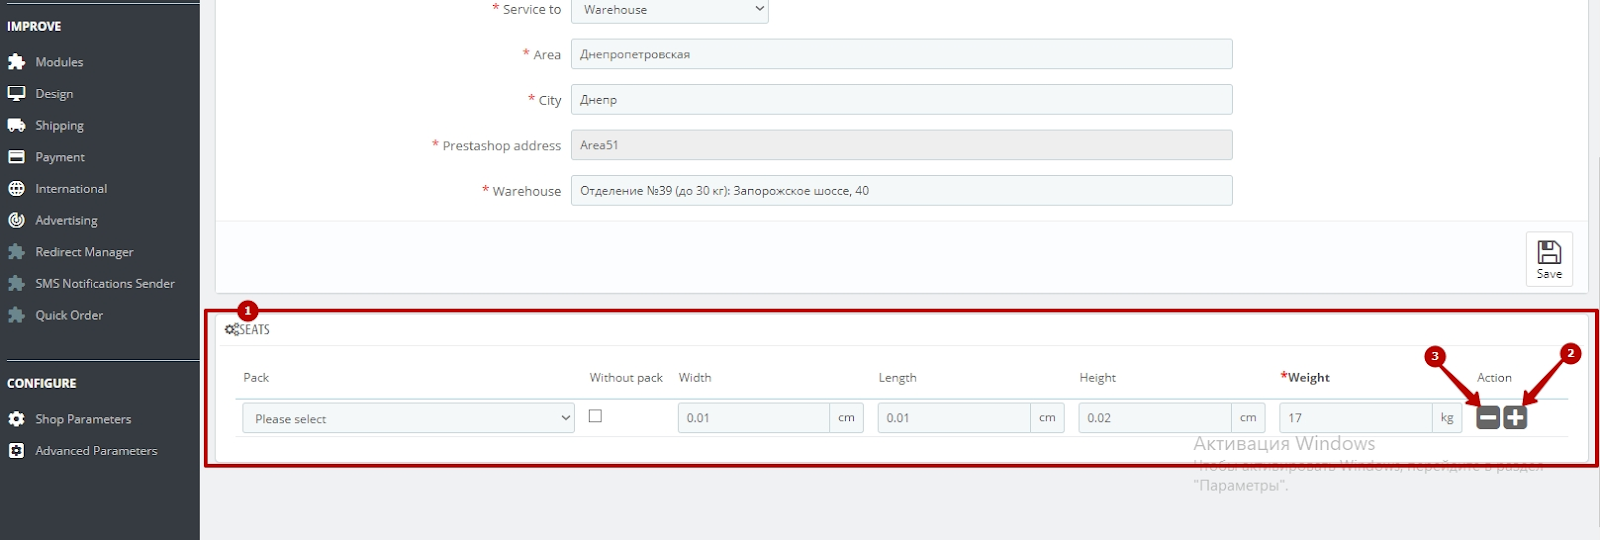
The SEATS block (1).
In the SEATS block, you can add / remove cargo space with indication of its weight and dimensions.
To add a place for the cargo, press the “+” button (2), to delete - press the “-” button (3).
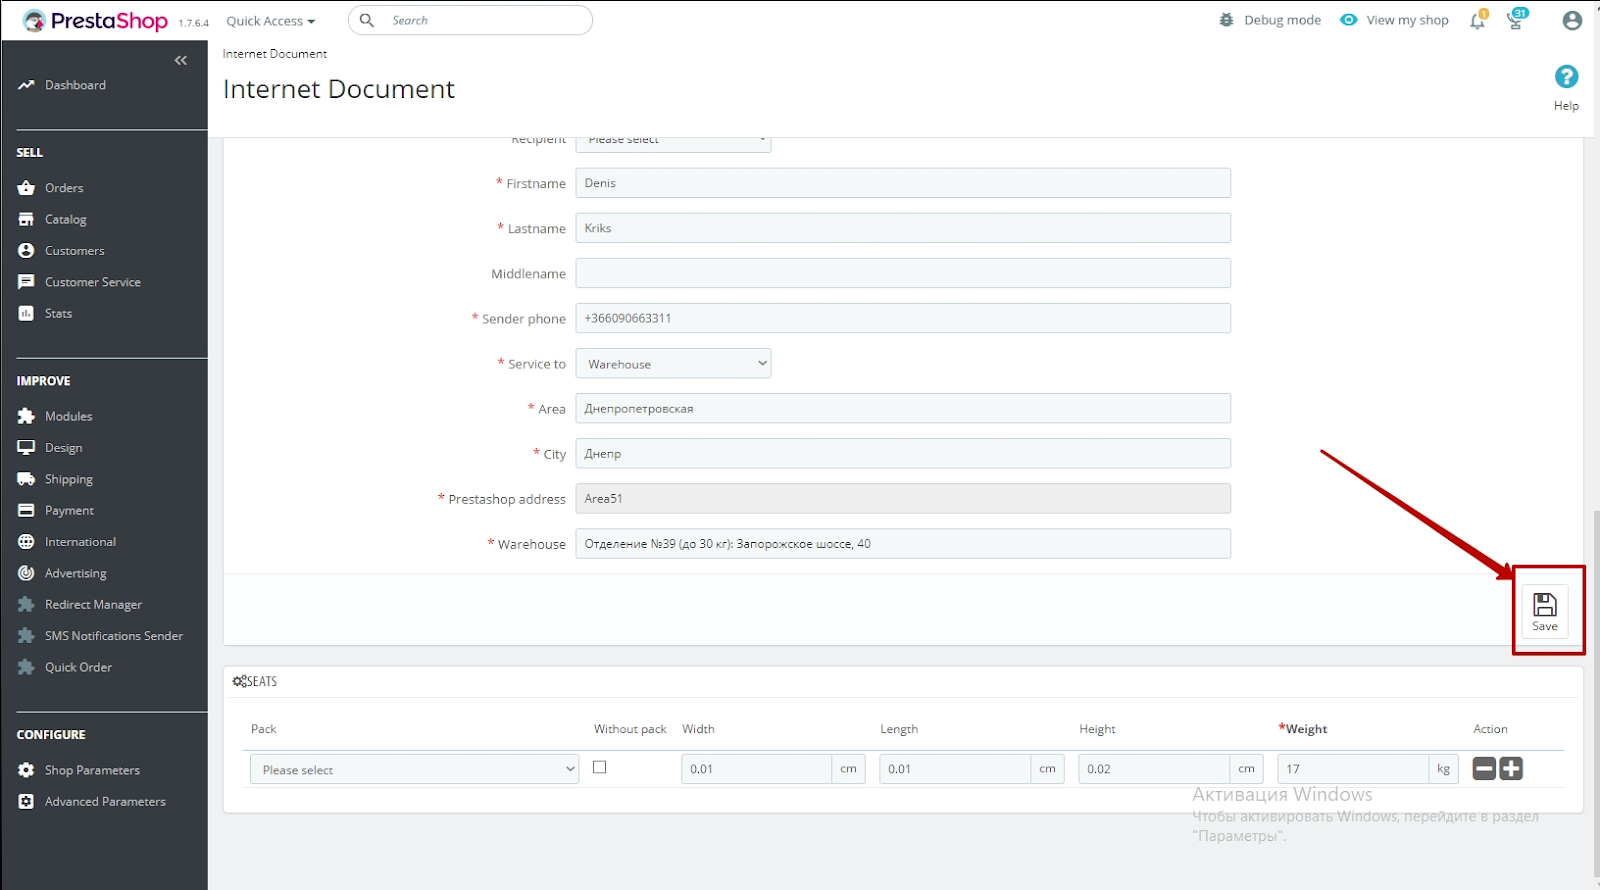
After filling in all the data, click the Save button.
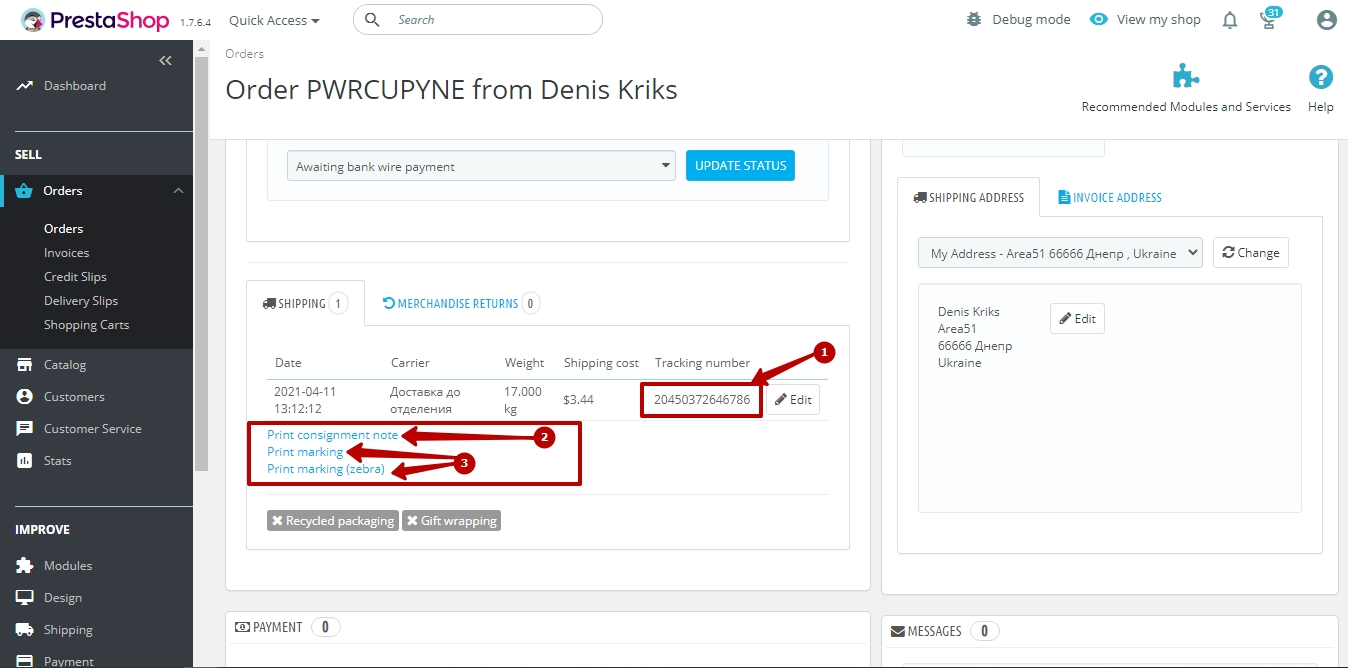
After creating the invoice, the tracking number (1) is displayed on the order page.
If you want to view or print the created invoice, select Print consignment note (2) in the list.
You can also view or print the markings by selecting Print marking or Print marking (zebra) (3).
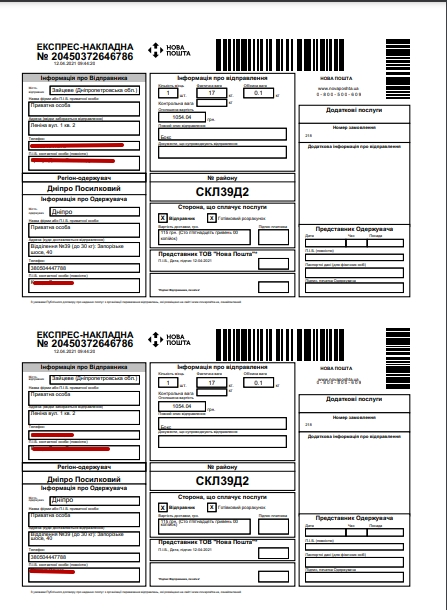
The Nova poshta’s invoice which you created is displayed.
The Nova poshta’s marking is displayed.

Now you can send goods to your customers using the delivery service "Nova poshta" and create invoices directly in the admin panel of your online store.
VIDEO INSTRUCTION