Configure PDF Invoice Plugin for CS-Cart
INSTRUCTION PDF INVOICE TO ORDER FOR CS-CART
Download and install
Download the plugin archive from Shop Pinta and save it to your computer.
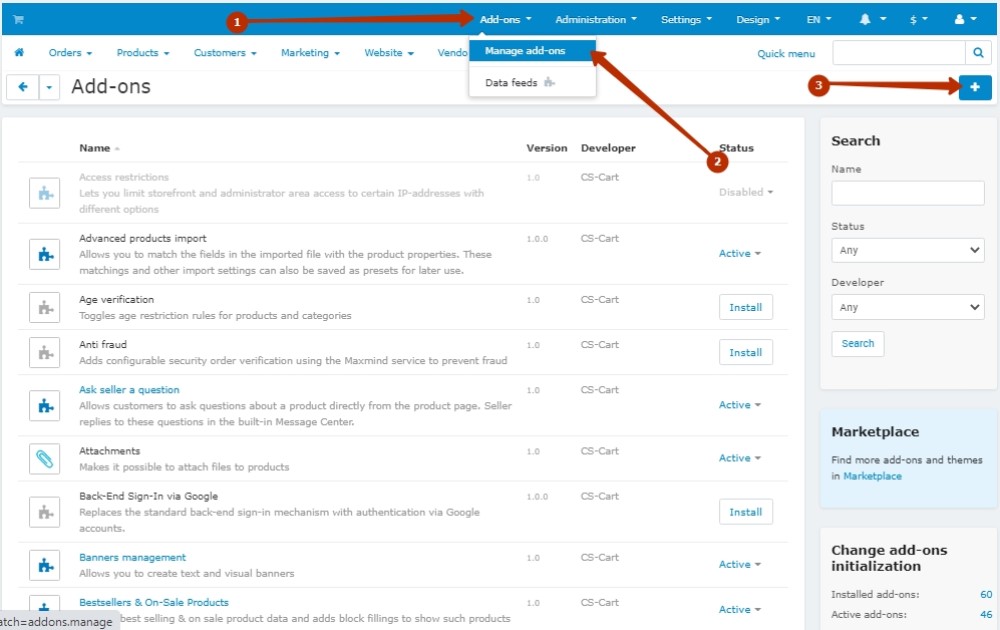
In the admin panel of your website select Add-ons (1) > Manage add-ons (2) and click Upload & install add-on button (3).
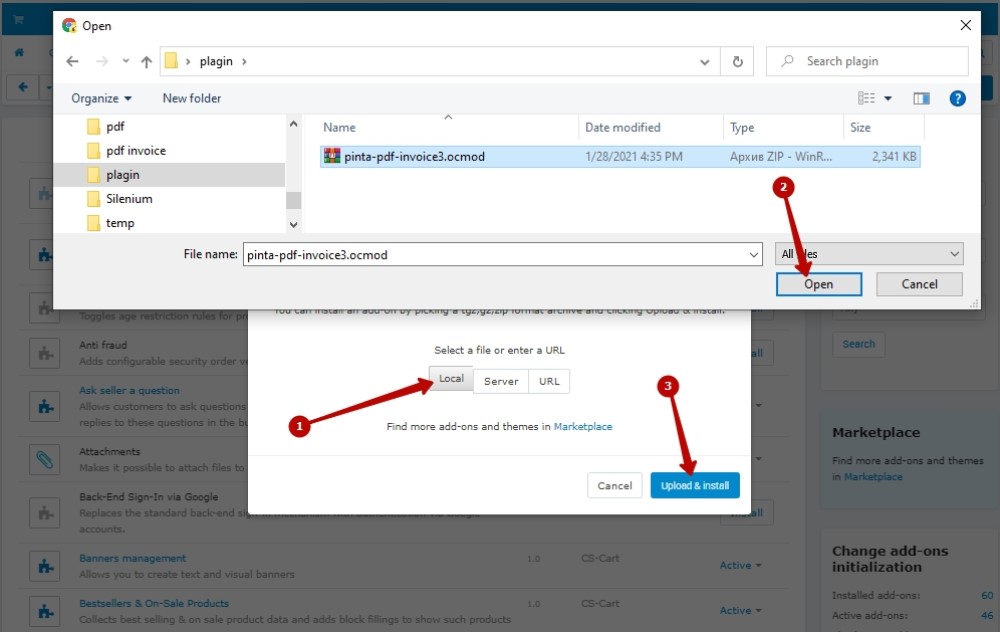
Download the plugin archive from your computer (1, 2) and click the Upload & install button (3).
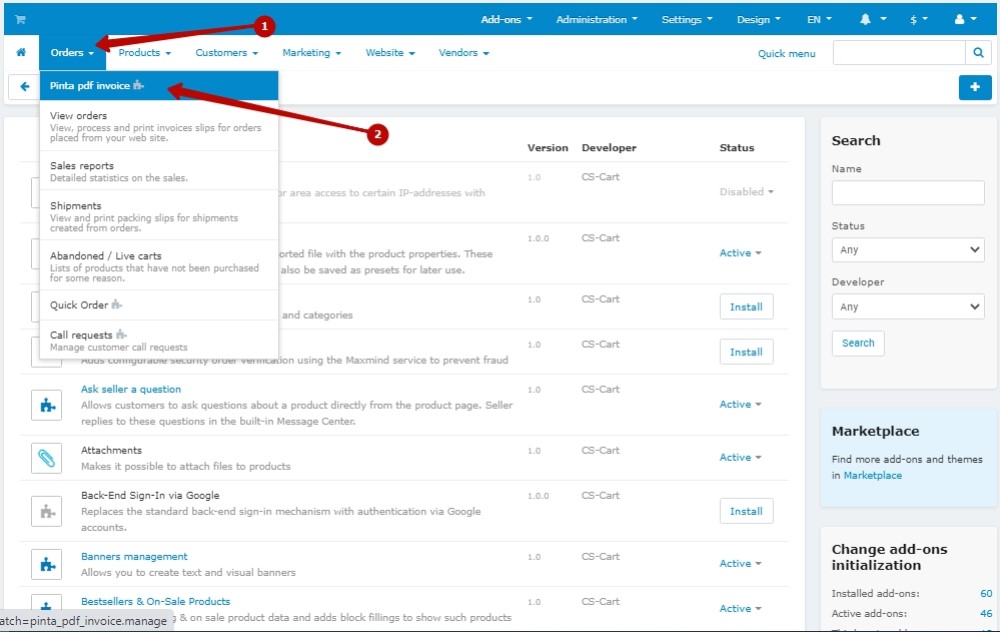
To configure the plugin, go to the main menu Orders (1) > Pinta pdf invoice (2).
Plugin page
The plugin consists of tabs:
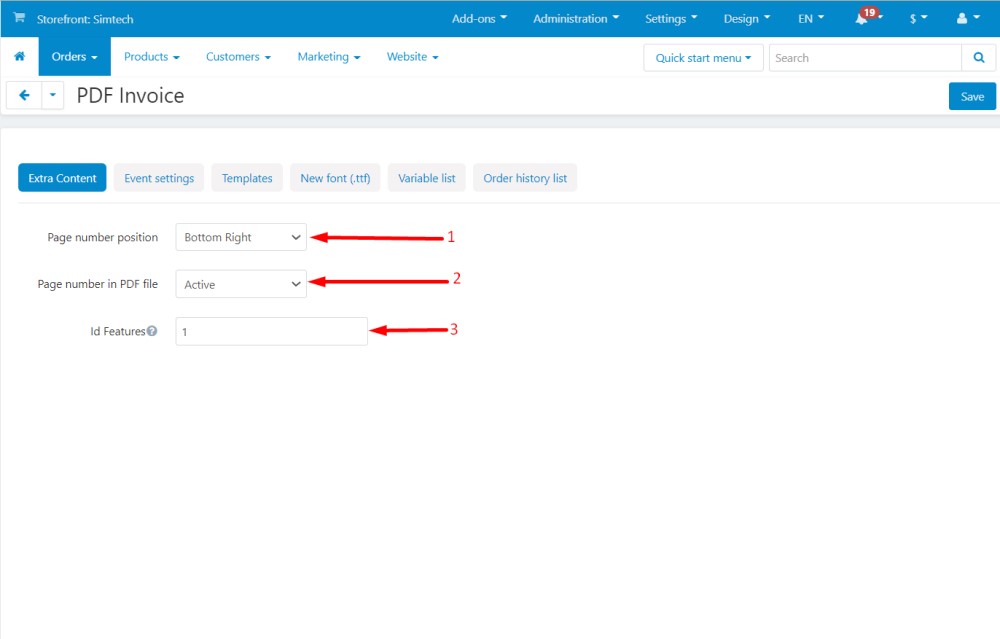
The Extra Content tab - for displaying the page number on the pdf file.
This tab consists of fields:
Page number position (1) - to select the page numbering orientation.
Page number in PDF file (2) - to enable / disable page numbering.
Id Features (3) - to enter the values of the id features (for example, 1, 2, 3...) which will be placed in the variable {$ product.features}.
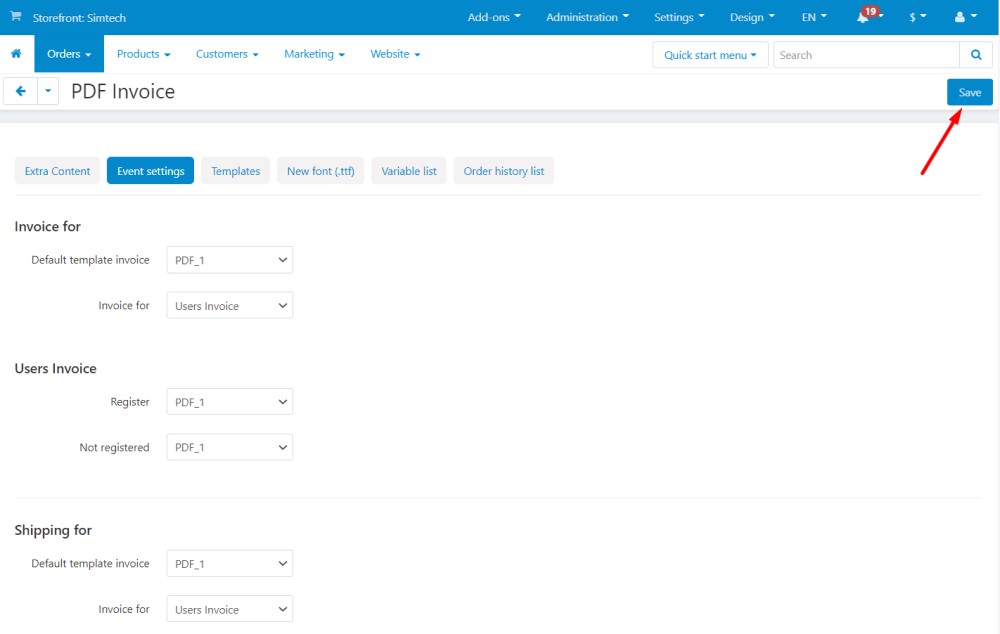
2. The Event settings tab is for configuring how the pdf is sent to email.
This tab contains:
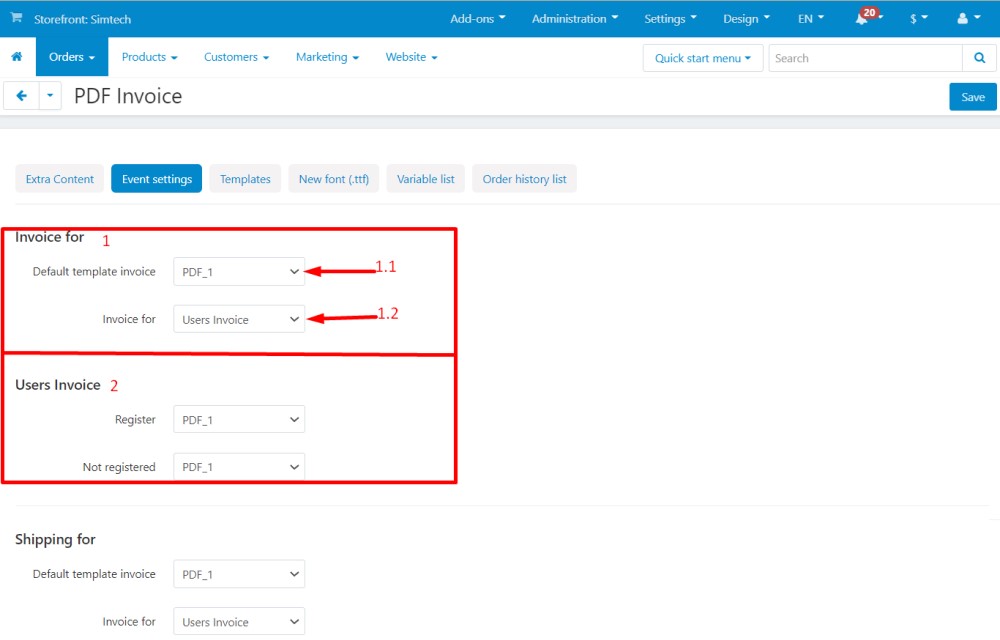
The Invoice for block (1) - to create a template for invoice, which will be sent to the mail specified by the customer when placing the order, and consists of fields:
Default invoice template (1.1) - to select the default template you want. If you don't want a pdf document sent to the mail, leave this field empty.
Invoice for (1.2) - to select the order conditions under which the pdf file will be sent.
The block with conditions (2) depends on the value selected in the Invoice for field (1.2) and can be displayed as one of the blocks:
Users Invoice,
Payment method Invoice,
Order status Invoice.
For each of these blocks, you can specify the templates you want to use for different types of events. If the fields are left empty, they will be assigned to the default template selected from the Default invoice template (1.1).
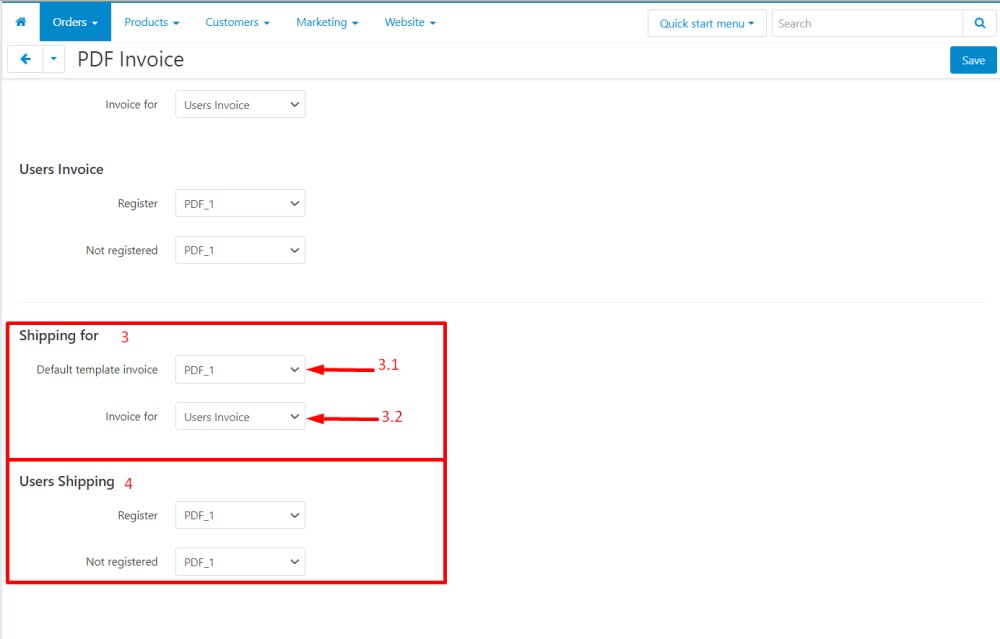
The Shipping for block (3) - configures the event when the pdf file of the waybill will be sent to the mail, and consists of fields:
Default shipping template (3.1) - to select the default template you want. If you don't want a pdf document sent to the mail, leave this field empty.
Invoice for (3.2) - to select the order conditions under which the pdf file will be sent.
The block with conditions (4) depends on the value selected in the Invoice for field (3.2) and can be displayed as one of the blocks:
Users Invoice,
Payment method Invoice,
Order status Invoice.
For each of these blocks, you can specify the templates you want to use for different types of events. If the fields are left empty, they will be assigned to the default template selected from the Default invoice template (3.1).
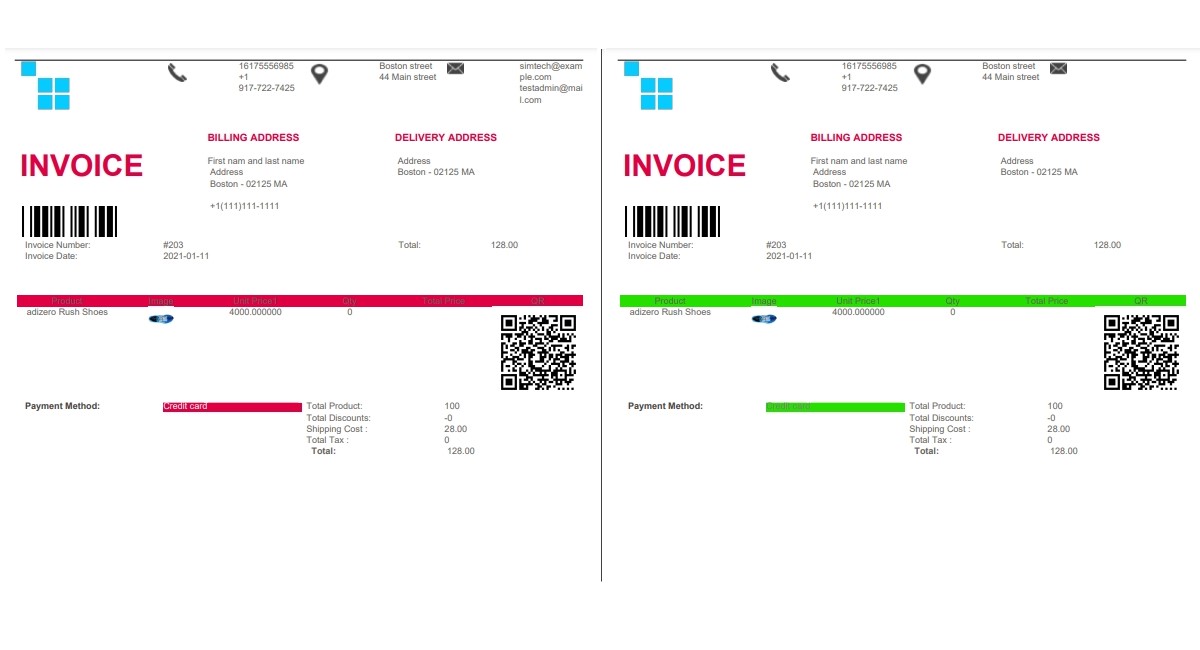
3. The Templates tab includes all created templates, which you can edit with:
The settings button (1) - for editing (Edit), deleting (Delete) or previewing the created template (Preview).
The add button (2) - to create a new template.

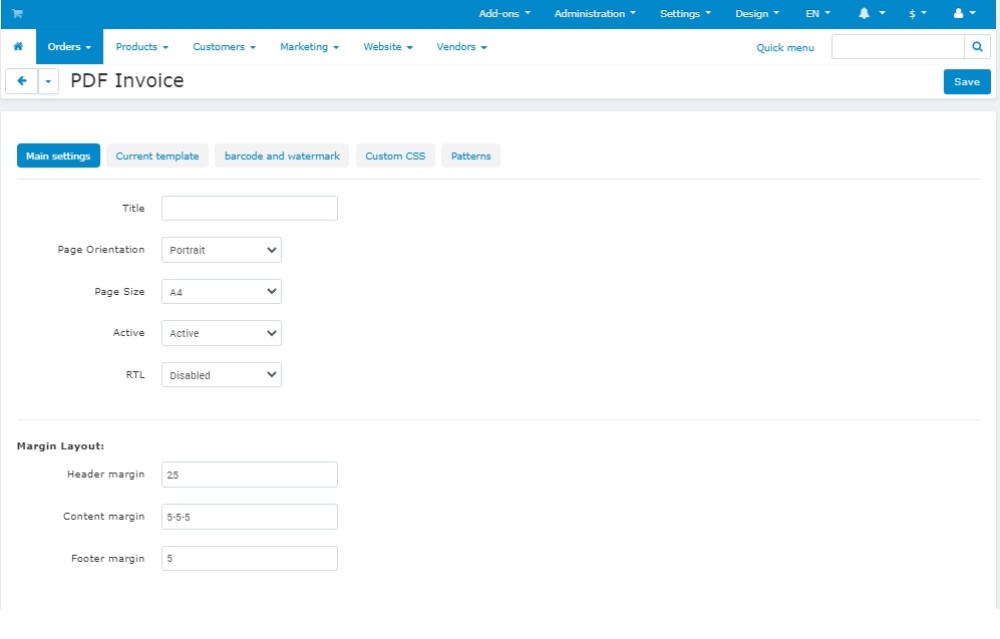
During creating / editing a template, such tabs become available - Main Settings, Current template, Barcode and Watermark, Custom CSS and Patterns.
The Main settings tab. Includes the main settings of the template, such as its inclusion, selection / creation of the name, sheet format, its orientation and indentation, RTL (for template inversion - "for Arabic spelling").
The Current template tab - for template formatting. It includes such features as enabling / disabling the header, footer, logo loading, template formatting blocks and product list.

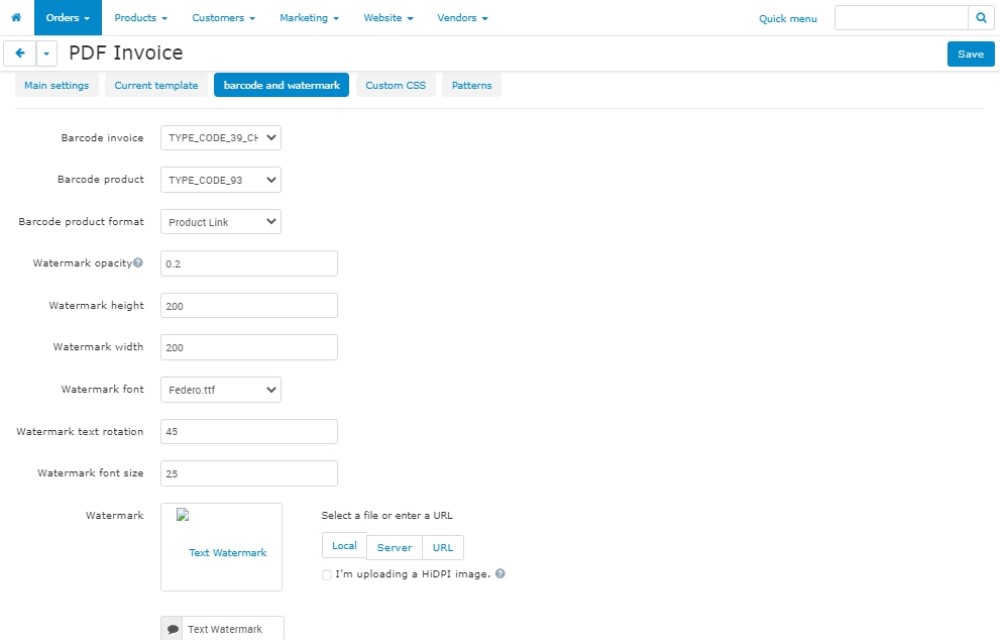
The Barcode and Watermark tab - to select the needed type of Barcode and Watermark, the elements for their formatting: size, transparency, orientation.
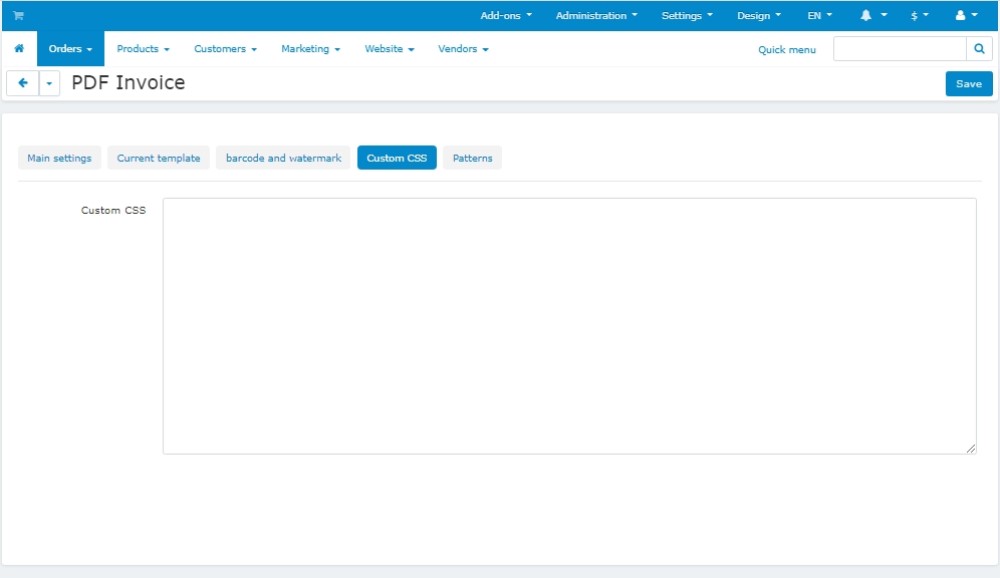
The Custom CSS tab - for using custom CSS styles that differ from the standard ones.
The Patterns tab contains the standard templates.
To use such a template, click the Load button.
Next, you need to enter the template title and edit its other components.
After editing, the template will be saved in the template list created by you (the main tab - Templates).

After editing the formatting of the template, save the changes by clicking the Save button. After that, you can continue configuring the plugin.

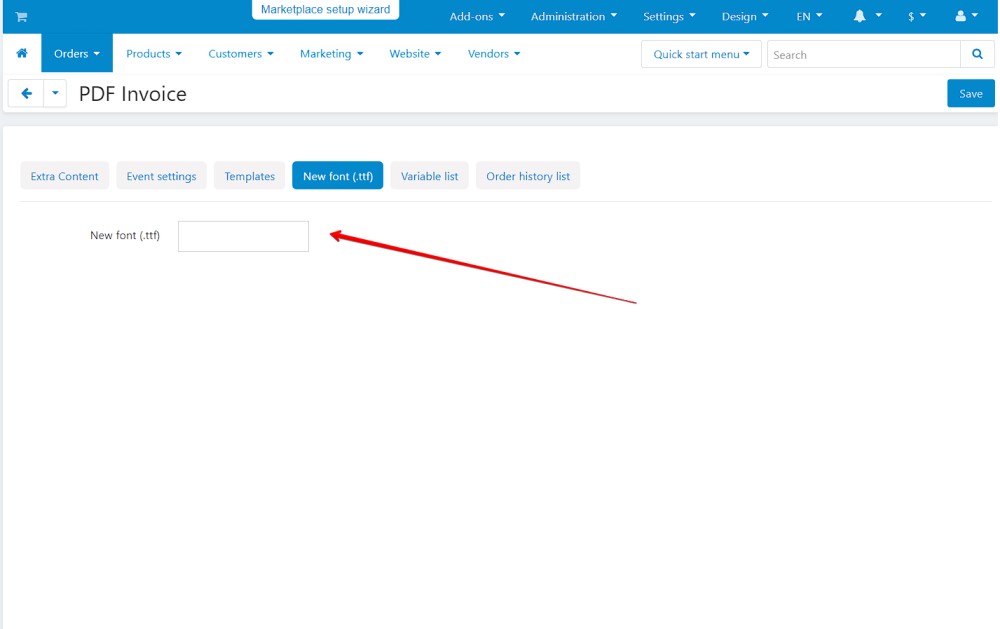
The New font (.ttf) tab allows you to load new fonts other than the standard ones.
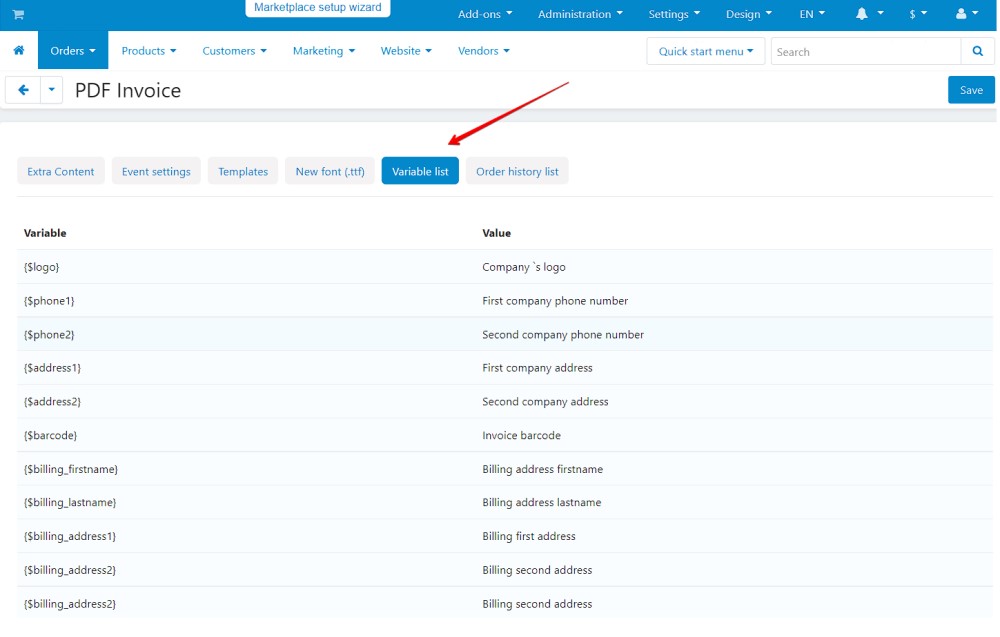
The Variable list tab includes a list of variables used in the template and their description.
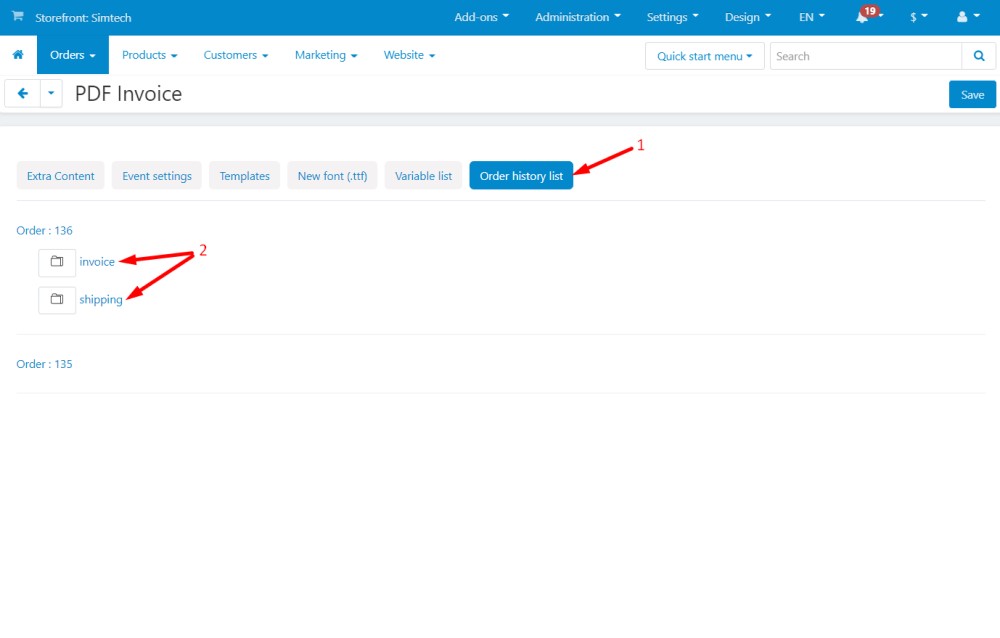
6. The Order history list tab (1) allows you to download pdf documents corresponding to placed orders. Use the invoice and shipping buttons (2) to upload the required invoice.
When you are finished editing the settings, save the changes by clicking the Save button.
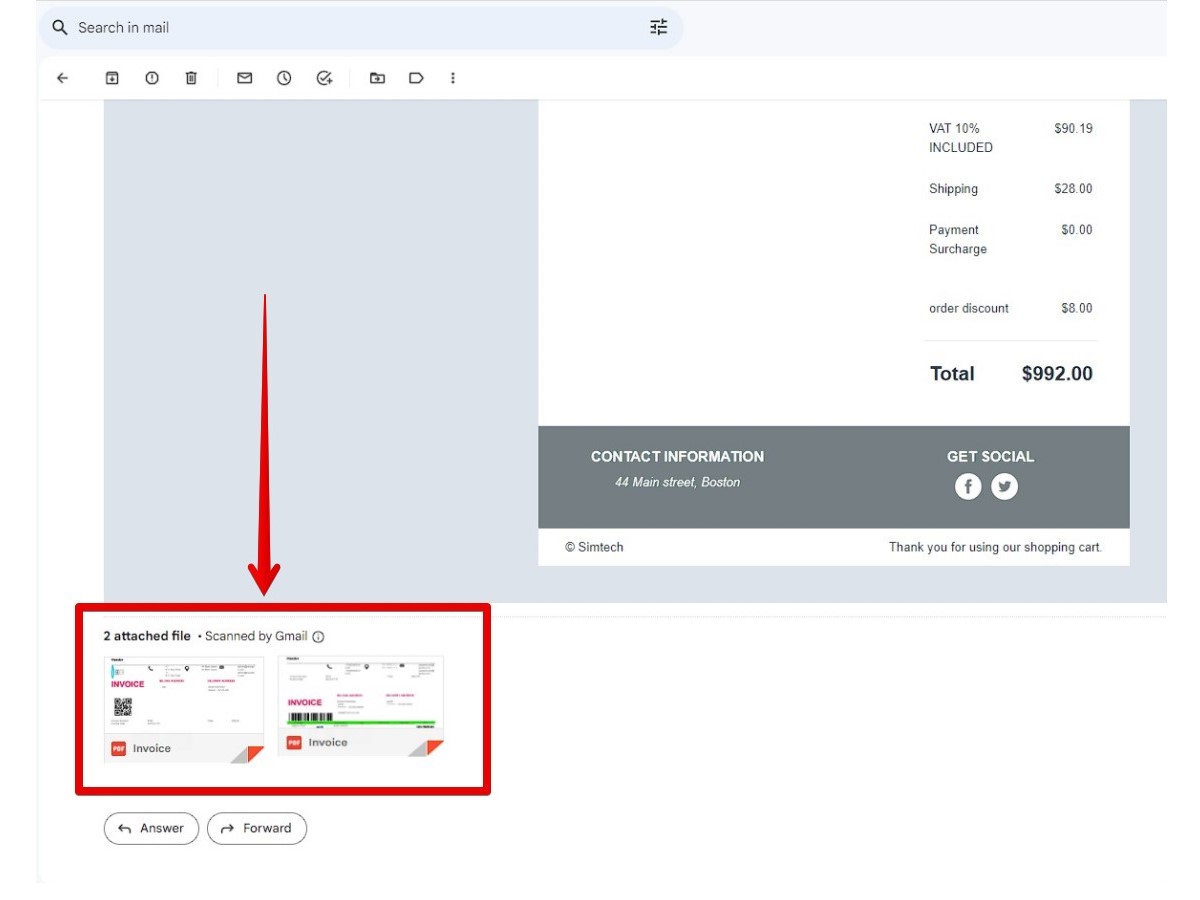
After placing an order in your online store, an email is sent to the specified email address with an order description and pdf files corresponding to the plugin settings.
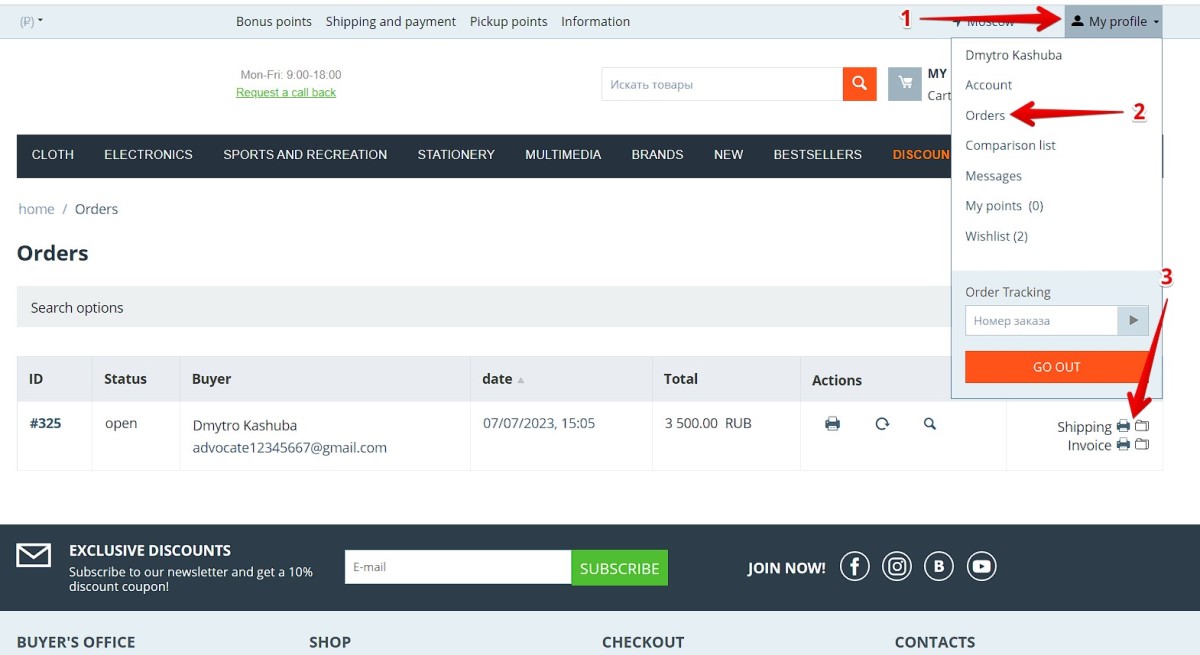
In addition, customers can also download / print pdf documents. To do this, go to the menu My profile (1) > Orders (2) and click Invoice or Shipping (3).
VIDEO INSTRUCTION