Instruction Product Labels for CS-cart
INSTRUCTION PRODUCT LABELS FOR CS-CART
Download and install
Download the plugin archive from the Shop Pinta store and save it on your computer.
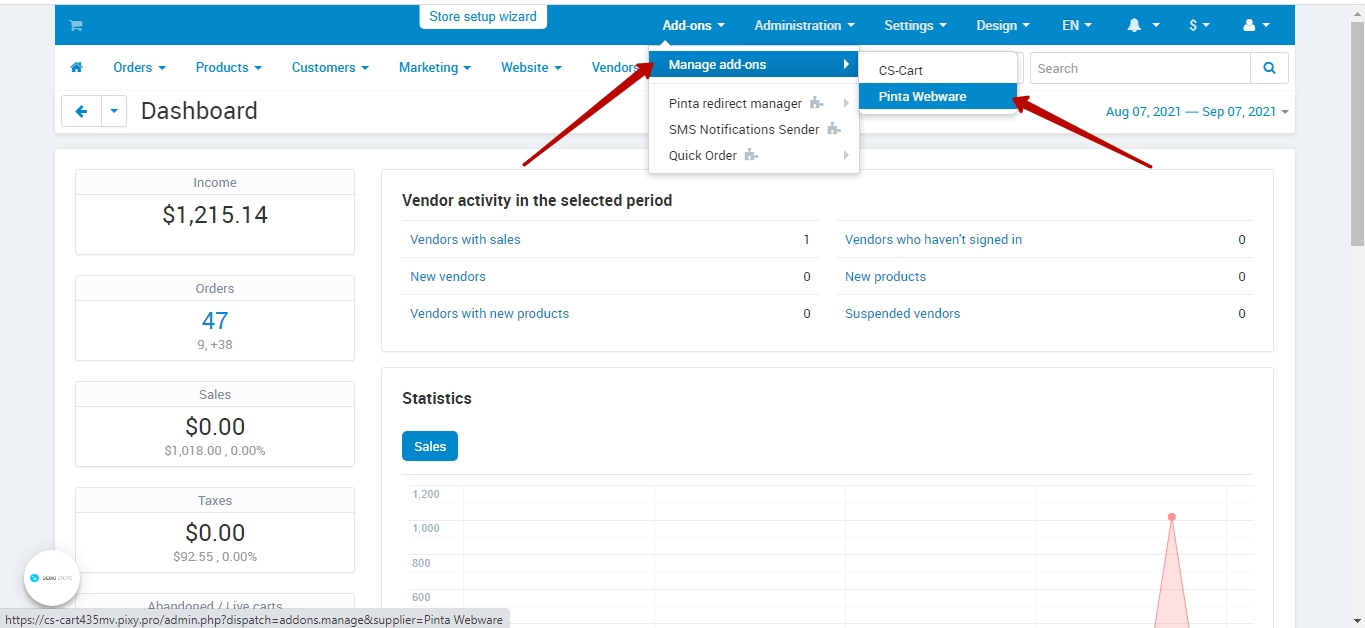
In the admin panel of your website, select Add-ons > Manage add-ons > Pinta Webware.
In the opened window, select Manual installation in the option list.
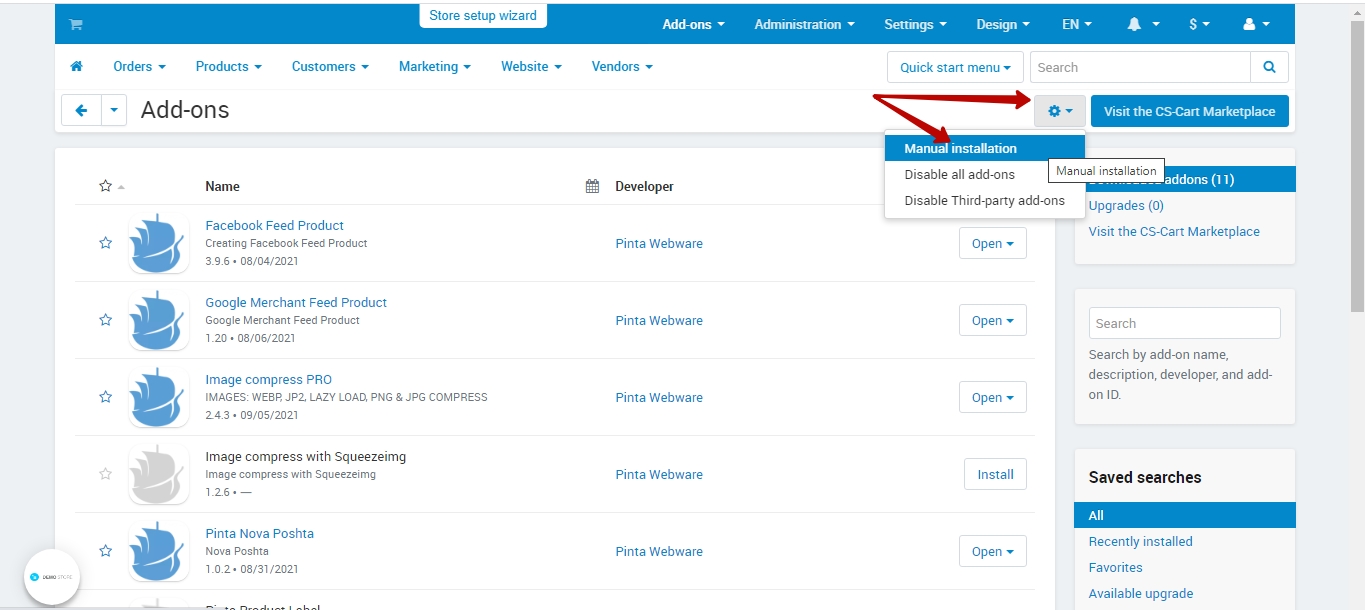
Upload the plugin archive from your computer (1, 2, 3) and click the Upload & install button (4).

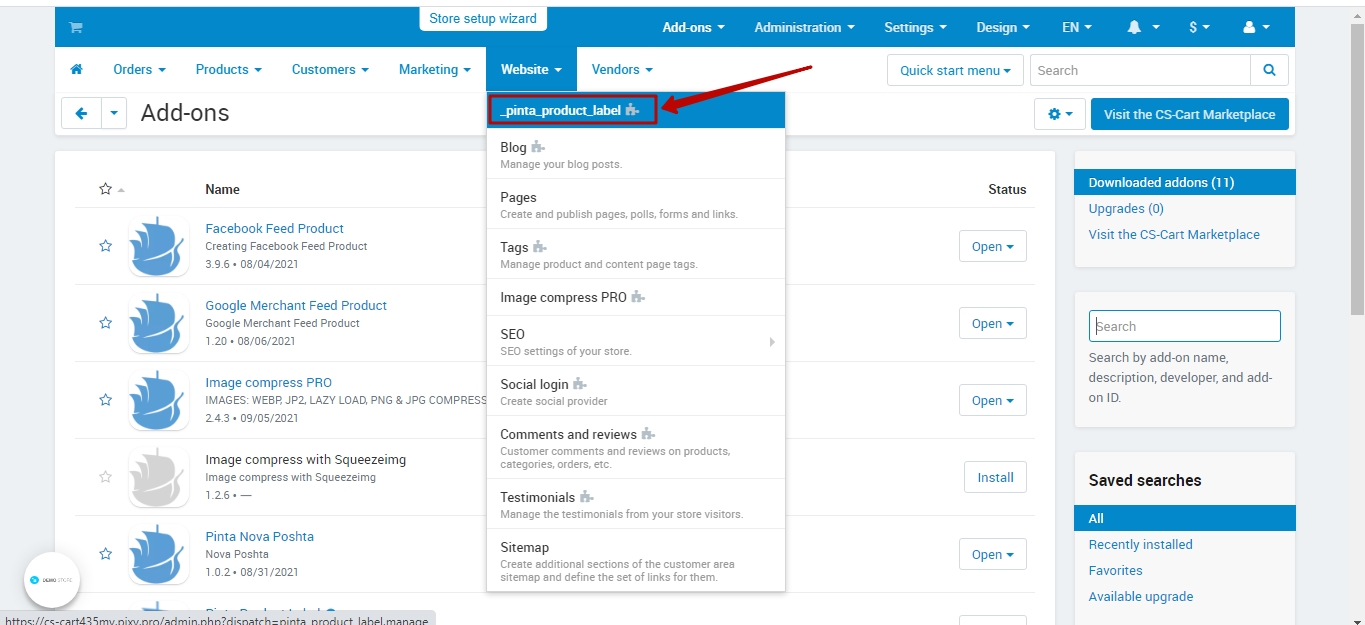
To configure the plugin, go to the main menu of the admin panel Website > _pinta_product_label that appears after installation.
Plugin page
The plugin page allows you to add product labels on your website using such tabs - Manage of module, Create a new product label, Manage of product label.
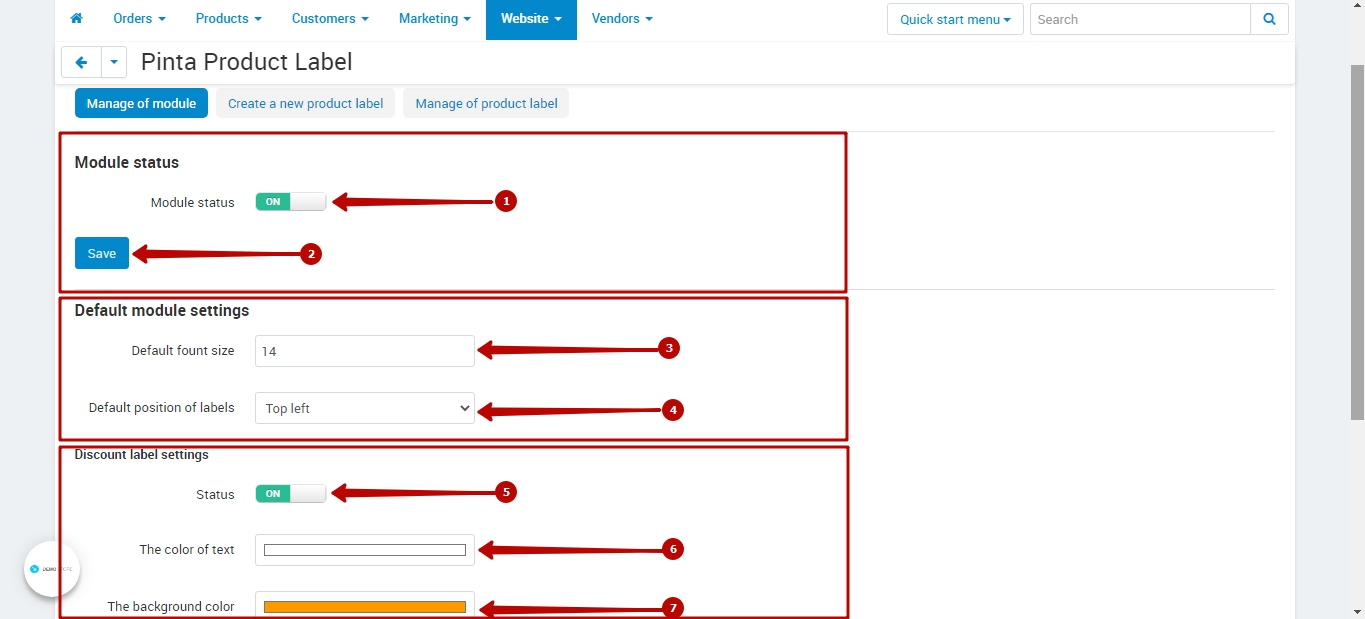
The Manage of module tab consists of blocks:
Module status contains:
The Module status button (1) - to enable / disable the plugin (position On / Off);
The Save button (2) - to save the selected status.
Default module settings contains:
The Default font size field (3) - to change the font size of the label text;
The Default position of labels field (4) - to select the label location on the product image.
Discount label settings allows you to edit the settings of the discount label and contains:
The Status button (5) - to enable / disable the use of the discount label on your website (position On / Off);
The color of text field (6) - to select the text color of the discount label;
The background color field (7) - to select the color of the discount label.
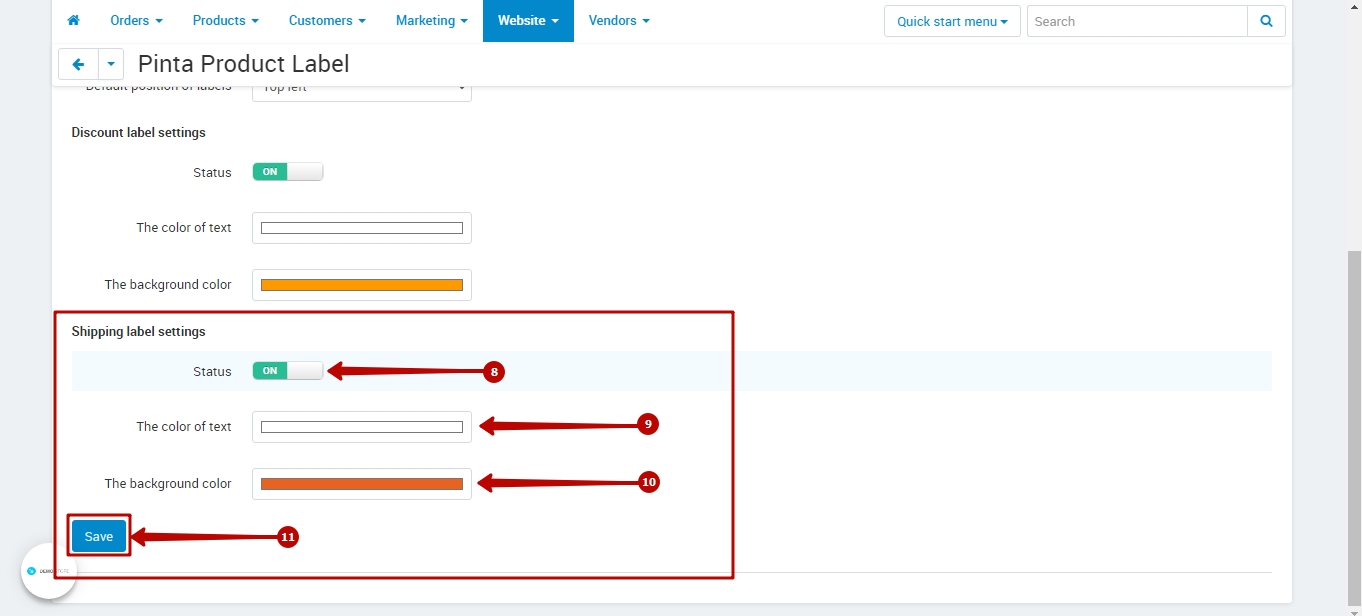
Shipping label settings allows you to edit the settings of the free shipping label and contains:
The Status button (8) - to enable / disable the use of the free shipping label on your website (position On / Off);
The color of text field (9) - to select the text color of the free shipping label;
The background color field (10) - to select the color of the free shipping label.
To save the settings, click the Save button (11).
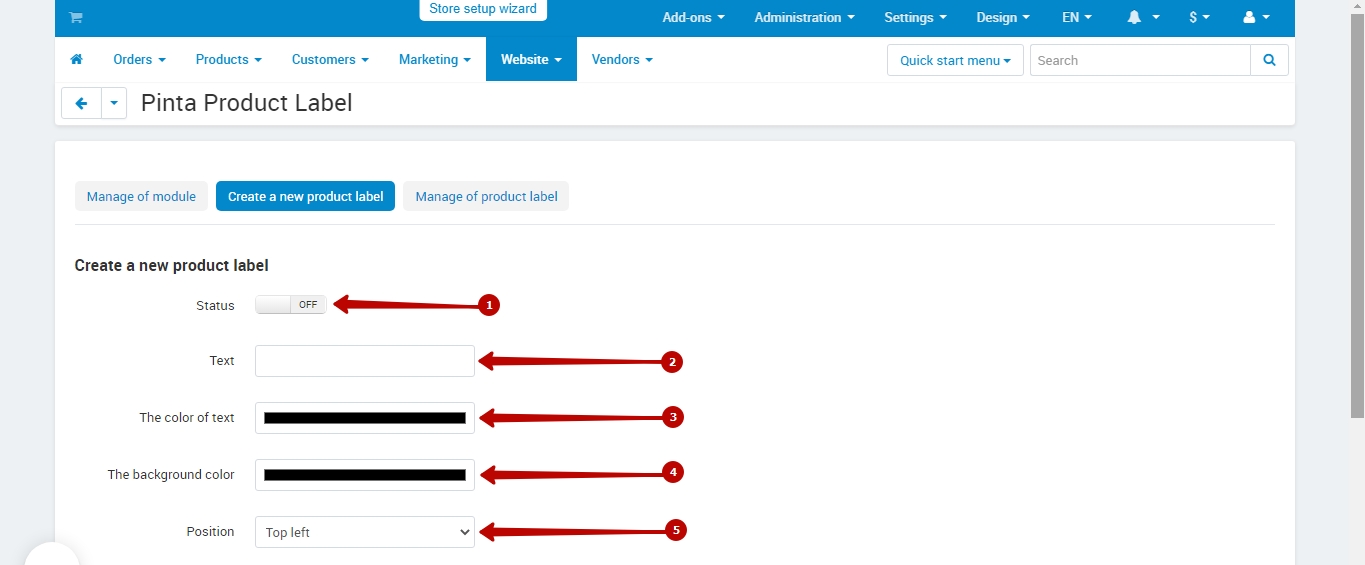
The Create a new product label tab allows you to create product labels and contains:
The Status button (1) - to activate a new product label on your website after creation (position On / Off).
The Text field (2) - to enter the text that will be added to the product label.
The color of text field (3) - to select the text color that will be added to the product label.
The background color field (4) - to select the color of the product label.
The Position field (5) - to select the location of the product label.
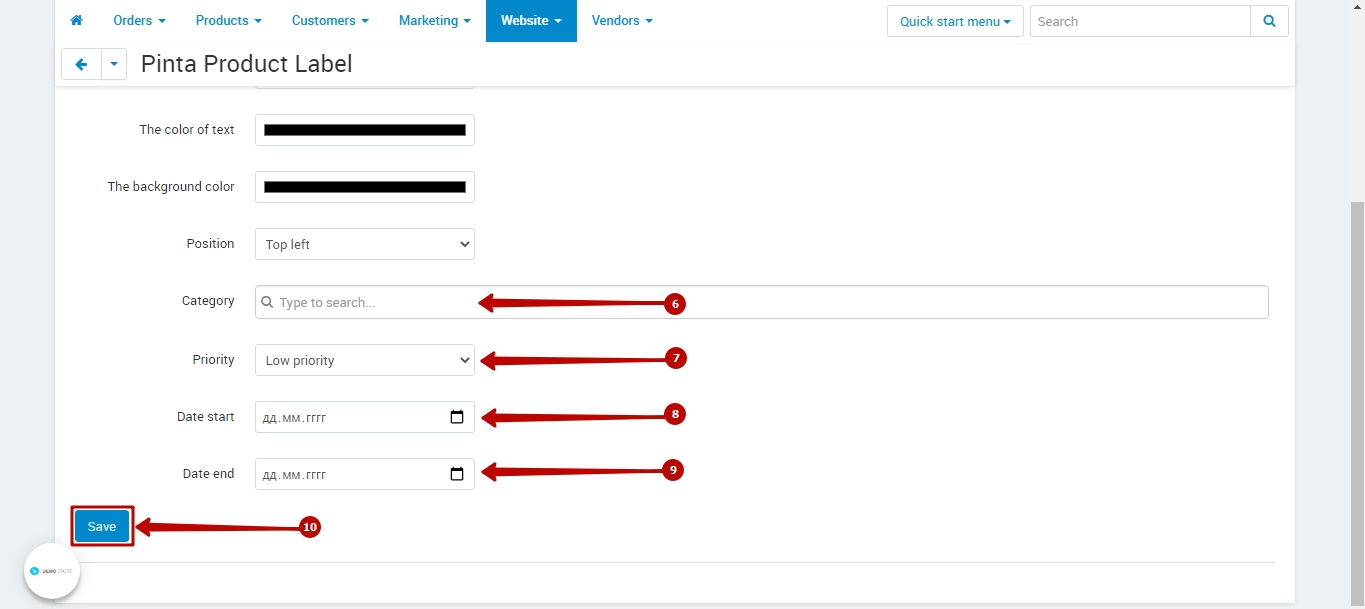
The Category field (6) - to select product categories for which the product label will be displayed.
The Priority field (7) - to select the priority for displaying the product label.
The Date start field (8) - to select the starting date for displaying the product label on your website.
The Date end field (9) - to select the ending date for displaying the product label on your website.
To create a new product label, click the Save button (10).
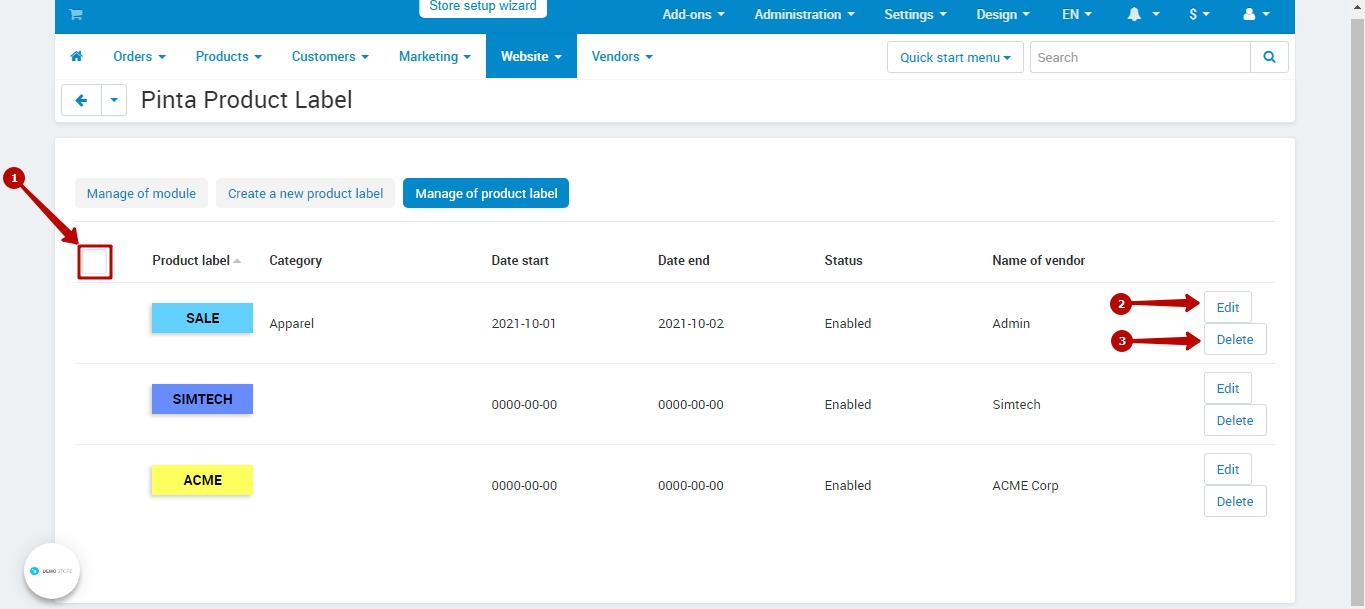
The Manage of product label tab allows you to edit / delete product labels and contains:
The checkbox (1) for selecting all product labels;
The Edit button (2) - to edit the parameters of the product label;
The Delete button (3) - to delete the product label.
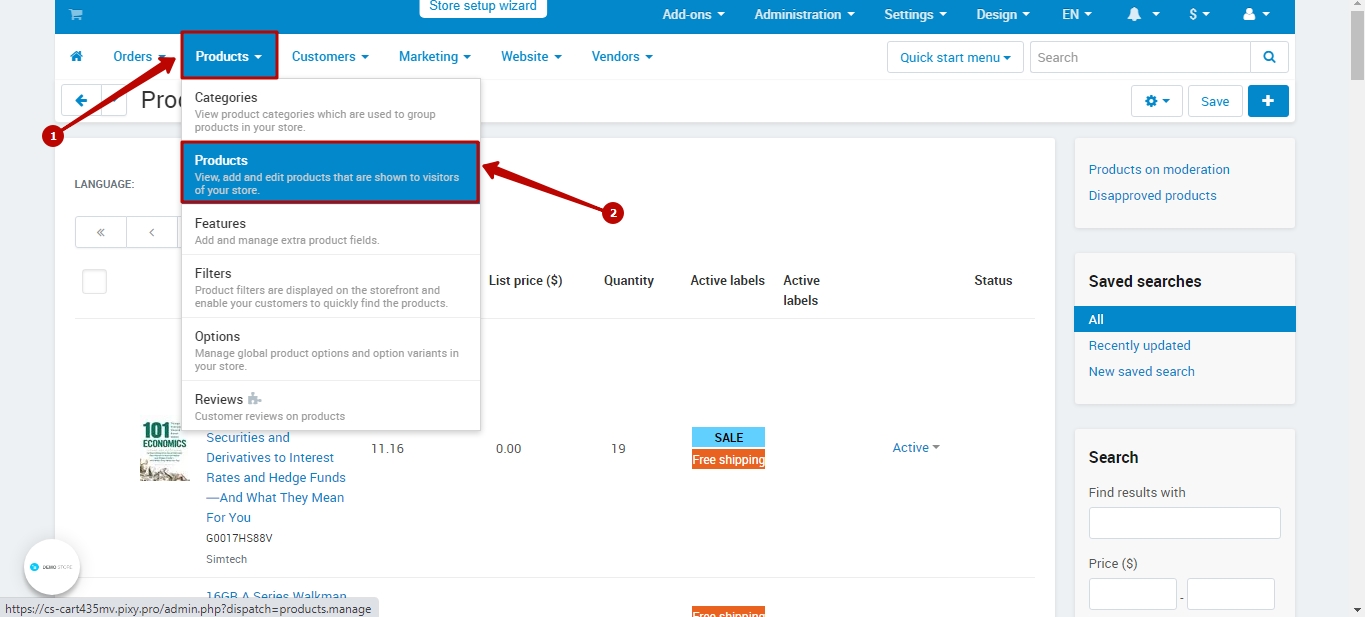
Also you can add / remove a product label for a specific product. To do this, in the main menu of the admin panel, select the Products (1) tab > Products (2).
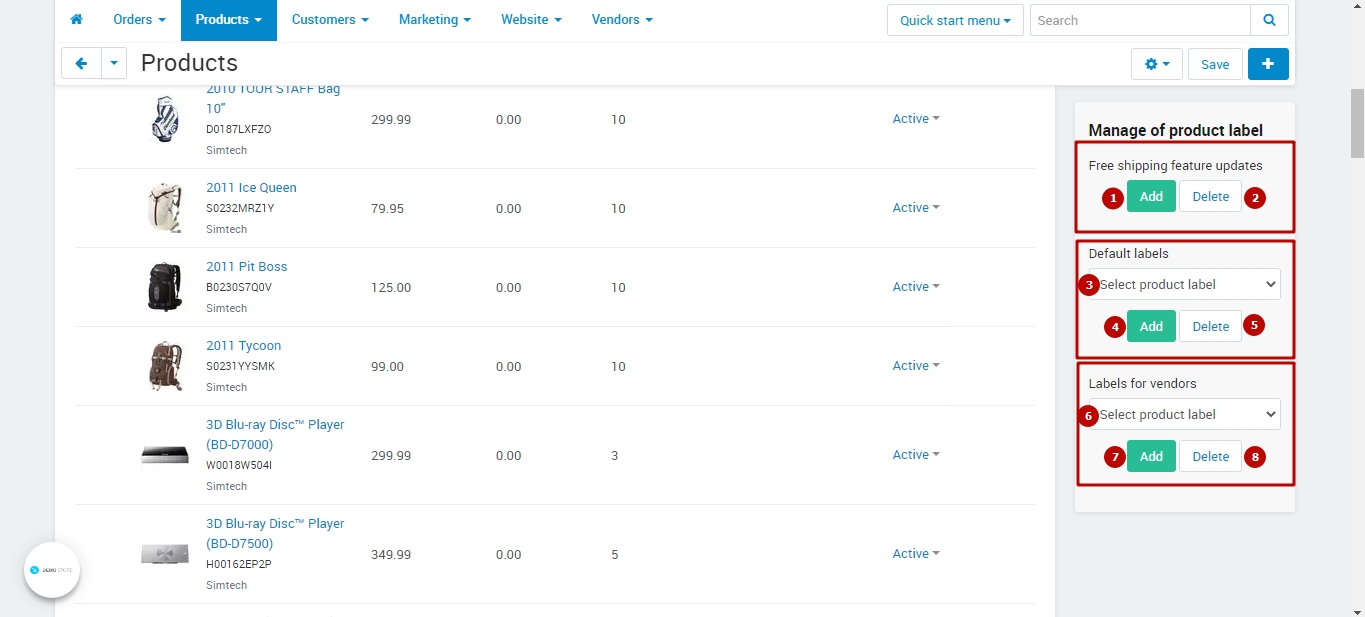
To add labels, use the Manage of product label side menu. It consists of blocks:
Free shipping feature updates - to apply the free shipping label.
Select the product.
Next, click the Add button (1) to add the label to the product or the Delete button (2) if you want to delete it.
Default labels - to apply the default product label (created by the online store administrator and are default for vendors).
Select the product.
Choose the product label in the Select product label field (3).
Next, click the Add button (4) to add the label to the product or the Delete button (5) if you want to delete it.
Labels for vendors - to apply the product label created by vendors.
Select the product.
Choose the product label in the Select product label field (6) (the administrator can select all created product labels, for the specific vendor - only those product labels that he created).
Next, click the Add button (7) to add the label to the product or the Delete button (8) if you want to delete it.
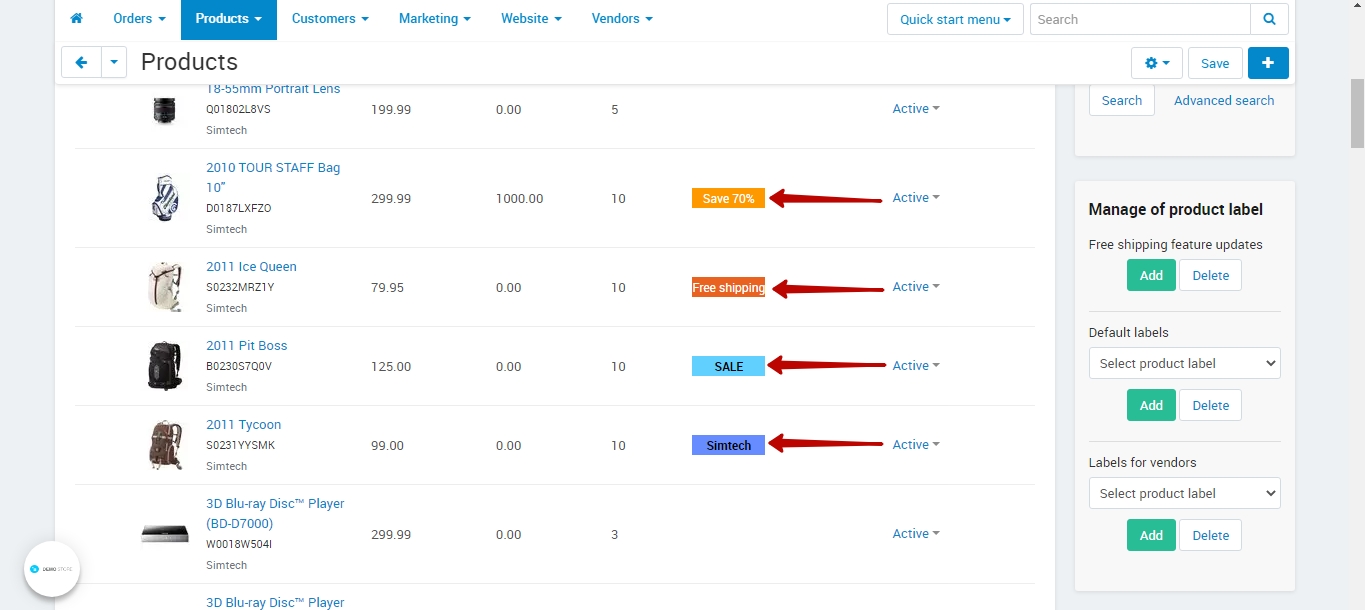
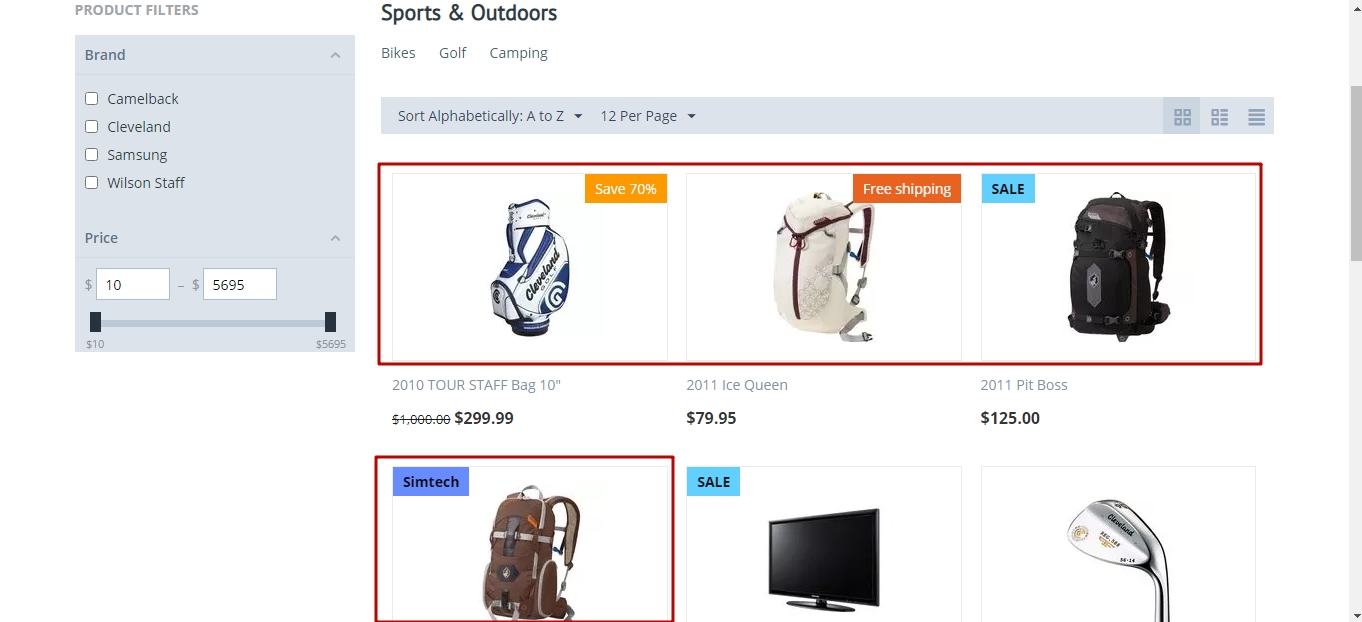
Now, for any products on your website, you can add product labels and inform your customers about the best deals.
VIDEO INSTRUCTION