Instruction for Product Labels in PrestaShop 1.7
INSTRUCTION PRODUCT LABELS FOR PRESTASHOP 1.7
Download and install
Download the plugin archive from the Shop Pinta store and save it on your computer.
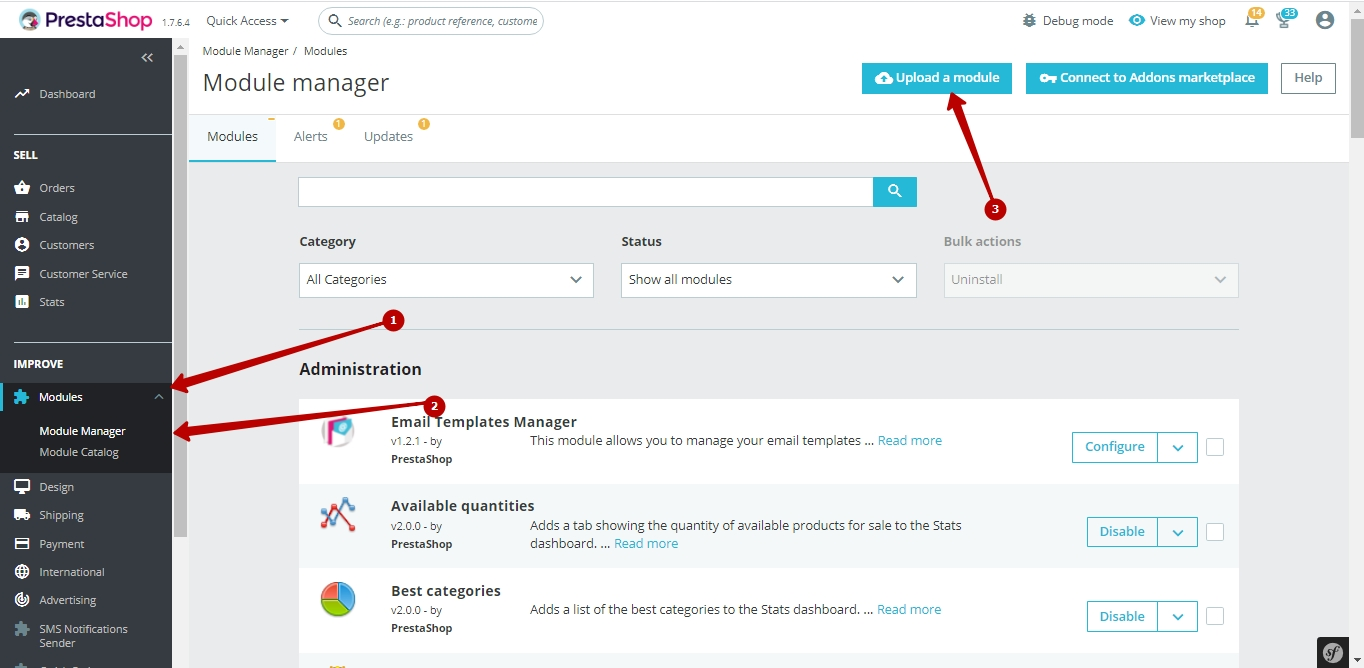
In the admin panel of your website, select Modules (1) > Module manager (2).
Click the Upload a module button (3).
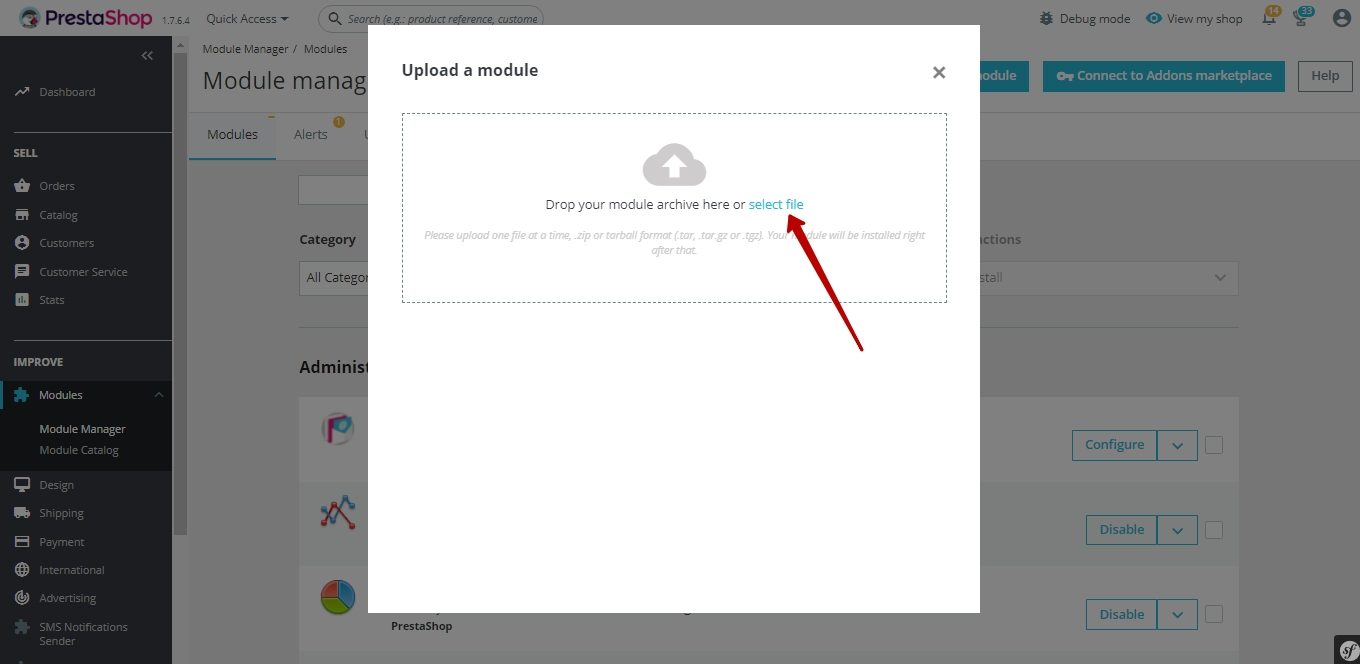
In the opened window, click on select file.
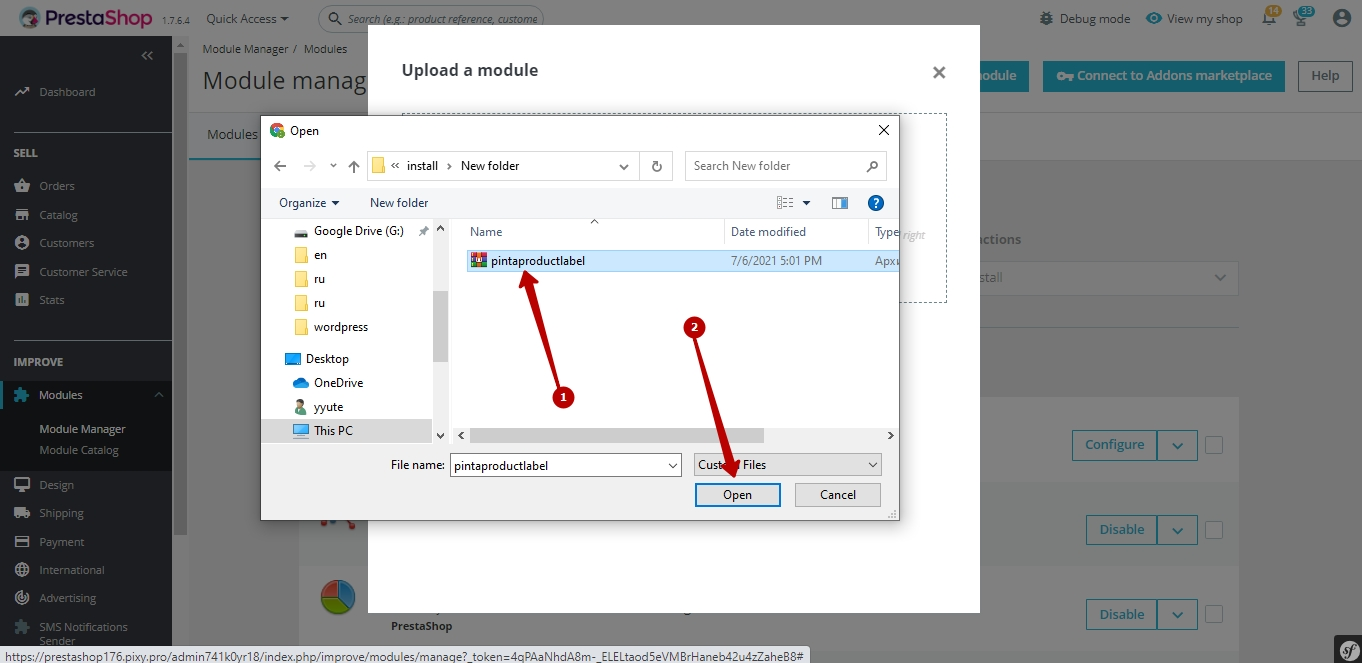
Next, select the plugin archive (1) and click the Open button (2).
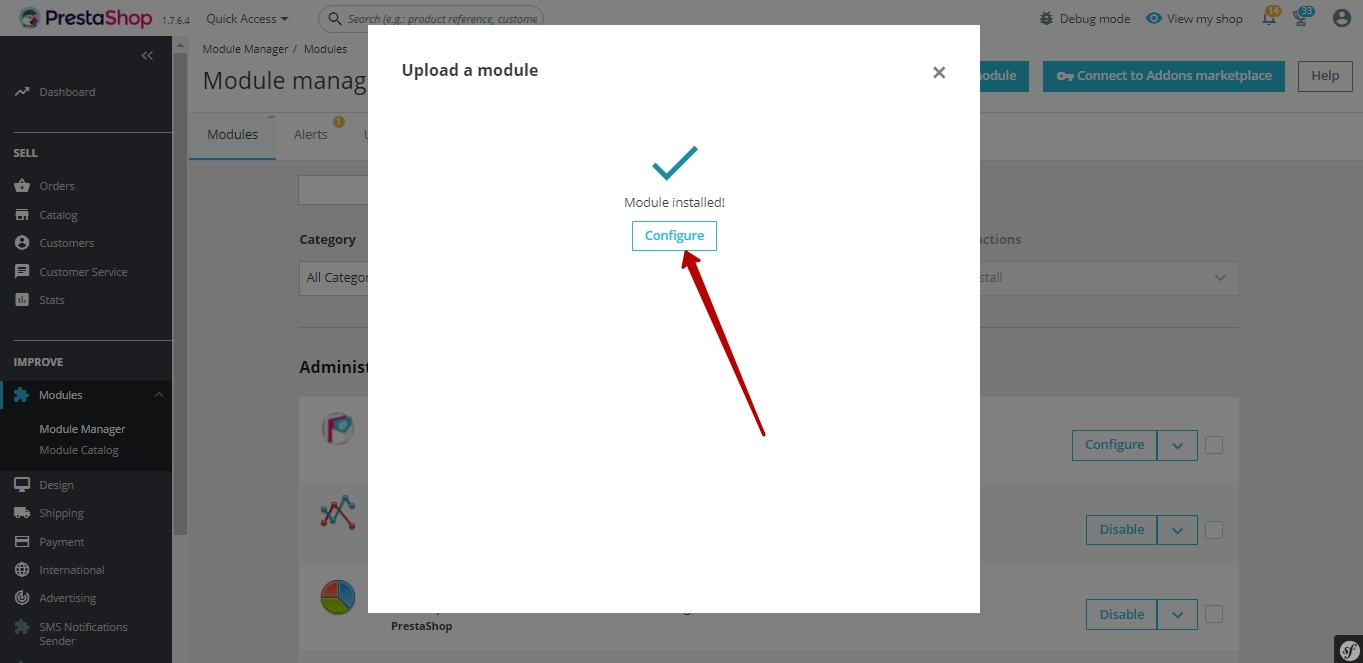
Wait for the download to finish.
To configure the plugin, click the Configure button.
Plugin page
The plugin page consists of:
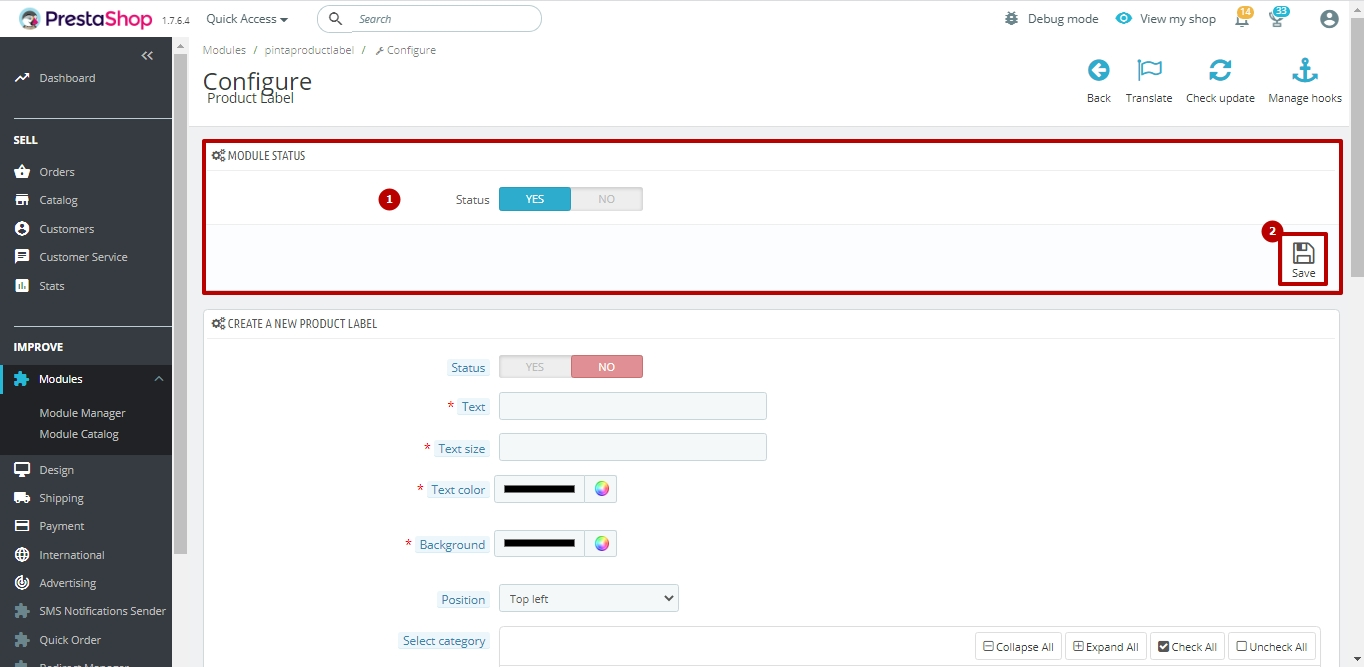
The MODULE STATUS block includes:
The Status checkbox (1) - to enable / disable the plugin (position YES / NO).
The Save button (2) - to save the settings.
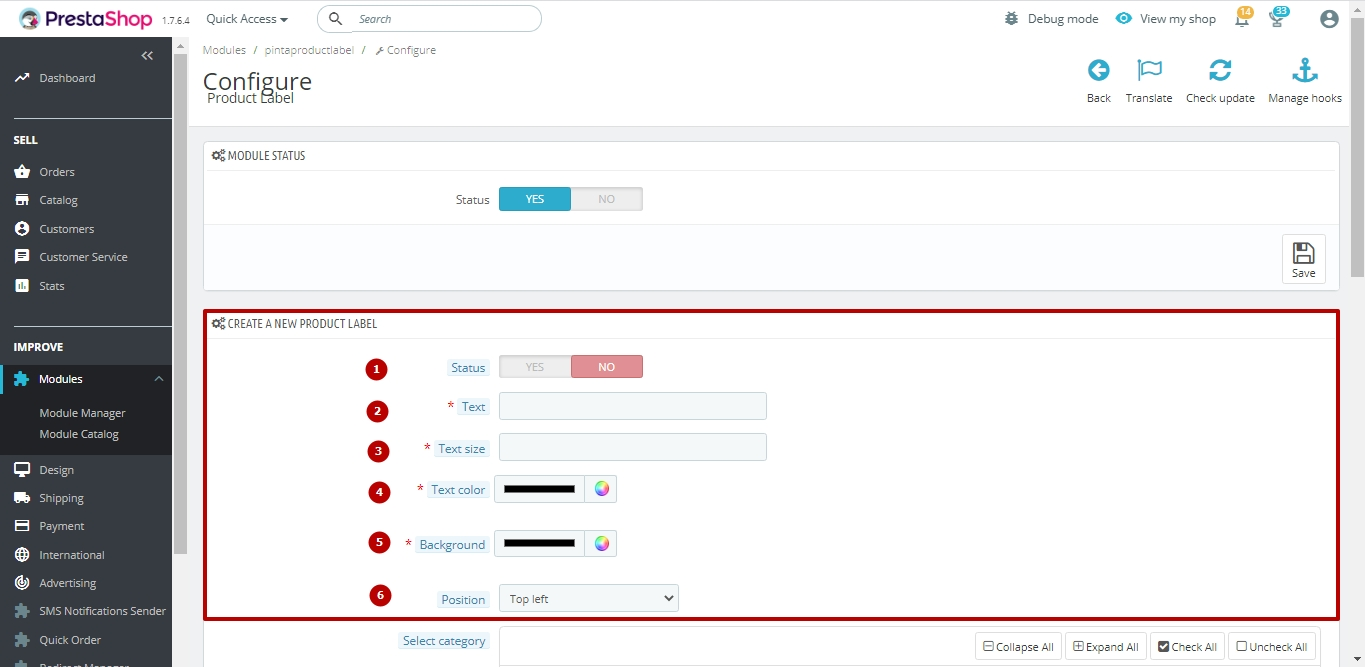
The CREATE A NEW PRODUCT LABEL block allows you to add a new product label and includes:
The Status checkbox (1) - to activate a new product label on your website after creation (position YES / NO).
The Text field (2) to enter the text that will be added to the product label. This field is required.
The Text size field (3) - to enter the text size (within 8-32 px) that will be added to the product label. This field is required.
The Text color field (4) - to select the text color that will be added to the product label. This field is required.
The Background field (5) - to select the color of the product label. This field is required.
The Position field (6) - to select the position of the product label.
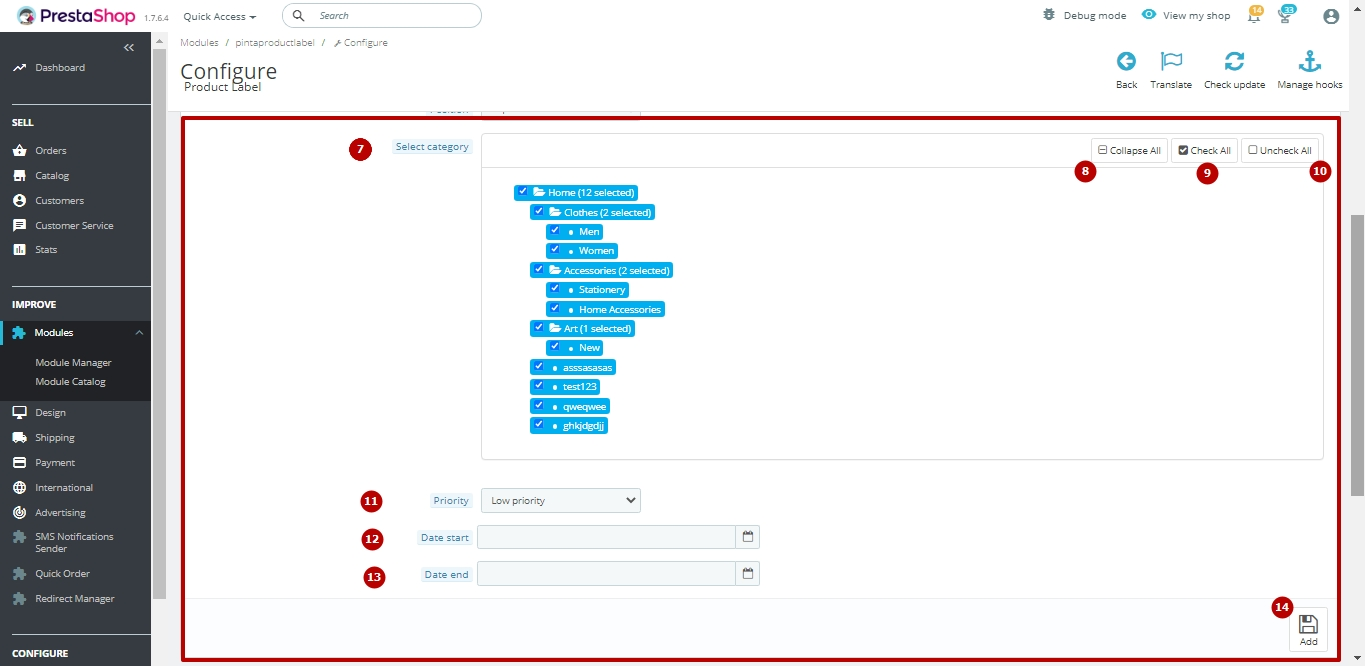
The Select category field (7) - to select categories / subcategories of products for which the product label will be displayed.
Using the Collapse All / Expand All button (8) you can collapse / expand the list of product categories and mark the required categories / subcategories.
Click the Check All button (9) if you want to check the checkboxes of all product categories / subcategories.
To deselect all checkboxes of product categories / subcategories, click the Uncheck All button (10).
The Priority field (11) - to select the priority of displaying the product label if the product has selected a few product labels.
The Date start field (12) - to select the starting date for displaying a product label on your website.
The Date end field (13) - to select the ending date for displaying the product label on your website.
To create a new product label, click the Add button 14).
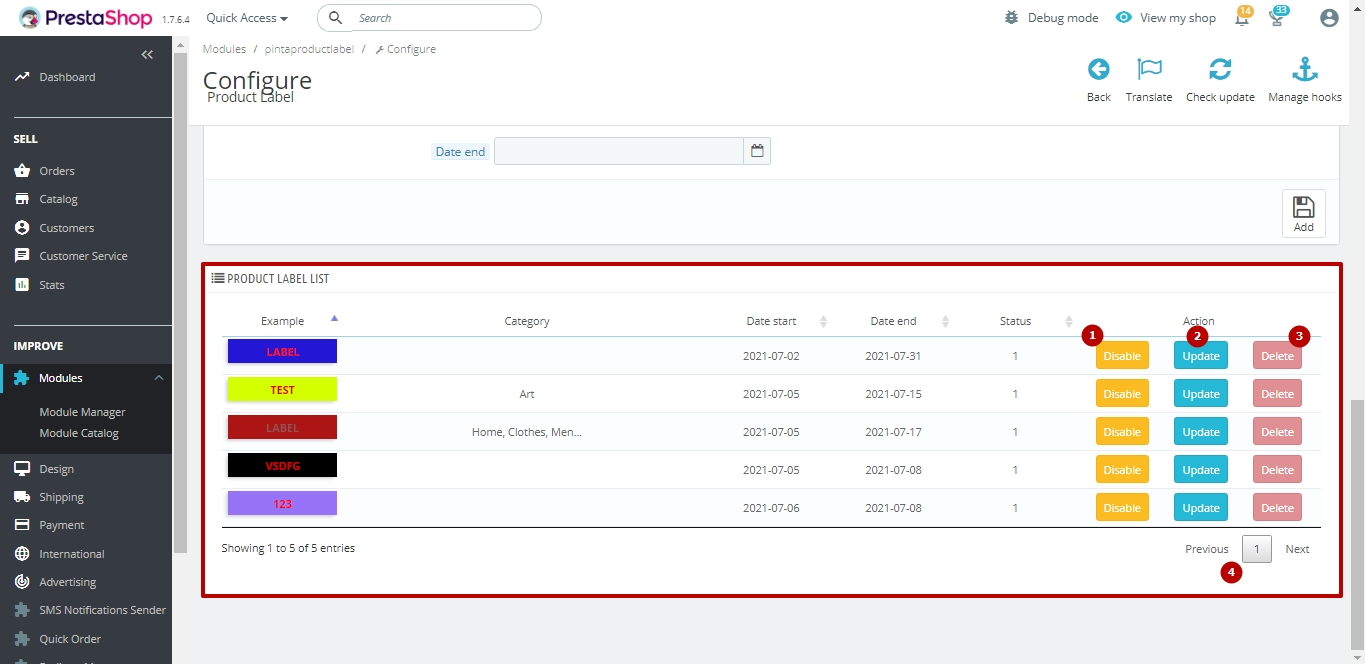
The PRODUCT LABEL LIST block displays a list of all product labels created on your website.
For each product label, its appearance is displayed, the categories / subcategories of products for which the product label is added, the period of time during which the product label is activated, and its status.
If necessary, you can change the parameters of the product label, namely:
to change the activation status of the product label, click the Enable / Disable button (1),
to edit the product label settings, click the Update button (2),
to delete the product label, click the Delete button (3).
Also, at the end of this block a navigation bar (4) there is. It helps you quickly navigate the list of product labels.
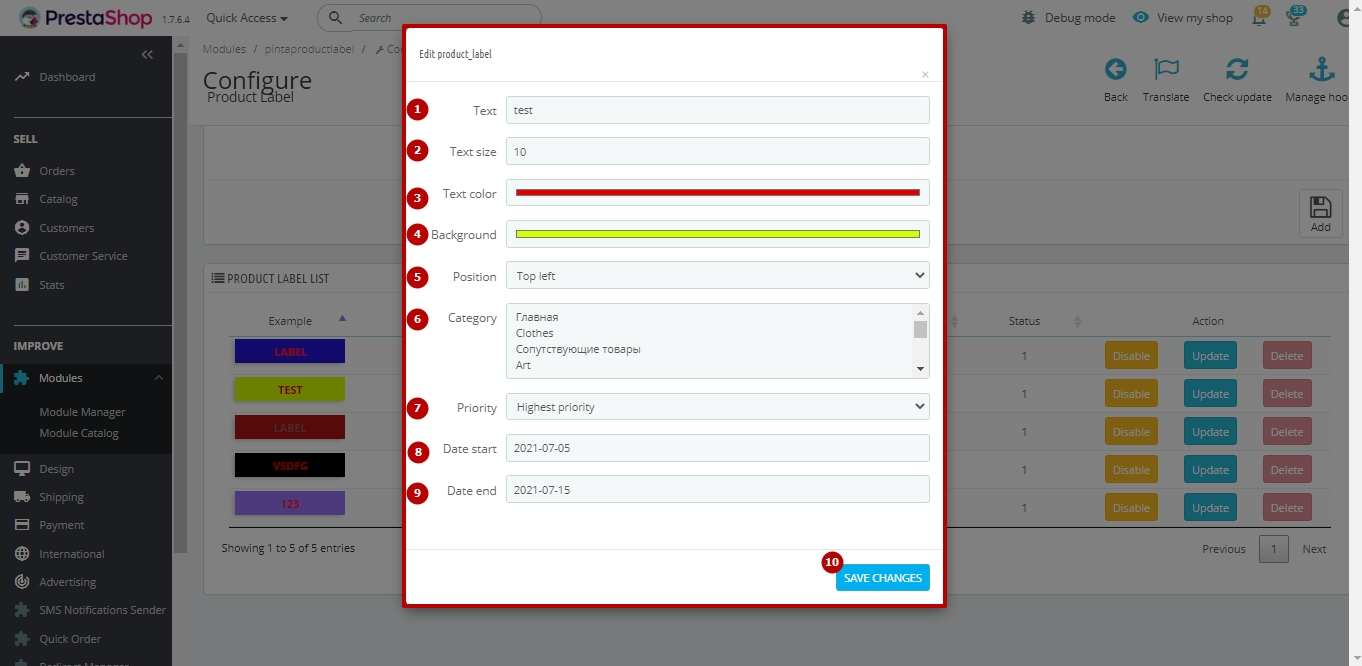
When editing the parameters of a product label (Update button), the Edit product label block opens with the following fields:
Text (1) - to edit the text of the product label.
Text size (2) - to edit the text size of the product label (within 8-32 px).
Text color (3) - to edit the text color of the product label.
Background (4) - to edit the color of the product label.
Position (5) - to edit the position of the product label.
Category (6) - to edit the categories / subcategories of products for which the product label will be displayed.
Priority (7) - to edit the priority of displaying the product label.
Date start (8) - to edit the starting date for displaying a product label on your website.
Date end (9) - to edit the ending date for displaying the product label on your website.
To save the product label settings, click the SAVE CHANGES button (10).
To add / remove a product label for a specific product, go to the main menu of the admin panel Catalog > Products (1).
Check the product checkbox for which you want to apply a needed product label (2). Next, in the list of product labels, select the one you want.
After that, to add a product label, click the Add button (4) or click the Remove button (5) to remove it.
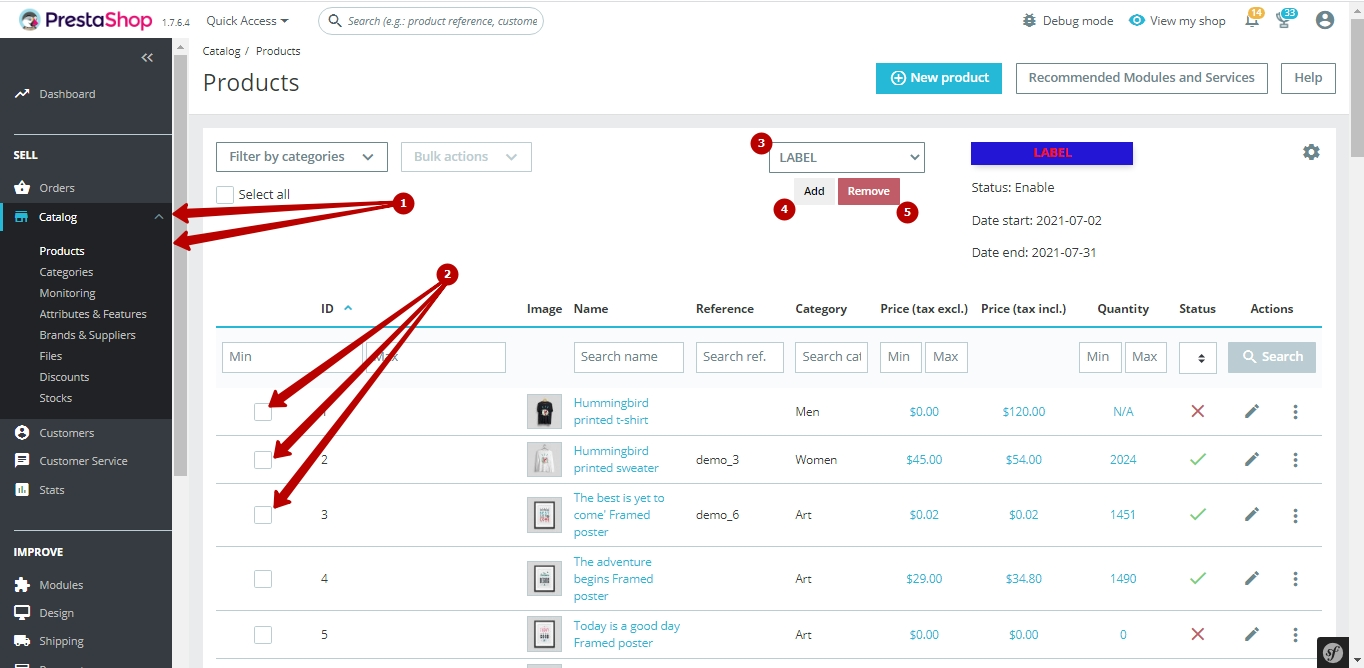
Now, you can add product labels for any products on your website and inform your customers about the great offers.
VIDEO INSTRUCTION