Instruction for Redirect URLs Manager in CS-Cart
Instruction REDIRECT URLS MANAGER for CS-CART
Download and install
Download the plugin archive from the Shop Pinta store and save it on your computer.
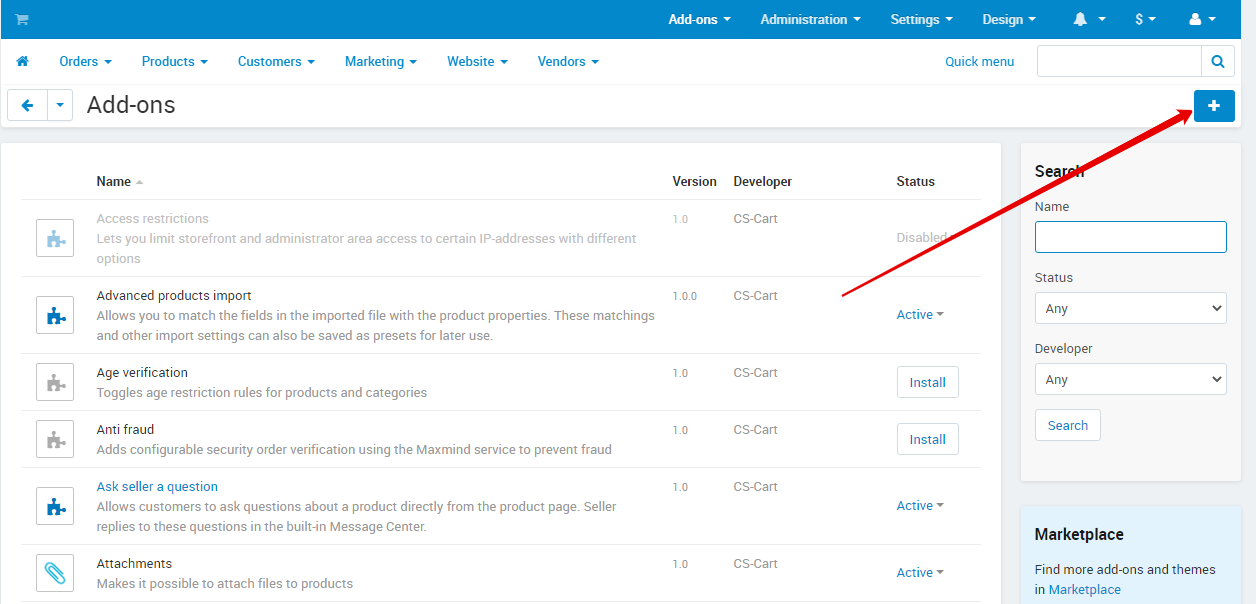
In the admin panel of your website, select Add-ons > Manage add-ons.

Click the Upload & install add-on button.
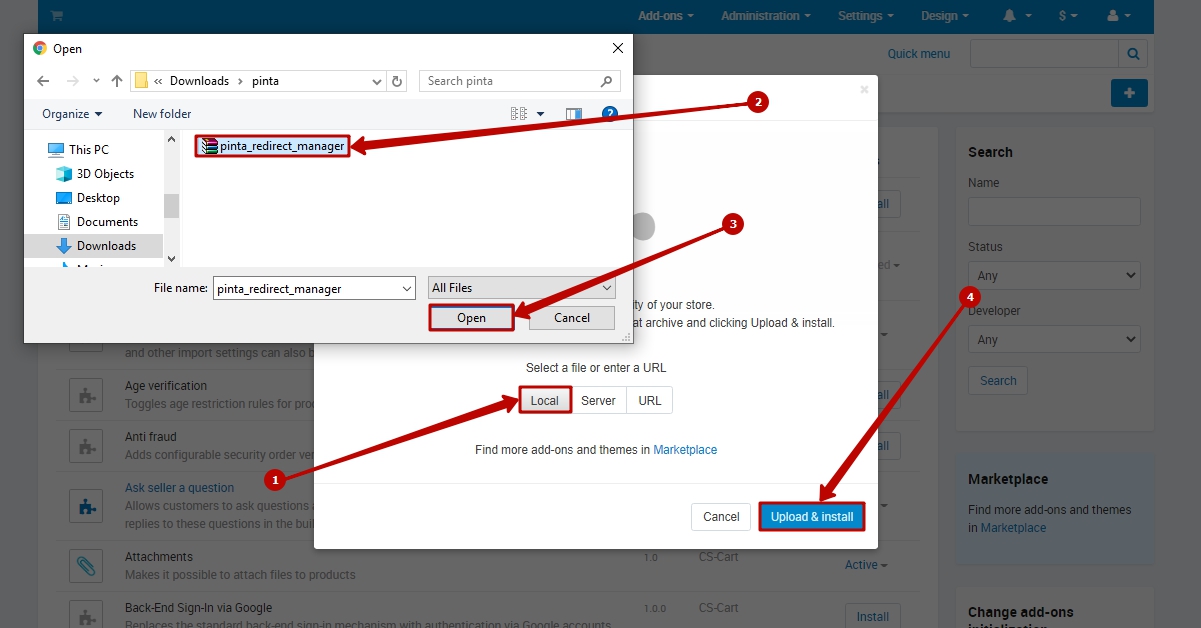
In the opened window Upload & install add-on, click the Local button (1).
Upload the plugin archive (2, 3) and click the Upload & install button (4).
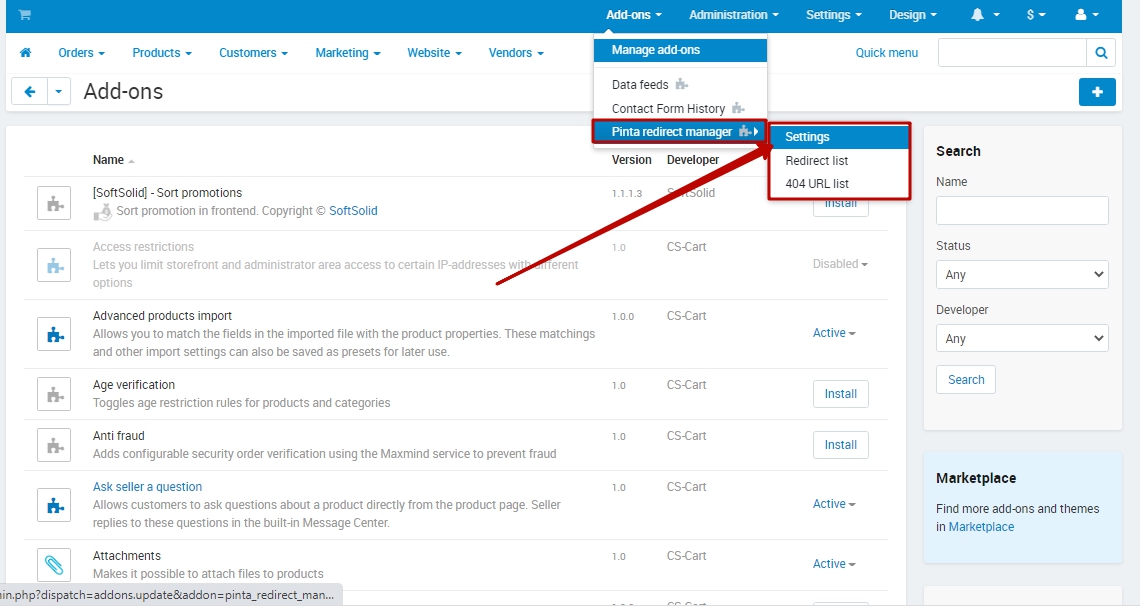
To configure the plugin, select the section on the main menu of the admin panel Add-ons > Pinta redirect manager > Settings. It will appear after installation.
Plugin page
The plugin page allows you to configure the redirection parameters and consists of:
The Redirects block (1) includes:
The Enable redirects checkbox (2) - to enable / disable the redirection.
The Add redirect from deleted products checkbox (3) - to automatically create the redirection after deleting a product.
The Redirect destination for deleted products field (4) - to select the type of page to be redirected to after deleting a product, by default.
The Redirect for disabled products checkbox (5) - to automatically create the redirection after disabling a product, by default.
The Redirect destination for disabled products field (6) - to select the type of page to be redirected to after disabling a product, by default.
The Default code field (7) - to select a redirect code that will be added after editing / deleting a product, by default.
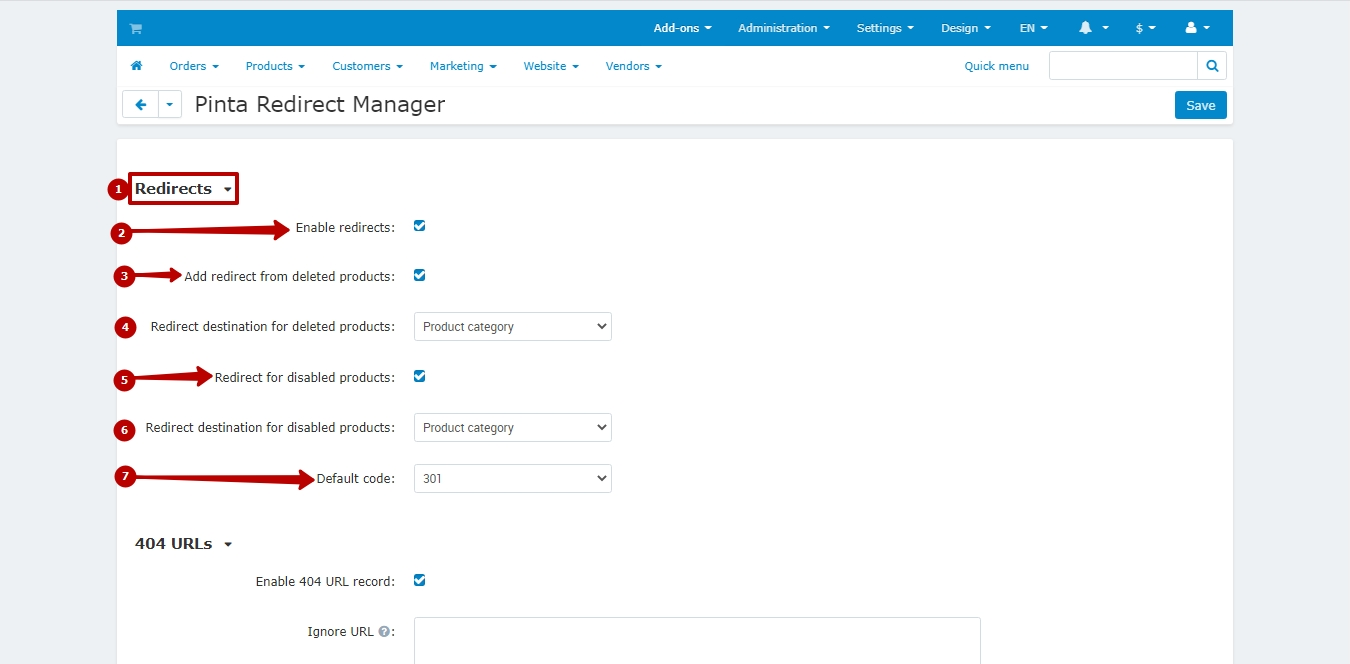
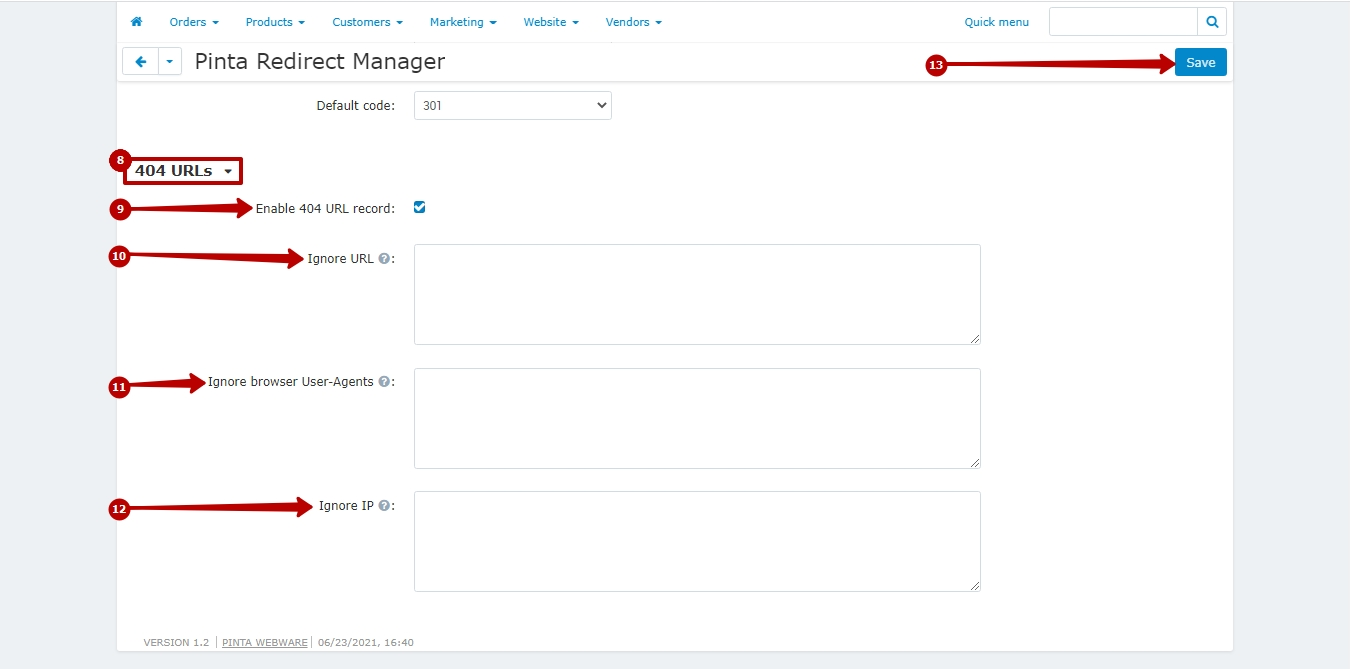
The 404 URLs block (8) includes:
The Enable 404 URL record сheckbox (9) - to enable / disable the recording of 404 URLs in the table.
The Ignore URL field (10) - to enter the ignored URLs that will not be automatically added to the table.
The Ignore browser User-Agents field (11) - to enter the ignored browser User-Agents that will not be automatically added to the table.
The Ignore IP field (12) - to enter the ignored IPs that will not be automatically added to the table.
After selecting the settings, click the Save button (13).
Redirects page
To create / edit redirections, go to the menu Add-ons > Pinta redirect manager > Redirect list.
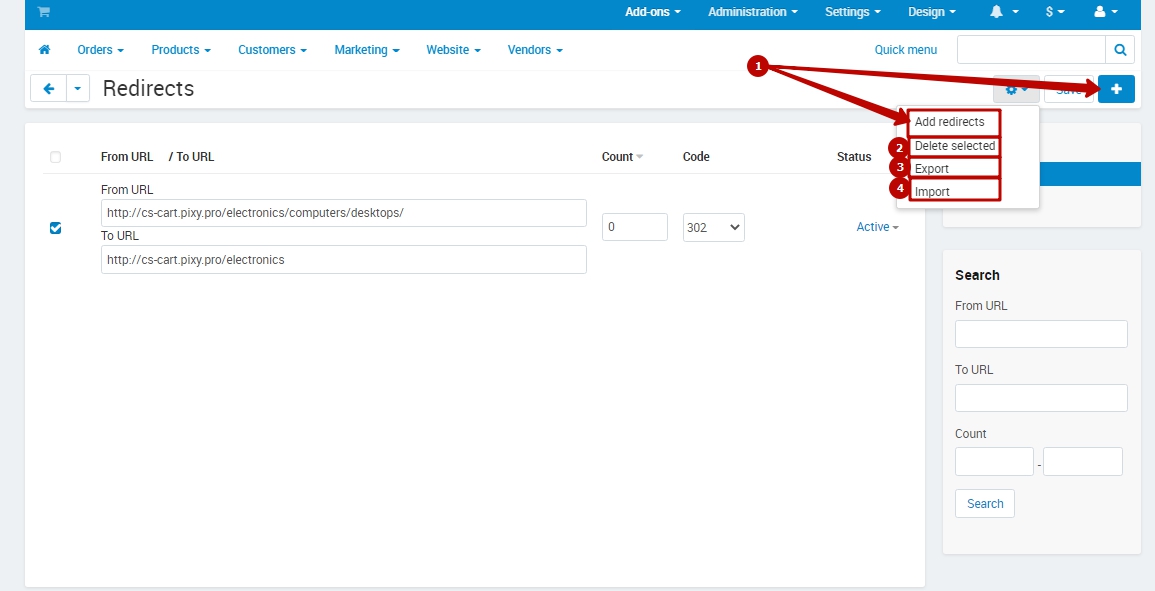
The redirection settings include:
Add redirects (1) - to create a new redirect (or click the “+” (Add redirect) button).
Delete selected (2) - to remove the marked redirects.
Export (3) - to export redirects created with this plugin to a CSV file.
Import (4) - to import a file with redirects.
The New redirect page displays:
The From URL field (1) - to enter the URL from which the redirect will be made.
The To URL field (2) - to enter the URL to be redirected to.
The Code field (3) - to select a redirect code.
The Status checkbox (4) - to enable / disable a redirection (position Active / Disabled).
To save a new redirection, click the Create button (5).
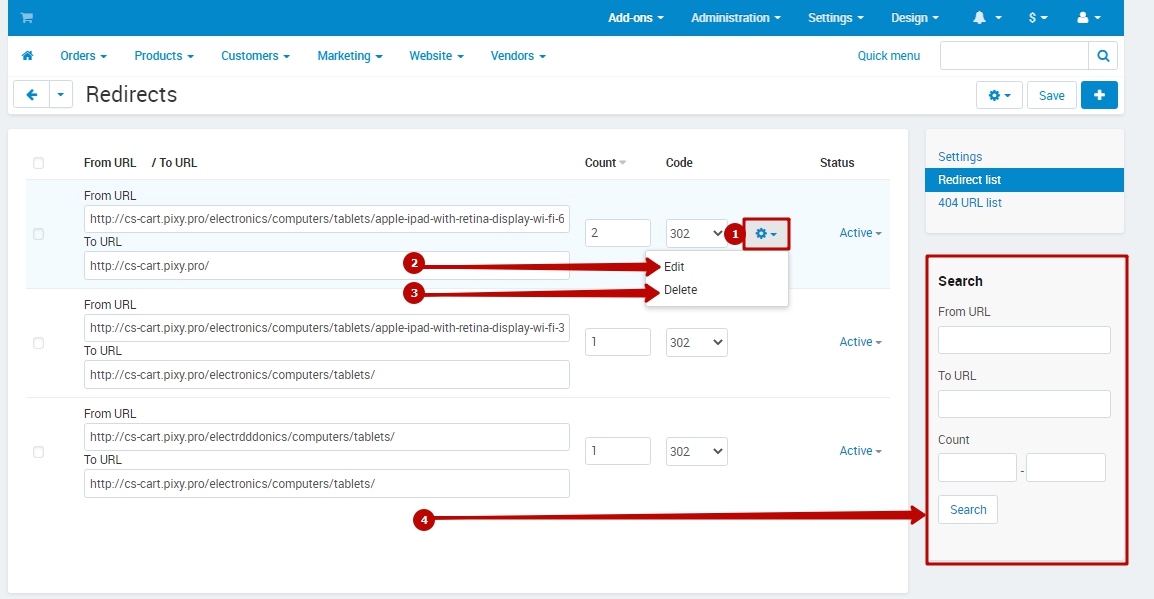
On the Redirects page, all created redirects are displayed in a table.
Each redirect has a 404 URL (404 error), a valid URL, a transition counter, a redirect code, and a redirect status.
Using settings (1) you can edit any redirection - Edit (2) - or delete it - Delete (3).
You can quickly find a specific redirect using the data filter (4).
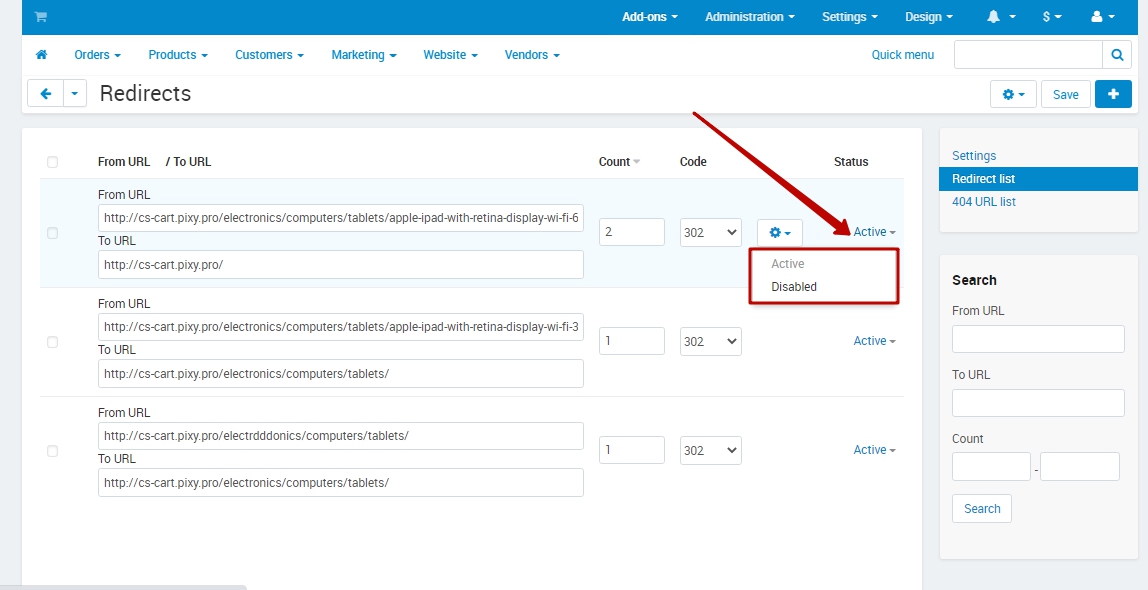
To activate / deactivate the redirection, select the corresponding value (Active / Disabled) in the Status column.
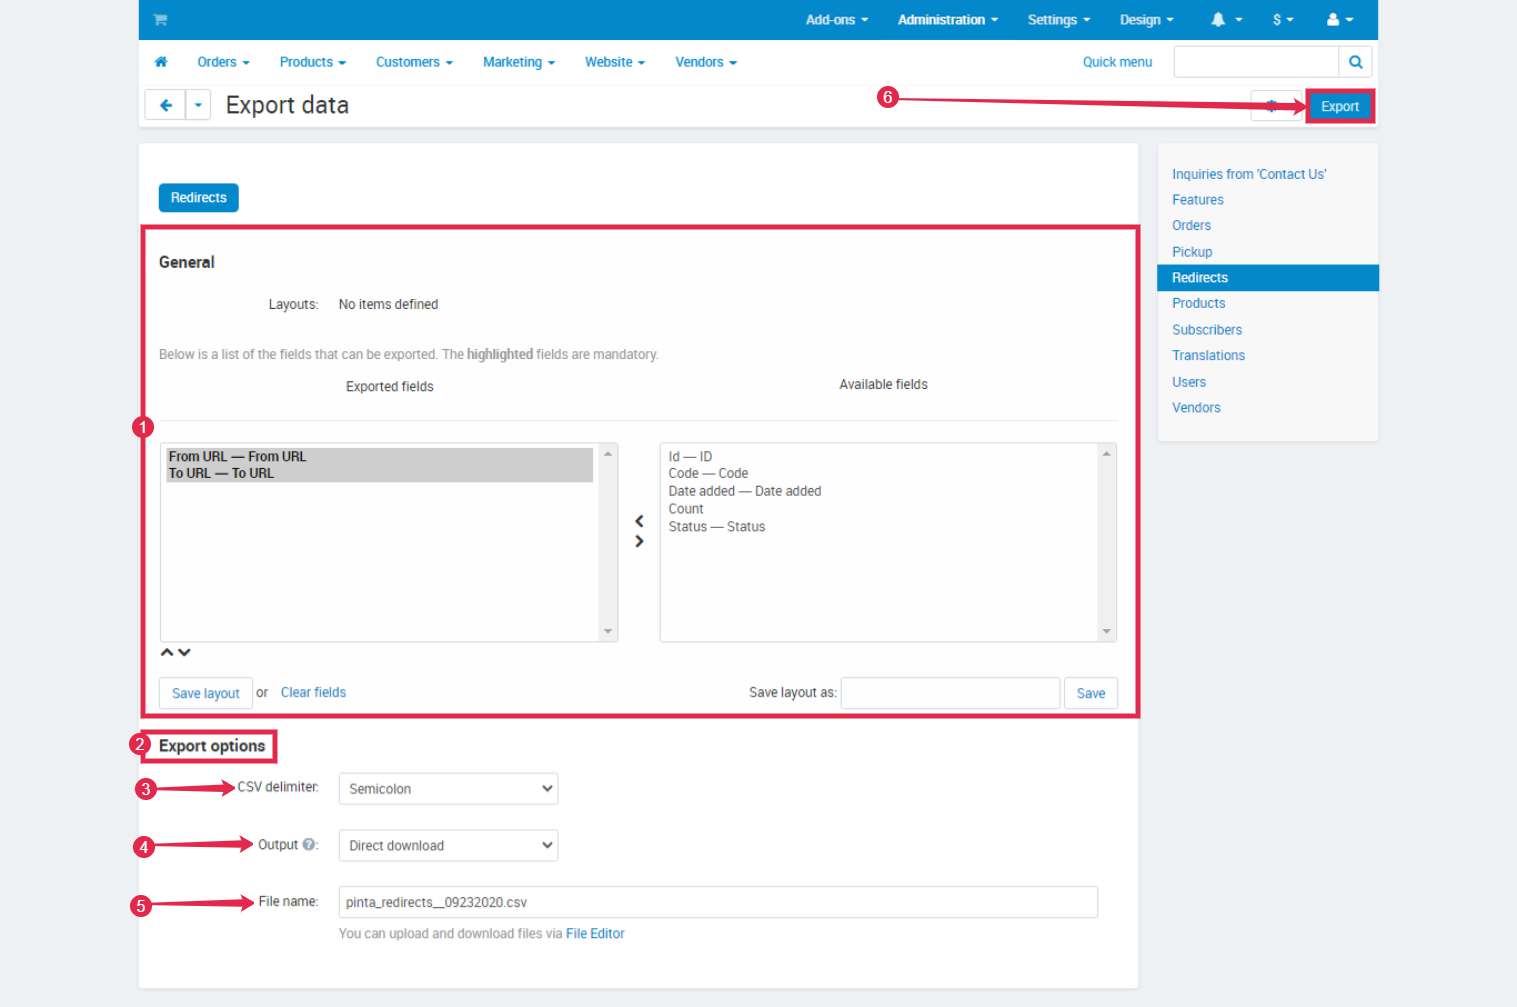
Export data
The page for exporting redirects contains:
The General block (1) with general settings.
The Export options block (2) includes:
The CSV delimiter field (3) - to select the type of redirection delimiters in the file (Comma, Semicolon, or Tab).
The Output field (4) - to select the file download.
The File name field (5) - to enter the file name.
To export previously created redirects, click the Export button (6).
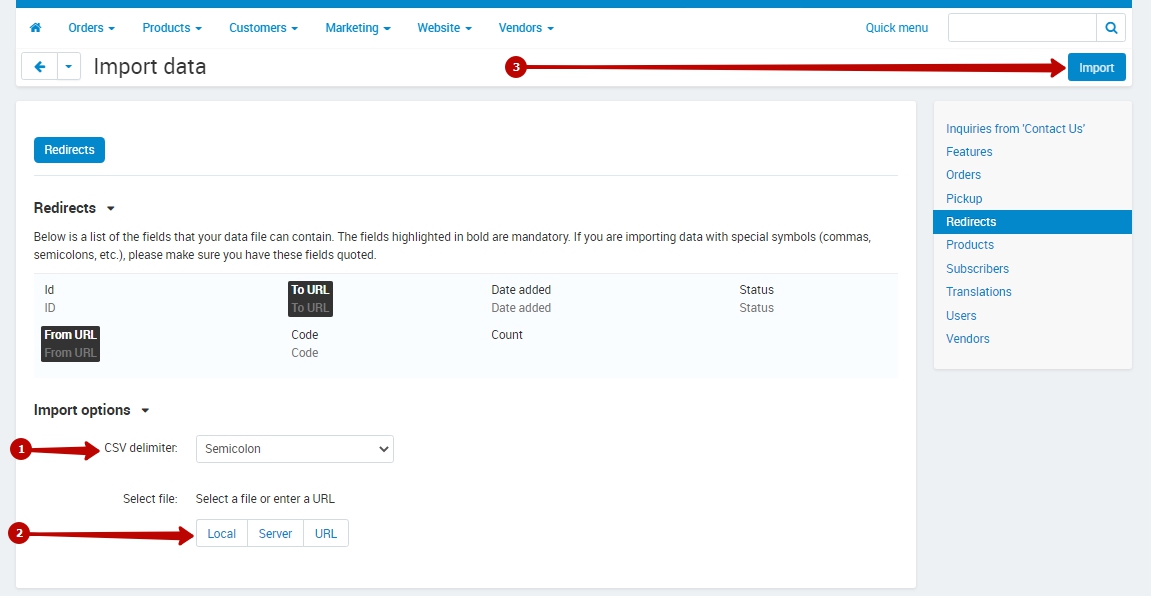
Import data
In the CSV delimiter field (1), select the type of redirection delimiter in the file (Comma, Semicolon, or Tab).
Next, choose the file saved on your computer. To do it, in the Select file field, click the Local button (2).
To import new redirections from a CSV file, click the Import button (3).
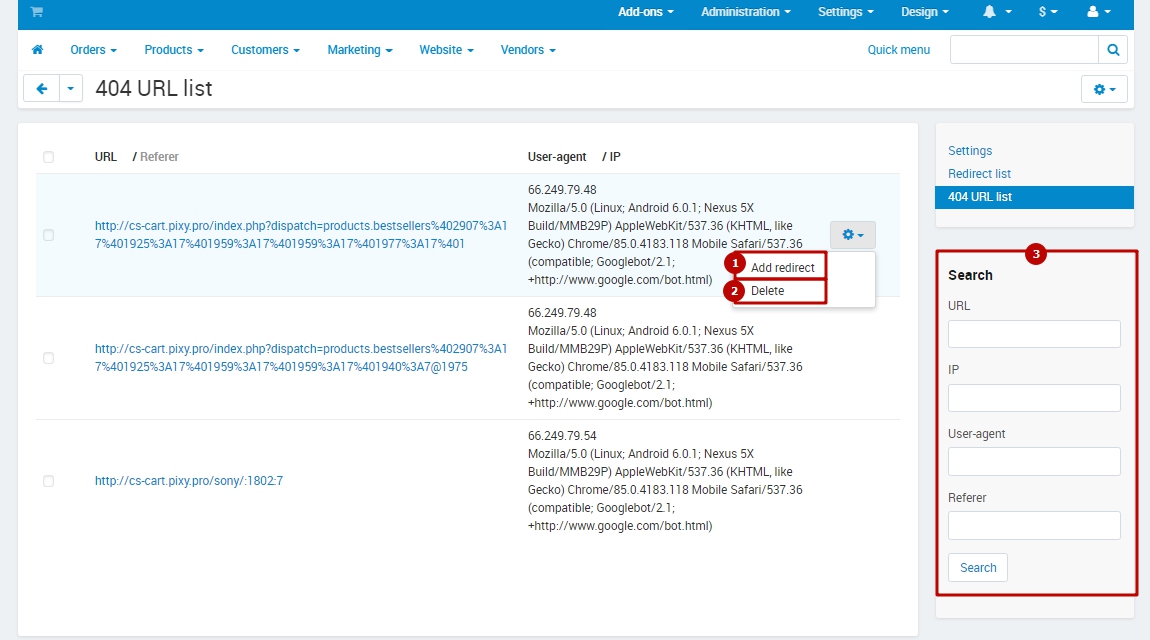
404 URL list
To open the 404 URL list, go to the menu Add-ons > Pinta redirect manager > 404 URL list.
The 404 URL list page displays all 404 URLs on your website that customers have ever visited.
The table with 404 URLs contains data about user transitions to the 404 URLs (URL / Referer, User-Agent / IP).
Using settings, you can create a new redirect - Add redirect (1) - or remove the 404 URL - Delete (2).
You can quickly find a 404 URL with specific data using a table data filter (3).
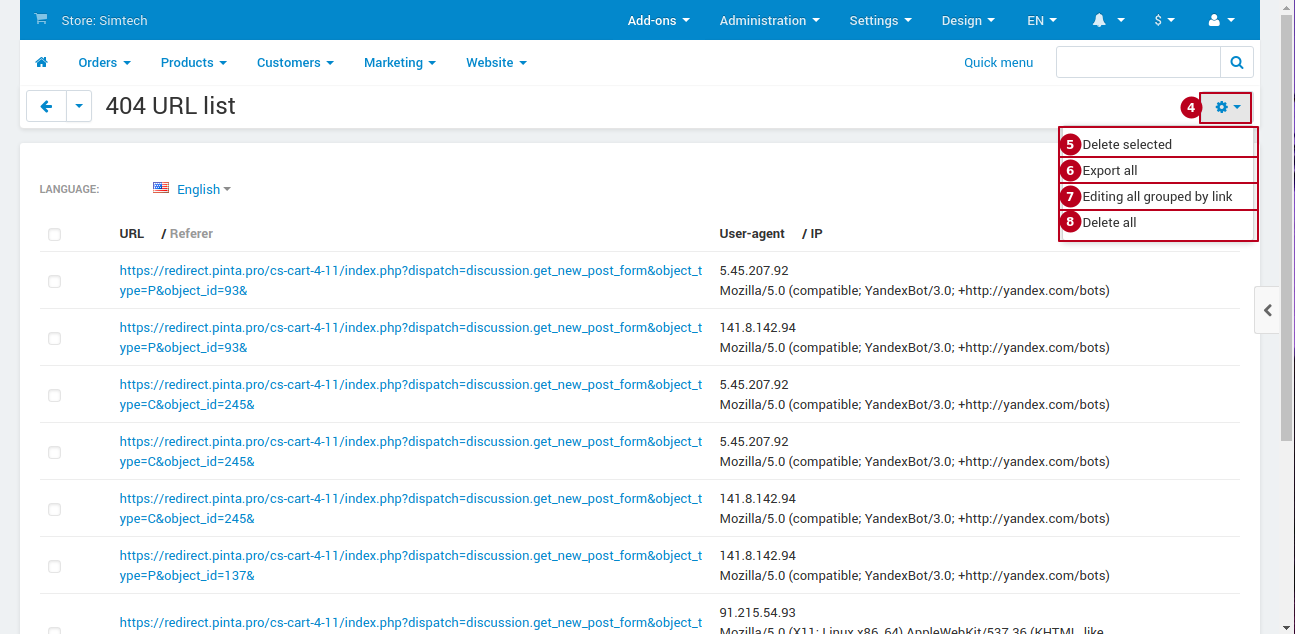
Using the list of settings, you can edit the table with 404 URLs (4):
Delete selected (5) - to remove the selected 404 URLs from the table.
Export all (6) - to export all 404 URLs from the table to a CSV file.
Editing all grouped by link (7) - to export 404 URLs, grouped by URL, from the table to a CSV file indicating the number of clicks.
Delete all 404 urls (8) - to remove all 404 URLs from the table.
Now you can create redirects for your website URL without technical knowledge and problems.
VIDEO INSTRUCTION