Instruction for Redirect URLs Manager in OpenCart 3.0
Instruction REDIRECT URLS MANAGER for OPENCART 3.0
Download and install
Download the plugin archive from the Shop Pinta store and save it on your computer.
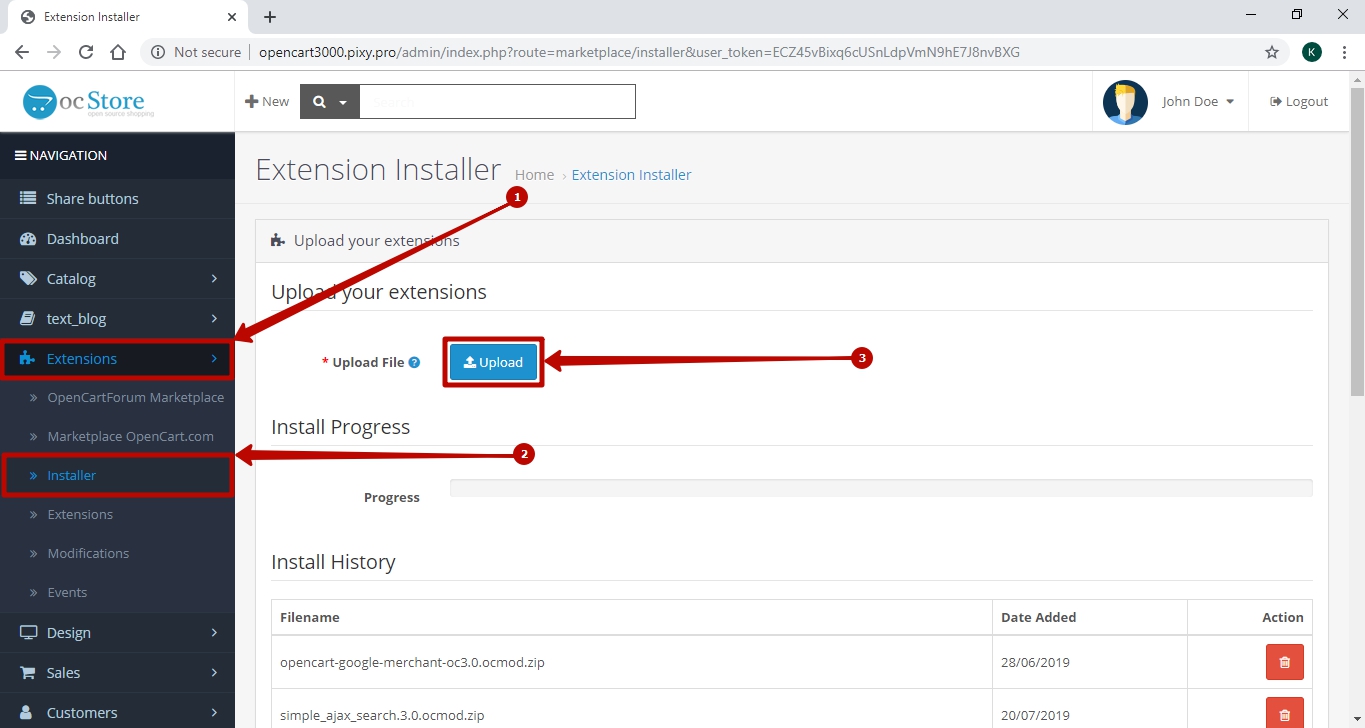
In the admin panel of your website, select Extensions (1) > Installer (2).
In the Upload your extensions block, click the Upload button (3).
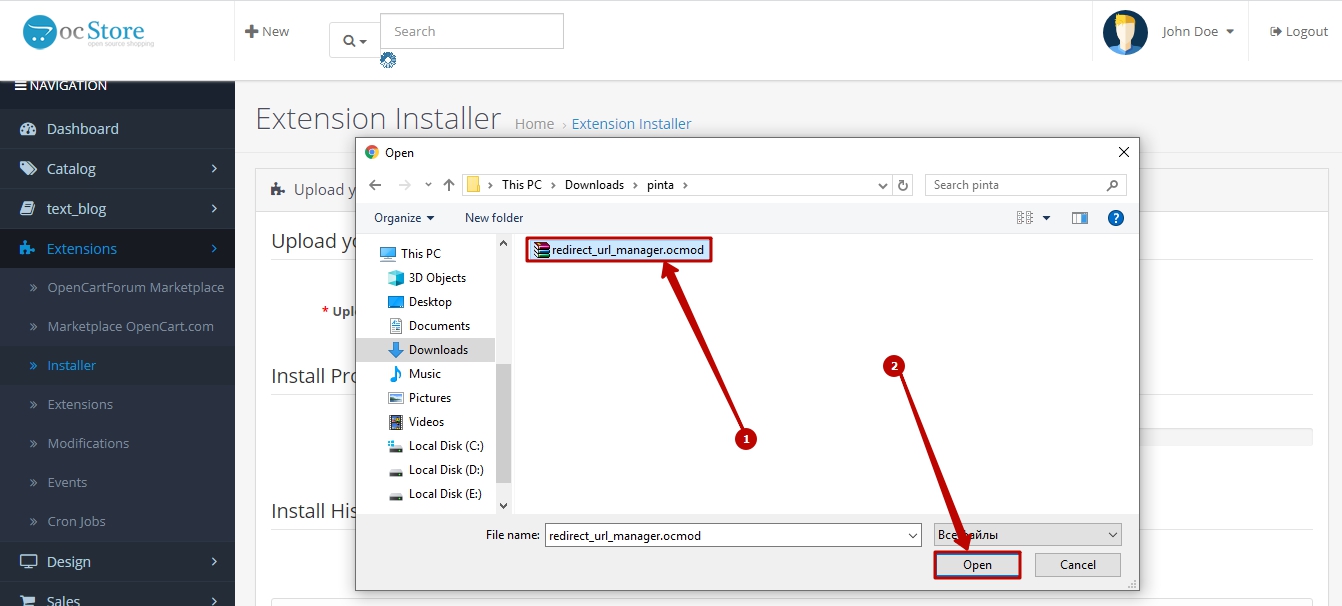
In the opened window, download the plugin archive (1, 2).
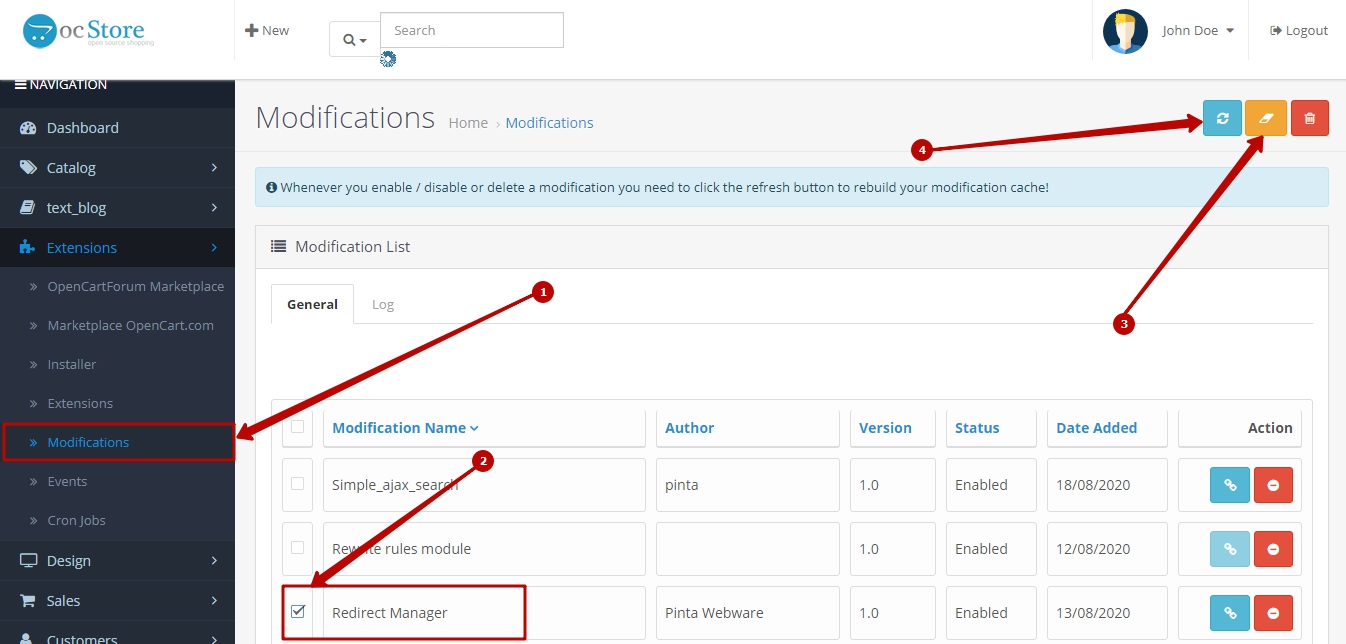
Clear the modification cache (recommended for the OpenCart version lower than v.4.0).
To do it, go to the Modifications subcategory (1), select the checkbox of the Redirect Manager modifier (2), click the Clear (3) and Refresh (4) buttons.
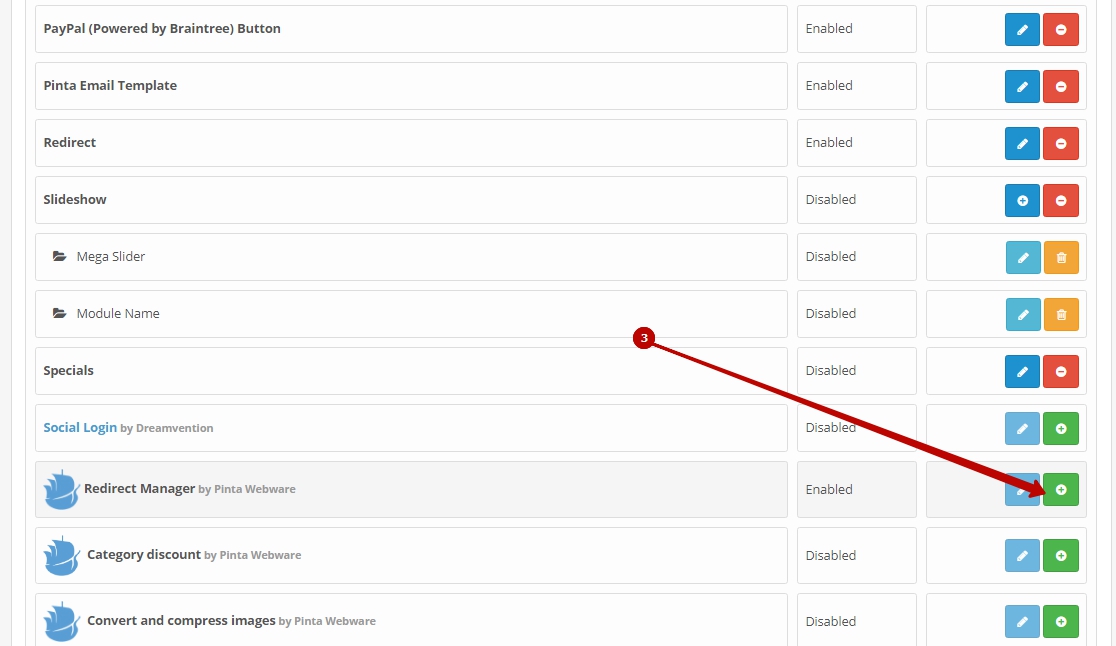
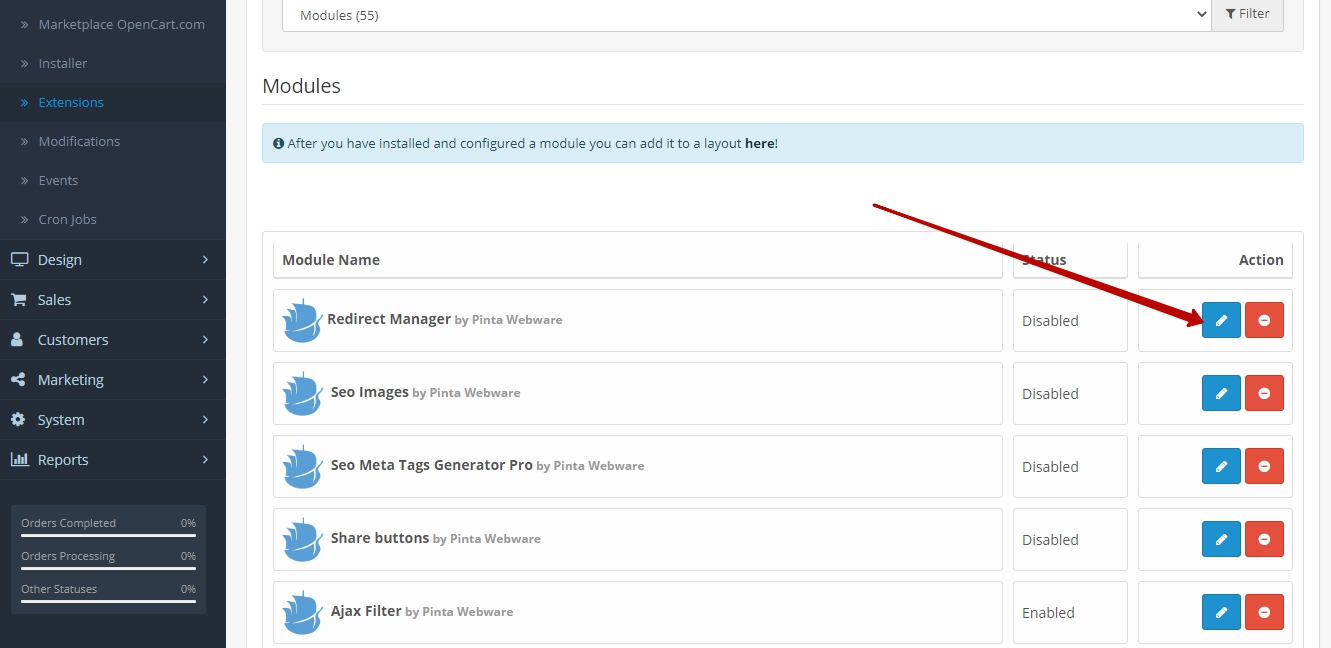
Go to the Extensions subcategory (1). In the Modules list (2) find the Redirect Manager plugin.
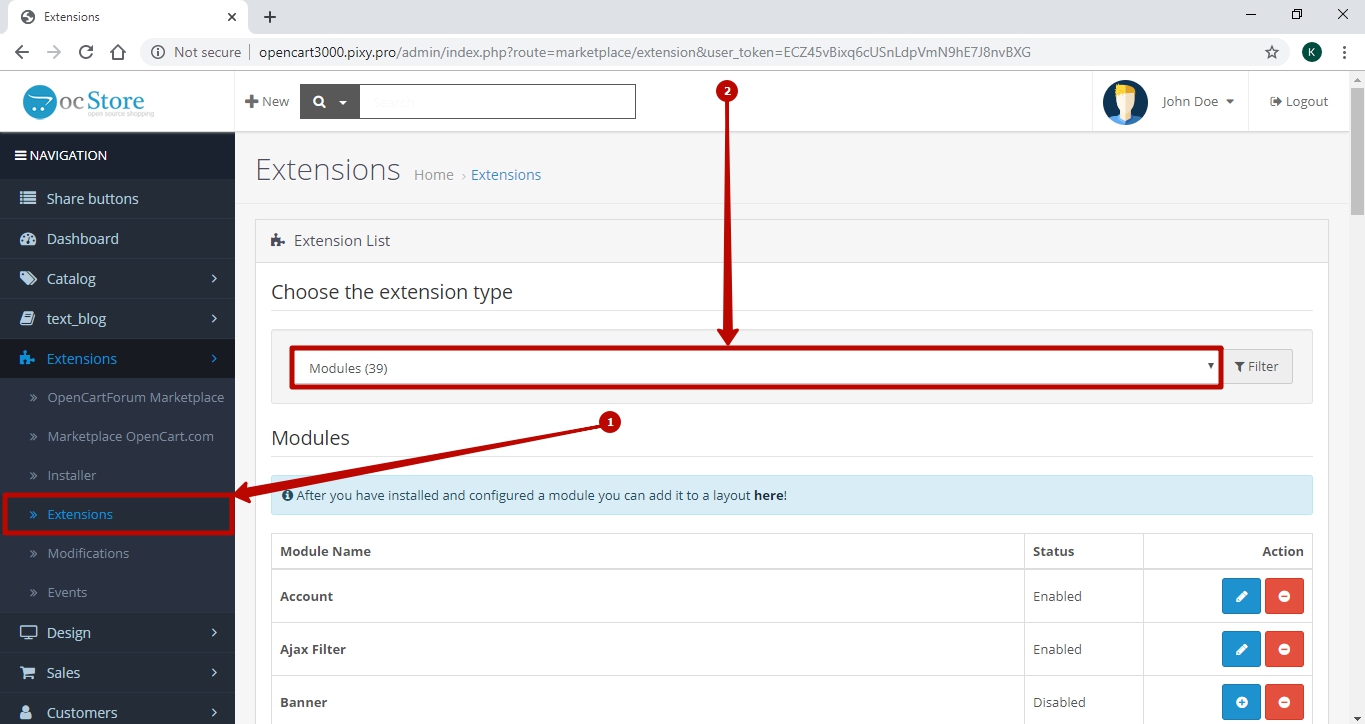
Next, click the Install button (3).
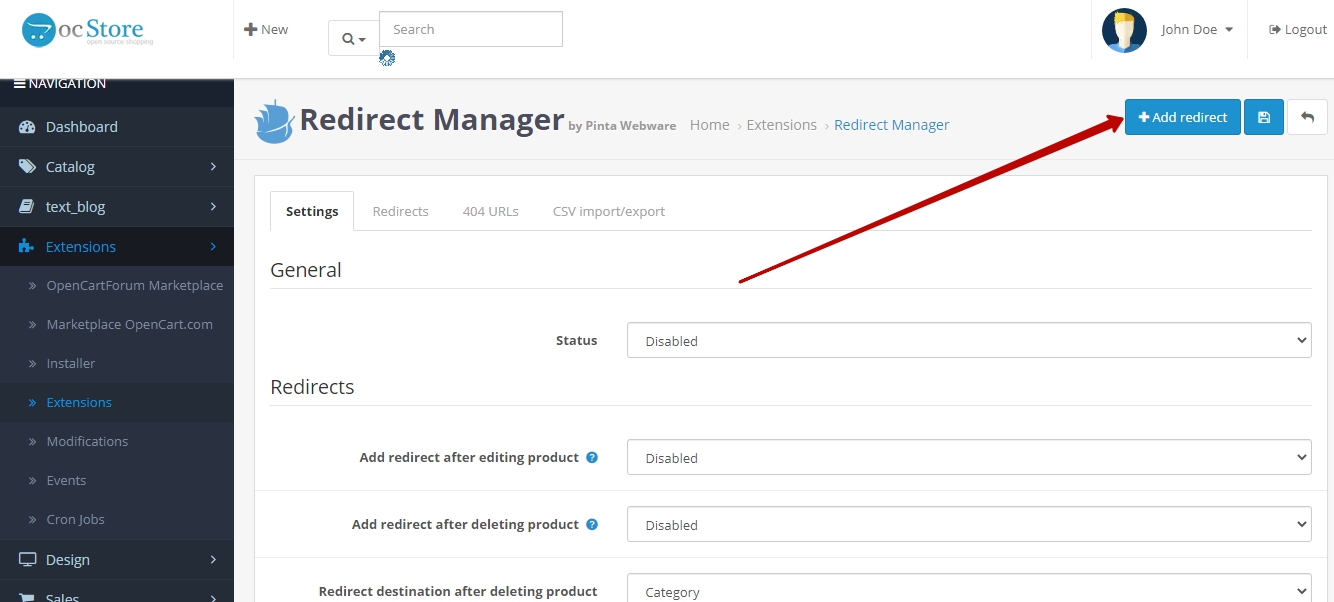
To configure the plugin, click the Edit button.
Plugin page
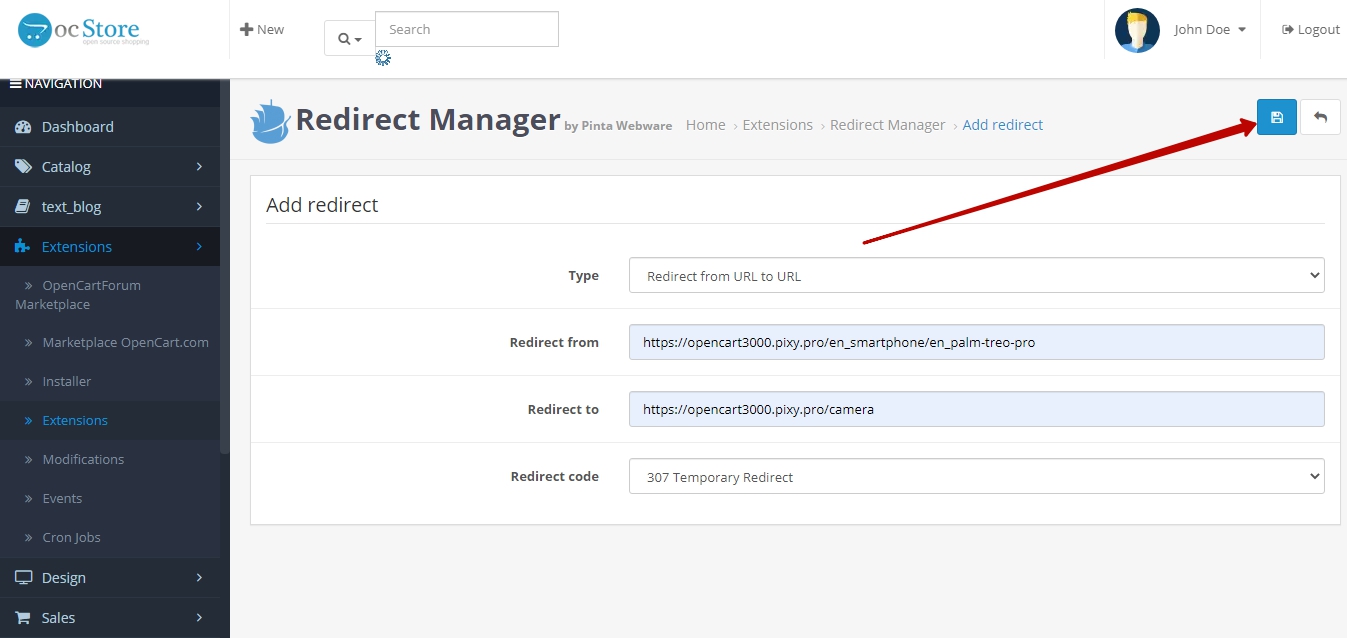
To create a new redirect manually, click the Add redirect button.
The Add redirect page displays the following fields:
Type (1) - to select the type of redirection:
Redirect from URL to URL - to redirect from one URL to another.
Redirect with keyword replacement - to redirect with keyword replacement in the URL.
Redirect from URL containing seo-keyword to another URL - to redirect from URL that includes the seo keyword to another URL.
Redirect from (2) - to enter the URL from which the redirect will be made.
Redirect to (3) - to enter the URL to be redirected to.
Redirect code (4) - to select the redirect code.
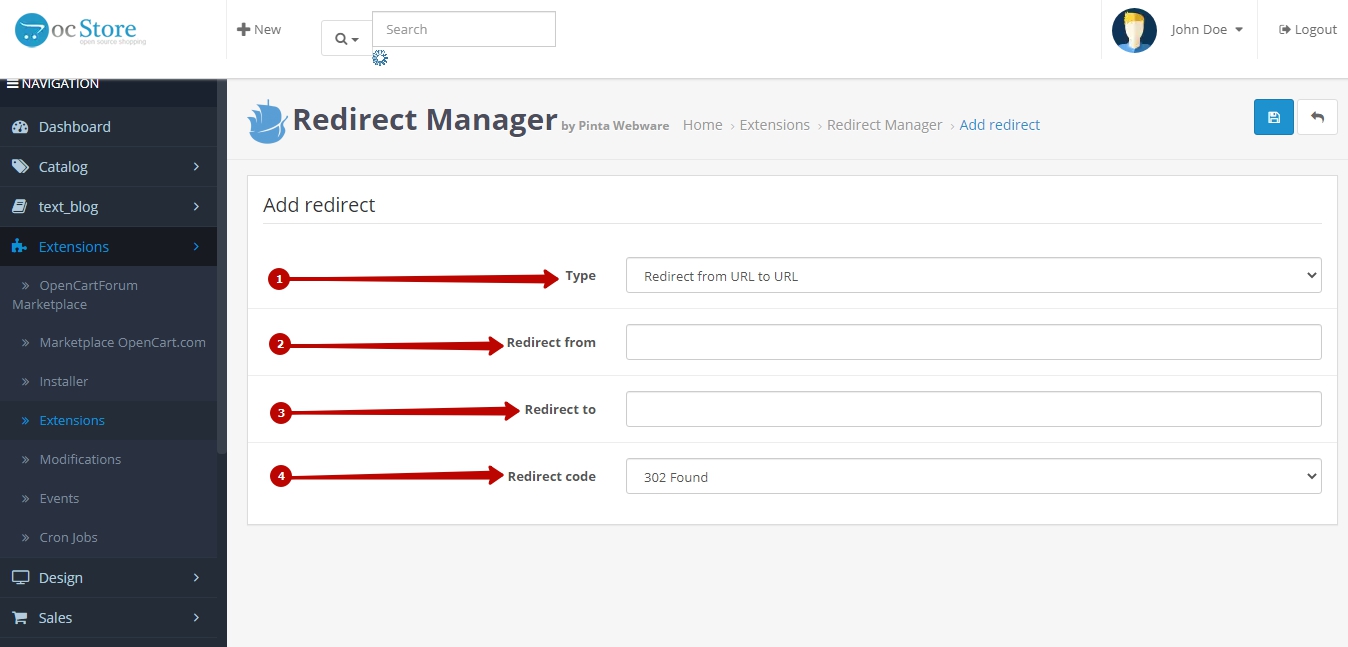
To save the created redirect, click the Save button.
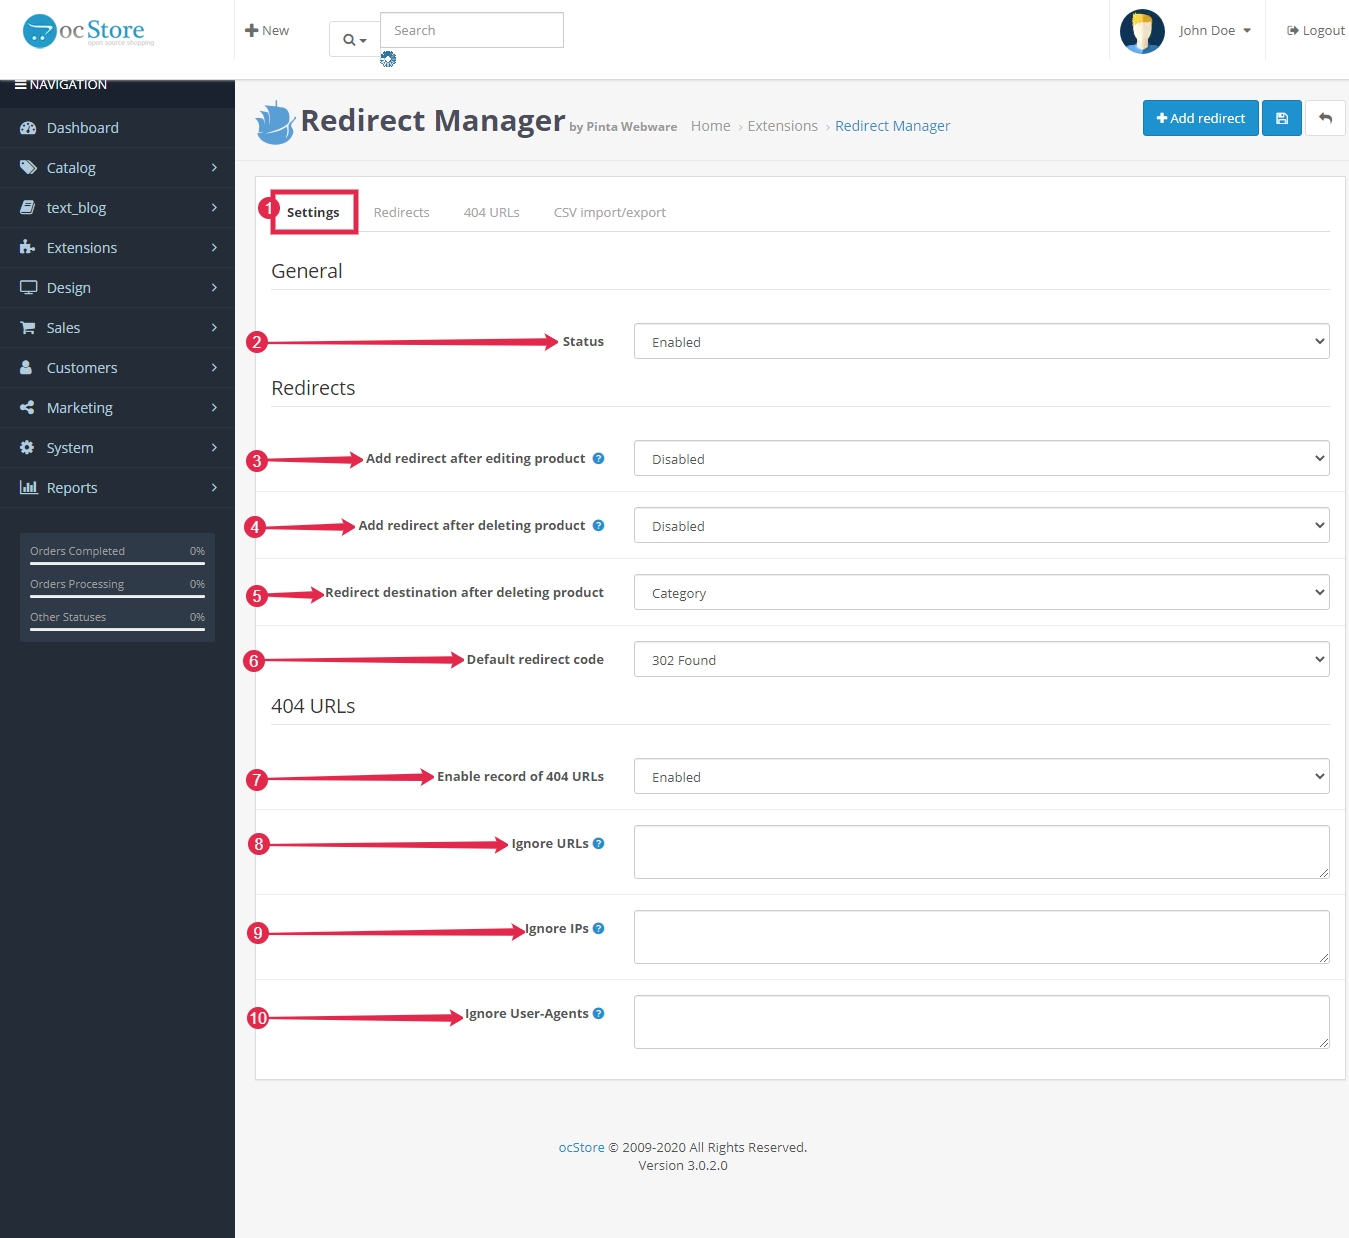
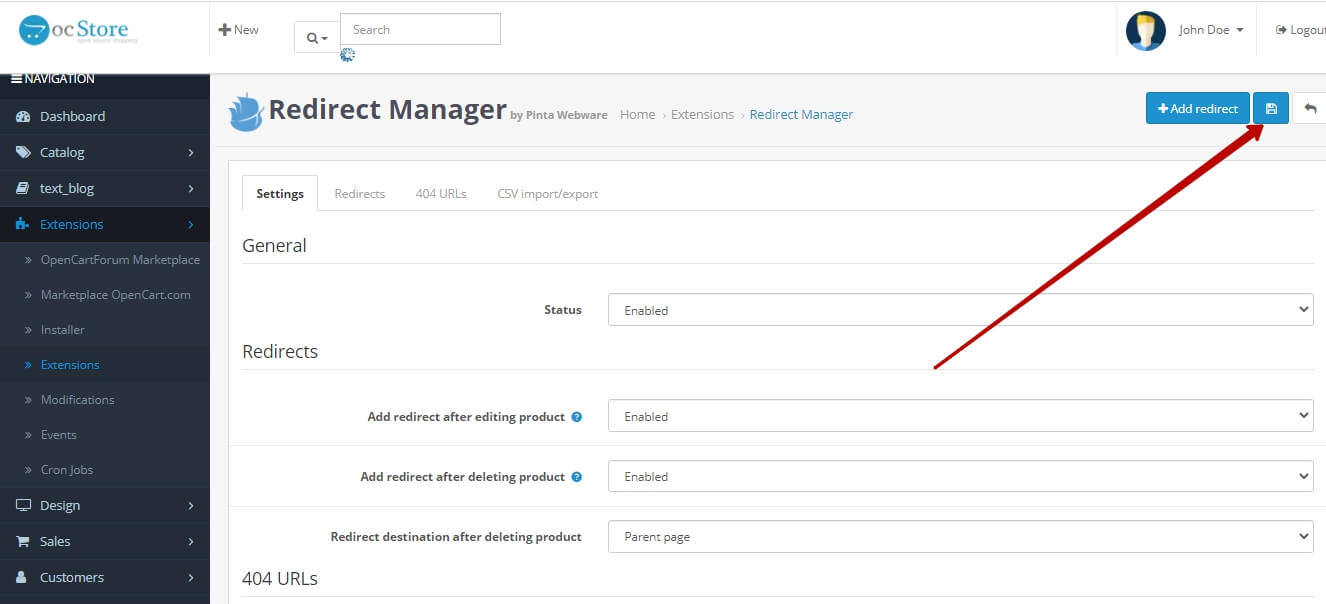
The plugin page allows you to use automatic functions and consists of 4 tabs:
The Setting tab (1).
In the General block, the plugin is enabled / disabled using the corresponding value in the Status field (2) (position Enabled / Disabled).
In the Redirects block, redirection settings are made:
The Add redirect after editing product field (3) - to enable / disable adding a redirect after editing a product (position Enabled / Disabled).
The Add redirect after deleting product field (4) - to enable / disable adding a redirect after deleting a product (position Enabled / Disabled).
The Redirect destination after deleting product field (5) - to select the type of page to be redirected to after deleting a product, by default.
The Default redirect code field (6) - to select a redirect code that will be added after editing / deleting a product, by default.
In the 404 URLs block, you can configure the parameters for ignoring 404 URLs and such URLs will not be considered when writing data to the table:
The Enable record of 404 URLs field (7) - to enable / disable the recording of 404 URLs in the table (position Enabled / Disabled).
The Ignore URLs field (8) - to enter the ignored URLs that will not be automatically added to the table.
The Ignore IPs field (9) - to enter the ignored IPs that will not be automatically added to the table.
The Ignore User-Agents field (10) - to enter the ignored browser User-Agents that will not be automatically added to the table.
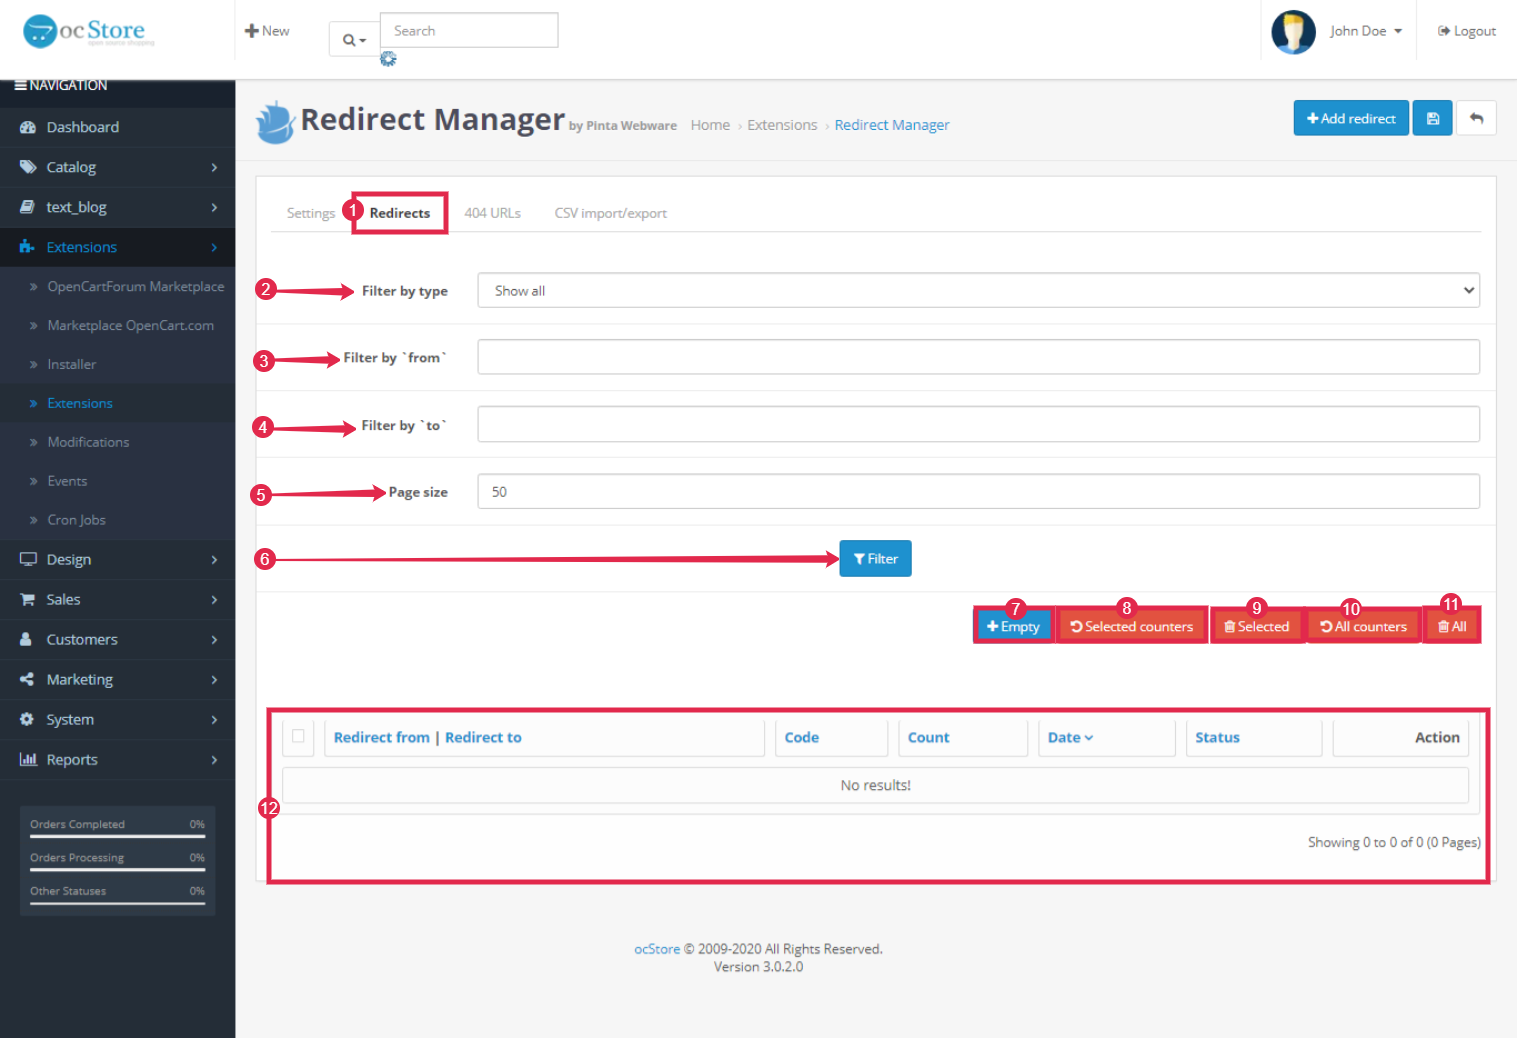
The Redirects tab (1) consists of the table with redirects (12) and settings that help you easily filter, edit / delete created redirects.
The following fields are used to filter redirects by data:
Filter by type (2) - to use a filter by redirection type.
Filter by ‘from’ (3) - to use a filter by the URL from which the redirect is made.
Filter by ‘to’ (4) - to use a filter by the URL to redirect to.
Page size (5) - to select the number of rows displayed in the table on one page.
To apply the settings for filtering data in the table, click the Filter button (6).
It is also convenient to use the buttons for changing the table data:
Empty (7) - to use the template for a new redirect.
Selected counters (8) - to reset the transition counter for the marked redirects.
Selected (9) - to remove the marked redirects.
All counters (10) - to reset the transition counter for all redirects.
All (11) - to remove all redirects.
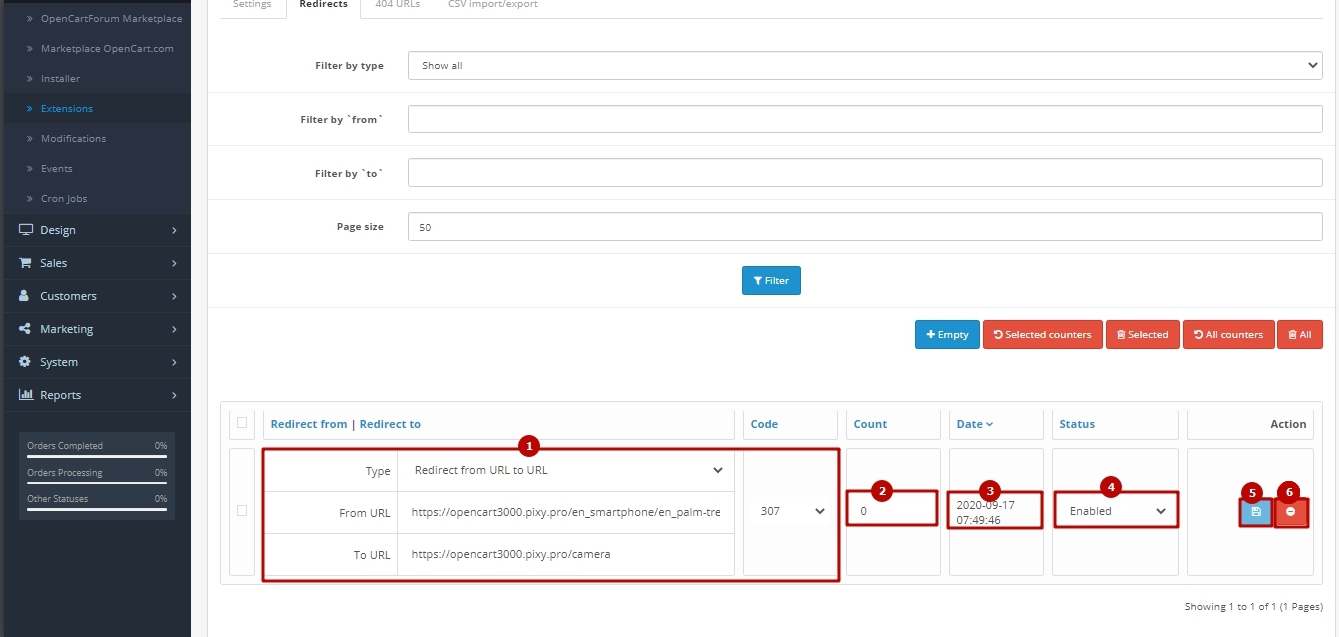
The table displays all created redirects with this plugin.
For each redirection, the following is indicated:
The basic redirection options (1):
The Type field - to select the type of redirection,
The From URL field - to enter the URL from which the redirect will be made,
The To URL field - to enter the URL to be redirected to,
The Code field - to select a redirect code.
The Count field (2) - to display the transition counter for 404 URLs.
The Date field (3) - to display the date when the redirect was created.
The Status field (4) - to enable / disable a redirection (position Enabled / Disabled).
You can edit and save many redirection parameters by clicking the Save button (5).
If necessary, you can delete the redirect using the Remove button (6).
The 404 URLs tab (1) displays all 404 URLs on your website that customers have ever visited:
You can quickly find specific 404 URLs in the table (7) using fields for filtering:
Filter by URL (2) - to use a filter by URL.
Filter by User-Agent (3) - to use a filter by User-Agent.
Filter by IP (4) - to use a filter by IP.
Page size (5) - to select the number of rows displayed in the table on one page.
To apply the settings for filtering data in the table, click the Filter button (6).
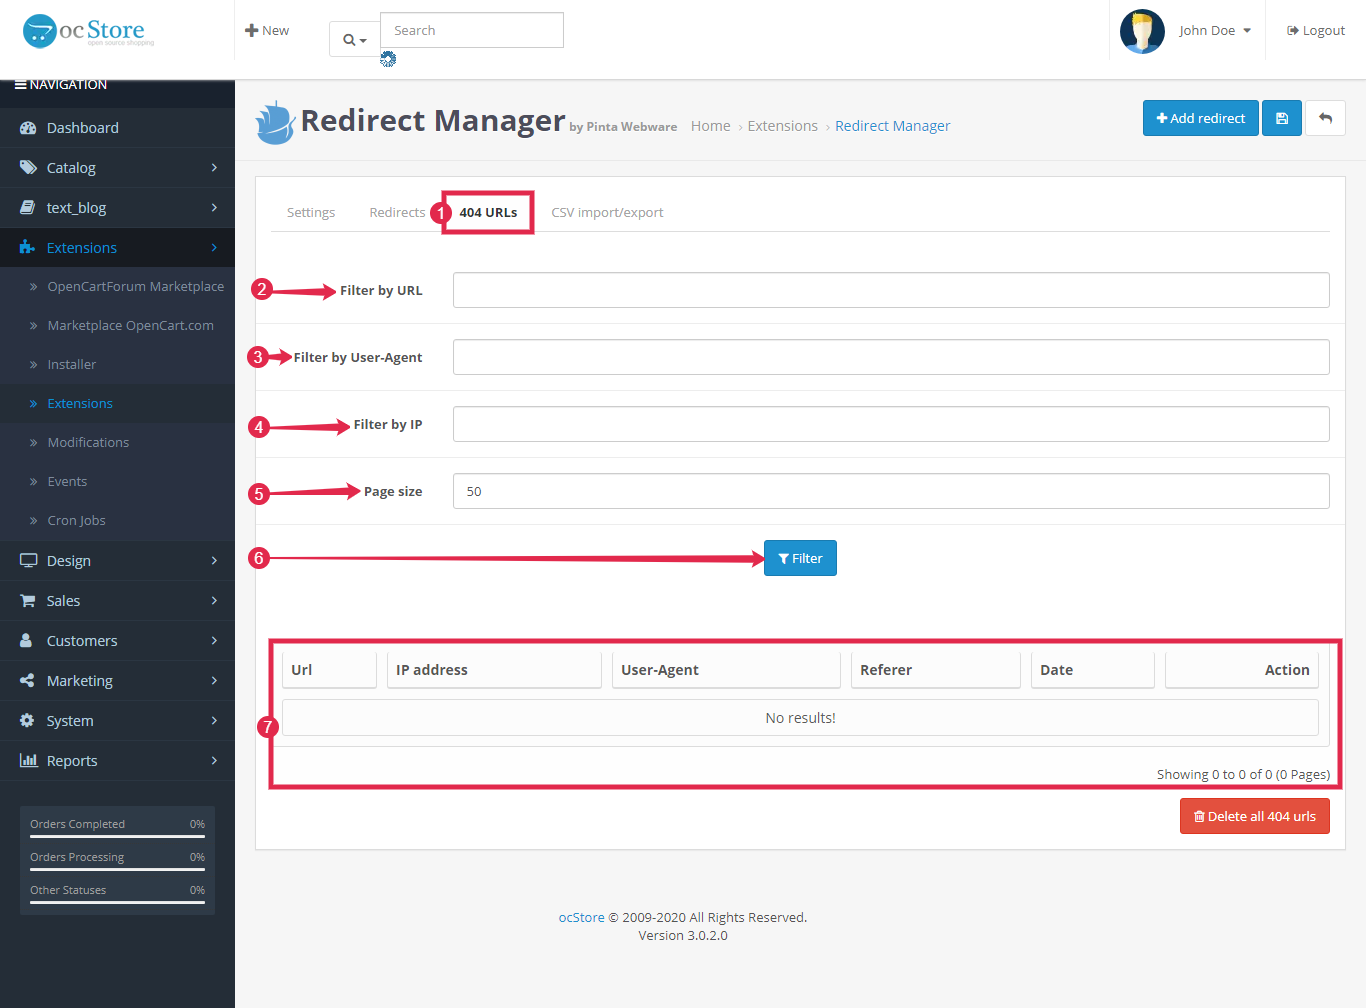
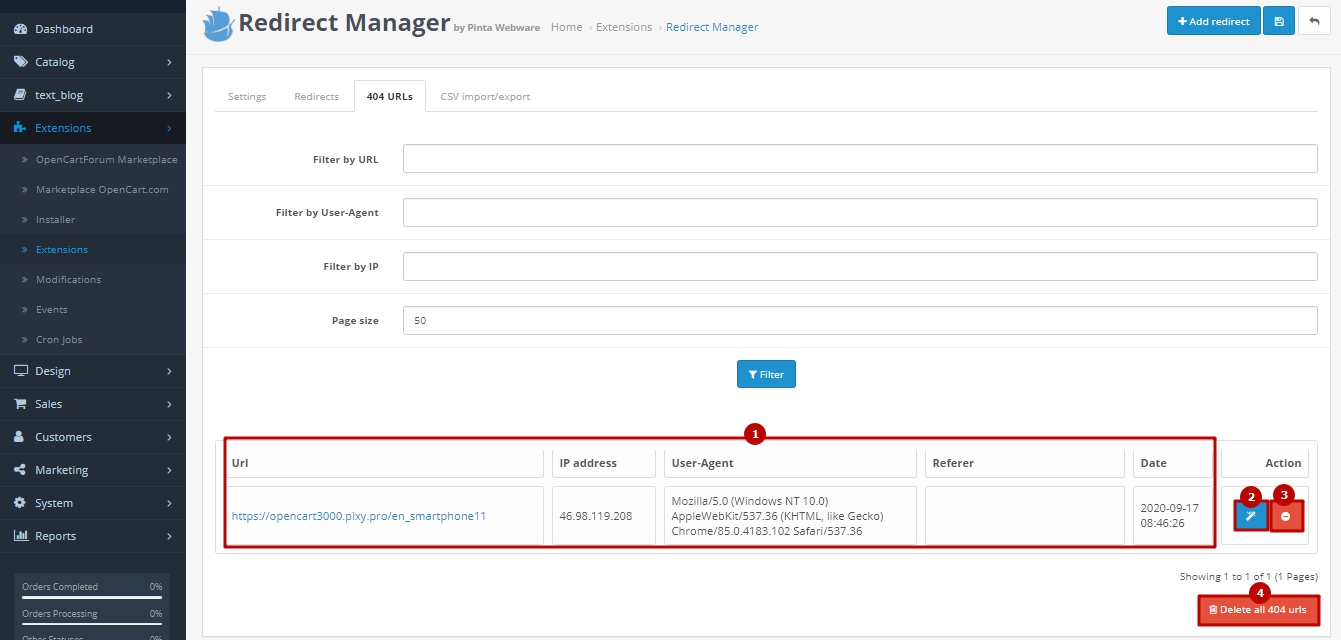
The table with 404 URLs contains data about user transitions to the 404 URLs (URL, IP address, User-Agent, Referer, Date).
To use the 404 URL and create a new redirect, click the Add redirect button (2).
To remove the 404 URL, click the Remove button (3).
If you want to delete all 404 URLs from the table, click the Delete all 404 urls button (4).
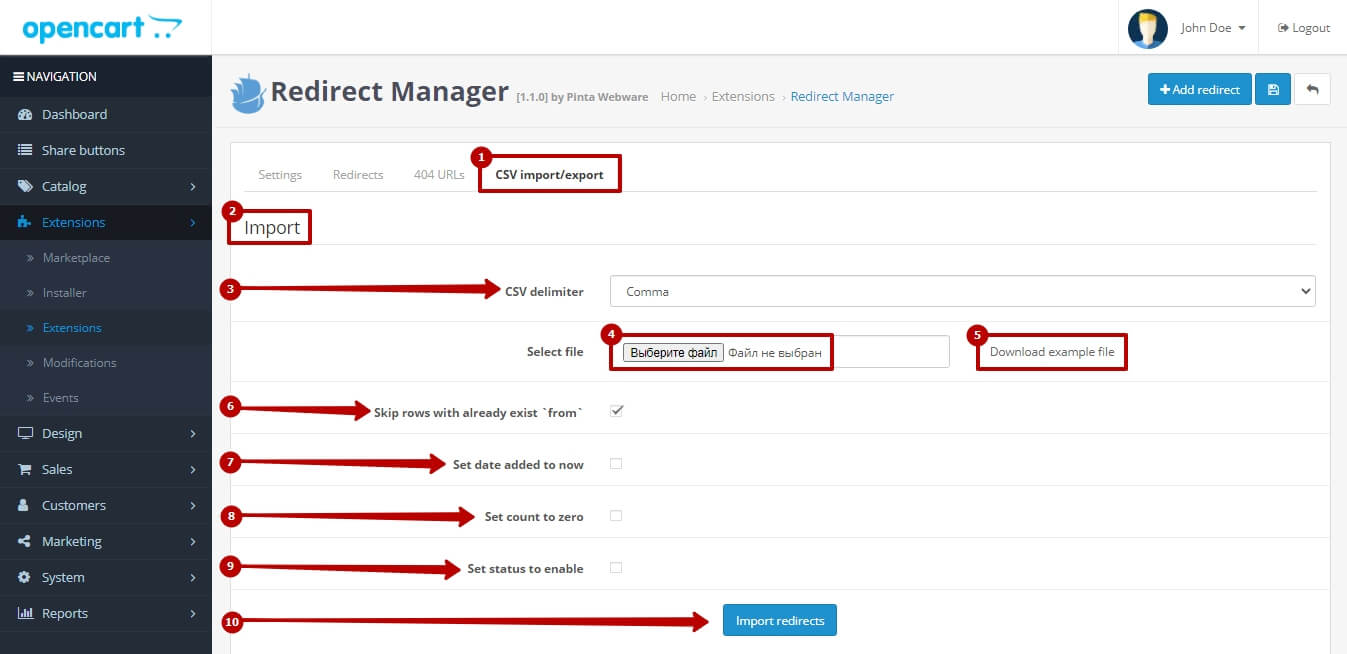
The CSV import/export tab (1) allows you to export all redirects / 404 URLs to a CSV file. Also, you can upload the edited file with redirections, using the import function.
The Import block (2) allows you to configure the import of a file with redirects:
The CSV delimiter field (3) - to select the type of redirect delimiter in the file (Comma, Semicolon, or Tab).
The Select File field - to select and view a file with redirects:
The Choose File button (4) - to select a file saved on your computer.
The Download example file button (5) - to download the file with the redirect examples.
Checkboxes for selecting the settings for the uploaded file:
Skip rows with already exist ‘from’ (6).
Set date added to now (7).
Set count to zero (8).
Set status to enable (9).
To import new redirections from a CSV file, click the Import redirects button (10).
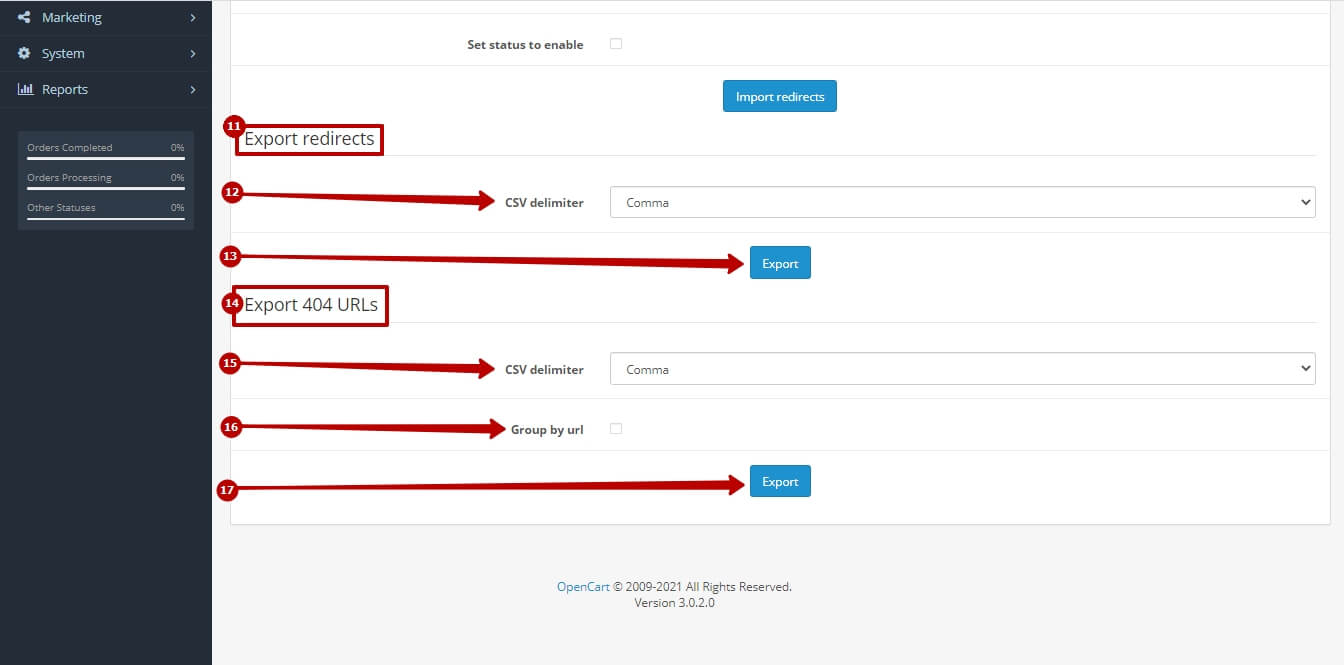
The Export redirects block (11) allows you to export redirects created with this plugin to a CSV file.
In the CSV delimiter field (12), you can select the type of redirection delimiters in the file (Comma, Semicolon, or Tab).
To export previously created redirects, click the Export button (13).
The Export 404 URLs block (14) allows you to export 404 URLs to a CSV file.
In the CSV delimiter field (15), you can select the type of redirection delimiters in the file (Comma, Semicolon, or Tab).
To group data by URL, check the Group by url checkbox (16).
To export 404 URLs to a CSV file, click the Export button (17).
After selecting the settings, click the Save button.
Now you can create redirects for your website URL without technical knowledge and problems.
VIDEO INSTRUCTION