Instruction for Smart Ajax Search Plugin in CS-Cart
INSTRUCTION AJAX LIVE SEARCH FOR CS-CART
Download and install
Download the plugin archive from the Shop Pinta store and save it on your computer.
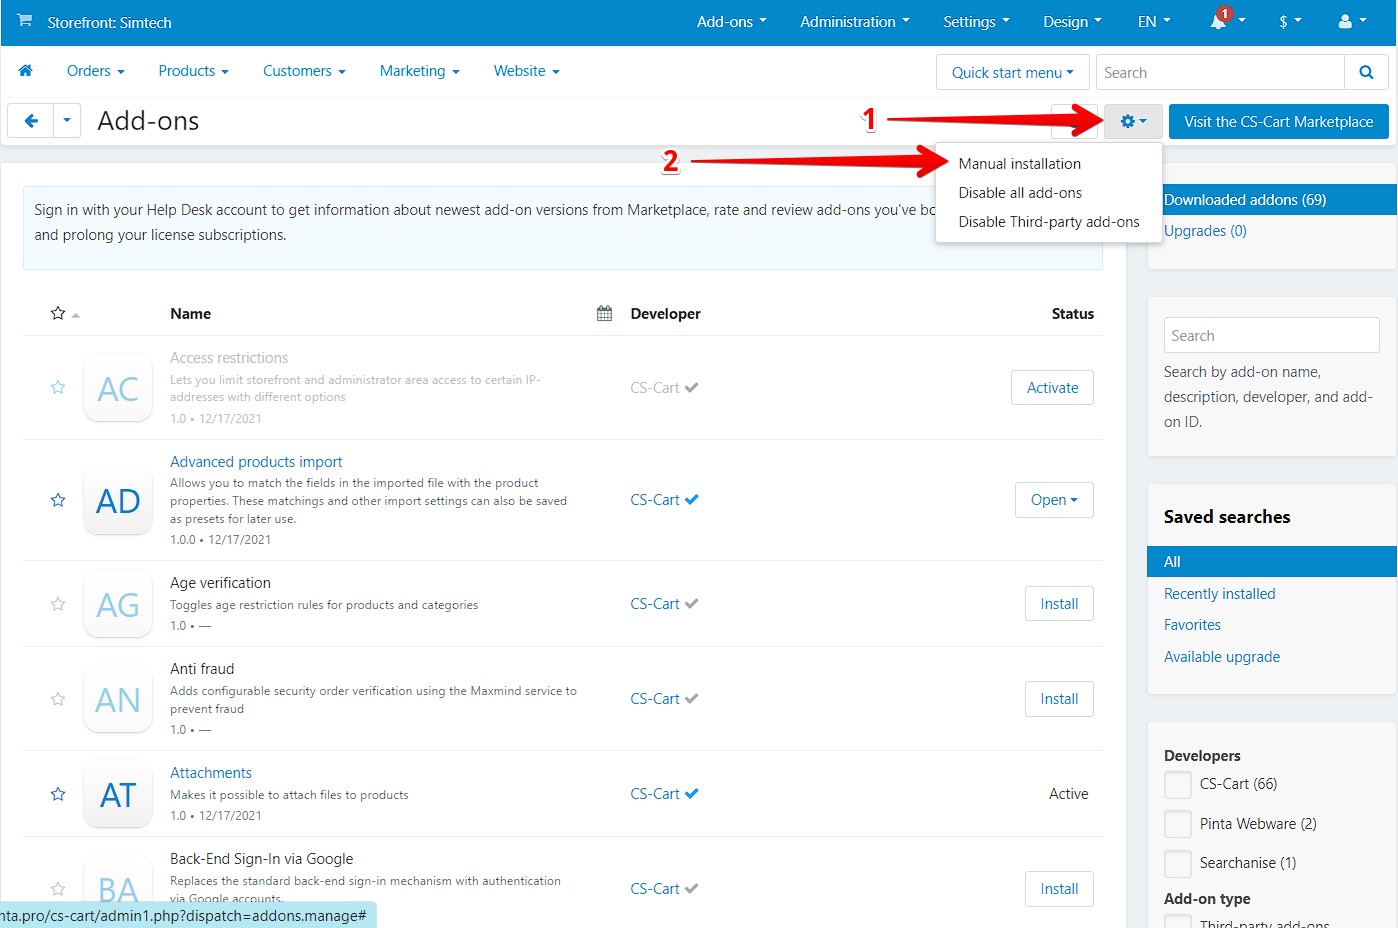
In the admin panel of your website, select Add-ons (1) > Manage add-ons (2).
Download the plugin archive from the Shop Pinta store and save it on your computer.
In the admin panel of your website, select Add-ons (1) > Manage add-ons (2).

On the Add-ons page, select Manual installation (2) from the list of options (1).
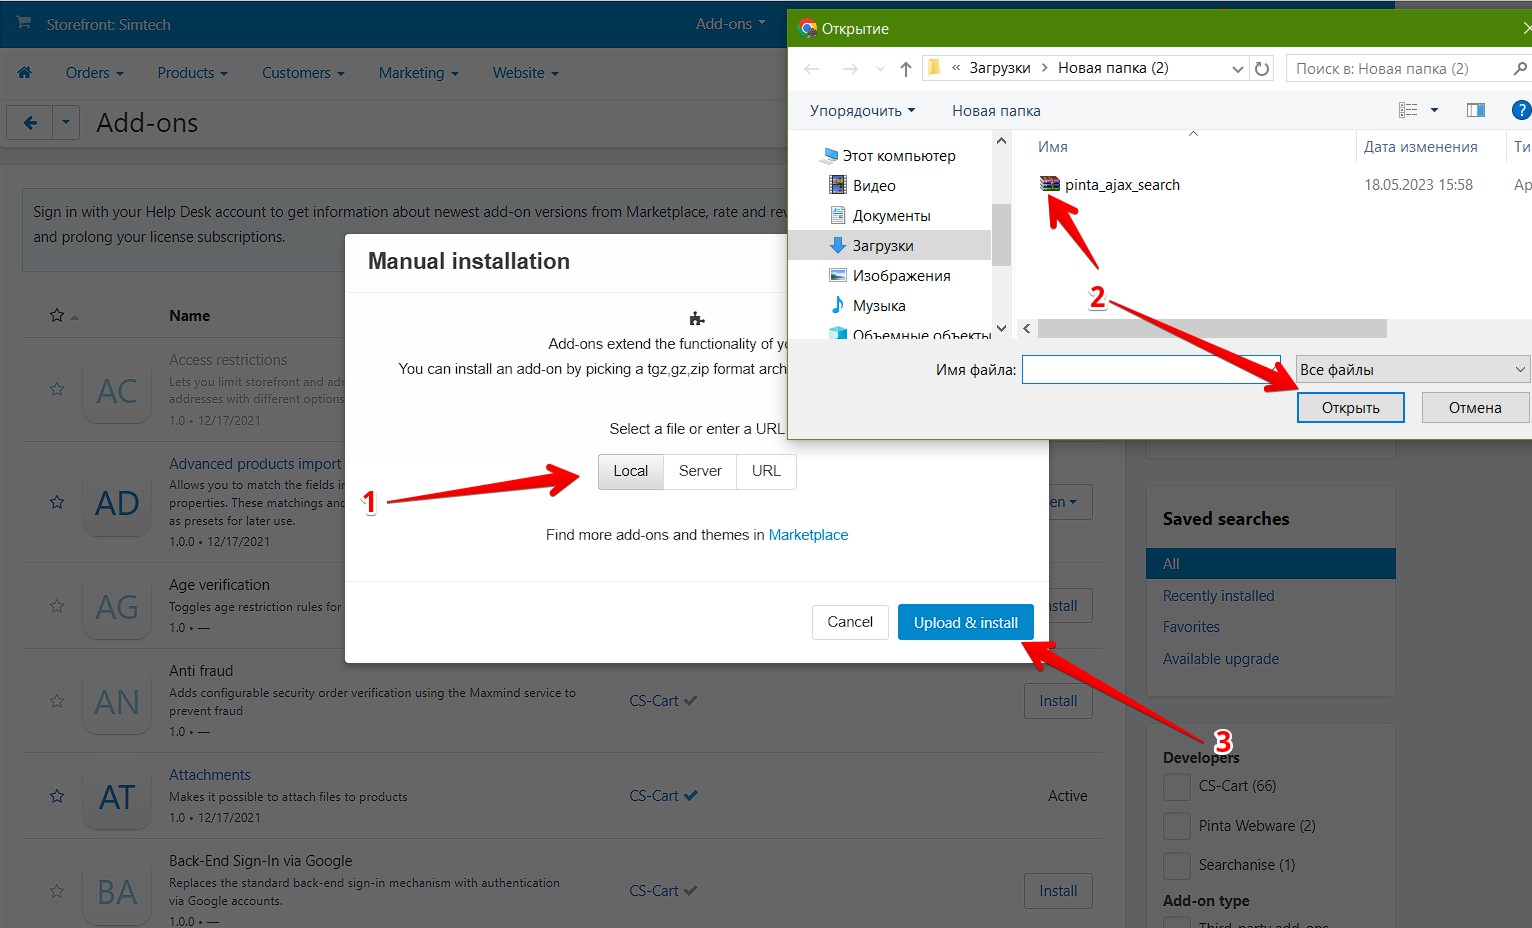
Upload the plugin archive from your computer (1, 2) and click the Upload & install button (3).
To configure the plugin, go to the section Add-ons (1) > Simple Ajax Search (2) that appears in the main menu of the admin panel after installation.

Plugin page
The plugin page consists of 4 tabs:
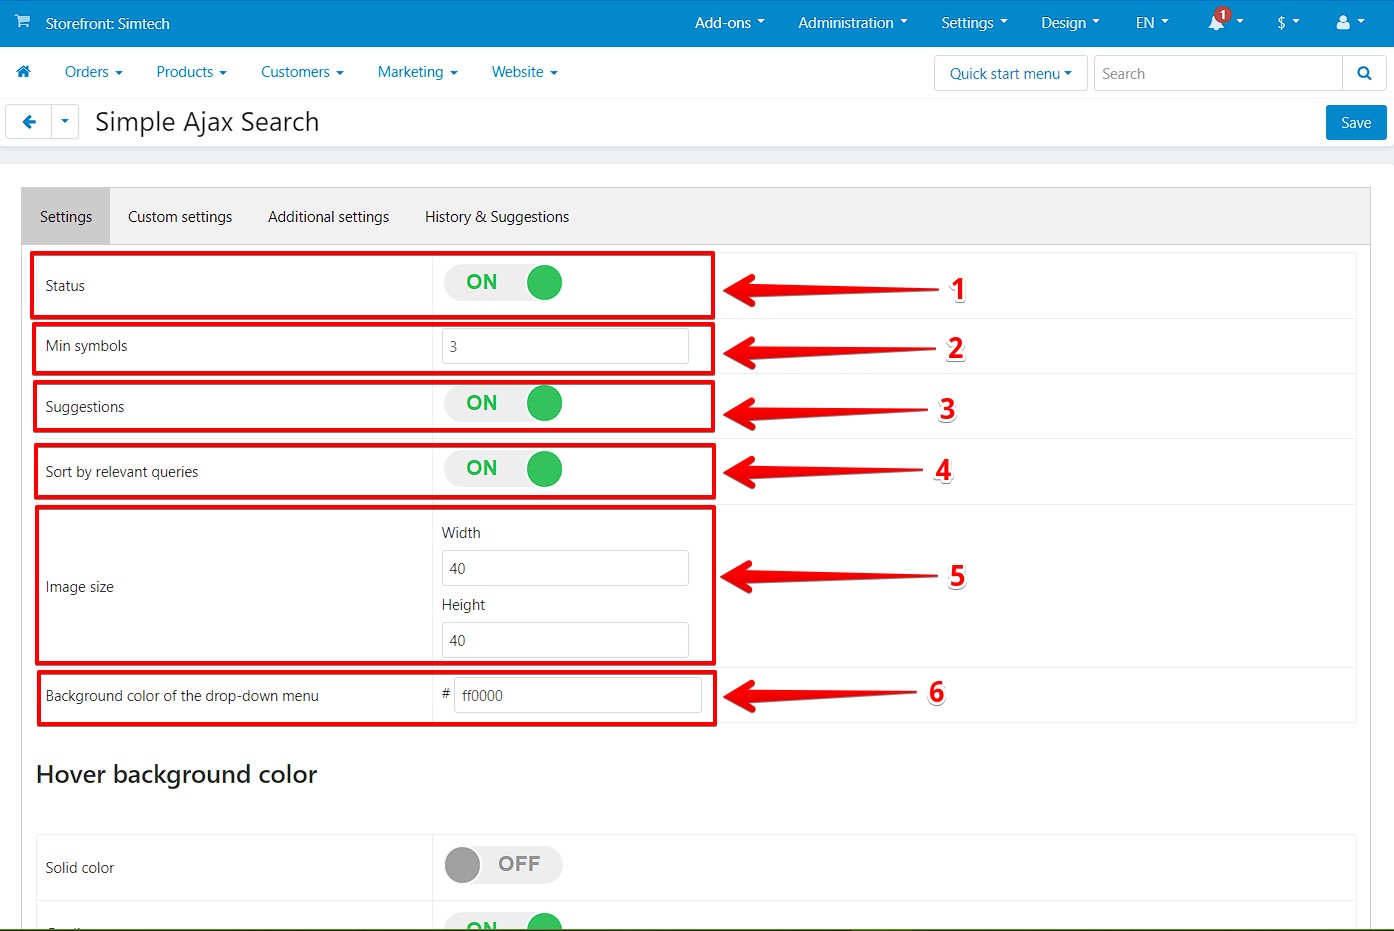
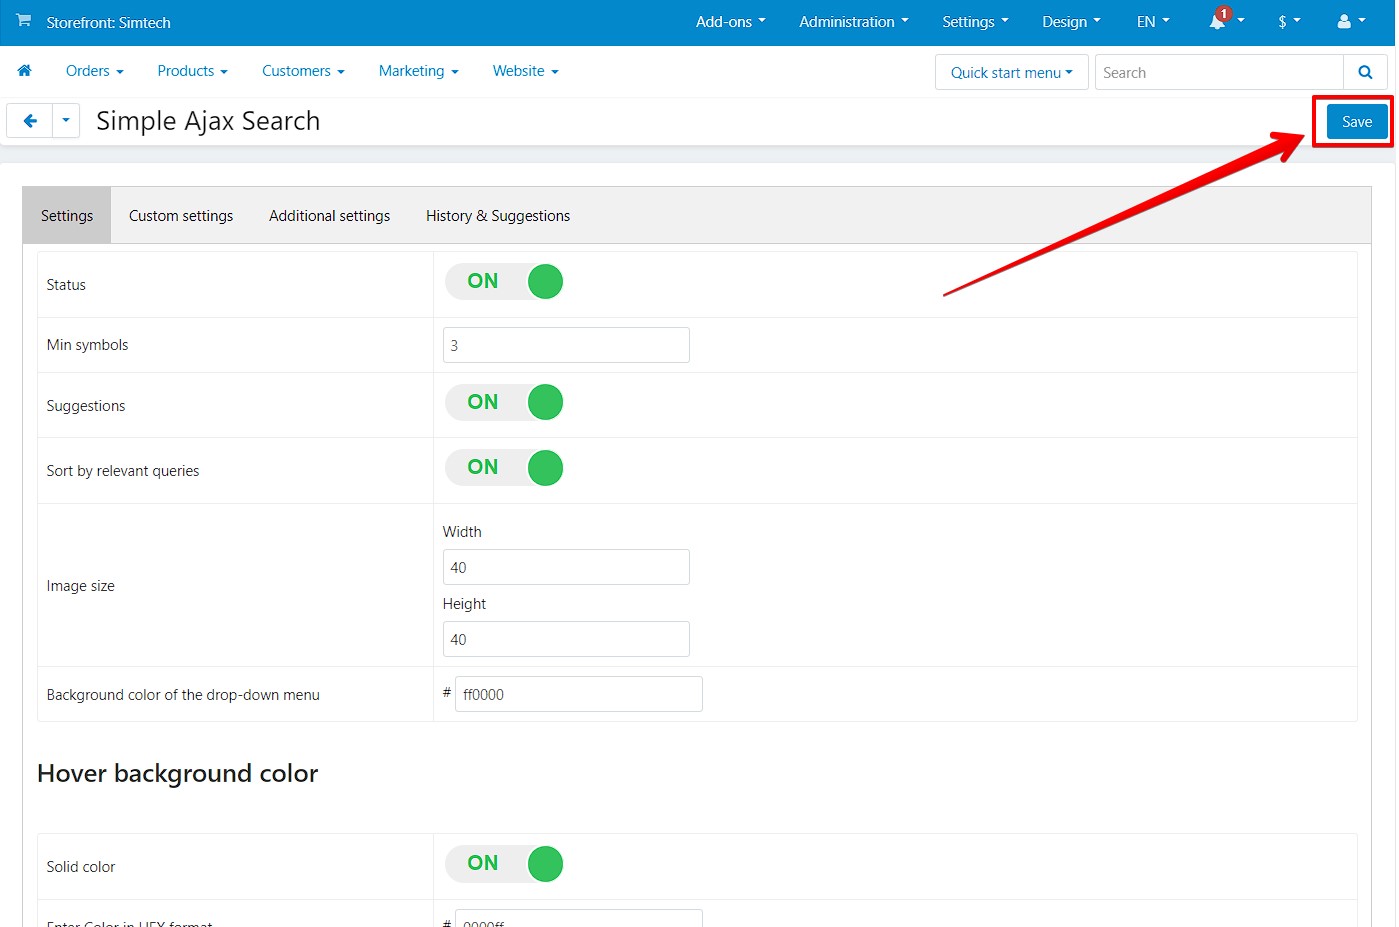
The Settings tab.
This tab contains:
The Status сheckbox (1) - to enable / disable the plugin (position ON / OFF).
The Min symbols field (2) - to enter the number of symbols in the query required to display the drop-down list with search results. If the query from the Search field contains insufficient symbols, the drop-down list will not be displayed.
The Suggestions checkbox (3) - to add the Auto-completion of the results functionality to the standard search field (position ON / OFF). The user enters the name of the product and receives the result corresponding to the request.
The Sort by relevant queries checkbox (4) - to sort the search results so that the most relevant products are displayed at the top of the list (position ON / OFF).
The Image size (5) - to select the width and height for product images in the drop-down list with search results.
The Background color of the drop-down menu (6) - to select the background color of the drop-down list with search results.
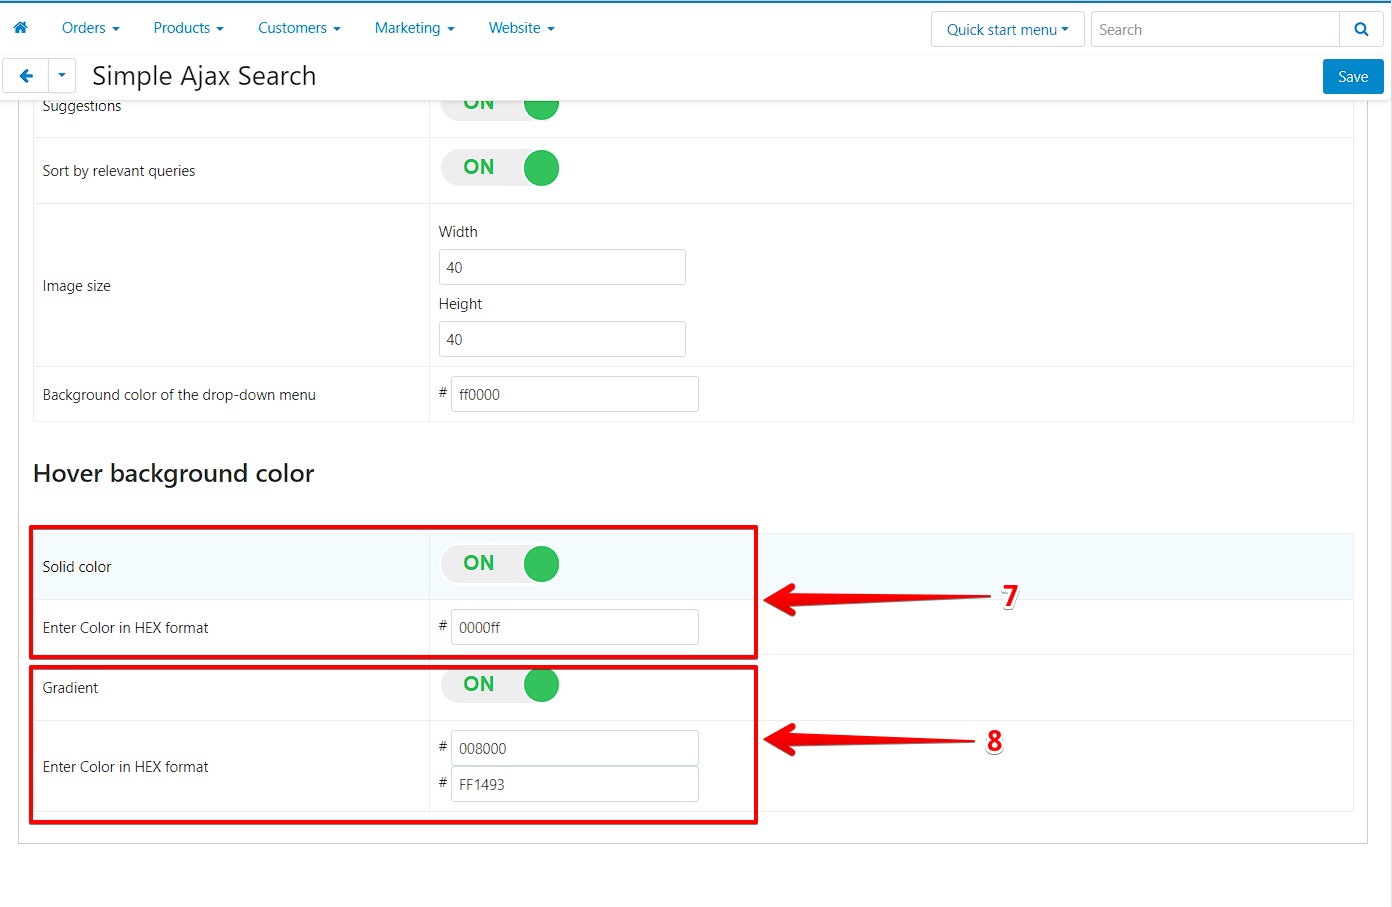
The Hover background color block allows you to select the background color that is displayed after hovering over the items in the drop-down list with search results.
This block consists of fields:
The Solid color сheckbox (7) - to select the background color (position ON / OFF). To use a solid background for the drop-down list, select the ON position and enter the code of the desired color (the Enter Color in HEX format field).
The Gradient сheckbox (8) - to select the background color by applying a smooth transition from one color to another (position ON / OFF). To use a gradient background for the drop-down list, select the ON position and enter the code of the desired colors (the Enter Color in HEX format field).
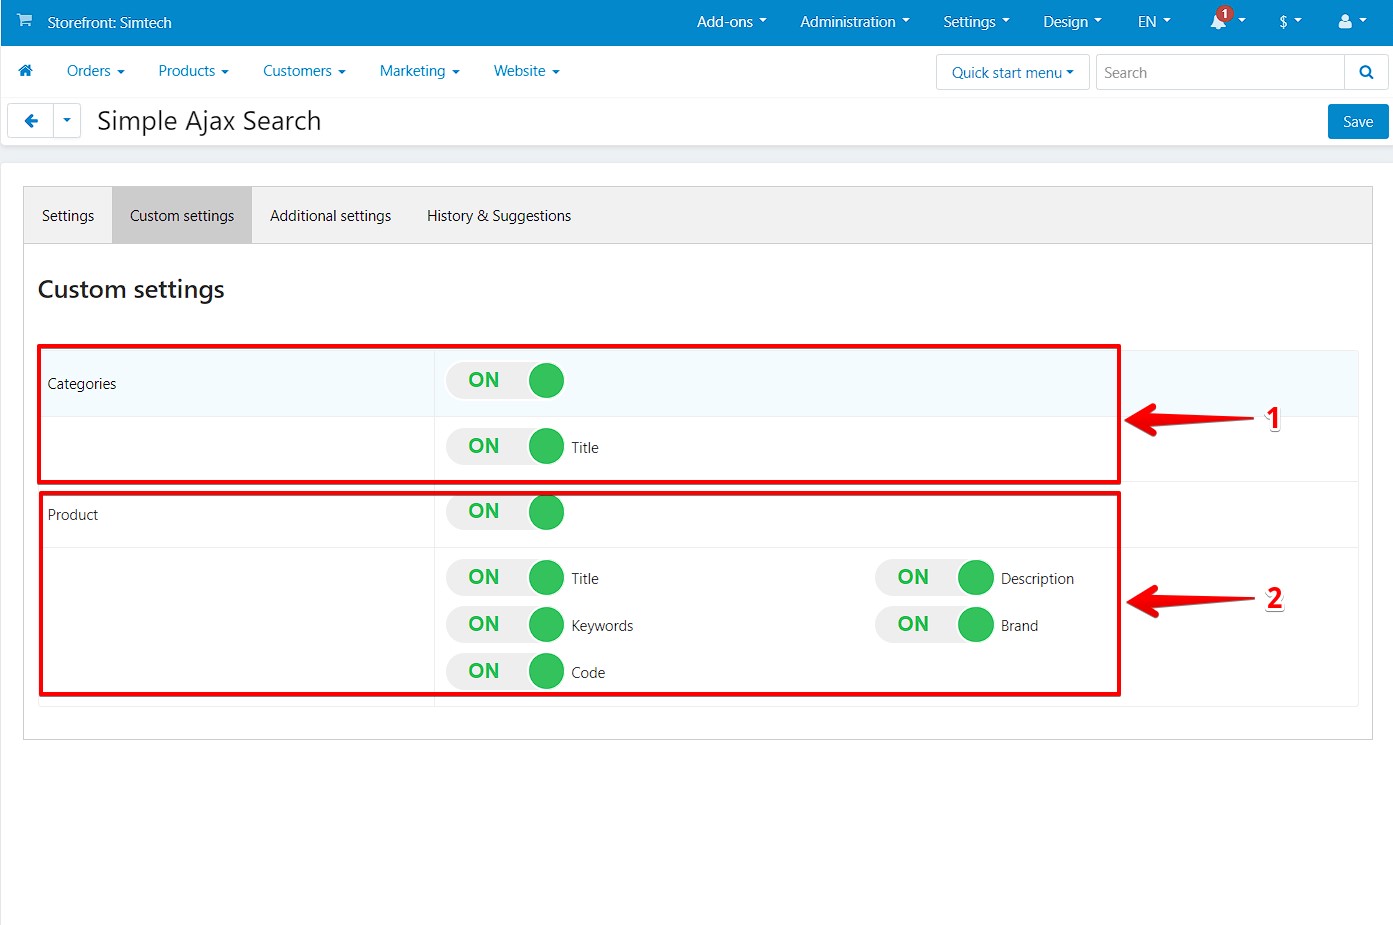
The Custom settings tab.
This tab allows you to select data for compare with user search queries:
The Categories block (1) - to activate the category name (position ON / OFF).
The Product block (2) - to activate the product name, keywords, code, description, brand name (position ON / OFF).
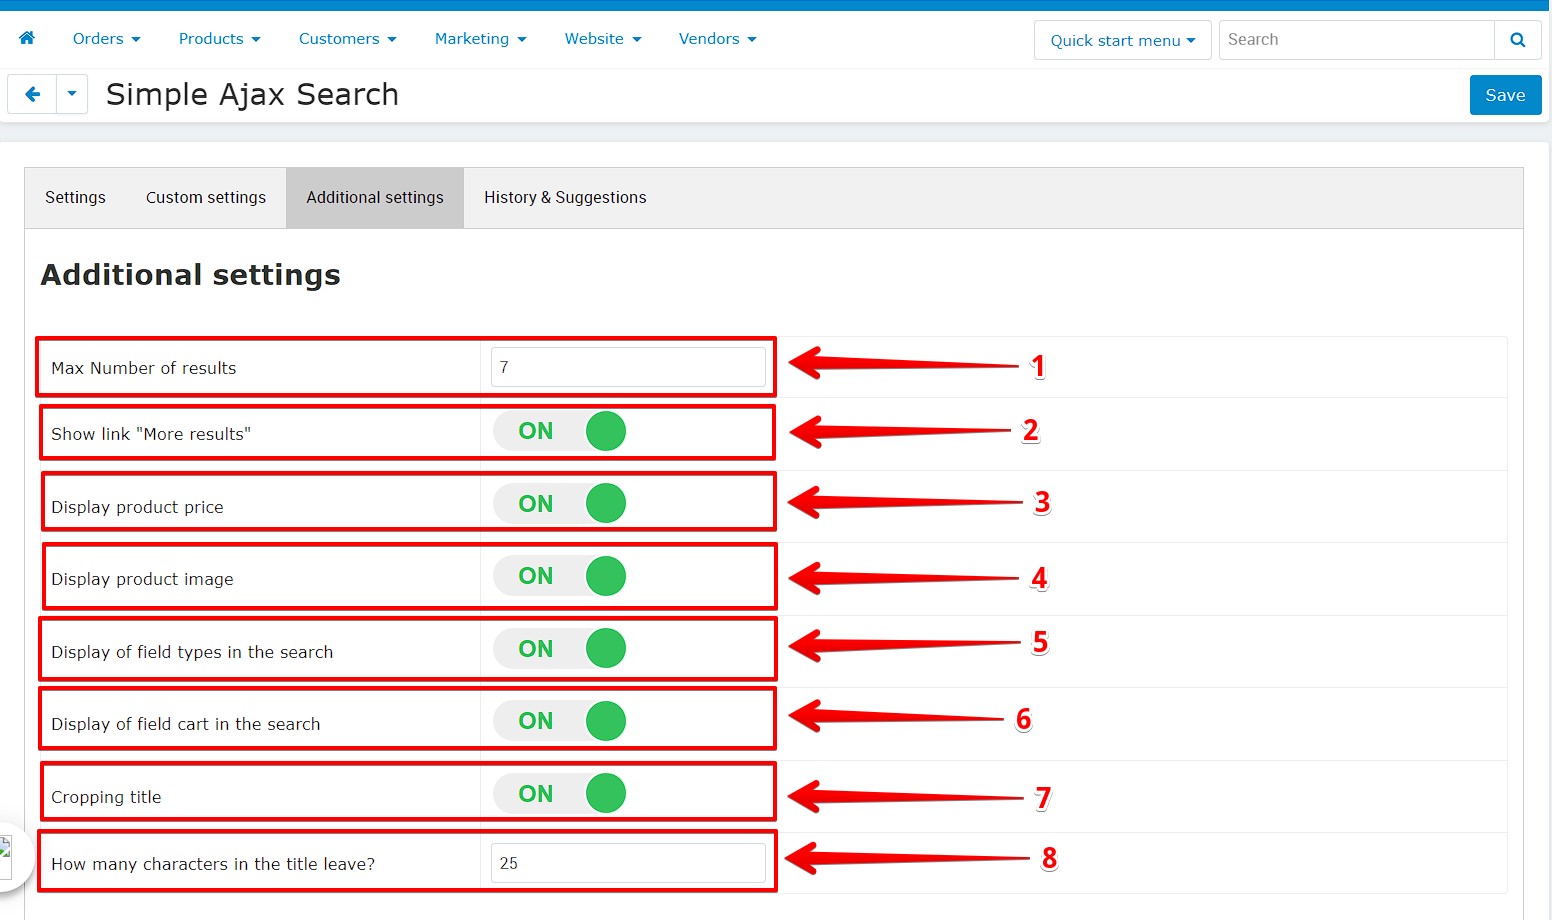
The Additional settings tab.
This tab consists of checkboxes:
Max Number of results (1) - to enter the number of search results that is displayed in the drop-down list.
Show link "More results" (2) - to add a link string at the end of the drop-down list with search results. This link allows you to open a page with all search results that match the query (position ON / OFF).
Display product price (3) - to display the product price in the drop-down list with search results (position ON / OFF).
Display product image (4) - to display the product image in the drop-down list with search results (position ON / OFF).
Display of field types in the search (5) - to display the data type in the drop-down menu with search results (position ON / OFF).
Display of field cart in the search (5) - to display the Cart icon in the drop-down list with search results (position ON / OFF). In order for your customers to be able to add the product to the cart directly from the search results, select the ON position.
Cropping title (6) - to limit the length of the product name (position ON / OFF). To set the maximum allowed product name, you must select the ON position and enter the number of symbols (7).
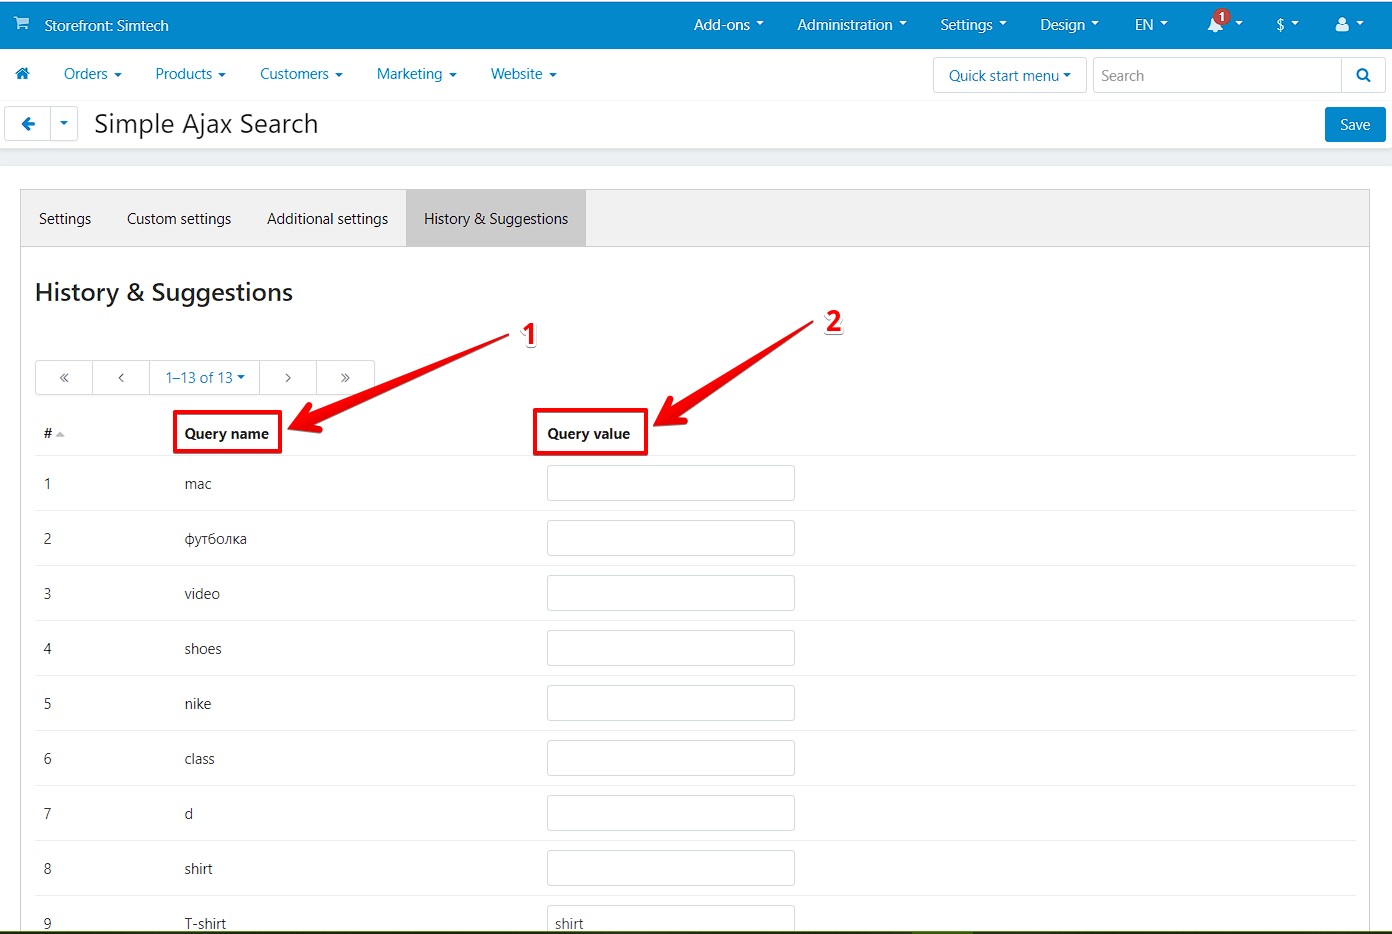
The History & Suggestions tab.
This tab displays all search queries of your website users (the Query name column (1)).
For any of the search queries, you can specify another query for which the search will be performed (the Query value column (2)).
After adding a query from the Query name column to the Search field, the search results will match the query from the Query value column.
Thus, you can direct users to specific pages of your website.
To save the plugin settings, click the Save button.
Now your customers can use a convenient and fast search for products on your website.

VIDEO INSTRUCTION