Social Media Login for Opencart 3.0: Instruction
INSTRUCTION SOCIAL MEDIA LOGIN
FOR OPENCART 3.0
Download and install
Download the plugin archive from the Shop Pinta store and save it on your computer.
In the admin panel of your website, select Extensions (1) > Installer (2).
In the Upload your extension block, click the Upload button (3).
In the opened window, select the plugin archive and click the Open button (4).

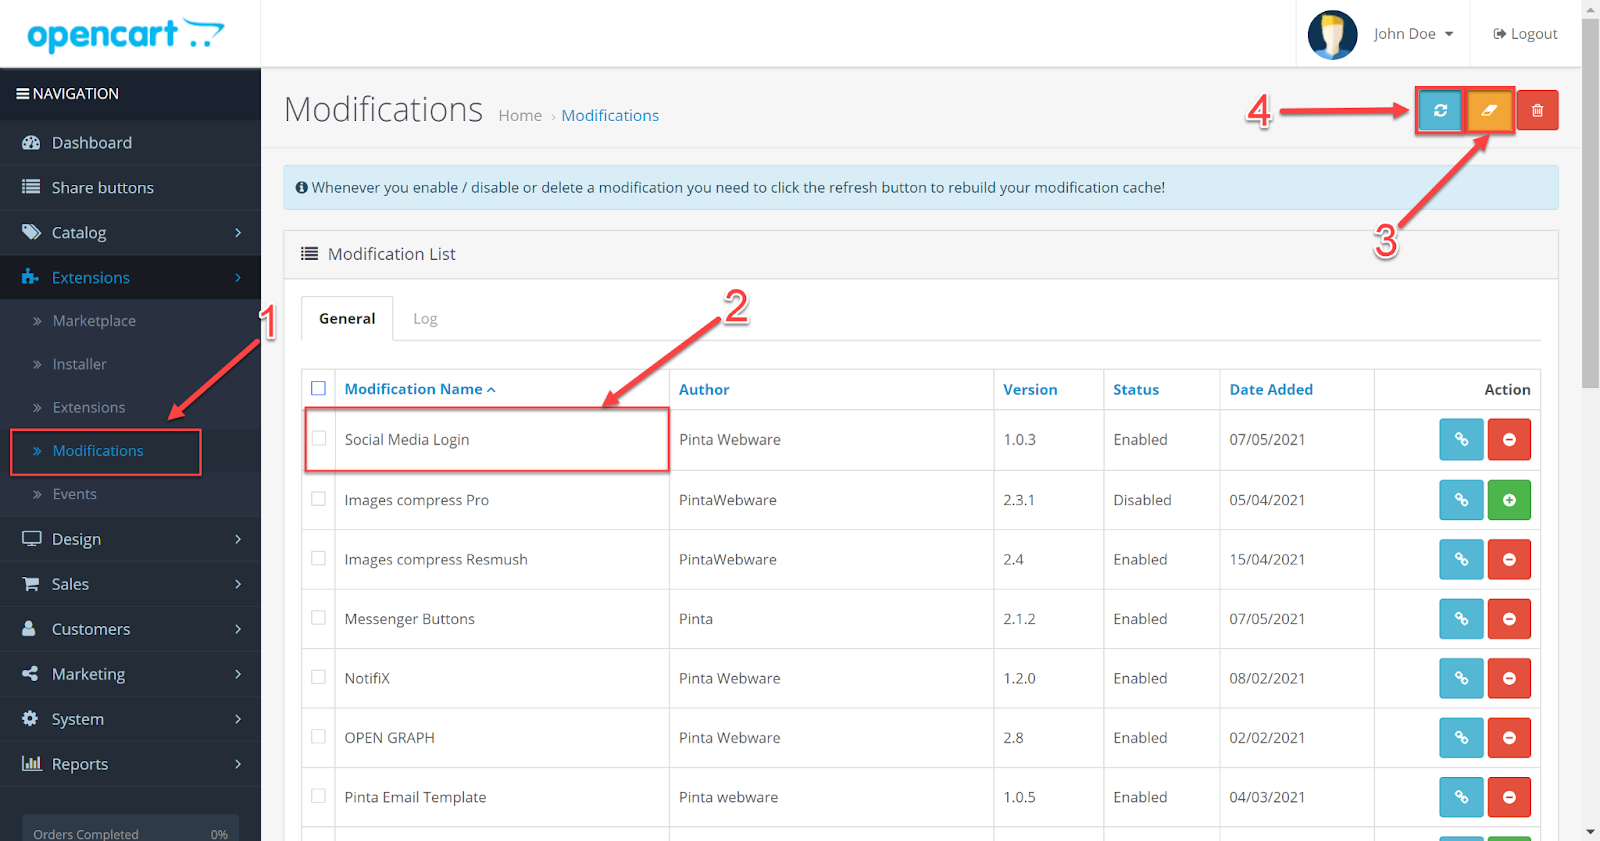
Clear the cache (recommended). Go to the Modifications subcategory (1), select the checkbox for the Social Media Login module (2), click the Clear (3) and Refresh (4) buttons.
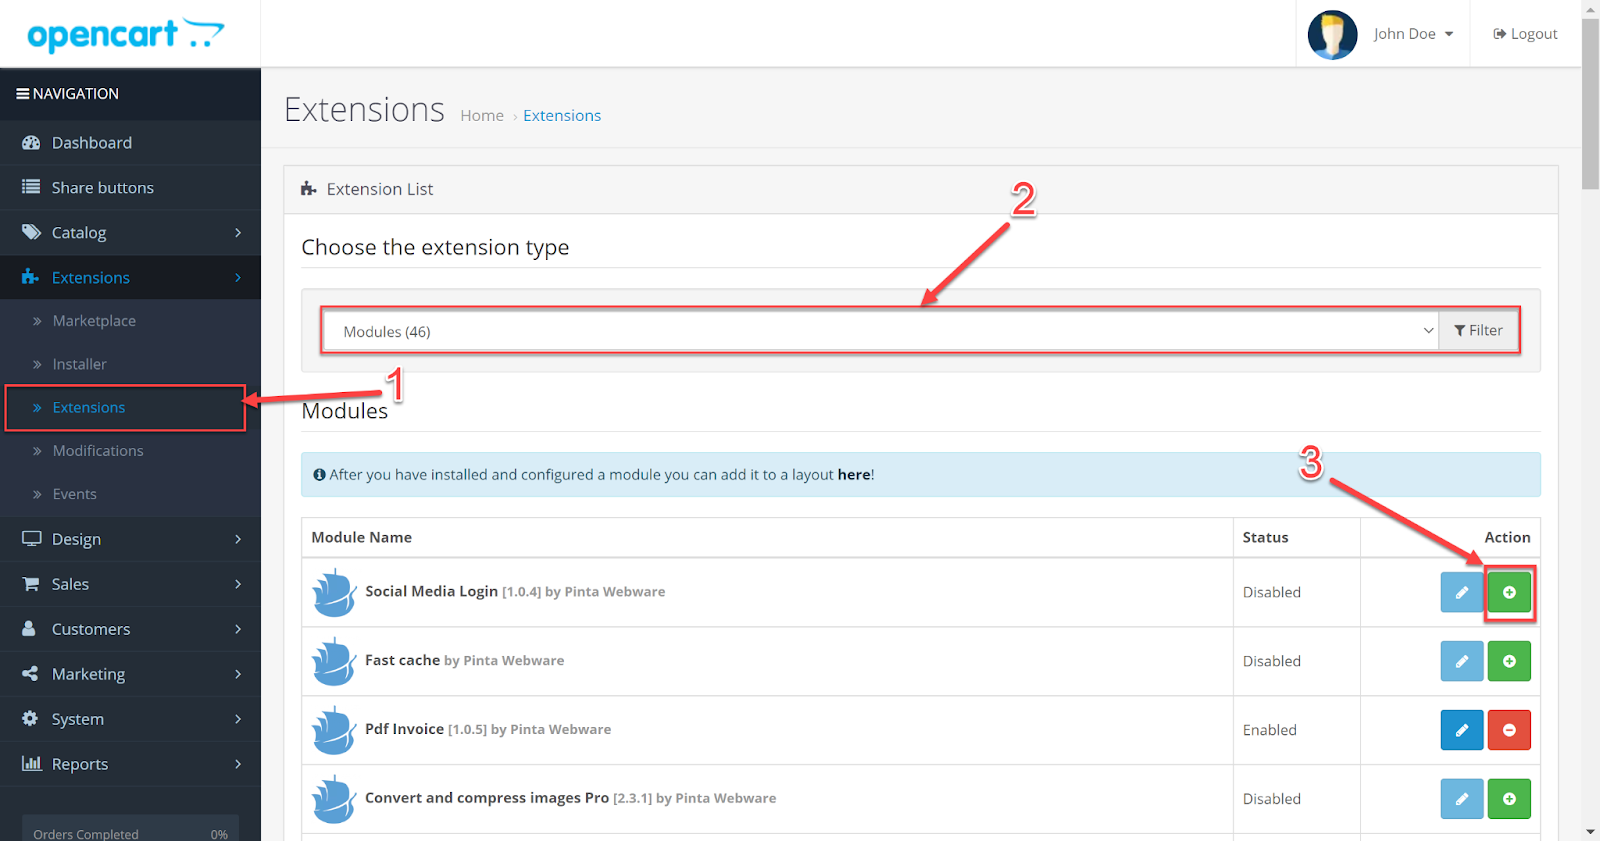
Go to the Extensions subcategory (1), in the Modules list (2) find the Social Media Login plugin and click the Install button (3).
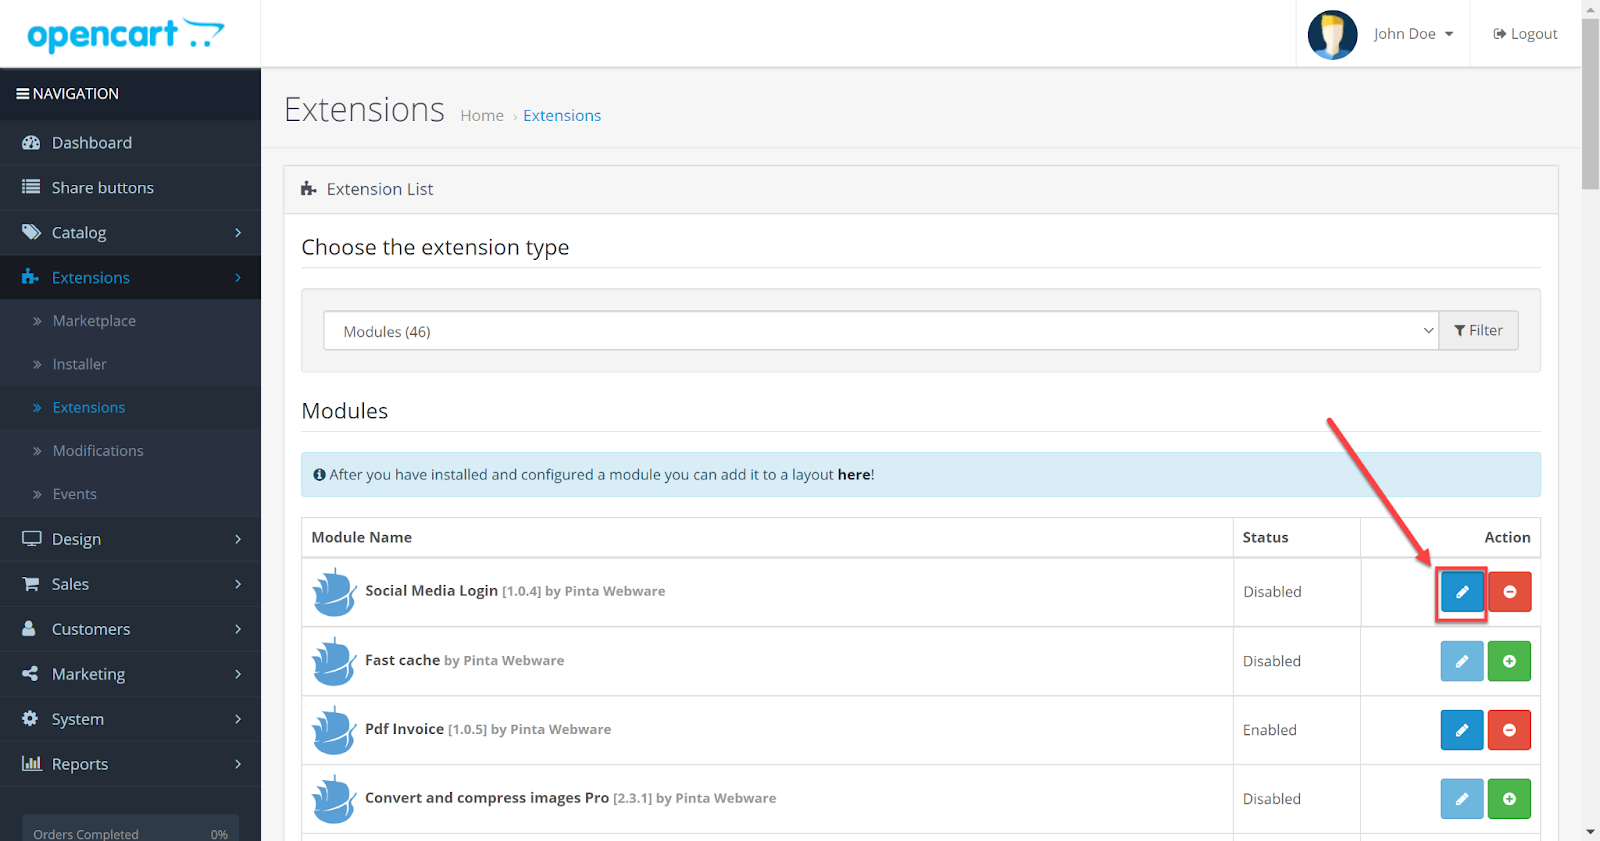
To configure the plugin, click the Edit button.
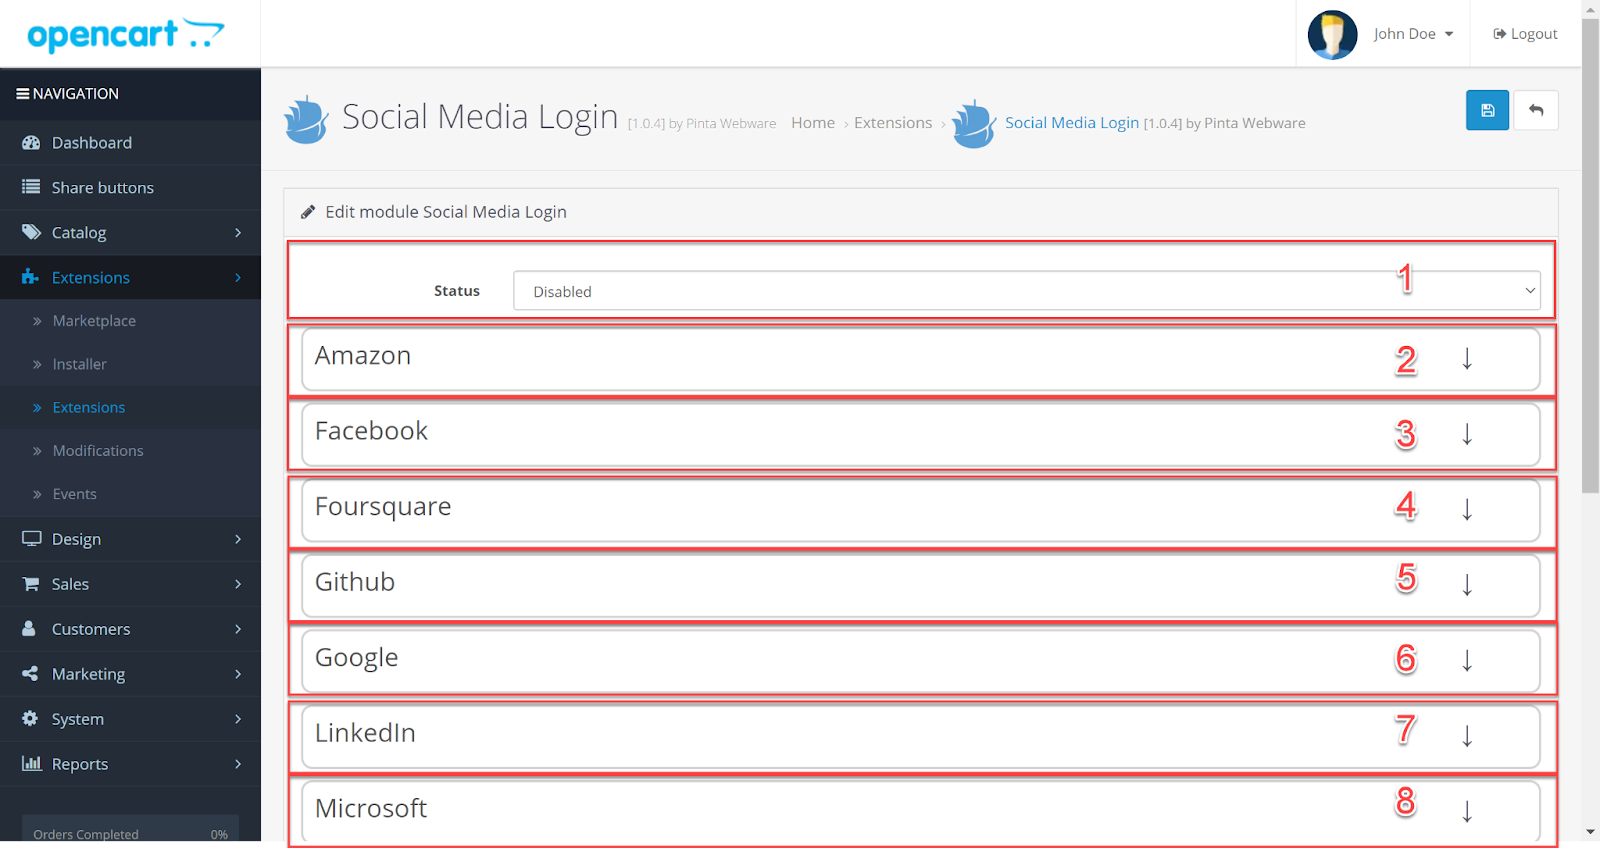
Plugin page
The plugin page allows you to configure social networks for display on your website and consists of:
The Status field (1) - to enable / disable the plugin (position Enabled / Disabled).
The blocks for social networks activation:
Amazon (2),
Facebook (3),
Foursquare (4),
Github (5),
Google (6),
LinkedIn (7),
Microsoft (8),
Spotify (9),
Twitter (10),
VKontakte (11),
Yahoo (12),
Yandex (13).

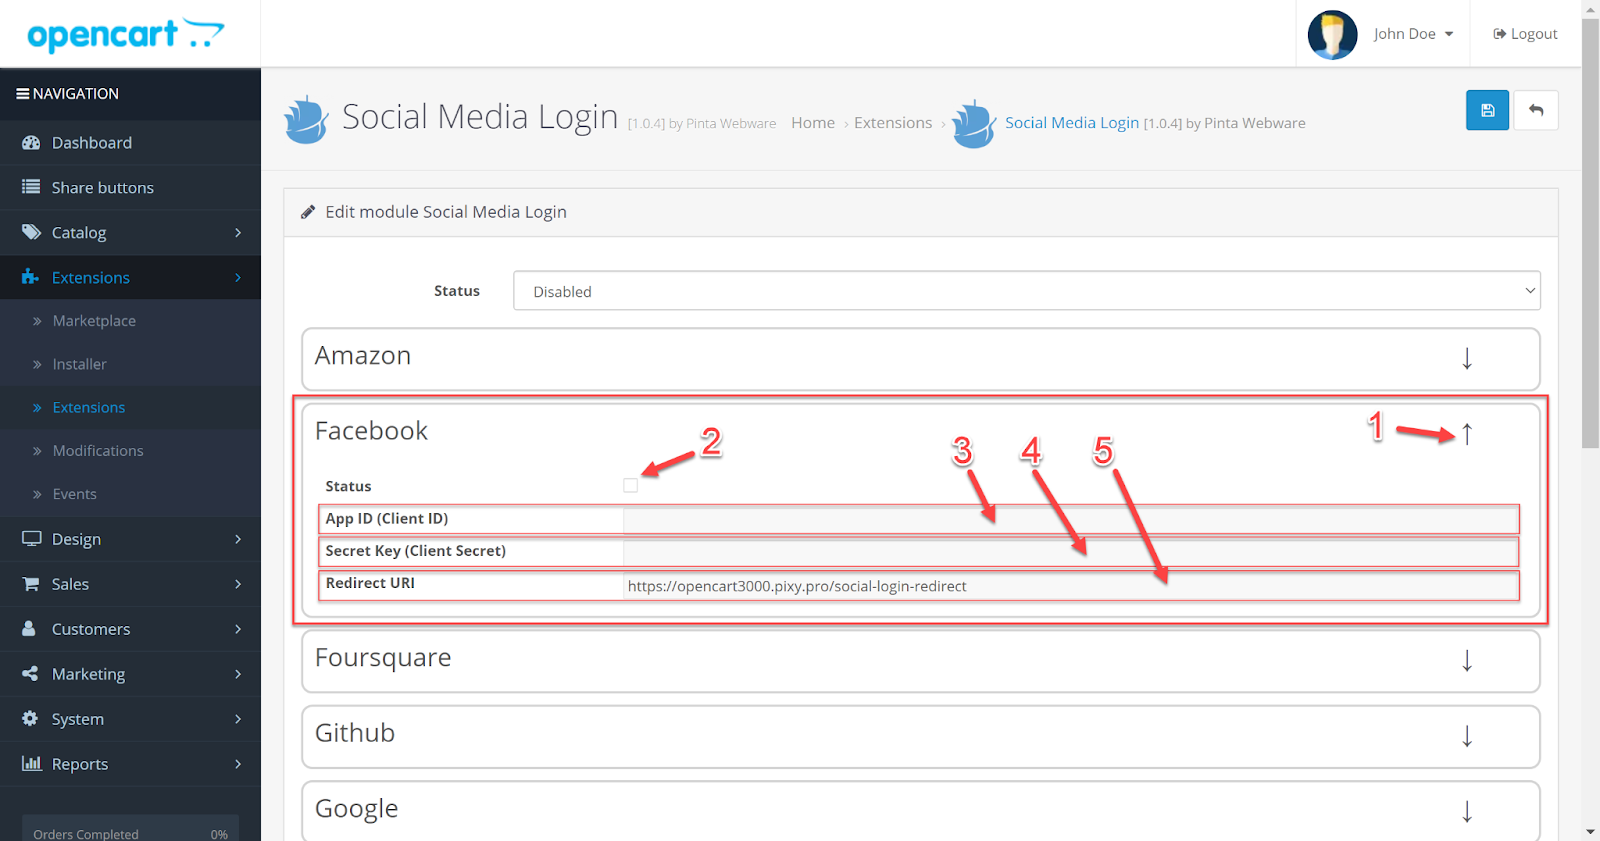
To activate the social network on your website and to use the login without additional registration, open up the block for social network activation.
This block consists of:
The Status checkbox (2) - to enable / disable the display of this social network in the list on your website.
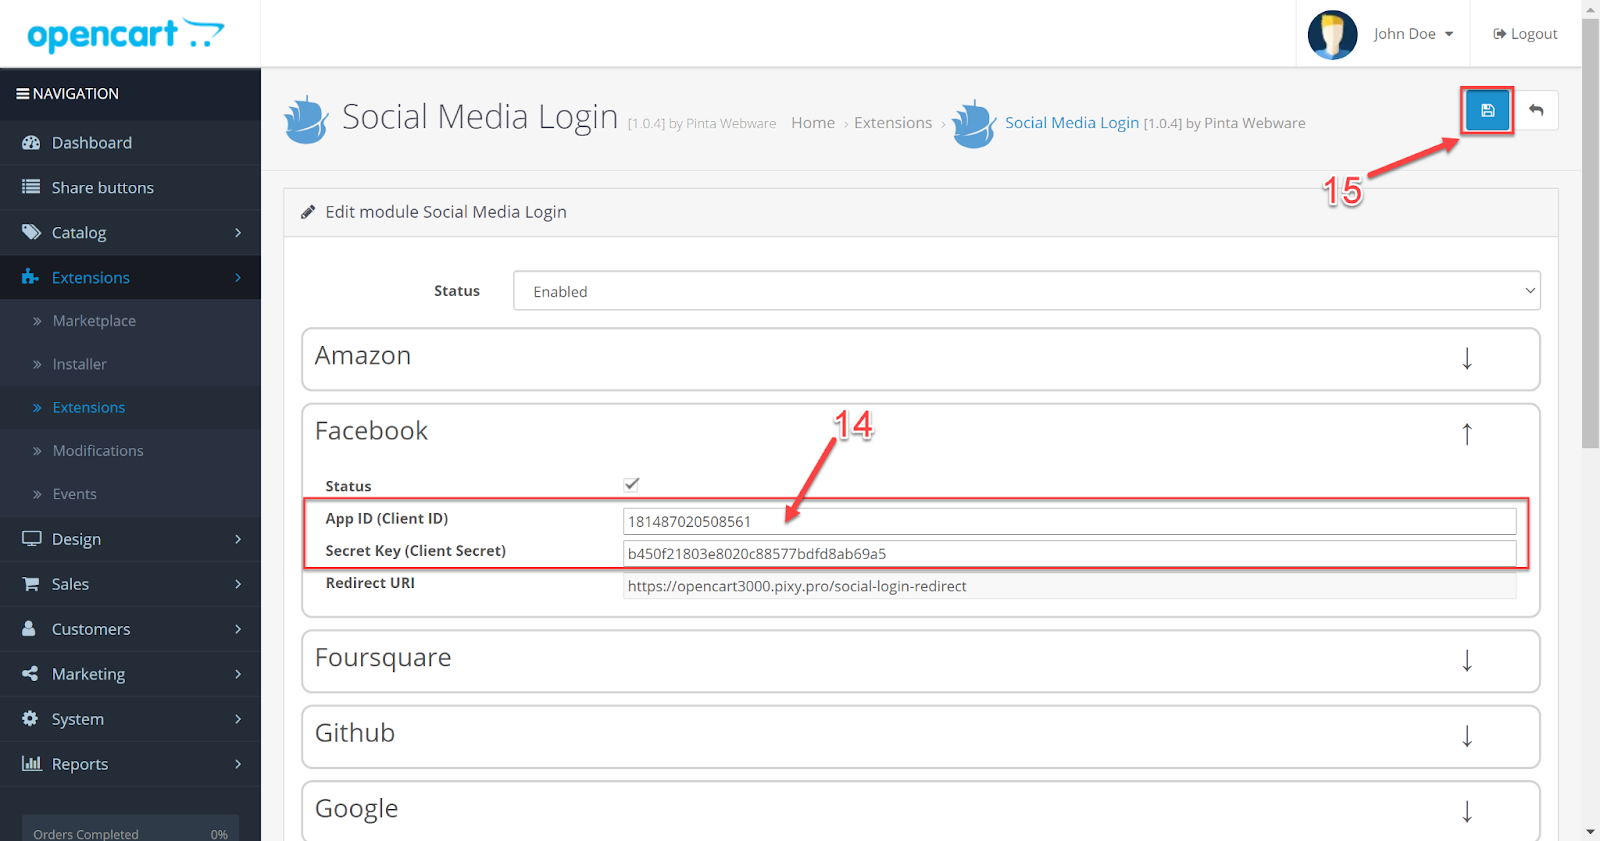
The App ID (Client ID) field (3) - to enter the identifier of your application for this social network.
The Secret Key (Client Secret) field (4) - to enter the secret client key generated on the settings page of your application for this social network.
The Redirect URl field (5) - the specified redirect link is required to set up a connection with your website.
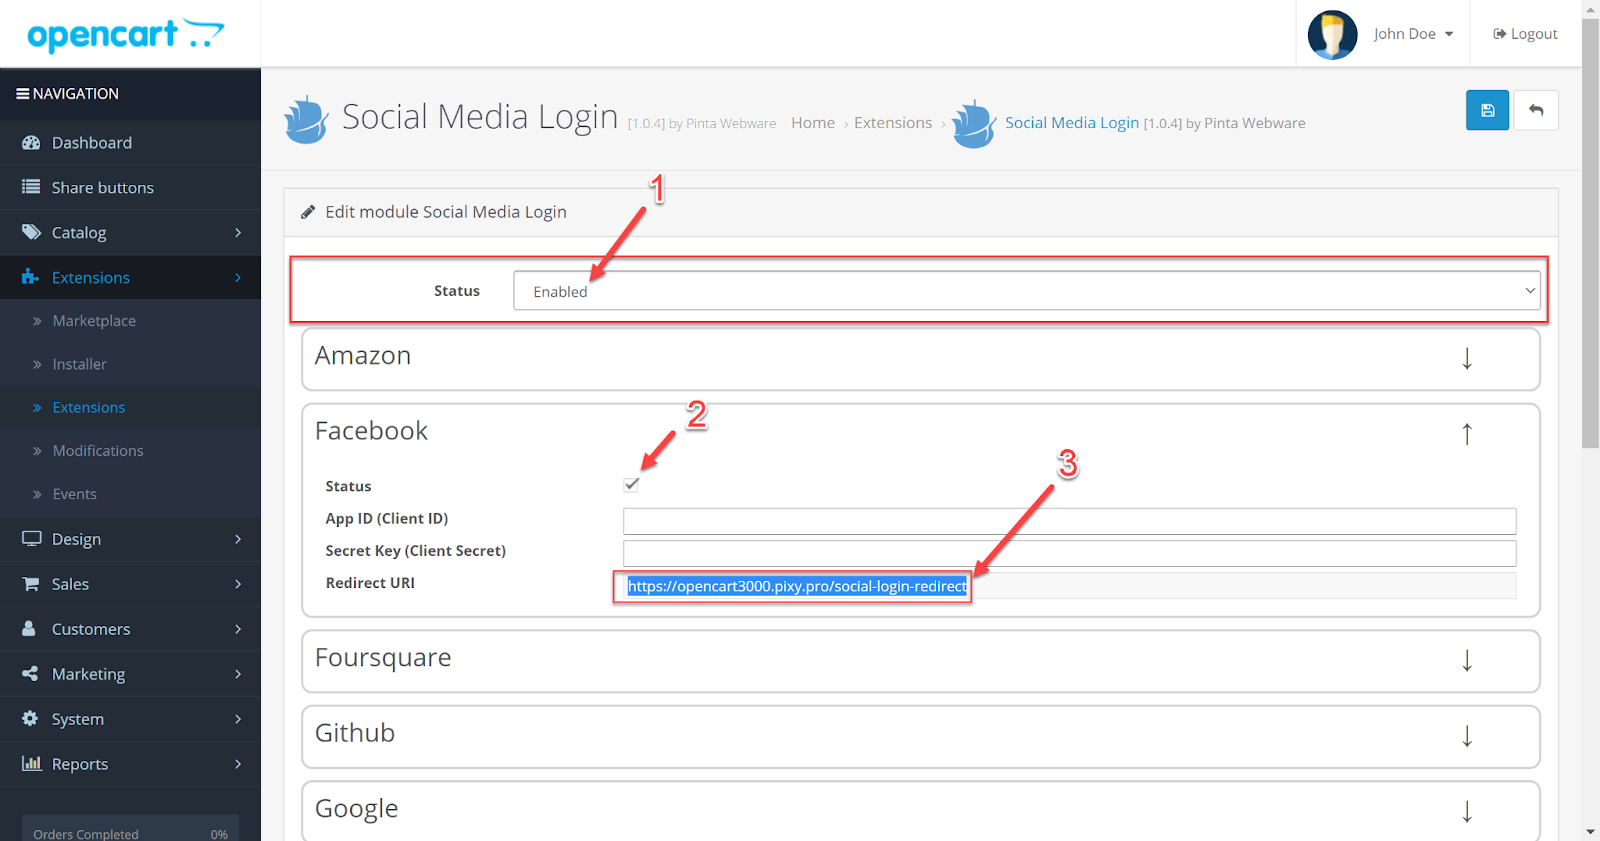
In order for the client on your website to be able to log into the Personal Account using his Facebook social network login, you need to configure the following settings:
In the Status field, select Enabled (1).
Check the Status checkbox (2).
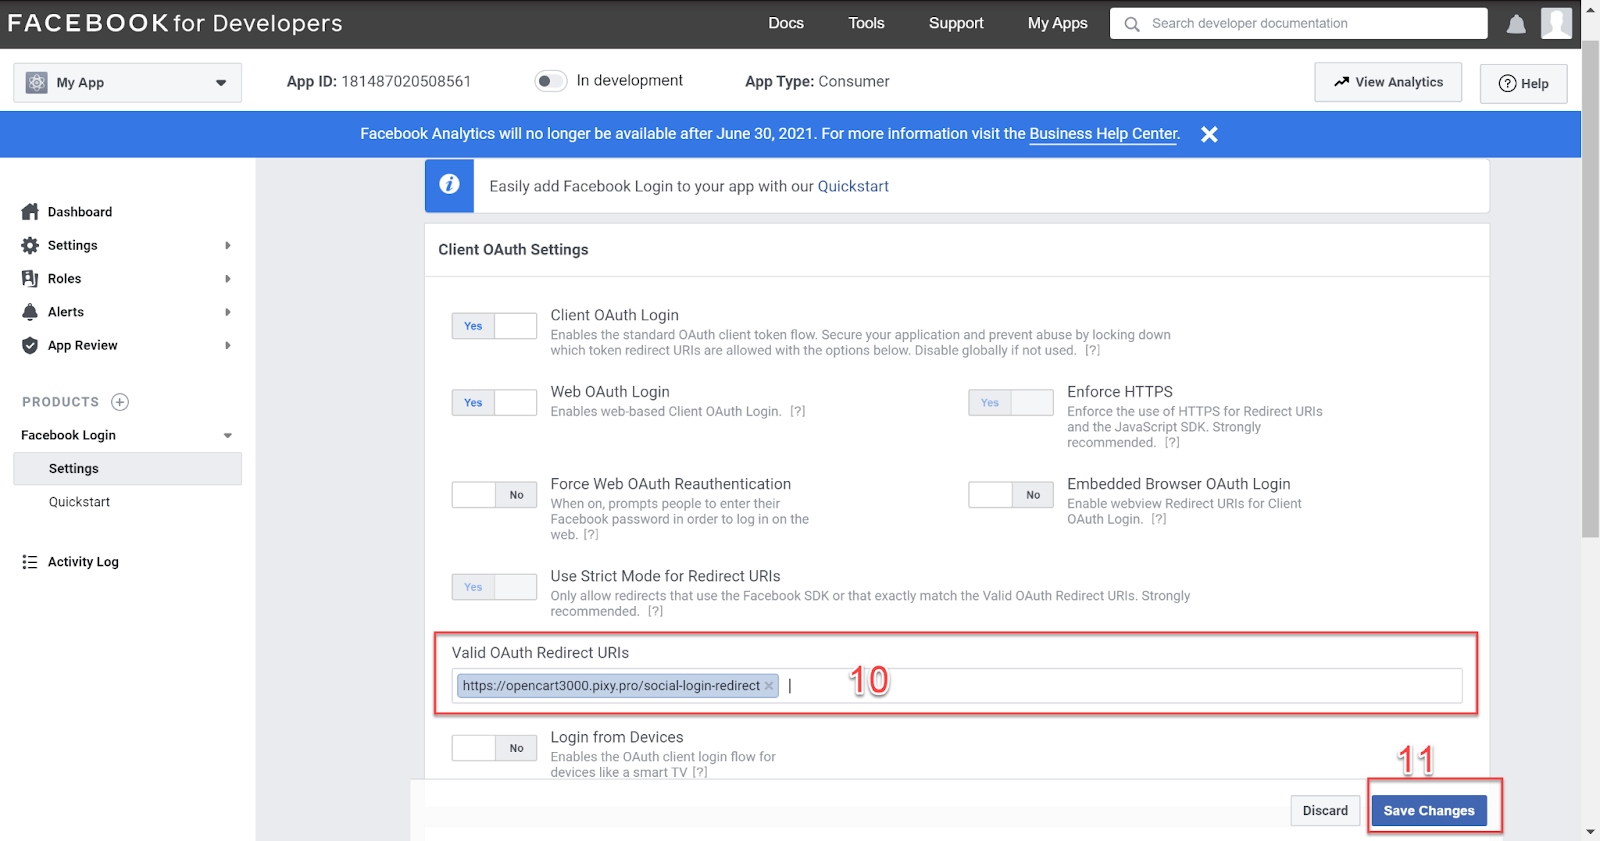
Copy the link from the Redirect URl field (3).
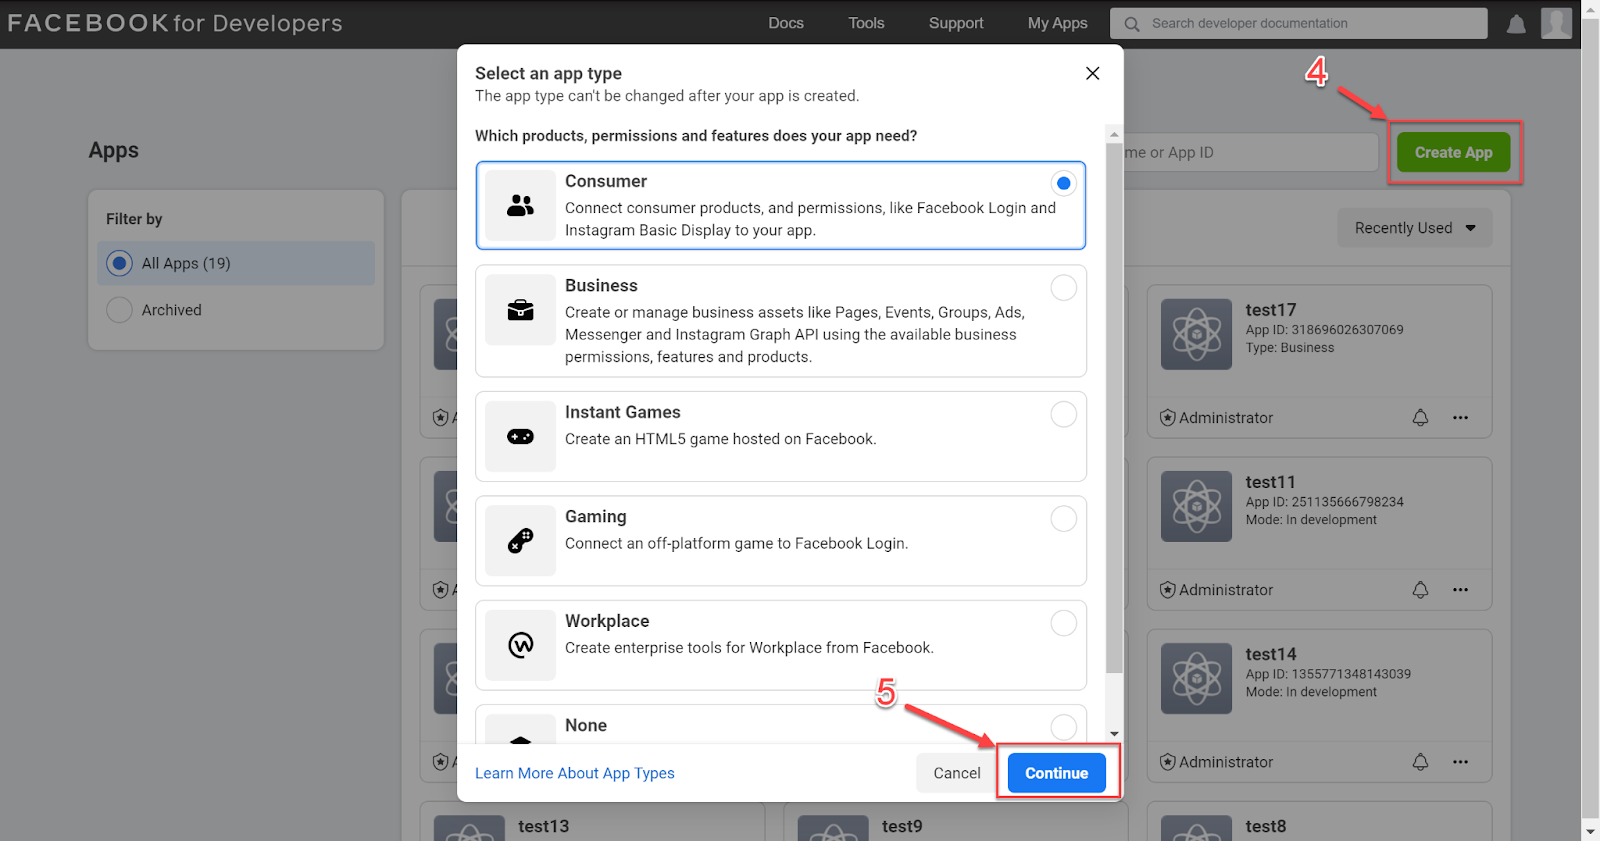
Register a Facebook developer account (if this has not been done before).
Next, click the Create App button (4) to create your application. In the Select an app type block, depending on your goals, mark the required field and click the Continue button (5).
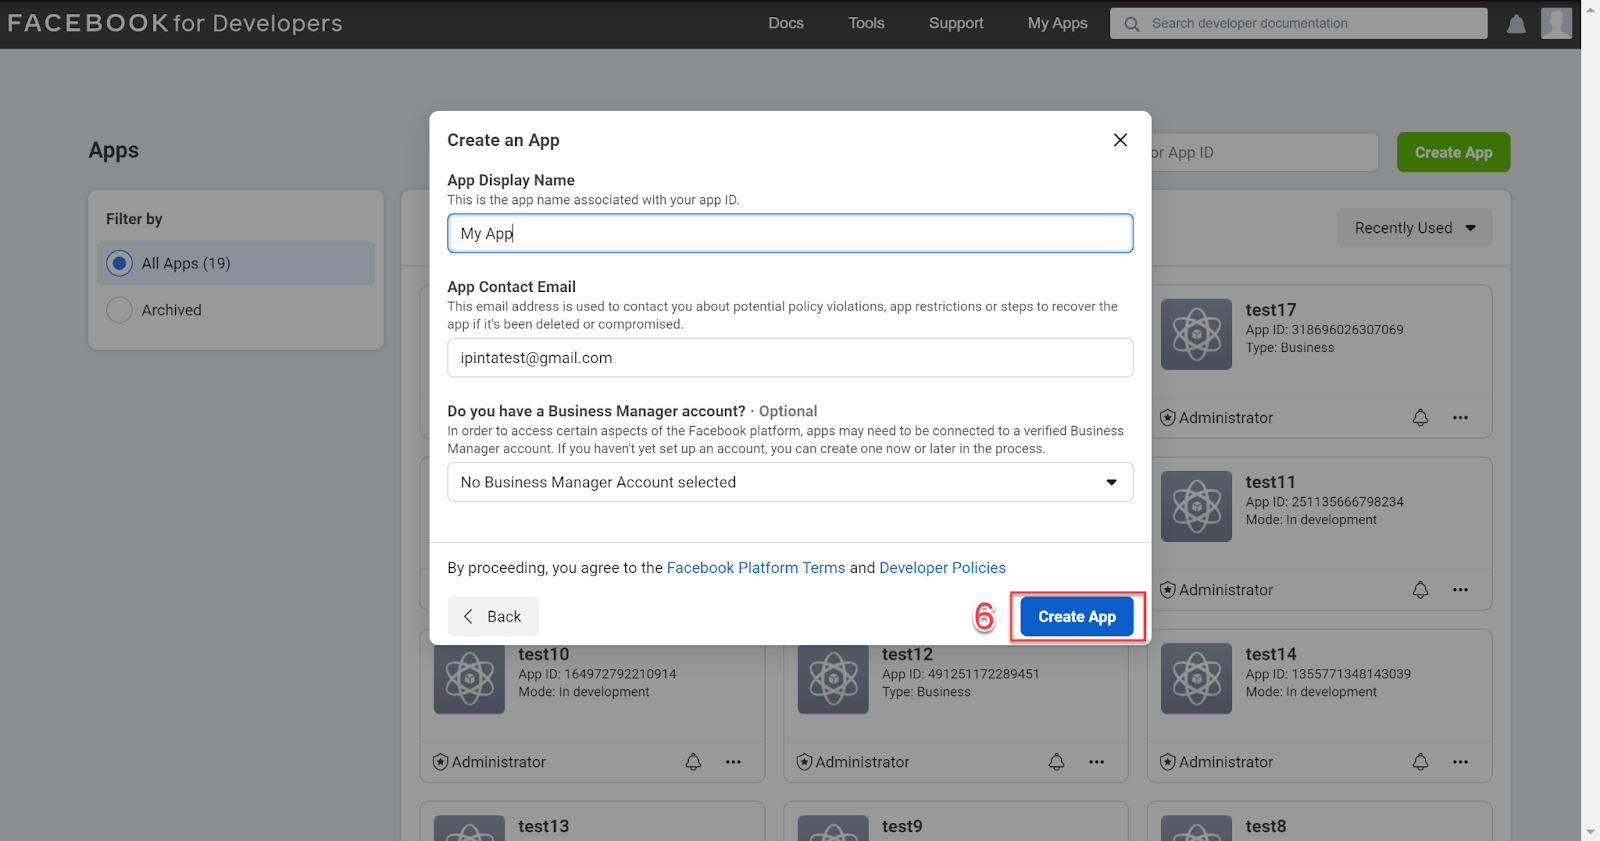
In the Create an App block, enter the name of your application and your email. Next, click the Create App button (6).
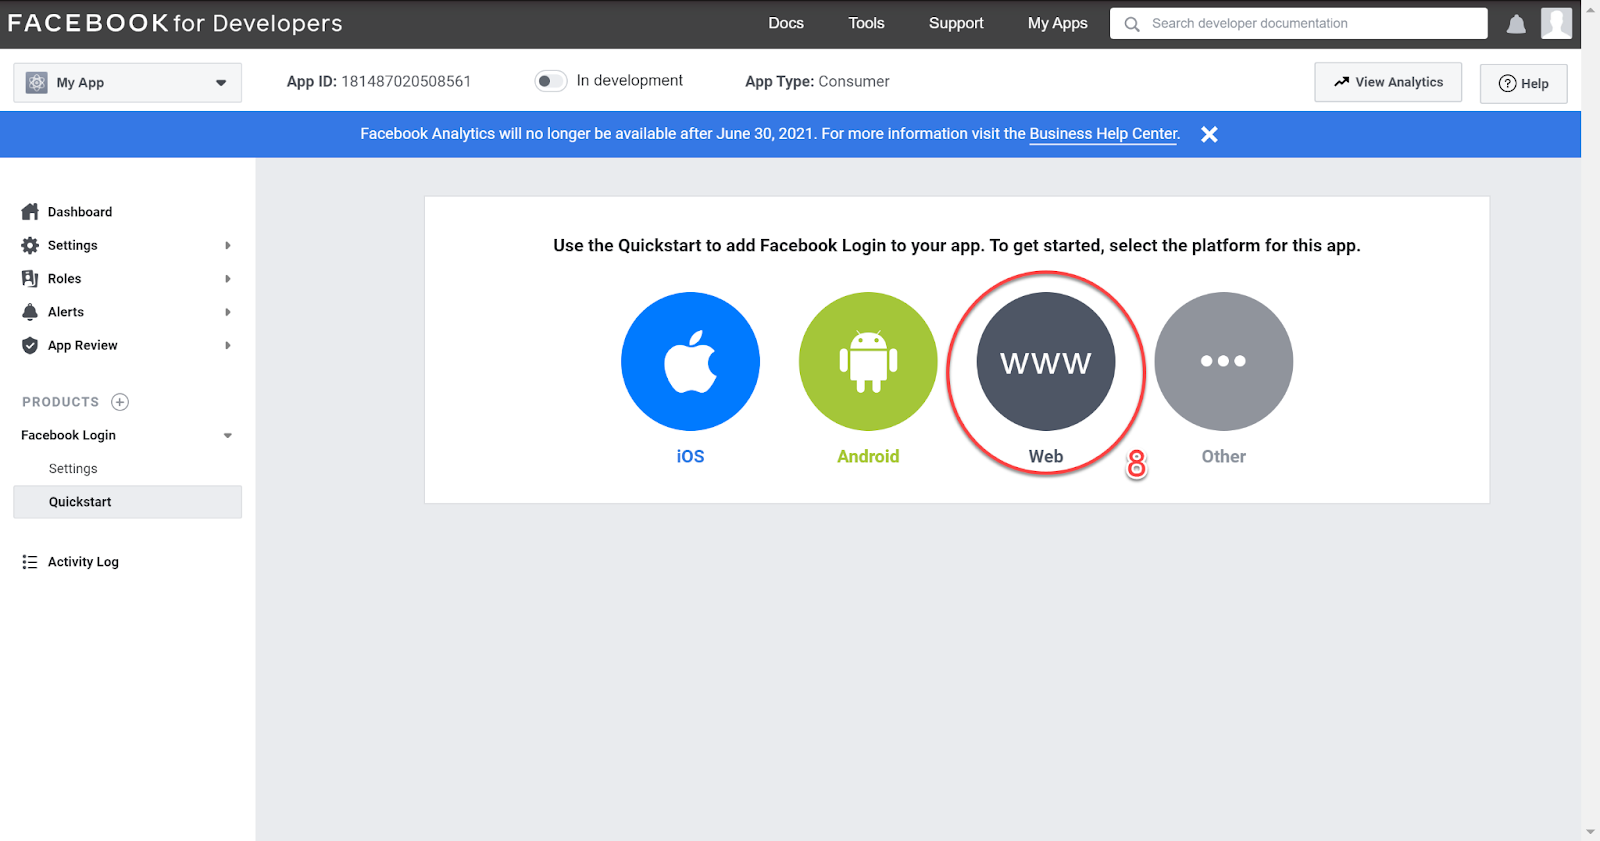
Go to Facebook Login settings and click the Set Up button (7).

Next, select the Web platform (8) and configure the interconnection with your website.
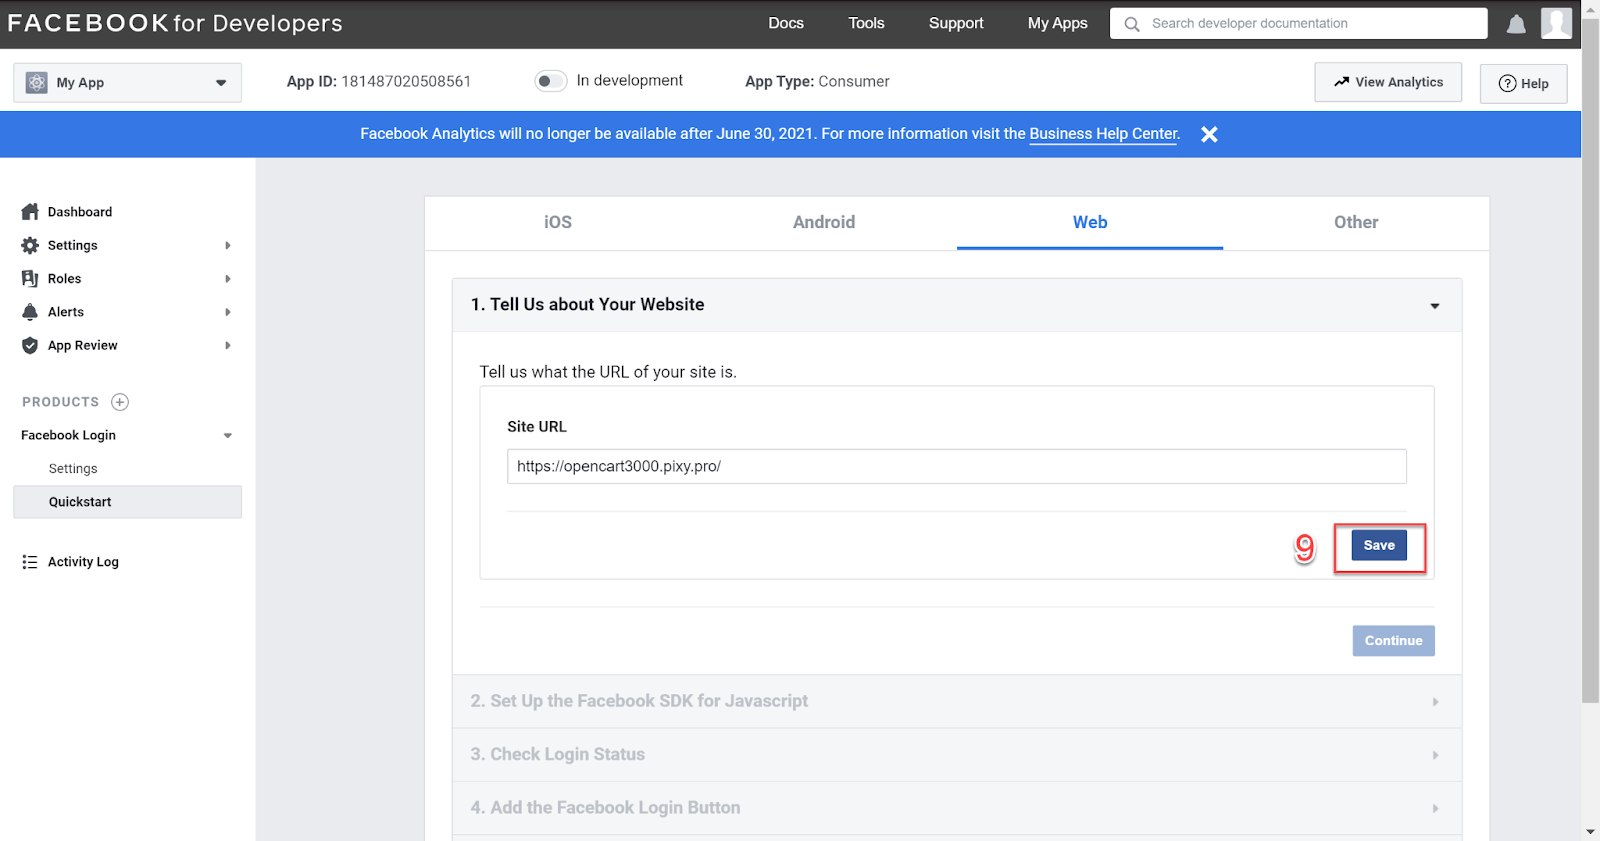
Enter the URL of your website and click the Save button (9).
Paste the redirect link (10) that you copied into the Redirect URl field on the plugin page and click the Save Changes button (11).
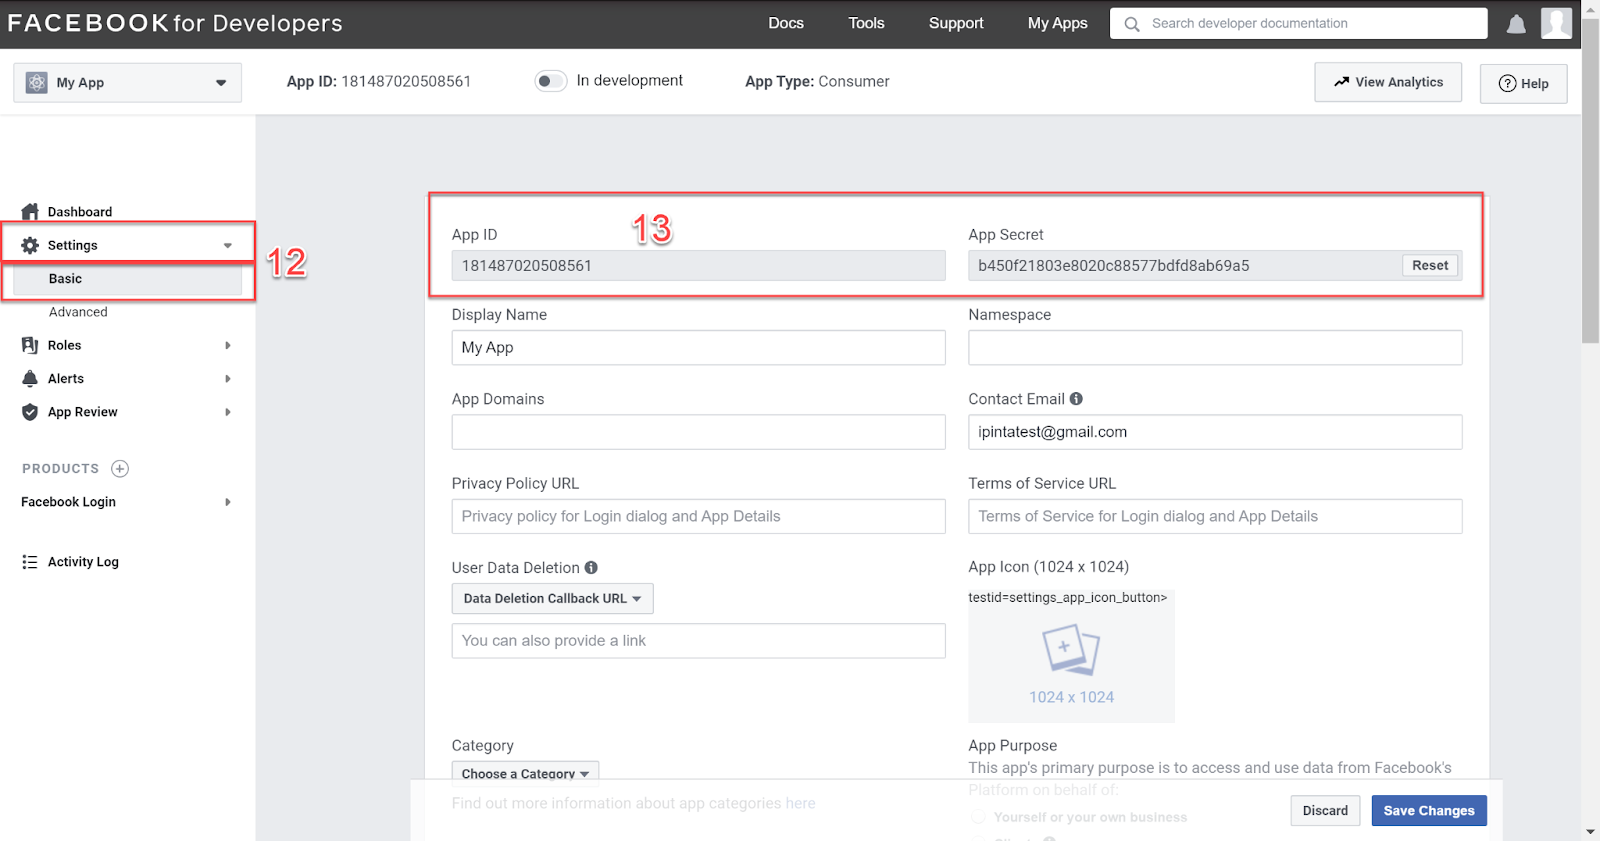
Next, you need to copy your App ID and App Secret (13). To do this, go to the Settings > Basic tab (12).
Fill in the App ID (Client ID) and Secret Key (Client Secret) fields on the plugin page (14) and click the Save button (15).
Now on the page of your website Facebook (16) is displayed in the list of social networks (menu My Account > Login through).
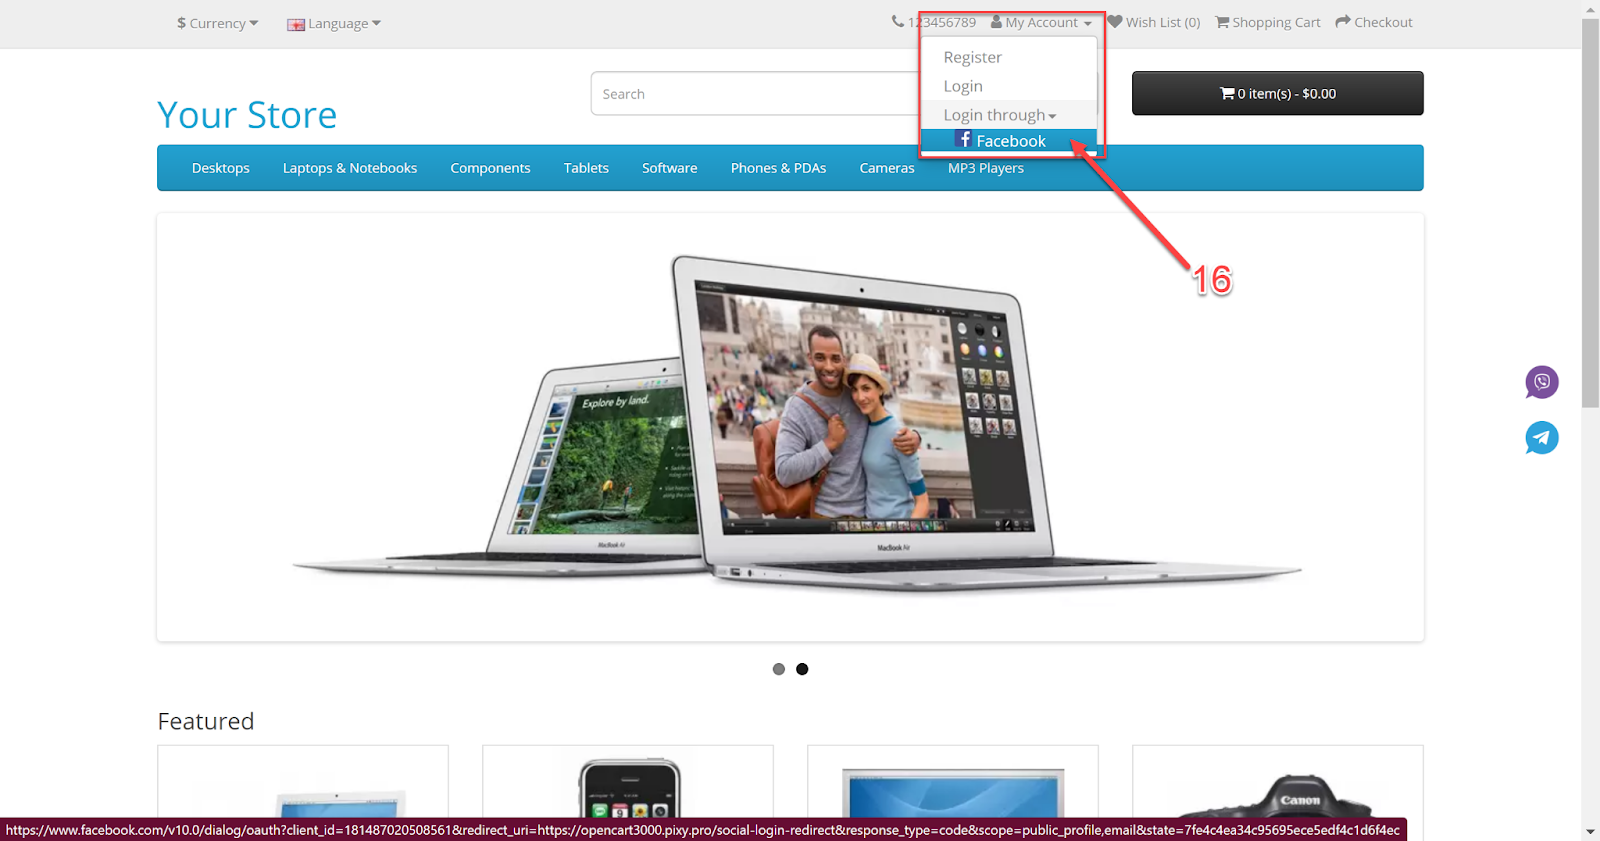
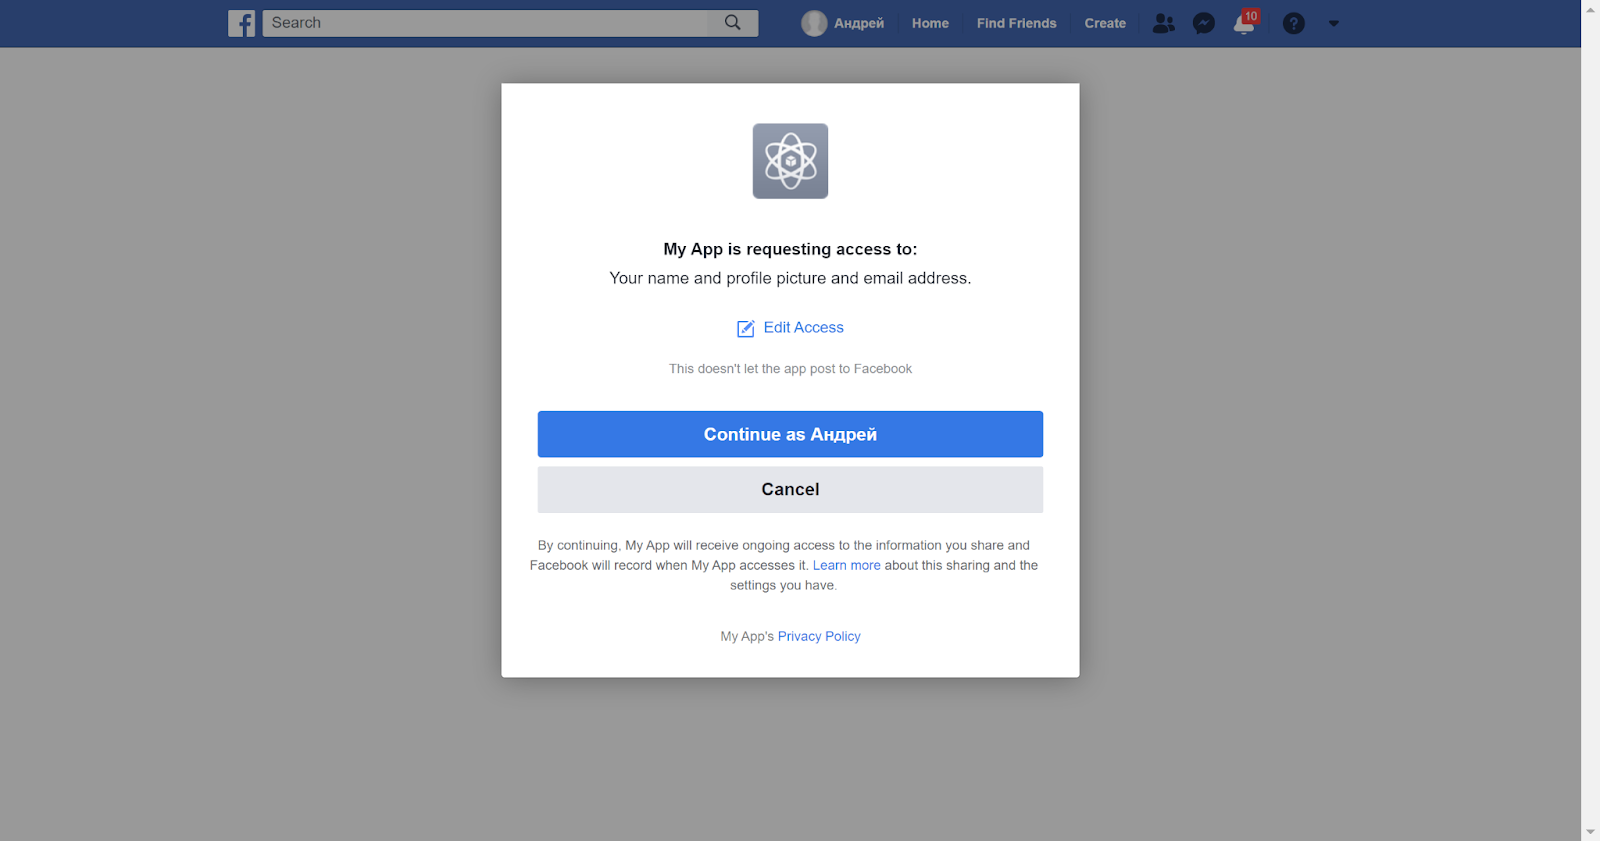
Any of your website visitors will be able to enter a Personal Account using their social network account.
Likewise, activate other social networks to display on your website.