Instruction Total Costs with Shipping for Prestashop
INSTRUCTION TOTAL COSTS WITH SHIPPING FOR PRESTASHOP
Download and install
Download the plugin archive from Shop Pinta store and save it on your computer.
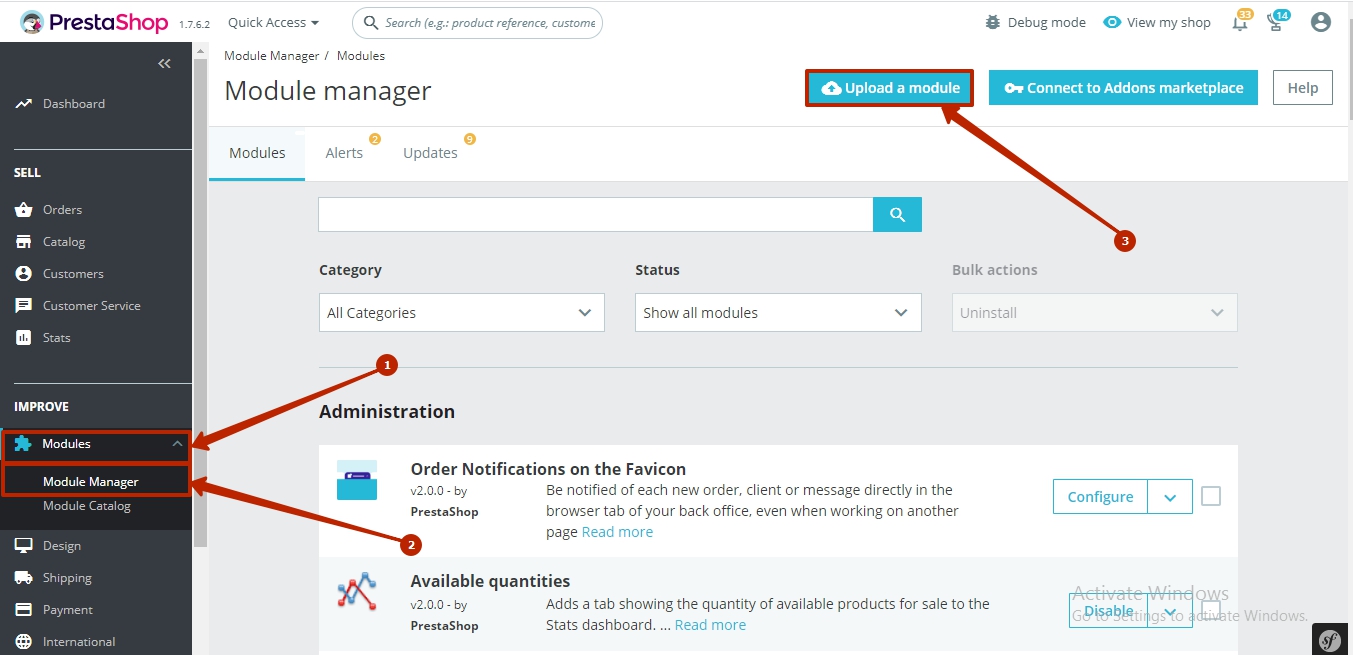
In the admin panel of your site, select Module (1) > Module manager (2).
Click the Upload a module button (3).
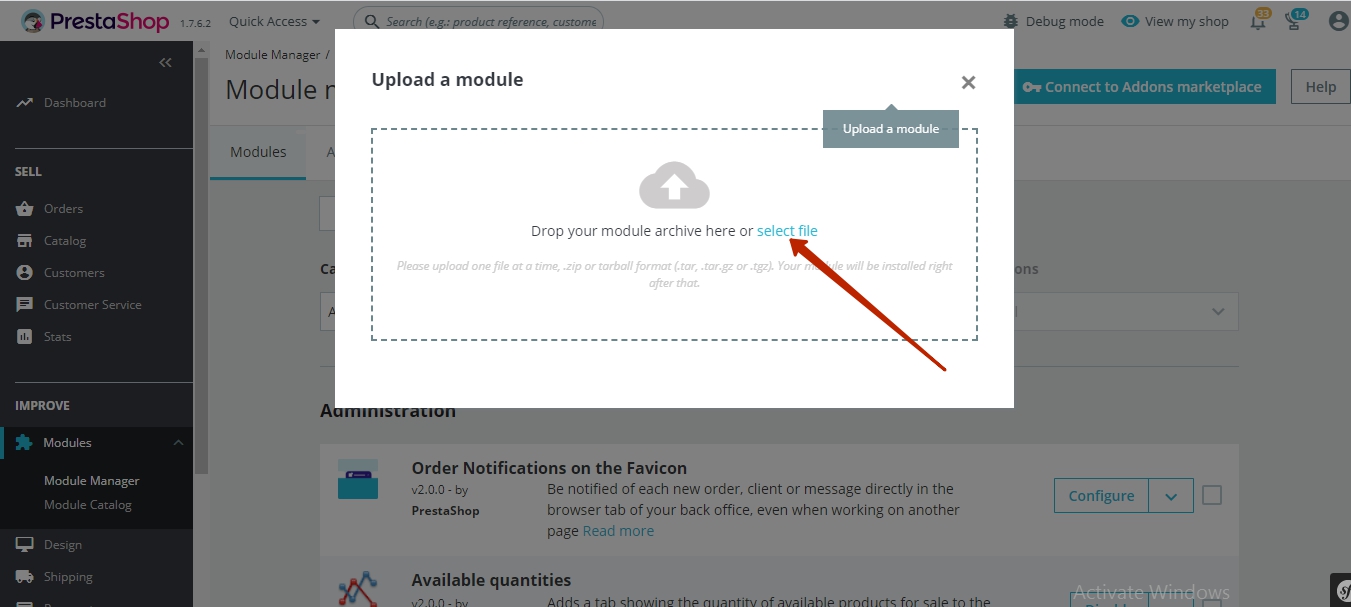
In the pop-up window, click on select file.
In the opened window, select the plugin archive (1) and click the Open button (2).

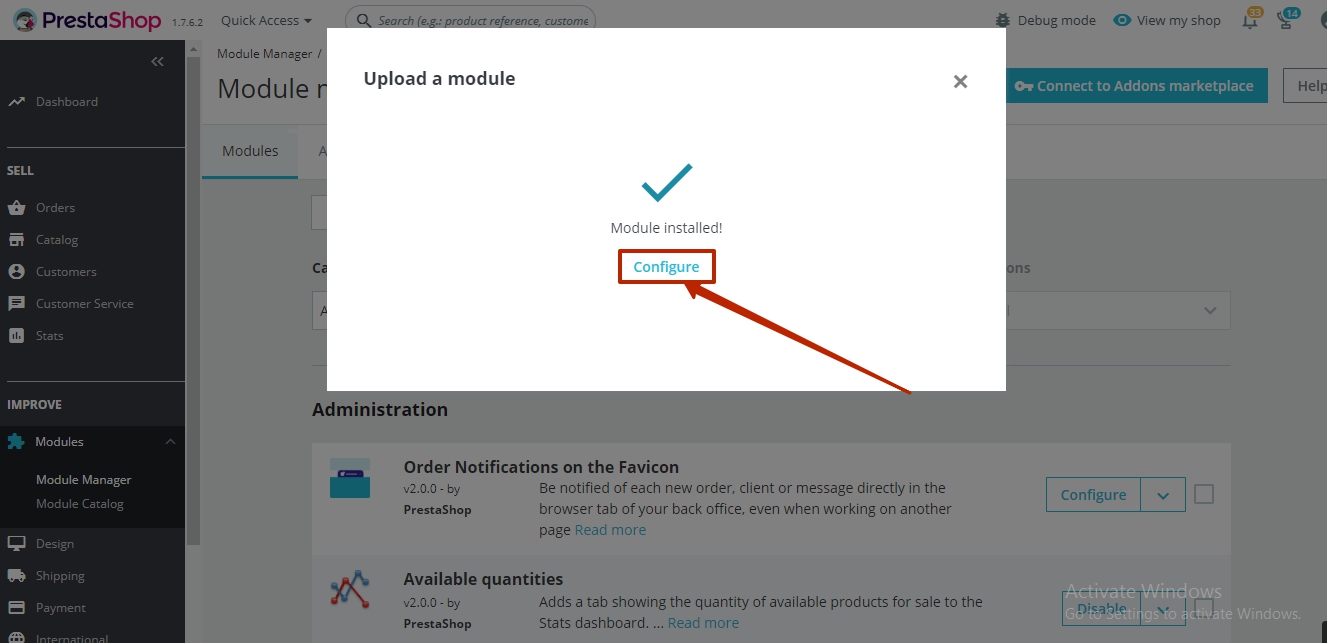
To configure the plugin, click the Configure button.
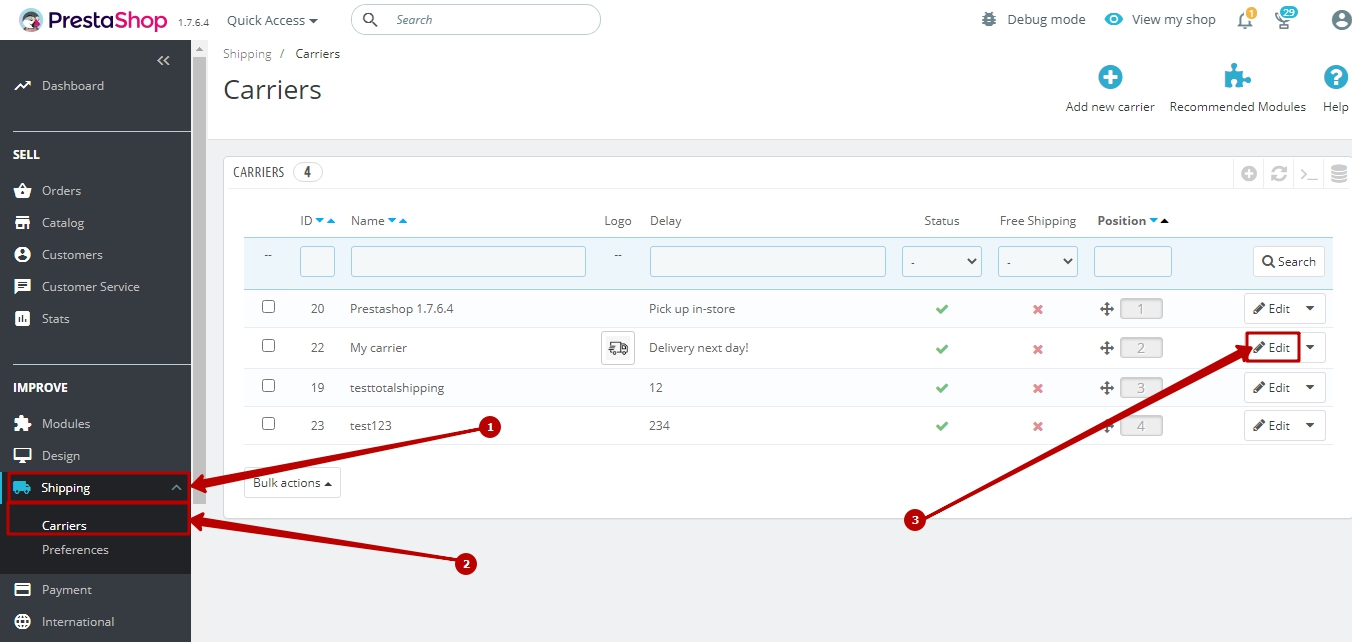
In the admin panel of your site, select Shipping section (1) > Carriers (2).
Opposite the carrier My carrier, click the Edit button (3).
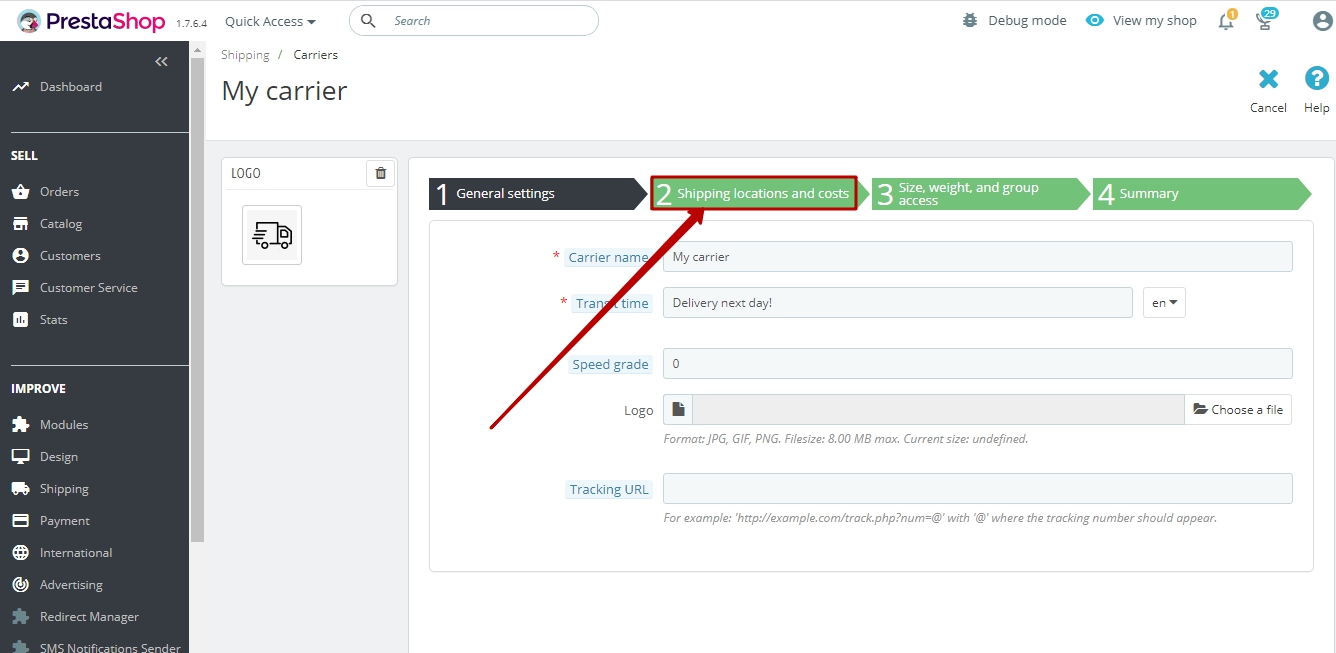
Select the Shipping locations and costs tab.
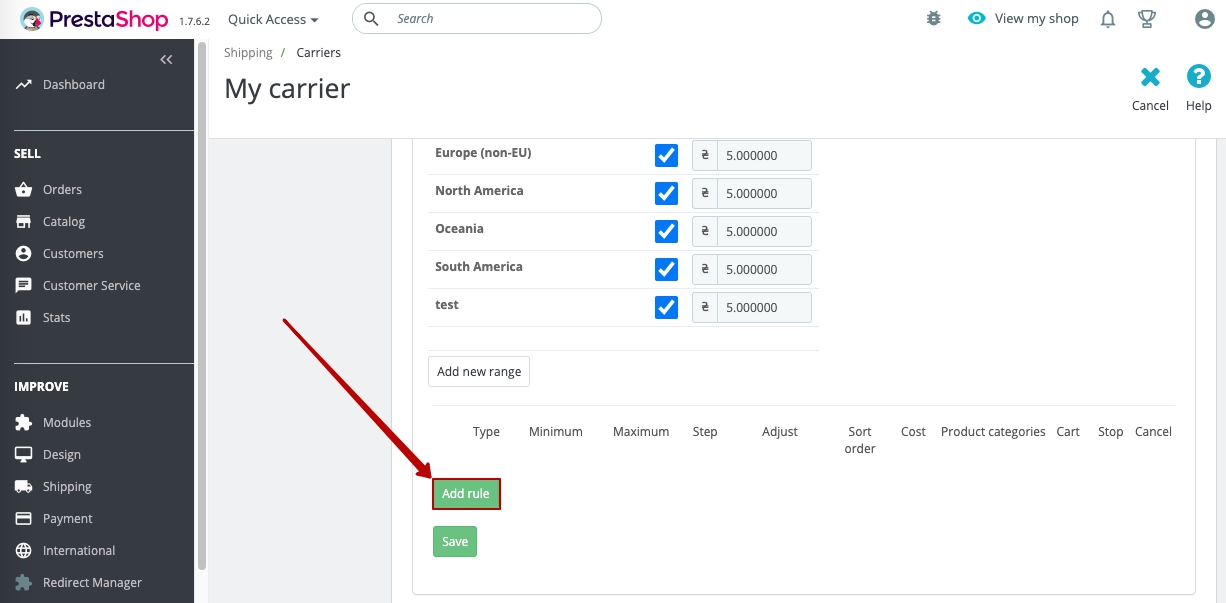
Delivery rule creation page
To create a new delivery rule, click the Add rule button.
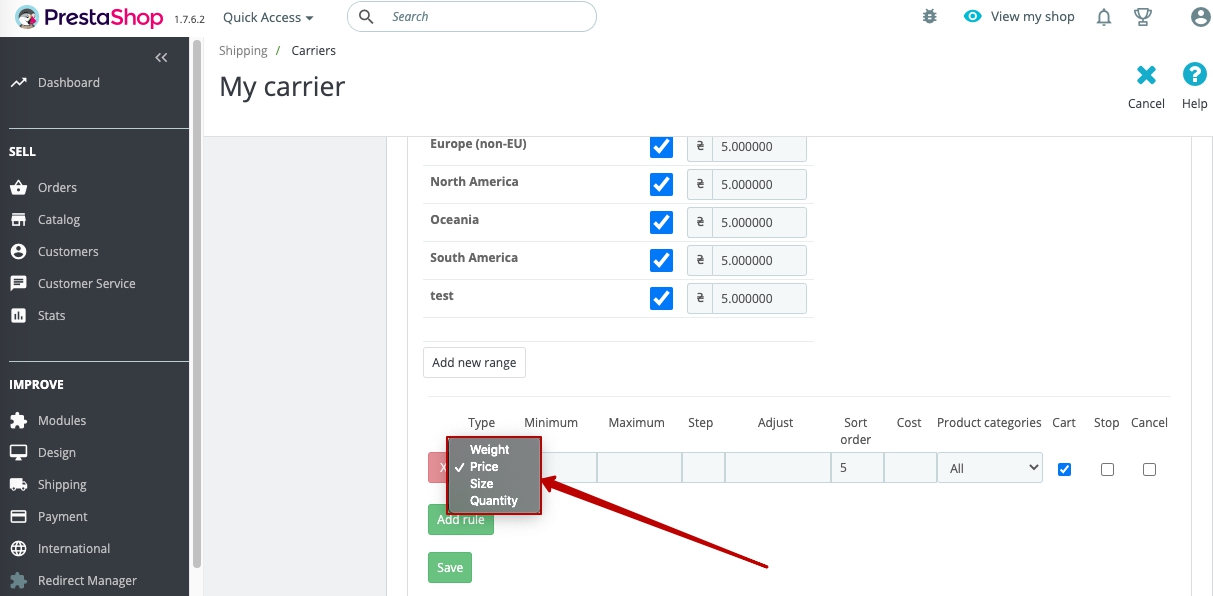
In the Type field, you can select a base for creating a rule:
Weight - based on the weight of the item.
Price - based on the value of the item.
Size - based on the overall dimensions of the item.
Quantity - based on the quantity of the item.
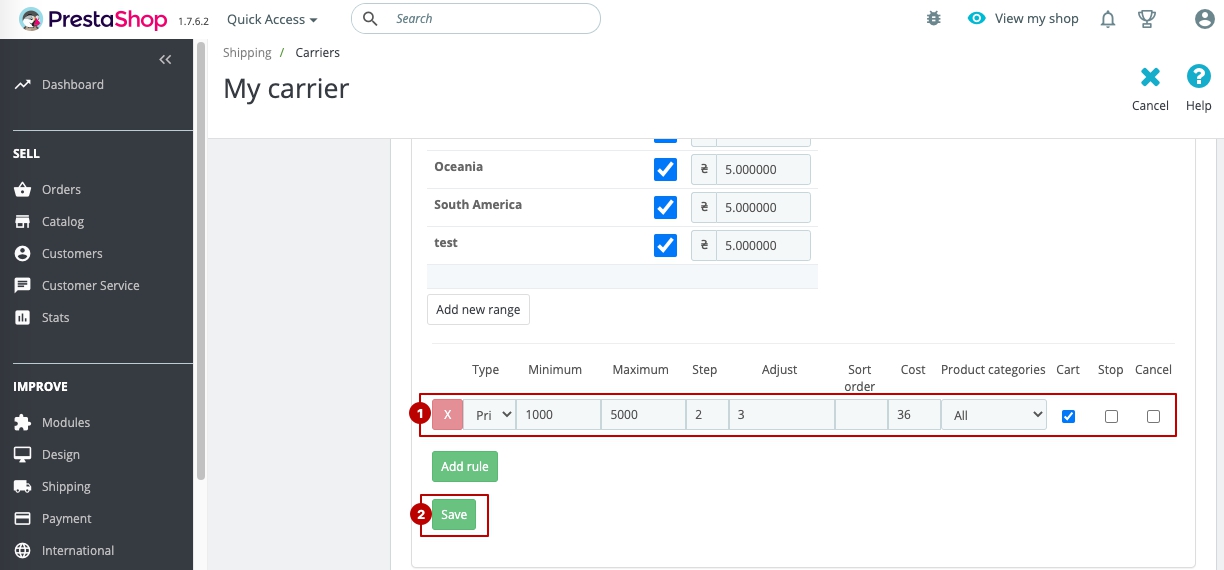
The Minimum field (1) - to enter the minimum value at which the delivery rule will be executed.
The Maximum field (2) - to enter the maximum value at which the delivery rule will be executed.
The Step field (3) - to enter the step at which the adjustment will be applied.
The Adjust field (4) - to enter the value by which the delivery price will be adjusted (for example, if the value is “10", it will increase by 10; if the value is “-10%", the price will decrease by 10%).
The Sort order field (5) - to enter the sort order number relative to other delivery rules.
The Cost field (6) - to enter the shipping cost for this rule.
The Product categories field (7) - to select a product category for which this rule will be applied.
The Cart checkbox (8).
If the Cart checkbox (8) is selected, the rule will be applied to the amount (weight / price / size /) of the cart. If the Cart checkbox is not selected, the rule is applied to each item in the cart separately.
The Stop checkbox (9).
If the Stop checkbox (9) checkbox is selected, the courier will not be displayed in the cart (the conditions of the rule are met).
The Cancel checkbox (10).
If the Cancel checkbox (10) is selected, checking the rules for the current courier will be stopped (the conditions of the rule are met).
To delete a rule, click the "x" button (11).
If you want the created rule to always be executed, you just need to leave the Minimum (1) and Maximum (2) fields empty.

After entering the data that is important for you (1), click the Save button (2).
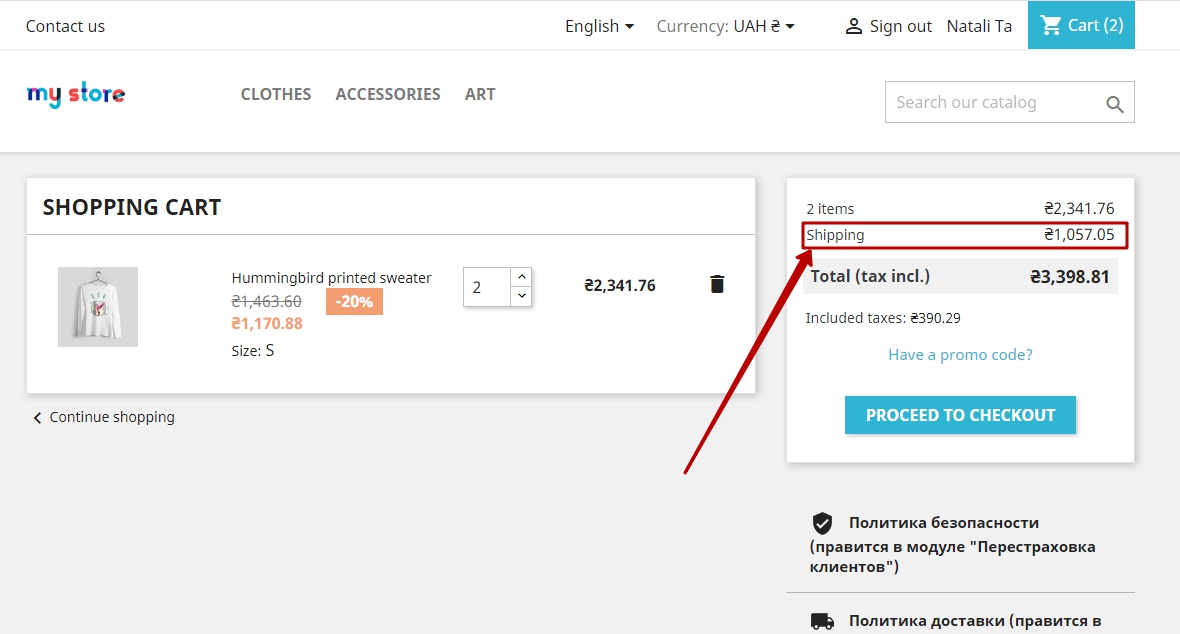
Now in your store, when the order created, the delivery rule you created is displayed: